Chadder Quick Bread Recipe

Soft and full of flavor, serve Cheddar Quick Bread warm with butter for a side dish that will quickly turn into a family favorite.

Quick Bread Tips:

Use freshly shredded cheddar cheese because pre-shredded has a flour/non-stick coating on it which prevents it from melting well in a loaf of bread like this.

Get creative! Add fresh or dried herbs, like parsley, or chives. Switch up cheeses, etc.

Quick breads are (almost) fool proof. Just watch that you don’t overdue the amount of liquids when adding flavors and ingredients.

How to Store Chadder Quick Bread 

Storing leftovers: You can store this bread on the counter or in the fridge, in a well-sealed ziploc bag or airtight container. It will last for up to 4 days. If you keep it on the counter, be sure to keep it cool and out of humidity.

To freeze cheese bread: Allow to cool completely before freezing. You can freeze either the entire loaf or slices so you can grab what you need at any time. Store tightly wrapped to avoid freezer burn and thaw on the counter.

Easy, Cheesy, Cheddar Quick Bread is a soft and delicious fool-proof recipe you need to keep on hand. This extra fast bread recipe is ready to bake in less than 15 minutes.

Servings: 12 Slices

PREP TIME: 5 mins

COOK TIME: 45 mins

CHILL/SET TIME: 10mins

TOTAL TIME: 1hr

INGREDIENTS:
  • 2 cups flour
  • 4 teaspoons baking powder
  • 1 Tablespoon sugar
  • 1½ teaspoons garlic powder
  • ½ teaspoon salt
  • 1½ cup whole milk
  • 1 large egg
  • 4 Tablespoons butter, melted
  • 2 cups freshly shredded cheddar cheese, from block
INSTRUCTIONS:
  1. Pre-heat oven to 350F.
  2. In a large mixing bowl whisk together the flour, baking powder, sugar, garlic, and salt.
  3. To the center of the dry ingredients add the milk, egg, and melted butter.
  4. Whisk quickly, but do not over whisk. The batter will thicken quickly.
  5. Add in the shredded cheese. Mix or fold in the cheese with a rubber spatula for ease.
  6. Pour batter into a greased bread pan. Bake for 45 minutes.
  7. Remove from oven and allow the loaft to cool for 10 minutes before removing andit from the pan and placing on a wire rack.
  8. Slice and serve with butter or chive cream cheese.
NOTES:
Helpful tips 
  • Use freshly shredded cheddar cheese as pre-shredded has a flour/non-stick coating on it that prevents it
  • From melting well in a loaf of bread like this.
Nutritional Info:

Calories: 271kcal | Carbohydrates: 17g | Protein: 10g | Fat: 18g | Saturated Fat: 11g | Polyunsaturated Fat: 1g | Monounsaturated Fat: 5g | Trans Fat: 1g | Cholesterol: 68mg | Sodium: 314mg | Potassium: 184mg | Fiber: 1g | Sugar: 2g | Vitamin A: 575IU | Vitamin C: 1mg | Calcium: 277mg | Iron: 1mg
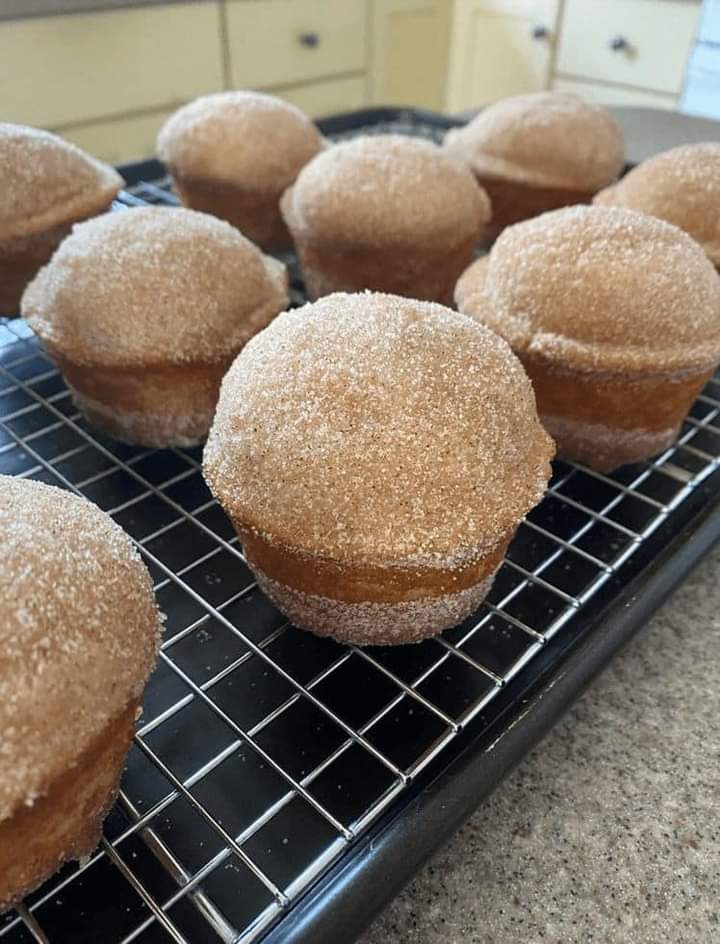
Cinnamon Dounut Muffins Recipe

Cinnamon donut muffins will become a favorite to make for breakfast or anytime you want a sweet treat.

These muffins taste a lot like a cinnamon donut and are great with coffee. Kids and adults love these delicious little treats.

Cinnamon  Donut Muffins – Donut muffins are a super soft, homemade muffins that are easy to make! These buttery treats taste just like an old fashioned donut rolled in cinnamon and sugar!

The actual muffin is a super simple batter.

But, don’t be fooled by the simplicity – they have this amazingly light flavor of vanilla and spices.

Then, when they come out of the oven I generally give them just long enough that I can handle them without burning my finger tips straight off before I dunk them in butter and roll them in cinnamon sugar.

These absolutely store really well, but they’re definitely on another level of delicious when eaten still warm.

Cinnamon Sugar Donut Muffins – Donut muffins are a super soft, homemade muffins that are easy to make! These buttery treats taste just like an old fashioned donut rolled in cinnamon and sugar!

Prep Time: 10min

Cook Time: 20min

Total Time: 30min

Servings: 10

INGREDIENTS:
FOR THE MUFFINS:
  • 1 1/2 Cups All Purpose Flour
  • 1/2 Cup Granulated Sugar
  • 1 1/2 Teaspoons Baking Powder
  • 1/8 Teaspoon Salt
  • 1/2 Teaspoon Ground Cinnamon
  • 1/4 Teaspoon Nutmeg
  • 1 Teaspoon Vanilla Extract
  • 1 Large Egg
  • 1/2 Cup Milk
  • 1/3 Cup Butter, Melted and Cooled
FOR THE TOPPING:
  • 1/3 Cup Granulated Sugar
  • 2 Teaspoons Ground Cinnamon
  • 5 Tablespoons Butter, Melted
INSTRUCTIONS:
  1. Preheat oven to 350 degrees. Grease muffin cups or line with paper liners. Set aside.
  2. In a large bowl whisk together the flour, sugar, baking powder, salt, cinnamon, and nutmeg. Set aside.
  3. In a small bowl beat the egg. Add the milk, vanilla extract, and melted butter and mix well to combine.
  4. Add the wet ingredients to the dry ingredients and stir just until moistened, being careful not to over mix.
  5. Spoon batter into muffin cups about ½ – ¾ of the way full. Bake in preheated oven for 20-25 minutes. Allow muffins to cool for 5 minutes before removing from pan.
  6. For the topping: In a small bowl mix together the cinnamon and sugar. In another small bowl melt the 5 Tablespoons of butter.
  7. Dip the muffins into the butter, then roll in the cinnamon sugar mixture.
Nutritional Info:

Calories: 220kcal

Crockpot Bbq Rib Recipe

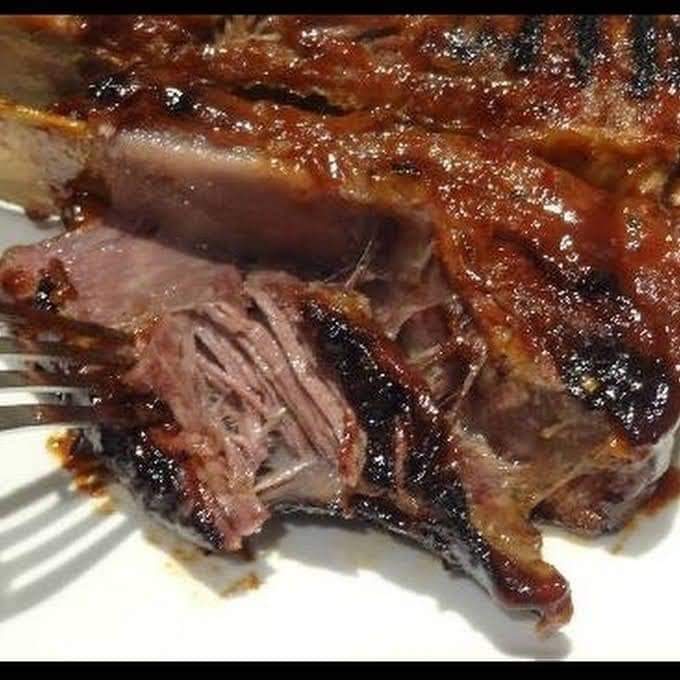
Wow your guests with these Crock Pot Barbecue Ribs! A great recipe for fall off the bone baby back ribs the entire family will love, especially the kids! These slow cooker ribs are covered in a brown sugar dry rub and smothered in bbq sauce. They’re slow cooked in the crockpot all day and are ready to go for game time or for an easy weeknight dinner.

These Crock Pot BBQ Ribs are easy to make and can be tossed into the crockpot in the morning or you can even prep the rib rub the night before to save on time. Slow cooker barbecue pork ribs are easy, and take just a few minutes or work before and after they slow cook all day.

You can even make these crockpot ribs a freezer meal by prepping them ahead of time and placing them in the freezer in a ziplock bag until ready to use.

SIDES TO SERVE WITH BARBECUE RIBS:

Cauliflower mashed potatoes

Homemade corn bread

Italian pasta salad

Honey dijon brussel sprouts

This crock pot barbecue ribs recipe is easy and will be a game changer on game day or any potluck! Wow all your guests with fall off the bone ribs smothered in honey barbecue Sauce!

Crock Pot Barbecue Ribs Recipe 

You can’t go wrong with these crockpot fall off the bone ribs. These barbecue ribs are slow cooked in the crockpot all day and are great for when friends come over for game day, potluck or an easy family dinner.

INGREDIENTS:
  • 3 tbsp paprika
  • 2 tbsp brown sugar
  • 1/4 tsp Cayenne pepper
  • 1 tsp salt
  • 1 tsp pepper
  • 4 lbs pork baby back ribs
  • 3 cups BBQ sauce
INSTRUCTIONS:
  1. In a small bowl mix the dry ingredients together, then rub the mixture onto both sides of the ribs.
  2. Arrange ribs in your crock pot – stand them up against the walls with the thicker side down and the meaty side against the wall.
  3. Pour BBQ Sauce all over the ribs, cover and cook for 7 hours on low.
  4. Once the 7 hours is up, brown the ribs in the oven.
  5. Line a baking sheet with foil, carefully remove the ribs from the crock pot and place them bone side up on the baking sheet.
  6. Skim the fat from the crock pot then pour the remaining juices from the crock pot into a small saucepan using a strainer.
  7. Bring the sauce to a boil and allow to simmer for about 15 minutes. Turn on your oven’s broiler and allow it to heat up.
  8. Once the broiler is preheated, brush the sauce on the ribs and broil for 5 minutes, take the ribs out, turn them over and brush them with sauce, then broil them again for about 5 minutes.
  9. Serve with remaining sauce on the side.
Nutritional Info:

Calories: 470kcal | Carbohydrates: 60g | Protein: 23g | Fat: 14g | Saturated Fat: 2g | Cholesterol: 83mg | Sodium: 1599mg | Potassium: 705mg | Fiber: 1g | Sugar: 49g | Vitamin A: 335IU | Vitamin C: 0.9mg | Calcium: 74mg | Iron: 1.9mg

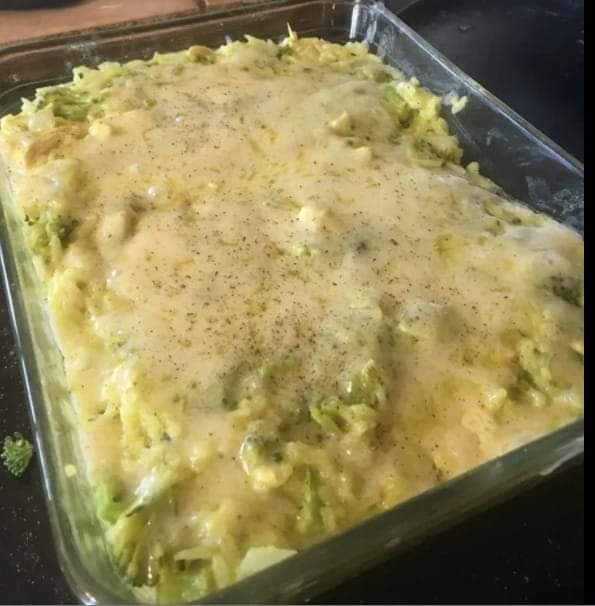
Broccoli Rice Chicken Cheese Casserole

This cheesy  Broccoli Rice Chicken Cheese Casserole is the EASIEST meal you’ll make all week and is sure to become a new family favorite! Made with rotisserie chicken, this time-saving recipe is perfect for weeknights and is a hit with kids and adults alike! Don’t forget the dinner rolls to serve alongside this delicious dinner! 

Casseroles are the perfect weeknight meal and we just happen to LOVE them around here. Our very favorite casserole recipe is this Chicken and Rice Casserole and it’s one of the most-requested meals from both the boys and Chris – they just can’t get enough of it!

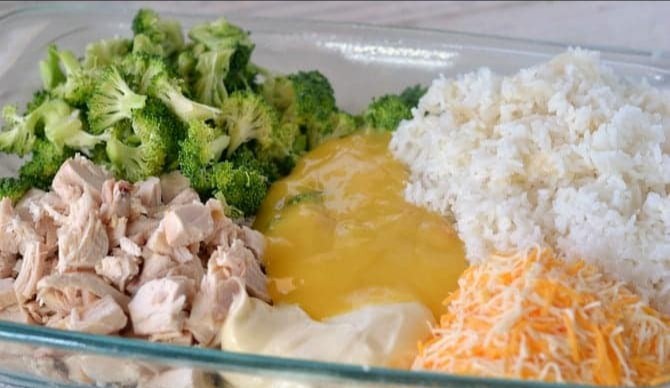
I love this casserole recipe because it’s about as easy as dinner can be. You guys, I don’t even use a bowl. I mix it right up in the baking dish.

One of the most delicious ways to customize this casserole is with the topping. Here are some to consider:

Ritz Crackers – treat this ingredient the same way you would the cornflakes (other crackers works as well). Chicken broccoli rice casserole with ritz crackers is a favorite around here!

Breadcrumbs – you could use plain or flavored bread crumbs. Mix with 3 tablespoons of butter before sprinkling over the top.

Cornflakes + Shredded Cheese – use any kind of cheese you like.

Potato Chips – use your favorite to add flavor and crunch

French Fried Onions – a reader favorite, this adds both crunch and flavor to the casserole – so good!

This cheesy Broccoli Rice Chicken Cheese Casserole is the EASIEST meal you’ll make all week and is sure to become a new family favorite! Made with rotisserie chicken, this time-saving recipe is perfect for weeknights and is a hit with kids and adults alike!

 Prep Time: 5min

 Cook Time: 30min

 Total Time: 35min

 Servings: 8

Ingredients:

  • 2 cups of diced rotisserie chicken or any other cooked chicken}
  • 2 cups broccoli florets broken down into bite-sized pieces
  • 1 can cream of chicken soup can use low-sodium or Healthy Request
  • 2 cups cooked rice
  • 1 1/2 cups shredded cheese
  • 1/2 cup mayonnaise
  • 1/2-3/4 cup crushed corn flakes
  • 2 tbsp butter melted
Instructions:
  1. Preheat oven to 350F. Combine all ingredients into a greased 9×13 baking dish.
  2. I use a 9×13 because we like extra room for our corn flakes {more crunch!} but this recipe will fit into an 8×8 or 9×9 baking dish.
  3. Mix up all the ingredients except corn flakes and butter right in the baking dish.
  4. Sprinkle the crushed corn flakes over the top of the casserole.
  5. Drizzle melted butter over the top.
  6. Bake for 30 to 35 minutes or until casserole is heated through.
Notes
Using Frozen Broccoli?

I used fresh broccoli but frozen broccoli but can be substituted as long as you thaw it first.

Nutritional Info:

Calories: 354kcal | Carbohydrates: 26g | Protein: 16g | Fat: 21g | Saturated Fat: 7g | Cholesterol: 56mg | Sodium: 389mg | Potassium: 207mg | Fiber: 1g | Sugar: 2g | Vitamin A: 660IU | Vitamin C: 23mg | Calcium: 125mg | Iron: 5mg

Southern Old Yum Yum Cake

Try making this Yum Yum Cake the next time you have a family gathering for a sweet and decadent dessert that is sure to have rave reviews. A delicious cake topped with homemade icing that includes coconut and pecans. 

There are many desserts that I fondly remember from my childhood. Growing up in the south, I’ve attended my share of family gatherings, church functions, and even a family reunion or two. 

VARIATIONS:
  • An alternative to making the icing is to omit it and top the finished and cool cake with some cool whip before serving.
  • Make a blueberry yum yum by substituting blueberries for pineapple in the same unit of measure.
  • Instead of using crushed pineapple, try using peaches or mandarine oranges.
STORAGE:

This cake is best to be enjoyed the same day or the day after it is made. If you have any leftovers, cover the cake with some plastic wrap or place it into an airtight container, and store it in the refrigerator for up to 2 days. It is fine to allow the cake to sit at room temperature the same day that it is made for a few hours.

Freezing:

The cake portion, without the icing, may be made ahead of time and frozen for up to 1 month. Place it in the refrigerator the night before serving to allow it time to thaw. Remove and allow it time to come to room temperature while making the icing to pour on top.

Try making this Southern Old Yum Yum Cake the next time you have a family gathering for a sweet and decadent dessert that is sure to have rave reviews. A delicious cake topped with homemade icing that includes coconut and pecans. 

Prep Time: 15mins

Cook Time: 45mins

Servings: 12

Calories: 492kcal 

Ingredients:
Cake Ingredients:
  • 2 cups self-rising flour
  • 2 teaspoons baking soda
  • 2 large eggs
  • 2 cups granulated sugar
  • 2 cups crushed pineapple
  • 1 teaspoon vanilla extract
Icing Ingredients:
  • ½ cup butter (1 stick)
  • 1 cup granulated sugar
  • ⅔ cup evaporated milk (the small 5 ounce can)
  • 1 cup shredded coconut
  • 1 cup finely chopped pecans
Instructions:
  1. Begin the recipe by preheating the oven to 325 degrees F.
  2. Grab a rectangle 9×13-inch baking dish and lightly spray it with cooking spray. Set aside.
  3. Begin making the cake using a large bowl, mix together the dry ingredients.
  4. The 2 cups self-rising flour and 2 teaspoons baking soda until combined. Set aside.
  5. In a separate medium bowl, stir together the 2 large eggs, 2 cups granulated sugar, 2 cups crushed pineapple, and 1 teaspoon vanilla extract until combined.
  6. Make a well in the center of the flour mixture and pour in the egg mixture. Whisk to combine (or use an electric mixer) all of the ingredients together, careful not to overmix.
  7. Add the cake batter to the prepared baking dish and spread it into an even single layer.
  8. Place into the oven to bake for 40 to 45 minutes, until a cake tester (toothpick) comes out with little to no crumbs.
  9. Carefully remove the cake from the oven and allow it to cool in the pan on a baking rack for about 10 to 15 minutes.
  10. While the cake is cooling, begin preparing the icing. In a small saucepan over medium-high heat, add the ½ cup (1 stick) butter and allow it to melt, stirring constantly.
  11. Add the 1 cup sugar and whisk to combine. Adjust the heat to medium-low and slowly whisk in the ⅔ cup (5 ounces) milk for about 1 to 2 minutes.
  12. Turn off the heat and add in the 1 cup coconut and 1 cup chopped pecans, stir to combine.
  13. Pour the icing in an even layer over the top of the cake in the pan. It is perfectly fine if the cake is still warm.
  14. Allow the cake time to cool and set for about 5 to 10 minutes before cutting to serve. Enjoy!
  15. This cake is best to be enjoyed the same day or the day after it is made. If you have any leftovers, cover the cake with some plastic wrap or place it into an airtight container, and store it in the refrigerator for up to 2 days.
Notes:
  • An alternative to making the icing is to omit it and top the finished and cool cake with some cool whip before serving.
  • Make a blueberry yum yum by substituting blueberries for pineapple in the same unit of measure.
  • Instead of using crushed pineapple, try using peaches or mandarine oranges.
Nutritional Info:

Calories: 492kcal | Carbohydrates: 77g | Protein: 6g | Fat: 19g | Saturated Fat: 9g | Polyunsaturated Fat: 3g | Monounsaturated Fat: 6g | Trans Fat: 0.3g | Cholesterol: 55mg | Sodium: 291mg | Potassium: 191mg | Fiber: 2g | Sugar: 61g | Vitamin A: 341IU | Vitamin C: 4mg | Calcium: 62mg | Iron: 1mg

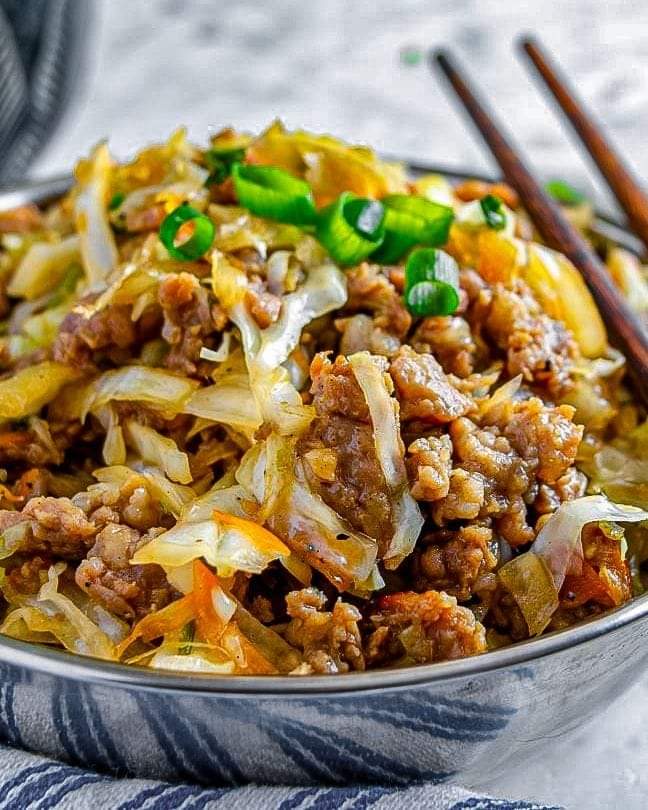
Egg Roll In A Bowl

Chicken Egg Roll in a Bowl — This egg roll in a bowl is easy, ready in 15 minutes, full of flavor, has lots of texture, and is healthier than actual egg rolls!

Tips for Making Egg Roll in a Bowl

Coleslaw Mix – If you can’t find coleslaw or a cabbage mix where you live, you can substitute two heaping cups of shredded cabbage and carrots instead.

Wilts Down – Cabbage wilts down quite a bit, so even if it looks like a lot, it’ll dramatically reduce in volume. But of course use your best judgement.

Gluten-Free – To make this egg roll in a bowl recipe gluten-free, use tamari instead of soy sauce. Try to find a low-sodium version though.

Sodium Sensitive – If you’re sensitive to salt, add a little less soy sauce than the recipe calls for, give it a taste, and then add more as needed.

Can I Use Ground Turkey? 

Yes, either ground turkey or ground pork may be used instead of ground chicken.

Prep Time: 5 min

Cook Time: 10 min

Total Time: 15 min

INGREDIENTS:


  • 2 tablespoons sesame oil
  • 2 tablespoons olive oil
  • 1 pound ground chicken (ground turkey or pork may be substituted)
  • 1 small sweet Vidalia yellow onion
  • 3 to 4 cloves garlic, finely minced or pressed
  • 1 teaspoon ground ginger
  • one 16-ounce bag coleslaw mix (shredded green cabbage and carrots
  • 1/2 cup reduced-sodium soy sauce
  • 1/2 teaspoon freshly ground black pepper, or to taste
  • about 3 green onions sliced into thin rounds, for garnishing
  • 1 tablespoon sesame seeds, optional for garnishing
INSTRUCTIONS:

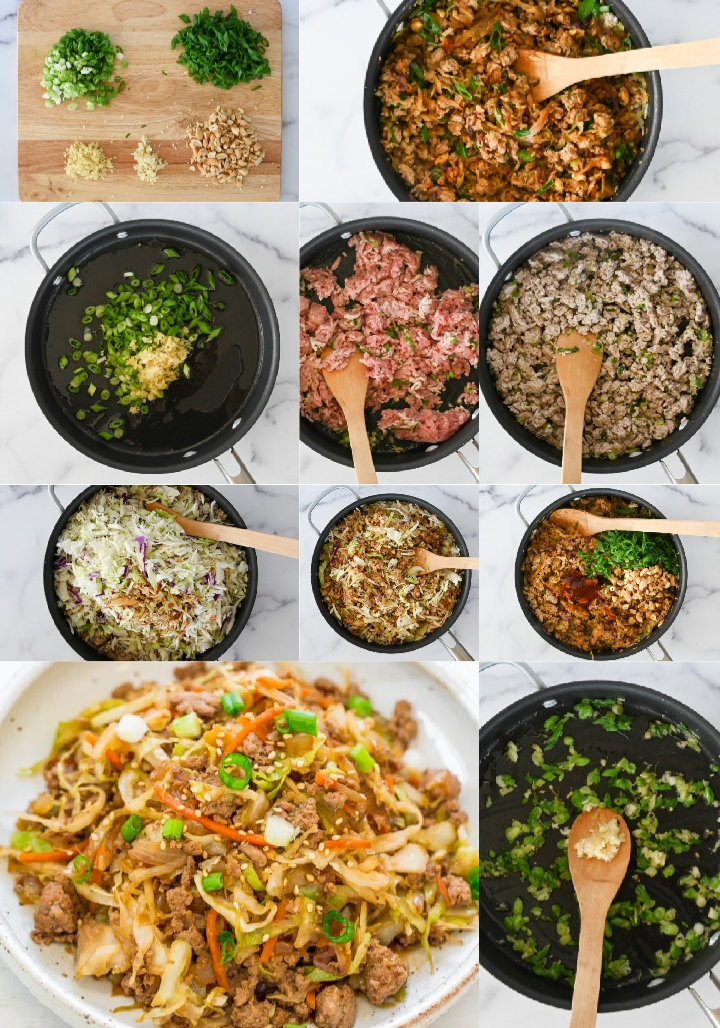
  1. To a large skillet add the oils, chicken, and cook over medium-high heat until done, about 4 to 5 minutes; crumble chicken and stir intermittently to ensure even cooking.
  2. Add the onions and cook for about 5 minutes or until tender; stir intermittently.
  3. Add the garlic, ginger, and cook for about 1 minute, or until fragrant.
  4. Add the coleslaw mix (looks like a lot but wilts quickly), evenly drizzle the soy sauce, add the pepper, stir to combine, and cook for about 5 minutes, or until cabbage is wilted and tender; stir intermittently.
  5. Evenly sprinkle with green onions, optional sesame seeds, and optional extra sauces for serving. Serve immediately.
NOTES:

Recipe is best warm and fresh but extra will keep airtight in the fridge for up to 5 days.

NUTRITION INFO:

YIELD: 4 SERVING SIZE: 1

Amount Per Serving: Calories: 572Total Fat: 41gSaturated Fat: 8gTrans Fat: 0gUnsaturated Fat: 31gCholesterol: 131mgSodium: 1770mgCarbohydrates: 22gFiber: 3gSugar: 13gProtein: 32g