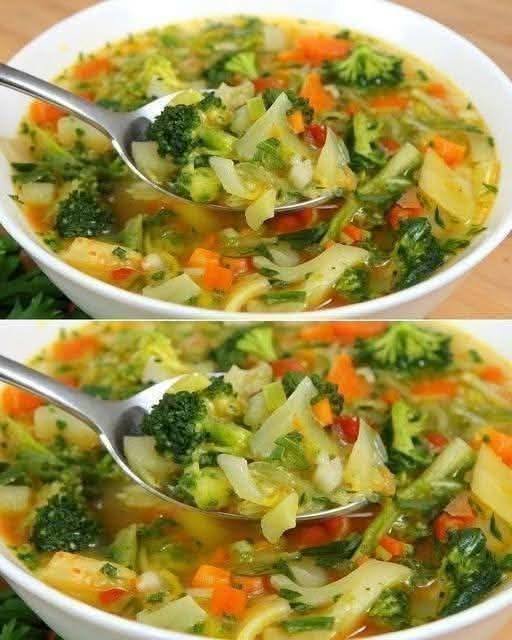
Light, Crisp, Hydrating & Low WW SmartPoints

Light, Crisp, Hydrating & Low WW SmartPoints
If you are searching for a light, refreshing, and incredibly crunchy salad that is both healthy and satisfying, this Crunchy Cucumber & Veggie Refresh Salad is exactly what you need. Made with fresh baby cucumbers, sweet carrots, and juicy tomatoes, this vibrant salad is simple yet packed with flavor, nutrients, and hydration.

This recipe is perfect for warm weather, quick lunches, healthy side dishes, and meal prep. It is low in calories, naturally gluten-free, vegetarian, and Weight Watchers friendly. Best of all, it takes less than 10 minutes to prepare.

The crisp texture of cucumbers combined with the natural sweetness of carrots and the juiciness of tomatoes creates a balanced bite in every spoonful. The light dressing enhances the vegetables without overpowering their freshness.

This salad fits beautifully into Mediterranean-style eating, weight loss plans, diabetic-friendly meal planning, and clean eating lifestyles.

Why You Will Love This Salad
This salad is:

• Extremely refreshing
• Naturally low in calories
• High in fiber
• Hydrating
• Quick and easy
• Budget-friendly
• Perfect for meal prep
• Low WW SmartPoints

It is the kind of recipe you will make again and again because it pairs well with almost everything — grilled chicken, fish, wraps, rice bowls, or even as a snack on its own.

Ingredients (Serves 2–3)
For the Salad:
3 baby cucumbers, thinly sliced (about 2 cups / 300g)
1 small carrot, peeled and finely diced (½ cup / 60g)
1 medium tomato, diced (1 cup / 150g)
For the Light Dressing:
1 tablespoon fresh lemon juice
1 teaspoon olive oil
¼ teaspoon salt (or to taste)
¼ teaspoon black pepper
½ teaspoon dried oregano (optional)
Optional additions (low point friendly):

1 tablespoon chopped fresh parsley
1 tablespoon finely diced red onion
Step-by-Step Instructions
Step 1: Prepare the Cucumbers
Wash the baby cucumbers thoroughly. Slice them thinly using a sharp knife or mandoline for even thickness. Thin slices give the best texture and allow the dressing to coat evenly.

Step 2: Dice the Carrot
Peel the carrot and cut into very small cubes. Finely diced carrot adds crunch and subtle sweetness.

Step 3: Chop the Tomato
Dice the tomato into small pieces. Remove excess seeds if you prefer less moisture.

Step 4: Combine Vegetables
Add cucumbers, carrots, and tomatoes into a large mixing bowl.

Step 5: Prepare the Dressing
In a small bowl, whisk together lemon juice, olive oil, salt, pepper, and oregano until well combined.

Step 6: Toss the Salad
Pour the dressing over the vegetables and toss gently until evenly coated.

Step 7: Rest Before Serving
Allow the salad to sit for 5–10 minutes so the flavors blend together.

Step 8: Final Taste Adjustment
Taste and adjust salt or lemon juice if needed.

Serve immediately for maximum crunch.

Flavor Profile & Texture
This salad delivers:

• Crisp crunch from cucumbers
• Sweetness from carrots
• Juicy freshness from tomatoes
• Bright acidity from lemon
• Light Mediterranean herb notes

It is refreshing, clean, and never heavy.

Nutritional Information (Per Serving – Makes 3 Servings)
Approximate values:

Calories: 55
Protein: 2g
Carbohydrates: 9g
Fiber: 2g
Sugars: 4g (natural from vegetables)
Fat: 2g
Sodium: 120mg

Values may vary slightly based on ingredient size.

WW SmartPoints (Estimated)
Blue Plan: 1 Point
Green Plan: 2 Points
Purple Plan: 1 Point

Most vegetables are zero points, and the only counted ingredient is olive oil.

To make it 0 points, you may omit olive oil completely.

Health Benefits
Hydration Boost
Cucumbers are over 95% water, helping keep the body hydrated.

Rich in Antioxidants
Tomatoes provide lycopene, a powerful antioxidant.

Fiber for Digestion
Carrots contain fiber that supports digestive health.

Heart Healthy
Olive oil (in moderation) supports heart health.

How This Salad Supports Weight Loss
Because it is low in calories and high in volume, this salad helps you feel full without consuming excess calories. The fiber content slows digestion and reduces cravings.

It is an excellent side dish for portion control and mindful eating.

Mediterranean Diet Friendly?
Yes. This salad aligns with Mediterranean principles:

• Fresh vegetables
• Olive oil in moderation
• Simple natural ingredients
• Minimal processing

Meal Prep & Storage
Store in an airtight container in the refrigerator.

Best consumed within 24 hours for maximum crunch.

If storing longer, keep dressing separate and mix before serving.

Serving Suggestions
• Pair with grilled chicken
• Serve alongside baked fish
• Add to a wrap
• Top with feta cheese (adds points)
• Mix with chickpeas for protein

Variations
Spicy Version
Add red chili flakes.

Creamy Version
Add 1 tablespoon Greek yogurt (adds minimal points).

Protein Boost
Add grilled tofu or shredded chicken.

Middle Eastern Style
Add fresh mint and a splash of apple cider vinegar.

Common Mistakes to Avoid
• Cutting vegetables too thick
• Adding too much salt
• Letting it sit too long (loses crunch)
• Overdressing

Expert Tips
• Use firm cucumbers for best texture
• Chill ingredients before preparing
• Add dressing just before serving for maximum freshness

Frequently Asked Questions
Can I make it ahead of time?
Yes, but store dressing separately.

Is it diabetic friendly?
Yes, it contains low glycemic vegetables.

Can I skip olive oil?
Yes, and it becomes zero points.

Why This Salad Is Better Than Store-Bought
Store-bought salads often contain preservatives, excess sodium, and heavy dressings. This homemade version is clean, fresh, and customizable.
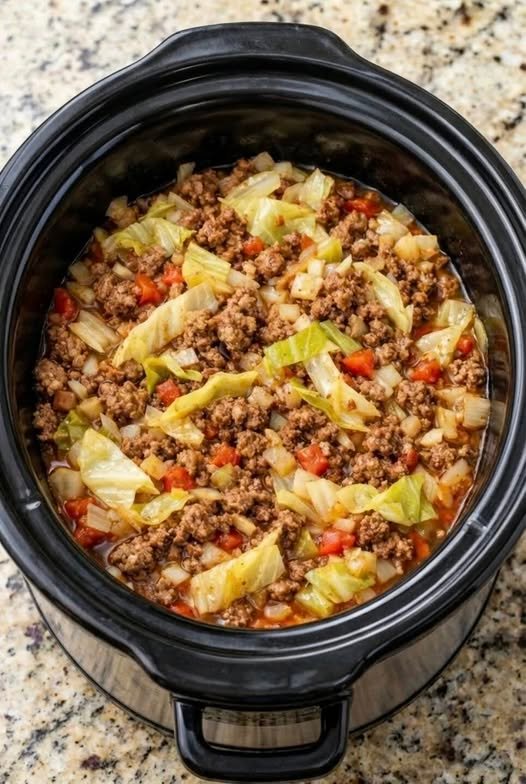

🥘 Slow Cooker Unstuffed Cabbage Rolls

🥘 Slow Cooker Unstuffed Cabbage Rolls

Prep time: 15 mins | Cook time: 4–7 hours | Servings: 6


🛒 The Ingredient Lineup

Ingredient Amount Notes
Ground Beef 1 lb (450g) Lean is best; can sub turkey/chicken.
Green Cabbage 1 small head Chopped (approx. 6 cups).
White Rice 1 cup Uncooked long-grain works best.
Beef Broth 2 cups For cooking the rice and thinning the sauce.
Tomato Base 1 can sauce + 1 can diced 15 oz sauce / 14.5 oz diced tomatoes.
Aromatics Onion & 3 cloves Garlic Diced and minced.
Pantry Staples Tomato paste, Brown sugar Adds depth and balances acidity.
Seasonings Paprika, Oregano, Thyme Salt and pepper to taste.

👩‍🍳 Step-by-Step Instructions

  1. Brown & Sauté: Heat 1 tbsp olive oil in a skillet. Brown the beef and onions together until the meat is no longer pink (about 5 mins). Stir in the garlic for the last 30 seconds, then drain the grease.

  2. Load the Slow Cooker: Transfer the beef mixture to your slow cooker. Add the chopped cabbage, uncooked rice, tomato sauce, diced tomatoes, broth, tomato paste, and all seasonings.

  3. Mix: Stir thoroughly to ensure the rice is submerged and the cabbage is evenly distributed.

  4. Slow Cook:

    • Low: 6–7 hours

    • High: 3–4 hours

  5. Finish & Serve: Give it a good stir 30 minutes before serving. If it looks too thick, add a splash of broth. Taste and adjust salt/pepper.

Pro-Tip: For an extra touch of indulgence, serve with a dollop of sour cream and a side of crusty bread to soak up that rich tomato broth.


💡 Variations for Your Routine

  • Low Carb: Swap the white rice for cauliflower rice (add it in the last 30 mins of cooking).

  • The “Cheesy” Version: Sprinkle mozzarella or cheddar over the top 10 minutes before serving and let it melt.

  • Spicy Kick: Add a teaspoon of crushed red pepper flakes to the beef while browning.

❄️ Storage & Reheating

  • Fridge: Lasts up to 4 days. It actually tastes better on Day 2!

  • Freezer: Store in airtight containers for up to 3 months.

  • Reheating: Use the microwave or stovetop. Add a tiny splash of water if the rice has absorbed all the liquid.

Cheesy Zucchini Pancake Pockets (Soft & Crispy)

Cheesy Zucchini Pancake Pockets (Soft & Crispy)

📖 Description
These cheesy zucchini pancake pockets are a delicious savory treat—crispy on the outside, soft inside, and filled with gooey melted cheese. Perfect for breakfast, lunch, or a quick snack, they’re easy to make and packed with flavor from fresh herbs and tender zucchini.

🛒 Ingredients

  • 2 medium zucchini (grated)
  • 3 large eggs
  • 1 cup all-purpose flour
  • 1 teaspoon salt
  • ½ teaspoon black pepper
  • ½ teaspoon garlic powder
  • ½ cup fresh dill or parsley (finely chopped)
  • 1 cup shredded mozzarella or cheddar cheese
  • 2–3 tablespoons milk (optional for smoother batter)
  • 2 tablespoons oil or butter (for frying)

🧑‍🍳 Instructions

  1. Prepare the Zucchini
    Grate the zucchini using a coarse grater. Place it in a clean cloth and squeeze out excess water. This step is important to keep the pancakes from becoming soggy.
  2. Make the Batter
    In a large bowl, add the grated zucchini and crack in the eggs. Mix well until combined. Add flour, salt, black pepper, and garlic powder. Stir everything together until a thick batter forms. If it feels too thick, add a little milk to loosen it slightly.
  3. Add Herbs & Cheese
    Mix in the chopped dill or parsley for a fresh flavor. Add half of the shredded cheese into the batter and keep the rest for filling.
  4. Cook the Pancakes
    Heat a non-stick pan over medium heat and add a little oil or butter. Pour a ladle of batter into the pan and spread it slightly into a round shape. Cook for about 2–3 minutes until golden brown on the bottom.
  5. Add Filling & Fold
    Sprinkle some shredded cheese on one half of the pancake. Fold the pancake over like a pocket and press gently. Cook for another 1–2 minutes until the cheese melts and both sides are golden.
  6. Repeat
    Continue the process with the remaining batter, adding oil as needed.

🍽️ Serving Suggestions
Serve these warm with yogurt dip, sour cream, or a simple garlic sauce. They also pair well with a fresh salad or tea for a light meal.

💡 Tips

  • Always remove excess water from zucchini for best texture.
  • Use mozzarella for stretchiness or cheddar for a sharper taste.
  • Cook on medium heat to avoid burning while ensuring the inside cooks through.

These cheesy zucchini pockets are simple, satisfying, and perfect for any time of the day! 😋

Healing Garden Vegetable Soup

Healing Garden Vegetable Soup

A nourishing, cozy vegetable soup packed with vitamins, minerals, and anti-inflammatory goodness. Light yet satisfying, this soup is perfect for daily meals, family dinners, and anyone looking to feel better from the inside out.

 Description

This Healing Garden Vegetable Soup is loaded with fresh vegetables simmered gently in a flavorful broth. It’s naturally low in calories, rich in fiber, and bursting with antioxidants. The flavors are clean, comforting, and deeply satisfying—making it a soup your body and your family will crave again and again.

 Ingredients

  • 1 tbsp olive oil

  • 1 medium onion, finely chopped

  • 2 cloves garlic, minced

  • 2 carrots, diced

  • 2 celery stalks, chopped

  • 1 medium potato, thinly sliced

  • 1½ cups broccoli florets

  • 1 zucchini, sliced

  • 1 cup green beans, chopped

  • 6 cups vegetable broth (low sodium)

  • 1 tsp dried thyme

  • ½ tsp turmeric (optional, for healing boost)

  • Salt and black pepper to taste

  • Fresh parsley or dill, chopped (for garnish)

  • Juice of ½ lemon (optional, for brightness)

 Instructions

  1. Heat olive oil in a large pot over medium heat.

  2. Add onion and sauté for 3–4 minutes until soft and translucent.

  3. Stir in garlic and cook for 30 seconds until fragrant.

  4. Add carrots, celery, and potato. Cook for 5 minutes, stirring occasionally.

  5. Pour in vegetable broth and bring to a gentle boil.

  6. Reduce heat and simmer for 10 minutes.

  7. Add broccoli, zucchini, and green beans.

  8. Season with thyme, turmeric, salt, and pepper.

  9. Simmer for another 8–10 minutes until vegetables are tender but vibrant.

  10. Finish with lemon juice if using.

  11. Serve hot, garnished with fresh herbs.

Notes

  • Keep vegetables slightly firm to preserve nutrients.

  • Chop vegetables evenly for consistent cooking.

  • This soup tastes even better the next day!

 Tips for Best Results

  • Use fresh, seasonal vegetables whenever possible

  • Don’t overcook—bright color means more nutrients

  • Add leafy greens (spinach or kale) at the end for extra benefits

  • A pinch of chili flakes adds gentle warmth

 Servings

  • Serves: 4–6 people

  • Prep Time: 15 minutes

  • Cook Time: 25 minutes

Nutritional Information (per serving, approx.)

  • Calories: 120

  • Protein: 4g

  • Carbohydrates: 20g

  • Fiber: 6g

  • Fat: 3g

  • Sodium: varies by broth

Health Benefits

  • Supports digestion and gut health

  • Rich in antioxidants and vitamins A, C, and K

  • Anti-inflammatory and immune-boosting

  • Helps with hydration and detox support

  • Light, comforting, and easy on the stomach

 Q & A

Q: Can I eat this soup every day?
Absolutely! It’s balanced, light, and nutrient-dense.

Q: Can I freeze it?
Yes—store in airtight containers for up to 3 months.

Q: Can I add protein?
Of course! Add lentils, chickpeas, beans, or shredded chicken.

Q: Is this soup good for weight management?
Yes—low calorie, high fiber, and very filling.

Apple Mountain Dew Dumplings (

Country Apple Dumplings

Prep time: 15 mins | Bake time: 35–45 mins | Yields: 16 dumplings


Ingredients

  • 2 cans (8 oz each) refrigerated crescent roll dough

  • 2 large Granny Smith apples (peeled, cored, and cut into 8 wedges each)

  • 1 cup unsalted butter (2 sticks)

  • 1 ½ cups granulated sugar

  • 1 tsp ground cinnamon

  • 1 tsp vanilla extract

  • 1 can (12 oz) Mountain Dew (or similar lemon-lime soda)


Instructions

  1. Prep: Preheat your oven to 350°F (175°C) and grease a 9×13 inch baking dish.

  2. Wrap: Roll each apple wedge in one crescent roll triangle, starting from the wide end. Place them in the baking dish in two rows.

  3. The Sauce: Melt the butter in a saucepan. Stir in the sugar, cinnamon, and vanilla until just combined (it will be thick).

  4. Pour: Spoon the butter mixture over the dumplings.

  5. The Secret Step: Pour the Mountain Dew all around the edges and down the center of the pan (do not pour it directly over the top of the dough if you want them crispy).

  6. Bake: Bake for 35 to 45 minutes, or until the tops are golden brown and the pastry is cooked through.


Why it works

The bottom of the rolls becomes soft and “dumpling-like” from the soda and butter, while the tops stay flaky and crisp. It’s best served warm with a big scoop of vanilla bean ice cream!

Spinach & Feta Egg Muffins

Spinach & Feta Egg Muffins

Ingredients

  • 6 Large Eggs: Whisked well.

  • 2 cups Fresh Spinach: Roughly chopped.

  • 1/2 cup Feta Cheese: Crumbled into small chunks.

  • 1/4 cup Milk or Cream: For a fluffier texture.

  • Seasonings: 1/2 tsp Garlic powder, 1/4 tsp Salt, and 1/4 tsp Black pepper.

  • Optional: Diced onions or red bell peppers for extra color.


Step-by-Step Instructions

  1. Prep the Oven and Pan: Preheat your oven to 180°C (350°F). Generously grease a standard 6-cup muffin tin with olive oil or butter. This is a very important step to ensure the eggs don’t stick to the pan.

  2. Whisk the Egg Base: In a large mixing bowl, whisk the eggs, milk, garlic powder, salt, and pepper until the mixture is uniform and slightly bubbly.

  3. Distribute the Fillings: Place a handful of chopped fresh spinach into each muffin cup until they are about half full. Top the spinach with the crumbled feta cheese.

  4. Pour the Batter: Carefully pour the egg mixture over the spinach and feta in each cup. Fill them about 3/4 of the way to the top, leaving a little room for them to rise while baking.

  5. Bake: Place the tin in the oven and bake for 18–22 minutes. The muffins are done when the centers are firm and the tops are slightly golden brown.

  6. Cool and Remove: Let the muffins cool in the pan for 5–10 minutes. Use a butter knife to gently run around the edges of each muffin to pop them out easily.


Common Questions & Answers

Q: Can I make these in an Air Fryer? A: Yes! Use silicone muffin liners and place them in the air fryer basket. Cook at 160°C (320°F) for 12–15 minutes until set.

Q: How do I prevent the muffins from becoming watery? A: If you use frozen spinach instead of fresh, make sure to squeeze out every drop of excess water after thawing before adding it to the muffin tin.

Q: How long can I store these in the refrigerator? A: Store them in an airtight container for up to 4 days. They are great for a quick breakfast—just reheat them for 30 seconds in the microwave.

Q: Can I add different vegetables? A: Absolutely. This is a very versatile recipe. You can substitute the spinach for finely chopped broccoli, mushrooms, or kale.