Garlic Dill Cucumber Salad

Garlic Dill Cucumber Salad

This refreshing cucumber salad is crunchy, tangy, and packed with garlic and dill flavor. Perfect as a light snack, side dish, or meal prep salad.

Ingredients

  • 4 cucumbers, sliced
  • 3 garlic cloves, minced
  • 2 tbsp olive oil
  • 1 tbsp vinegar or lemon juice
  • 1 tsp dried dill or 1 tbsp fresh dill
  • 1/2 tsp chili flakes
  • 1/2 tsp salt
  • 1/4 tsp black pepper

Instructions

1. Prepare the Cucumbers

Wash and slice the cucumbers into thick rounds.

Place them in a large bowl.


2. Make the Dressing

In a small bowl, mix olive oil, vinegar or lemon juice, garlic, dill, chili flakes, salt, and black pepper.


3. Toss Everything Together

Pour the dressing over the cucumbers.

Mix well until evenly coated.


4. Chill

Refrigerate for 15–20 minutes before serving for the best flavor.


Tips

  • Use English cucumbers for fewer seeds.
  • Add feta cheese for extra flavor.
  • Store in an airtight container in the refrigerator.

Q&A

How long does cucumber salad last?

It stays fresh for up to 2 days in the refrigerator.

Can I make it spicy?

Yes, add extra chili flakes or sliced jalapeños.

Can I use fresh herbs?

Yes, fresh dill or parsley works very well.


Nutritional Benefits

  • Cucumbers are hydrating and low in calories.
  • Garlic adds strong flavor and antioxidants.
  • Olive oil provides healthy fats.
  • Dill adds freshness and aroma.

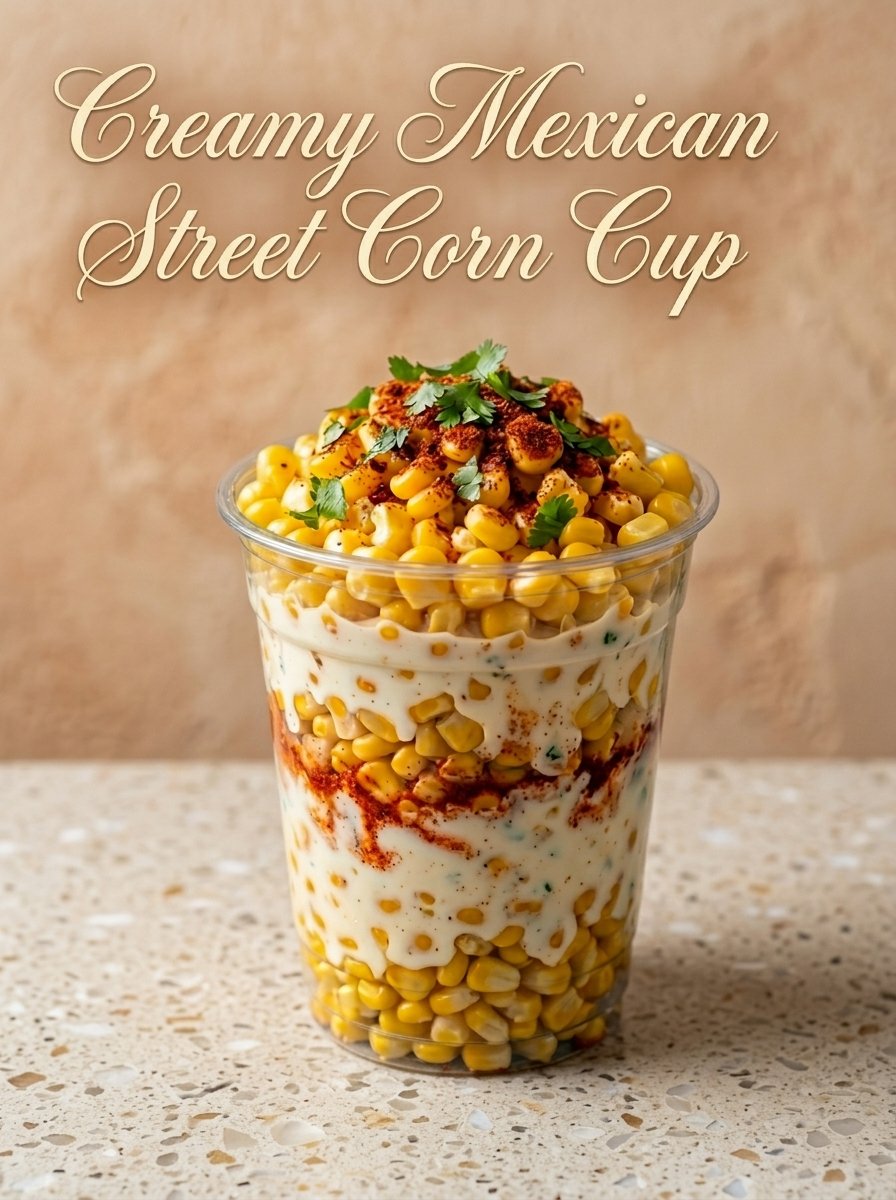
Creamy Mexican Street Corn Cups 

🌽 Creamy Mexican Street Corn Cups

Sweet, smoky corn coated in a creamy chili-lime sauce and topped with cheese — this easy Mexican-inspired snack is bursting with flavor in every bite! 🧀🍋✨

🛒 Ingredients

  • 🌽 4 cups corn kernels
  • 🧈 2 tbsp butter
  • 🥄 ¼ cup mayonnaise
  • 🥛 ¼ cup sour cream
  • 🧀 ½ cup Cotija or feta cheese, crumbled
  • 🧄 1 garlic clove, minced
  • 🍋 2 tbsp lime juice
  • 🌶️ 1 tsp chili powder or Tajín
  • 🌿 ¼ cup chopped cilantro
  • 🧂 Salt to taste
  • 👩‍🍳 Instructions

    1️⃣ Char the Corn

    ➡️ Melt butter in a skillet over medium-high heat.
    ➡️ Add corn and cook for 8–10 minutes until lightly charred and golden. 🌽🔥

    2️⃣ Make the Creamy Sauce

    ➡️ In a bowl, mix mayonnaise, sour cream, garlic, lime juice, chili powder, and salt. 🥄🍋

    3️⃣ Combine Everything

    ➡️ Add the warm corn to the sauce.
    ➡️ Stir in most of the cheese and cilantro until creamy and well coated. 🌿🧀

    4️⃣ Assemble the Cups

    ➡️ Spoon the corn mixture into serving cups.
    ➡️ Sprinkle extra chili powder, cheese, and cilantro on top. 🌶️✨

    5️⃣ Serve & Enjoy

    ➡️ Serve warm with lime wedges and enjoy every creamy, smoky bite! 🍋🥄

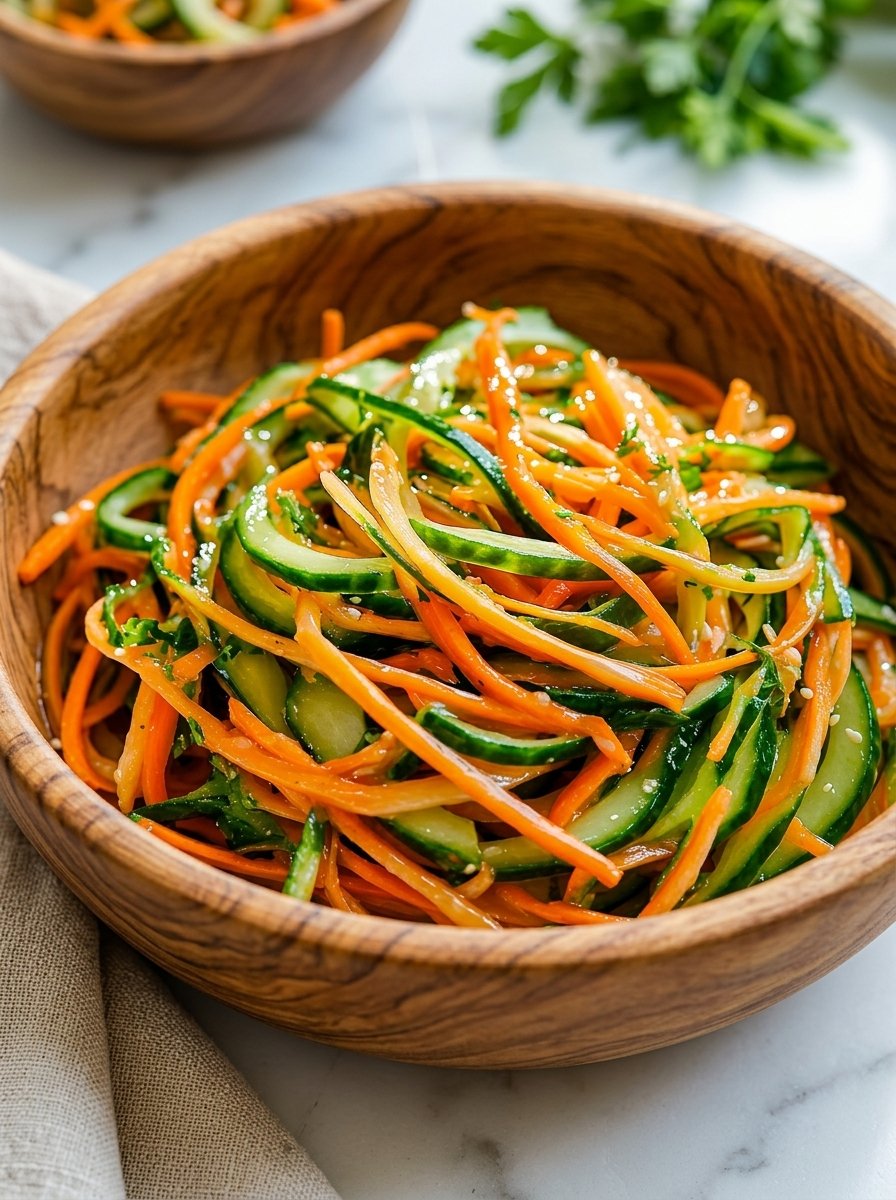
Spiralized Cucumber & Carrot Sesame Salad

Spiralized Cucumber & Carrot Sesame Salad

🛒 Ingredients

🥒 For the Salad

  • 2 large English cucumbers (or 4–5 Persian cucumbers)
  • 2 large carrots, peeled
  • 1 tbsp toasted sesame seeds
  • 2 green onions, thinly sliced (optional)
  • Fresh cilantro or parsley, chopped

🥣 For the Tangy Sesame Dressing

  • 2 tbsp rice vinegar (or apple cider vinegar)
  • 1 tbsp sesame oil
  • 1 tbsp olive oil
  • 1 tbsp low-sodium soy sauce (or tamari for gluten-free)
  • ½ tsp fresh ginger, finely grated
  • 1 small garlic clove, minced
  • Salt & black pepper to taste

👩‍🍳 Step-by-Step Instructions

Step 1: Prepare the Vegetables 🔪

➡️ Wash the cucumbers and carrots thoroughly.

➡️ Using a spiralizer, julienne peeler, or mandoline, turn the cucumbers and carrots into long thin ribbons or noodle-like strands.

➡️ If the cucumbers seem watery, place them in a colander with a tiny pinch of salt for 5–10 minutes.

➡️ Pat gently with paper towels to remove extra moisture for a crisp salad texture.

💡 Leaving the cucumber skin on adds beautiful color and extra crunch!


Step 2: Make the Sesame Dressing 🥣

➡️ In a small bowl or jar, combine:

  • Rice vinegar
  • Sesame oil
  • Olive oil
  • Soy sauce
  • Ginger
  • Garlic

➡️ Whisk well until smooth and combined.

➡️ Taste and adjust with salt and pepper if needed.

✨ The dressing should taste tangy, savory, and slightly nutty.


Step 3: Toss Everything Together 🥢

➡️ Add the cucumber and carrot ribbons to a large mixing bowl.

➡️ Pour the dressing over the vegetables.

➡️ Toss gently until every ribbon is lightly coated.

💡 Use tongs for easy mixing without breaking the veggie strands.


Step 4: Garnish & Serve ✨

➡️ Sprinkle toasted sesame seeds, sliced green onions, and fresh herbs over the top.

➡️ Serve immediately for maximum crunch or chill for 10–15 minutes for deeper flavor.

🥒 Best enjoyed fresh and cold!


🌟 Optional Add-Ins

Want to make it even more filling? Try adding:

  • 🥜 Crushed peanuts or cashews
  • 🫛 Edamame
  • 🍗 Grilled chicken
  • 🍤 Shrimp
  • 🍳 Soft-boiled egg
  • 🍜 Rice noodles
  • 🌶️ Chili flakes for heat

❓ Frequently Asked Questions

Q: Can I make this salad ahead of time?

➡️ Yes, but for the freshest texture, keep the dressing separate until serving. Cucumbers naturally release water over time.


Q: What can I use instead of sesame oil?

➡️ Sesame oil gives the salad its signature flavor, but you can reduce the amount and replace part of it with olive oil if preferred.


Q: Is this salad gluten-free?

➡️ Yes! Simply use tamari or coconut aminos instead of regular soy sauce.


Q: How long does it stay fresh?

➡️ It tastes best within 1 day. Store leftovers in an airtight container in the refrigerator.


🥢 Serving Ideas

This refreshing sesame salad pairs wonderfully with:

  • Grilled salmon 🐟
  • Teriyaki chicken 🍗
  • Stir-fried rice 🍚
  • Dumplings 🥟
  • Asian-inspired noodle bowls 🍜

Enjoy every crunchy, flavorful bite! 🥒🥕✨

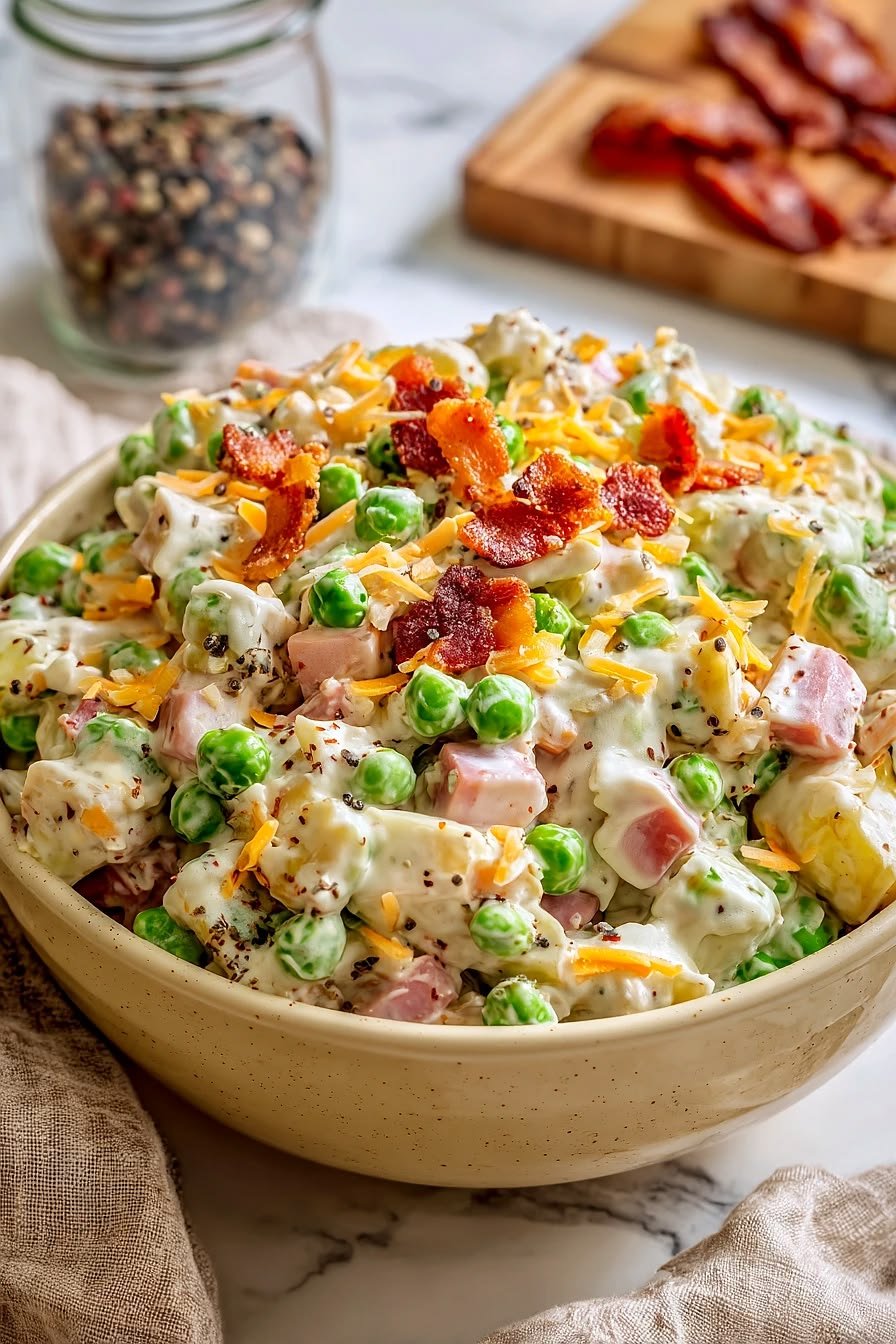
Creamy Bacon Pea Potato Salad Recipe

Creamy Bacon Pea Potato Salad Recipe

This creamy potato salad is loaded with crispy bacon, peas, cheese, and a rich dressing — perfect for BBQs, lunch, or family dinners 😍

🛒 Ingredients

  • 🥔 4 cups potatoes (boiled & cubed)
  • 🟢 1 cup green peas
  • 🥓 6 strips bacon (cooked crispy & chopped)
  • 🧀 1 cup shredded cheddar cheese
  • 🧅 ½ cup diced ham or turkey ham
  • 🥚 2 boiled eggs (optional)

For the Dressing

  • 🥛 1 cup mayonnaise
  • 🍶 2 tbsp sour cream or yogurt
  • 🟡 1 tbsp mustard
  • 🧂 Salt to taste
  • ⚫ Black pepper
  • 🌿 1 tsp dried herbs or parsley

👩‍🍳 Step-by-Step Recipe

1️⃣ Cook the Potatoes

  • Boil potatoes until fork tender.
  • Drain and let cool slightly. 🥔

2️⃣ Prepare the Bacon

  • Fry bacon until crispy. 🔥
  • Place on paper towel and chop into small pieces.

3️⃣ Make the Dressing

  • In a bowl mix:
    • mayonnaise
    • sour cream
    • mustard
    • salt
    • black pepper
    • herbs
  • Stir until creamy. 🥣

4️⃣ Combine Everything

  • In a large bowl add:
    • potatoes
    • peas
    • diced ham
    • cheese
    • eggs (if using)
  • Pour dressing over everything and mix gently.

5️⃣ Add Bacon

  • Sprinkle crispy bacon on top. 🥓
  • Add extra cheese if desired.

6️⃣ Chill & Serve

  • Refrigerate for at least 30 minutes before serving.
  • Serve cold and enjoy 😋

💡 Tips

  • Use chilled potatoes for best texture.
  • Don’t overmix or potatoes may break apart.
  • Add chopped pickles for extra flavor.

❓Q/A

❓Can I make it ahead of time?

✅ Yes, it tastes even better after chilling overnight.

❓Can I use frozen peas?

✅ Yes, just thaw them before mixing.

❓What potatoes work best?

✅ Yukon Gold or red potatoes hold their shape best.

Cranberry Pecan Chicken Salad

Description

Cranberry Pecan Chicken Salad is a creamy, crunchy, and slightly sweet salad made with tender chicken, dried cranberries, and toasted pecans. It’s a refreshing, protein-packed dish that works perfectly for sandwiches, wraps, lettuce cups, or a light lunch bowl. The balance of savory chicken with sweet cranberries and nutty pecans makes it both satisfying and flavorful.

Ingredients

  • 3 cups cooked chicken, shredded or diced
  • ½ cup dried cranberries
  • ½ cup pecans, chopped and lightly toasted
  • ½ cup celery, finely chopped
  • ½ cup mayonnaise (or Greek yogurt for lighter option)
  • 1 teaspoon Dijon mustard
  • 1 teaspoon lemon juice
  • Salt and black pepper to taste

Instructions

  1. In a large bowl, combine cooked chicken, cranberries, pecans, and celery.
  2. In a small bowl, mix mayonnaise, Dijon mustard, lemon juice, salt, and pepper until smooth.
  3. Pour dressing over the chicken mixture and stir until evenly coated.
  4. Chill for at least 30 minutes for best flavor.
  5. Serve cold as desired.

Notes

  • Toasting pecans enhances their flavor and crunch.
  • Rotisserie chicken works great for quick preparation.
  • Greek yogurt can replace mayo for a lighter version.

Tips

  • Add diced apples for extra freshness and sweetness.
  • Serve in croissants for a classic deli-style sandwich.
  • Keep chilled until serving for best texture.

Servings

4–6 servings

Nutritional Info (Approx. Per Serving)

  • Calories: 310
  • Protein: 25g
  • Carbohydrates: 14g
  • Fat: 18g
  • Fiber: 2g

Benefits

  • High in protein
  • Rich in healthy fats from pecans
  • Quick and easy no-cook meal
  • Great for meal prep lunches
  • Balanced sweet and savory flavor

Q&A

Can I make this ahead of time?

Yes, it stays fresh in the fridge for up to 3 days.

Can I freeze chicken salad?

No, freezing is not recommended because the texture becomes watery.

What can I use instead of pecans?

Walnuts or almonds work well as substitutes.

How can I make it healthier?

Use Greek yogurt instead of mayonnaise and add more celery or apples.

What should I serve it with?

Lettuce wraps, crackers, sandwiches, or stuffed in pita bread.

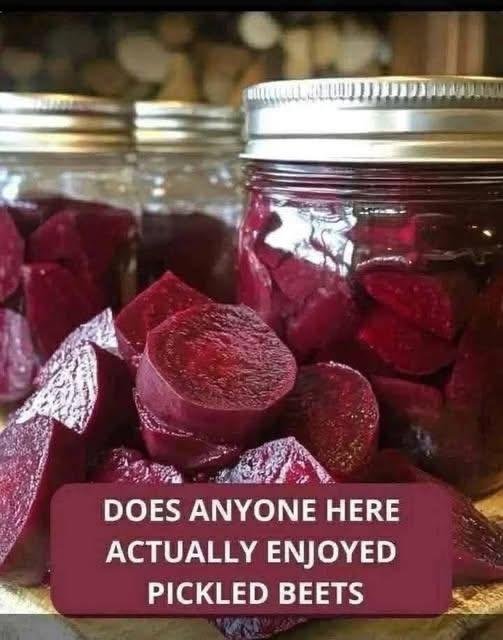
Vibrant Pickled Beets

Vibrant Pickled Beets

Ingredients

  • 6-8 Medium Beets (fresh) 🌿

  • 1 cup Apple cider vinegar 🍎

  • ½ cup Water

  • 1 tsp Salt

  • ½ tsp Whole peppercorns

  • 1 Cinnamon stick (optional, for warmth)

  • 2 Whole cloves (optional)

  • Note: You can skip the sugar entirely for a tart, natural flavor!


Step-by-Step Instructions

  1. Cook the Beets ♨️

    • Leave about an inch of the stems on to prevent the color from “bleeding” out. Boil the beets in a large pot of water for 25–35 minutes until fork-tender.

    • ➡️ Pro Tip: Once cooked, plunge them into cold water. The skins will slide right off with just a little pressure from your thumbs!

  2. Slice and Pack 🔪

    • Slice the peeled beets into rounds or wedges as shown in your photo.

    • ➡️ Pack them tightly into clean, sterilized mason jars.

  3. Prepare the Brine 🧪

    • In a small saucepan, combine the vinegar, water, salt, peppercorns, and spices.

    • ➡️ Bring the mixture to a rolling boil for about 2 minutes to let the flavors infuse.

  4. Fill the Jars 🫙

    • Carefully pour the hot brine over the beets in the jars, ensuring they are completely submerged.

    • ➡️ Leave about half an inch of “headspace” at the top of the jar.

  5. Cool and Cure ❄️

    • Let the jars cool to room temperature on the counter.

    • ➡️ Seal the lids and place them in the refrigerator. For the best flavor, wait at least 24 hours before eating!


Common Questions & Answers

Q: How long do these stay fresh? A: These refrigerator pickled beets will stay delicious for up to 3–4 weeks when kept chilled.

Q: Can I add other vegetables to the jar? A: Absolutely! Sliced red onions or even cloves of garlic are wonderful additions that soak up that beautiful pink brine.

Q: Are these beets crunchy or soft? A: Since they are boiled before pickling, they will have a tender, smooth texture with just a slight “snap.”

Q: Do I have to use apple cider vinegar? A: You can use white vinegar for a sharper tang, but apple cider vinegar provides a smoother, fruitier finish that complements the earthiness of the beets. 🥗