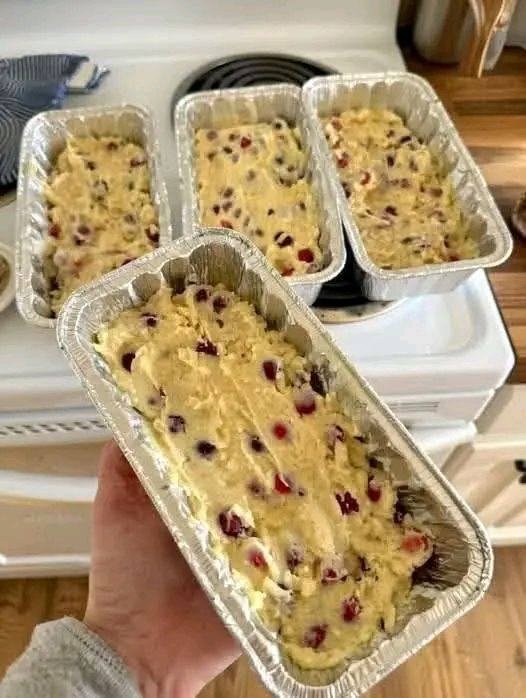
Cranberry Orange Bread

🍊 Cranberry Orange Bread Recipe

  • Prep time: 15 minutes

  • Cook time: 55–65 minutes

  • Servings: 10–12 slices

Ingredients

The Batter:

  • 2 cups All-purpose flour

  • 1 cup Granulated sugar

  • 1 ½ tsp Baking powder

  • ½ tsp Baking soda

  • 1 tsp Salt

  • 1 Egg, large (room temperature)

  • Âľ cup Fresh orange juice (about 2 oranges)

  • 2 tbsp Orange zest (finely grated)

  • ÂĽ cup Vegetable oil (or melted butter)

  • 1 ½ cups Fresh or frozen cranberries (halved if they are very large)

  • ½ cup Chopped walnuts or pecans (optional)

The Simple Glaze (Optional):

  • ½ cup Powdered sugar

  • 1 tbsp Orange juice

Instructions

  1. Preheat & Prep: Heat your oven to 350°F (175°C).  Grease a 9×5-inch loaf pan thoroughly with butter or non-stick spray.

  2. Mix Dry Ingredients: In a large bowl, whisk together the flour, sugar, baking powder, baking soda, and salt.

  3. Mix Wet Ingredients: In a separate medium bowl, beat the egg slightly.  Stir in the orange juice, orange zest, and oil.

  4. Combine: Pour the wet ingredients into the dry ingredients.  Stir by hand until just combined.  Do not overmix, or the bread will be tough.

  5. Fold: Gently fold in the cranberries and nuts.

  6. Bake: Pour the batter into the prepared loaf pan.  Bake for 55 to 65 minutes, or until a toothpick inserted into the center comes out clean.

  7. Cool: Let the bread cool in the pan for 10 minutes, then move to a wire rack.  If using the glaze, drizzle it over the bread once it has cooled completely.

💡 Tips for Success

  • Toss the berries: Toss your cranberries in a teaspoon of flour before adding them to the batter; this prevents them from sinking to the bottom of the loaf.

  • Zest first: Always zest your oranges before you juice them.  It is significantly harder to zest a squeezed, mushy orange!

  • Tent with foil: If the top is browning too quickly but the center isn’t done, loosely cover the pan with aluminum foil for the last 15 minutes.

🥗 Nutritional Info (Per Slice)

Estimates based on 12 slices.

Calorie Fat Carbs Fiber Sugar Protein
210 kcal 6 g 36 g 2g 20 g 3g

✨ Benefits

  • Vitamin C Boost: Thanks to the fresh orange juice and cranberries, this treat offers a nice dose of antioxidants.

  • Low Saturated Fat: By using vegetable oil instead of butter, the bread stays moist for days while keeping saturated fat levels lower.

  • Versatility: It freezes beautifully, making it a perfect “make-ahead” gift or breakfast prep.

❓ Common Q&A

Q: Can I use dried cranberries? A: Yes, but soak them in hot water or orange juice for 10 minutes first to plump them up; otherwise, they can be a bit chewy/tough in the bread.

Q: Why did my bread crack on top? A: Don’t panic! A longitudinal crack is a signature look for quick breads. It happens when the surface sets before the bread has finished rising. It’s perfectly normal.

Q: How do I store this? A: Wrap it tightly in plastic wrap. It actually tastes better the second day as the orange oils infuse the crumb. It stays fresh at room temperature for 3 days or in the freezer for 3 months.

Delicious Homemade Cheese Potato Bread in a Frying Pan

🧀🥔 Cheese Potato Bread (Frying Pan Recipe)

âś” No yeast

âś” No eggs

âś” No oven

âś” Soft inside, golden outside


📝 Ingredients

  • 1 cup all-purpose flour

  • 1 cup mashed potatoes (boiled, smooth, no lumps)

  • 1 cup shredded cheese (mozzarella or cheddar work best)

  • ½ cup milk

  • 2 tablespoons vegetable oil (plus a little for cooking)

  • 1 teaspoon baking powder

  • ½ teaspoon salt

Optional add-ins:

  • ½ teaspoon black pepper

  • ½ teaspoon garlic powder

  • 1 tablespoon chopped herbs (parsley, rosemary, or thyme)

  • Chili flakes or paprika for spice


👩‍🍳 Instructions

Step 1: Make the Dough

In a large bowl, add:

  • Flour

  • Mashed potatoes

  • Cheese

  • Baking powder

  • Salt

Mix well.
Now add:

  • Milk

  • Vegetable oil

Mix until a soft dough forms.
👉 Dough should be soft but not sticky.
If sticky, add 1 tablespoon of flour.
If dry, add 1 tablespoon of milk.


Step 2: Shape the Bread

Divide dough into 4–6 equal balls.
Flatten each ball into a small round (about ½ inch thick).


Step 3: Cook in Frying Pan

Heat a non-stick pan on medium-low heat.
Lightly grease with oil.

Place bread in pan and cook:

  • 5–7 minutes on one side

  • Flip and cook 5–7 minutes on the other side

Press gently with a spatula so it cooks inside too.
Cook until golden brown on both sides.


đź§€ Extra Cheese Option

Sprinkle extra cheese on top while cooking and flip once melted for a crispy cheese crust.


🍽 Serving Ideas

Serve hot with:

  • Soup

  • Salad

  • Eggs

  • Butter

  • Ketchup or chili sauce

Can be used as:

  • Sandwich base

  • Snack

  • Breakfast bread


đź›  Troubleshooting

Too sticky dough?
→ Add flour 1 tablespoon at a time

Burning outside, raw inside?
→ Lower heat and cook slower

Dry bread?
→ Add more mashed potato or milk next time


🌱 Variations

âś” Whole wheat flour instead of white
âś” Plant-based milk & cheese for vegan version
âś” Add onions, garlic, or herbs
âś” Add sesame seeds on top


📌 Summary

This Cheese Potato Bread is:

  • Quick

  • Cheap

  • Beginner-friendly

  • Customizable

  • Perfect without oven

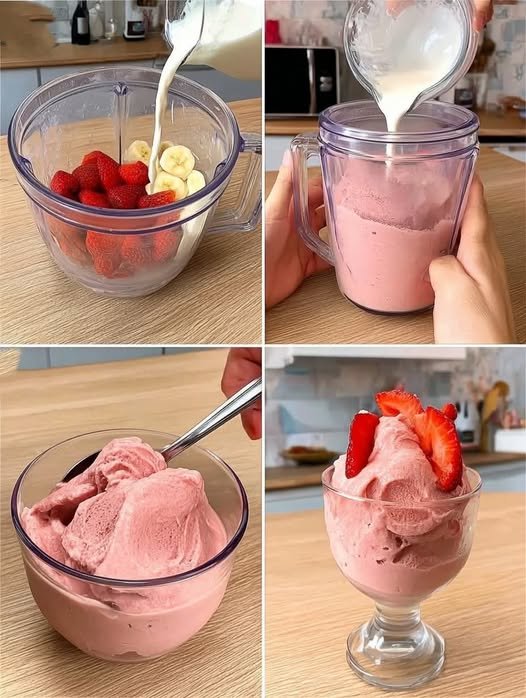
Strawberry Banana Nice Cream (Healthy 2-Ingredient Ice Cream)

Some desserts are quiet little gems, and tapioca pudding is one of them. Made with only four basic ingredients, it’s the kind of recipe you can pull together on a weeknight when a sweet craving hits but a full baking project feels like too much. Deeply rooted in classic American home cooking, this pudding is smooth, lightly sweet, and wonderfully nostalgic—without any extra effort.

All you need is a saucepan and a bit of gentle stirring, and you’re rewarded with a dessert that feels far richer than the work it requires. It’s perfect for busy evenings, relaxed weekends, or even prepared ahead for a simple brunch treat. Proof that comfort food doesn’t have to be complicated.

Serve it warm for a cozy, custard-like feel, or chilled for a cool, creamy dessert. Finish it with fresh berries, banana slices, a dollop of jam, or a drizzle of caramel—whatever sounds best in the moment.


🍮 4-Ingredient Stovetop Tapioca Pudding

Serves 4

🛒 Ingredients

Ingredient Amount Notes
Small pearl tapioca (not instant) â…“ cup Soaks before cooking
Milk (whole preferred) 2Âľ cups Creates a creamy texture
Granulated sugar â…“ cup Adjust to taste
Egg, beaten 1 large Tempered for smoothness

👩‍🍳 Directions

1. Soak the Tapioca
Combine the tapioca pearls and milk in a medium saucepan. Let rest for 20–30 minutes so the pearls soften.

2. Cook the Base
Place the saucepan over medium-low heat. Stir in the sugar and cook, stirring often, until the mixture begins to steam and the pearls become mostly translucent, about 10–15 minutes. Keep the heat gentle to avoid scorching.

3. Temper the Egg
In a small bowl, beat the egg. Slowly whisk in a few spoonfuls of the hot tapioca mixture to gradually warm the egg.

4. Finish the Pudding
Pour the tempered egg back into the saucepan, stirring constantly. Cook for another 3–5 minutes, until slightly thickened and able to coat the back of a spoon.

5. Rest & Adjust
Remove from heat and let sit for about 10 minutes, stirring occasionally to prevent a skin from forming. Taste and adjust sweetness if needed.

6. Serve

  • Warm: Serve right away for a soft, custard-like texture.
  • Chilled: Spoon into bowls or jars, cover, and refrigerate for 1–2 hours. Stir in a splash of milk if it thickens too much.

✨ Simple, nostalgic, and endlessly comforting—this classic tapioca pudding shows that the best desserts are often the easiest.

Garlic Cheese Fingers

Garlic Cheese Fingers

Prep Time: 10 minutes
Cook Time: 10–12 minutes
Serves: 4–6

Crispy flatbread or pizza crust topped with garlic butter and melted cheese, sliced into easy-to-share fingers.


Ingredients

  • 1 prepared pizza crust or flatbread (thin works best)

  • 1 tablespoon butter, melted

  • 1 tablespoon olive oil

  • 2 cloves garlic, finely minced

  • 1 cup shredded mozzarella cheese

  • ÂĽ cup grated Parmesan cheese

  • ½ teaspoon dried oregano or Italian seasoning

  • ÂĽ teaspoon black pepper

  • Optional:

    • Chopped fresh parsley

    • Red pepper flakes

    • Light sour cream or yogurt for dipping


Instructions

1. Preheat Oven

Preheat oven to 400°F (200°C).
Line a baking tray with parchment paper or lightly grease it.


2. Prepare Garlic Butter

In a small bowl, mix:

  • Melted butter

  • Olive oil

  • Minced garlic

  • Black pepper

  • Oregano or Italian seasoning

Stir until well combined.


3. Prepare the Crust

Place pizza crust or flatbread on the baking tray.
Brush the entire surface evenly with the garlic butter mixture.


4. Add Cheese

Sprinkle mozzarella evenly over the crust.
Top with Parmesan cheese.


5. Bake

Bake for 10–12 minutes, or until:

  • Cheese is fully melted

  • Edges are lightly golden

  • Bottom is crisp

For extra browning, broil for the last 1–2 minutes while watching closely.


6. Slice and Serve

Remove from oven and let rest for 2 minutes.
Slice into strips or triangles.
Garnish with chopped parsley if desired.


Optional Light Version (Lower-Calorie Method)

  • Use whole wheat or low-carb flatbread

  • Use part-skim mozzarella

  • Reduce butter to ½ tablespoon

  • Increase garlic and herbs for flavor without extra fat


Storage & Reheating

  • Storage: Refrigerate leftovers up to 2 days

  • Reheat: Oven or air fryer at 350°F (175°C) for 4–5 minutes

  • Avoid microwave for best texture


Serving Ideas

Serve with:

  • Marinara sauce

  • Light garlic yogurt dip

  • Tomato soup

  • Fresh salad

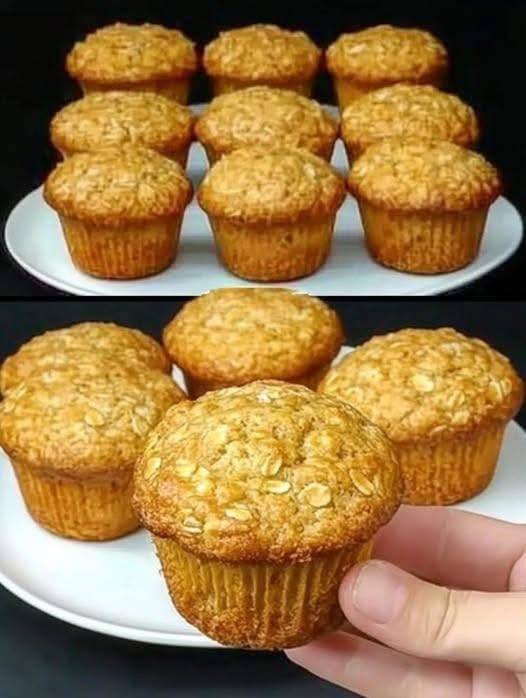
Apple & Oat Muffins

Apple & Oat Muffins

Prep Time: 5 minutes
Bake Time: 20–25 minutes
Yield: 10–12 muffins

Soft, lightly sweet muffins made with oats, apples, and nuts. These are easy to mix in one bowl and bake quickly.


Ingredients

  • 1 cup rolled oats

  • â…” cup (150 ml) warm milk (dairy or unsweetened plant-based)

  • 2 apples, grated or finely chopped

  • 2 eggs

  • 2 tablespoons butter or margarine, melted

  • ½ cup walnuts or almonds, chopped

  • ½ teaspoon vanilla extract

  • 1 teaspoon ground cinnamon (optional but recommended)

  • Vegetable oil, for greasing the muffin tin

  • Optional: a small pinch of salt


Instructions

1. Soften the Oats

Place the rolled oats in a large mixing bowl.
Pour in the warm milk and stir.
Let the mixture rest for 5–10 minutes so the oats absorb the liquid and soften.


2. Preheat the Oven

Preheat your oven to 350°F (180°C).
Lightly grease a muffin tin with vegetable oil or line with paper liners.


3. Prepare the Apples

Peel if desired, then grate or finely chop the apples.
Grated apples blend smoothly into the batter, while chopped apples give more texture.


4. Mix the Wet Ingredients

To the soaked oats, add:

  • Eggs

  • Melted butter or margarine

  • Vanilla extract

Whisk until everything is well combined.


5. Add the Solid Ingredients

Fold in:

  • Apples

  • Chopped nuts

  • Cinnamon (if using)

  • Pinch of salt (optional)

Stir gently until evenly mixed.


6. Fill the Muffin Tin

Divide the batter evenly among the muffin cups.
These muffins do not rise much, so you can fill each cup almost to the top.


7. Bake

Bake for 20–25 minutes, or until:

  • The tops feel firm

  • A toothpick inserted in the center comes out clean


8. Cool

Let the muffins cool in the pan for 5 minutes, then transfer to a wire rack to cool completely.


Helpful Tips

  • Extra flavor: Add raisins or chopped dates if you want more sweetness.

  • Texture: For softer muffins, grate the apples; for chunkier muffins, finely chop them.

  • Storage: Keep in an airtight container in the refrigerator for up to 3 days or freeze for longer storage.

  • Serving idea: Warm slightly and serve with butter or nut spread if desired.

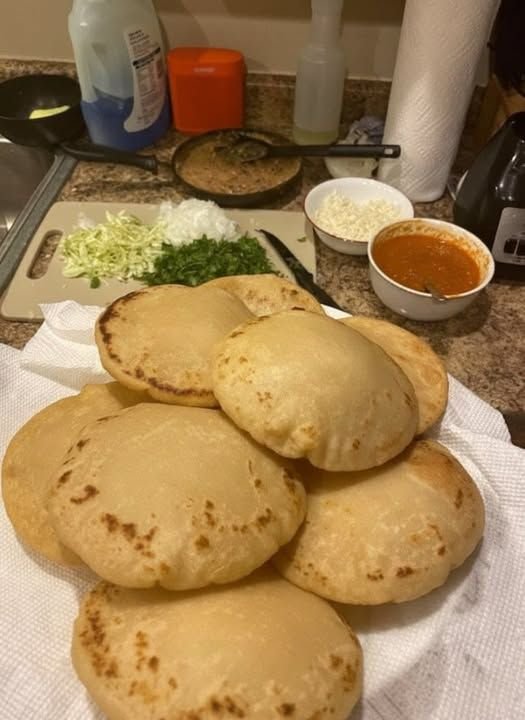
3-Ingredient Breakfast Arepas

3-Ingredient Breakfast Arepas

Description

These 3-Ingredient Breakfast Arepas are golden, pan-toasted corn cakes with a soft, pillowy center. Naturally gluten-free, incredibly filling, and endlessly versatile, they’re a staple breakfast you can enjoy every single day. Simple ingredients, big comfort.


Ingredients

  • 2 cups pre-cooked white cornmeal (such as PAN)

  • 2½ cups warm water

  • 1 tsp salt

(That’s it!)


Instructions

  1. In a bowl, mix warm water and salt.

  2. Slowly add cornmeal while mixing with your hand.

  3. Knead gently for 2–3 minutes until a smooth, soft dough forms (not sticky).

  4. Divide dough into equal balls.

  5. Flatten into discs about ½–¾ inch thick.

  6. Heat a lightly oiled skillet or griddle over medium heat.

  7. Cook arepas 5–7 minutes per side until golden with light char spots.

  8. Optional: finish in oven at 350°F (180°C) for 10 minutes for extra fluffiness.


Chef’s Notes

  • Dough should feel like soft clay—add a splash of water if dry.

  • Let dough rest 5 minutes before shaping for best texture.

  • They puff slightly as they cook—that’s the magic.


Tips for Best Results

  • Crispier exterior: Cook longer on slightly lower heat.

  • Fluffier inside: Finish in the oven after pan-searing.

  • Daily breakfast hack: Make extra and reheat in a skillet.

  • Stuffable: Slice open and fill once cooked.


Servings

  • Makes 6–8 arepas, depending on size

  • 2 arepas = 1 hearty serving


Estimated Nutritional Information (Per Arepa)

(Approximate)

  • Calories: ~180 kcal

  • Carbohydrates: ~36g

  • Protein: ~4g

  • Fat: ~2g

  • Fiber: ~3g

  • Sugar: 0g


Benefits

  • Only 3 ingredients

  • Naturally gluten-free

  • Very filling and satisfying

  • Budget-friendly

  • Great base for sweet or savory toppings

  • Perfect for meal prep


Q & A

Q: Can I eat these plain?
A: Absolutely—they’re delicious on their own, especially fresh and warm.

Q: What can I fill them with?
A: Cheese, eggs, shredded meat, butter, avocado, or anything you love.

Q: Can I store them?
A: Yes—refrigerate up to 4 days or freeze up to 1 month.

Q: Are they good for breakfast every day?
A: Yes! They’re simple, satisfying, and easy on digestion.

Q: Can I bake them instead?
A: You can, but pan-cooking gives the best flavor and texture.