High-Protein Cheesy Garlic Bread

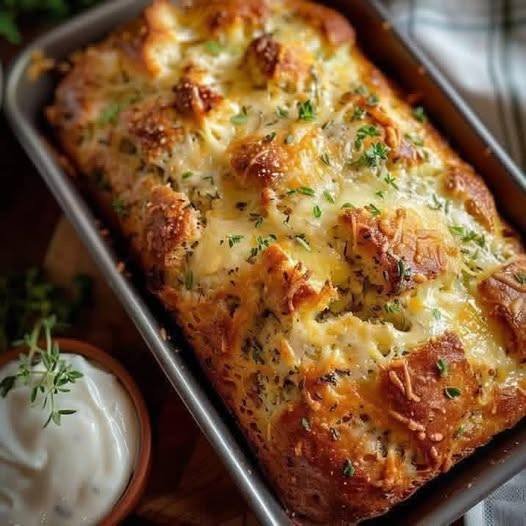
High-Protein Cheesy Garlic Bread

Yields: 1 Loaf | Prep time: 15 mins | Bake time: 35-40 mins

Ingredients

The Dough:

  • 1 cup Cottage cheese (small curd)

  • 2 Large eggs

  • 2 cups Self-rising flour (or 2 cups all-purpose flour + 1 tbsp baking powder + 1 tsp salt)

  • ½ cup Shredded cheddar or mozzarella (mixed into the dough)

  • 1 tsp Garlic powder

  • 1 tsp Dried oregano or Italian seasoning

The Topping:

  • ½ cup Shredded mozzarella (for that golden crust)

  • 2 tbsp Butter, melted

  • 2 cloves Garlic, minced

  • Fresh thyme or parsley for garnish


Instructions

  1. Preheat & Prep: Preheat your oven to 375°F (190°C). Grease a standard loaf pan with butter or non-stick spray.

  2. Blend the Wet Ingredients: In a blender or food processor, blend the cottage cheese and eggs until completely smooth. This is the secret to getting a “bread” texture rather than a “chunky” one.

  3. Mix: In a large bowl, combine the flour, garlic powder, and dried herbs. Pour in the blended cottage cheese mixture and the ½ cup of shredded cheese. Stir until a thick, sticky dough forms.

  4. Transfer: Spread the dough evenly into your prepared loaf pan.

  5. Add the Flavor: In a small bowl, mix the melted butter and minced garlic. Brush this generously over the top of the dough. Sprinkle the remaining mozzarella and fresh herbs on top.

  6. Bake: Bake for 35–40 minutes. The top should be deep golden brown, and a toothpick inserted into the center should come out clean.

  7. Cool: Let it sit in the pan for 10 minutes before slicing. This helps the crumb set so it doesn’t fall apart.


Serving Suggestion

This bread is incredible when dipped into a side of warm marinara or a garlic aioli (like the white sauce shown in your photo).
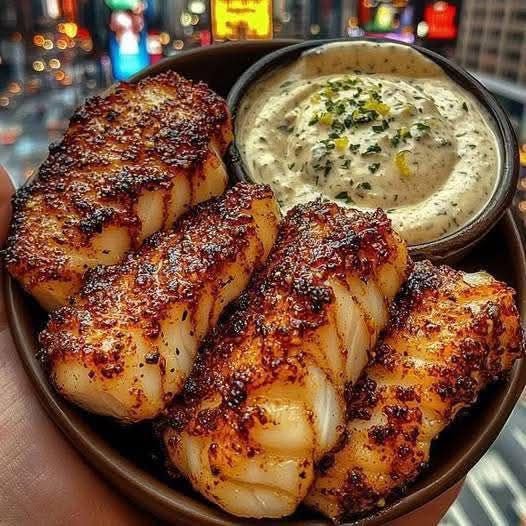
Pan-Fried Cod with Lemon Butter Sauce: A Restaurant-Quality Dish Made Simple

Ingredients:

For the Cod:
  • 4 cod fillets (150-200g each)
  • Salt and pepper, to taste
  • ½ cup all-purpose flour (for coating)
  • 2 tbsp olive oil
  • 1 tbsp unsalted butter
For the Lemon Butter Sauce:
  • 3 tbsp unsalted butter
  • 2 cloves garlic, minced
  • Juice of 1 lemon (about 3 tbsp)
  • Zest of 1 lemon (optional, for extra brightness)
  • ¼ cup chicken or vegetable broth (optional, for a thinner sauce)
  • 2 tbsp fresh parsley, chopped
  • Salt and pepper, to taste

Instructions:

Step 1: Prepare the Cod

Pat the cod fillets dry using paper towels to remove excess moisture, ensuring a nice sear. Season both sides with salt and pepper. Lightly coat each fillet in flour, shaking off any excess—this helps create a crispy, golden crust.

Step 2: Cook the Cod

In a large non-stick skillet, heat olive oil and 1 tbsp of butter over medium-high heat. Once the butter is melted and sizzling, add the cod fillets. Sear for 3–4 minutes until the bottom turns golden brown. Carefully flip and cook for another 2–3 minutes, depending on thickness. The cod is done when it flakes easily with a fork and reaches an internal temperature of 60°C (140°F). Transfer the fillets to a plate and cover with foil to keep warm.

Step 3: Make the Lemon Butter Sauce

Lower the heat to medium and add 3 tbsp of butter to the same pan. Once melted, sauté the minced garlic for about 30 seconds until fragrant, being careful not to burn it. Stir in the lemon juice, scraping up any flavorful bits from the pan. If you prefer a lighter sauce, add chicken or vegetable broth and let it simmer briefly. Finish by stirring in the lemon zest (if using) and chopped parsley. Season to taste with salt and pepper.

Step 4: Serve & Enjoy

Return the cod fillets to the pan, spoon the sauce over them, and let them absorb the flavors for about 30 seconds. Transfer to serving plates and drizzle any remaining sauce on top. Serve with your favorite sides, such as roasted vegetables, mashed potatoes, or a fresh salad.

Final Thoughts

This pan-seared cod with lemon butter sauce is simple yet elegant, offering a restaurant-quality meal with minimal effort. The crispy crust, tender flaky fish, and bright, buttery sauce make it perfect for a quick weeknight dinner or a special occasion.

Enjoy your meal!

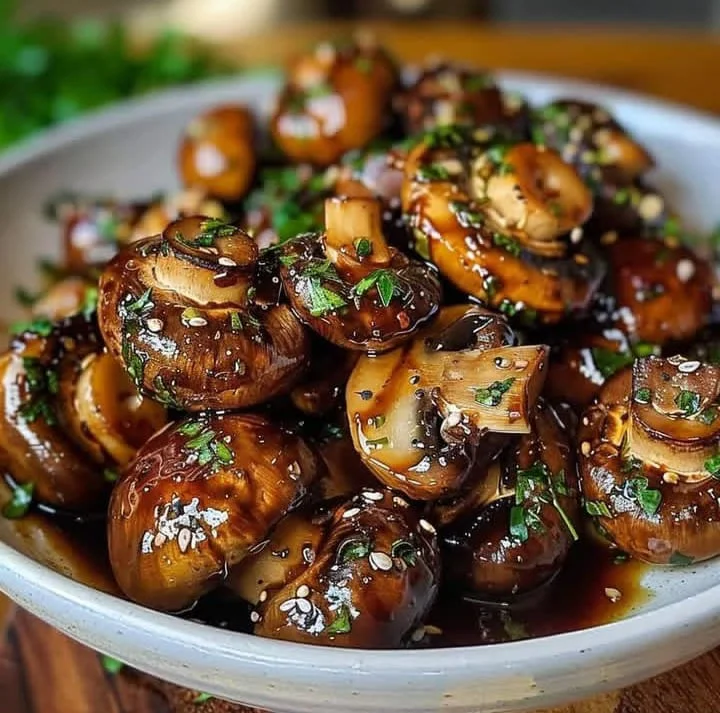
Garlic Butter Sautéed Mushrooms

Garlic Butter Sautéed Mushrooms

A rich, earthy dish that’s low in calories but high in flavor.

Prep time: 5 mins | Cook time: 10 mins | Servings: 2

Ingredients

  • 2 cups Mushrooms: Cremini or white button mushrooms, whole or halved.

  • 2 tbsp Butter: For a rich, satisfying fat base.

  • 1 tbsp Olive Oil: Helps prevent the butter from burning at high heat.

  • 3 Garlic Cloves: Minced or thinly sliced.

  • Fresh Thyme: 1-2 sprigs or $1/2$ tsp dried.

  • Salt and Black Pepper: To taste.

  • Optional: A sprinkle of sesame seeds and fresh parsley for garnish (as seen in the photo).


Instructions

  1. Clean the Mushrooms: Gently wipe the mushrooms with a damp paper towel to remove any dirt. Avoid soaking them in water, as they act like sponges and will become rubbery instead of golden.

  2. Heat the Skillet: Place a large skillet over medium-high heat. Add the olive oil and butter, allowing the butter to melt until it begins to foam.

  3. Sauté Garlic: Add the garlic to the pan and sauté for about 30 seconds until fragrant, being careful not to let it turn brown or bitter.

  4. The Sear: Add the mushrooms to the skillet in a single layer. Season with salt and pepper.

  5. Develop Color: Let the mushrooms cook undisturbed for 3–4 minutes. This allows the moisture to evaporate and the edges to caramelize.

  6. Stir and Finish: Once the browning begins, stir the mushrooms and continue cooking until they are golden and tender. Stir in the thyme during the last minute of cooking for maximum aroma.

  7. Serve: Cook off any remaining moisture in the pan. Taste and adjust seasonings, then serve warm.


Health Benefits

  • Nutrient Dense: Mushrooms are low in calories but rich in antioxidants that support your immunity.

  • Satiety: The combination of satisfying fats from the butter and the fiber in the mushrooms helps reduce the urge to overeat later.

Easy Skillet Naan Bread

Easy Skillet Naan Bread

⏱ Time

Prep: 15 minutes
Rise: 1 hour
Cook: 10–12 minutes
Total: ~1 hour 30 minutes
Makes: 6 naan


🛒 Ingredients

  • 2 cups all-purpose flour

  • 1 tsp salt

  • 1 tsp sugar

  • 1 tsp instant yeast

  • ¼ tsp baking powder

  • 1 tbsp milk powder

  • 1 egg, lightly beaten

  • ½ cup warm water

  • ½ cup milk

  • Butter or ghee, for brushing


👩‍🍳 Instructions

1️⃣ Mix Dry Ingredients
In a large bowl, combine:

  • Flour

  • Salt

  • Sugar

  • Yeast

  • Baking powder

  • Milk powder

Mix well.


2️⃣ Add Wet Ingredients
Make a well in the center. Add:

  • Egg

  • Water

  • Milk

Mix until a soft dough forms.


3️⃣ Knead Dough
Transfer dough to a floured surface.
Knead for 5–7 minutes until smooth and elastic.


4️⃣ First Rise
Place dough in a greased bowl.
Cover and let rise in a warm place for 1 hour or until doubled.


5️⃣ Shape Naan
Divide dough into 6 equal balls.
Roll each into an oval or circle about ¼-inch thick.


6️⃣ Cook on Skillet
Heat a skillet or griddle over medium-high heat.
Cook each naan for 2–3 minutes per side until puffed and golden with brown spots.


7️⃣ Finish & Serve
Brush with melted butter or ghee.
Serve warm.


🌿 Optional Add-Ins

  • Garlic (minced)

  • Chopped coriander

  • Black seeds (kalonji)

  • Chili flakes

  • Cumin

Mix into dough or sprinkle on before cooking.


🧊 Storage

  • Room temp: 1 day

  • Fridge: 3 days

  • Freezer: up to 2 months
    Reheat on a skillet or in foil.

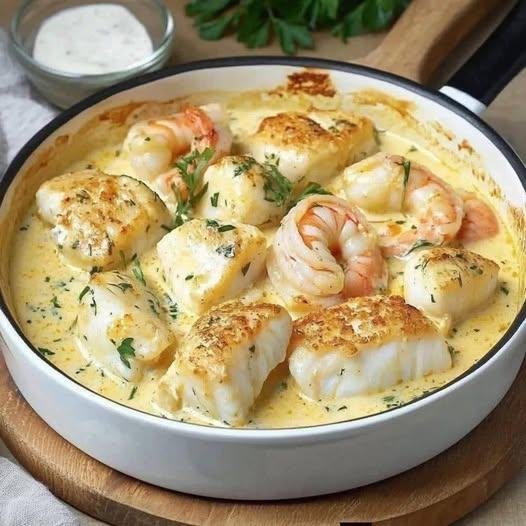
Creamy Garlic Butter Seafood Skillet

Creamy Garlic Butter Seafood Skillet

Prep time: 10 mins | Cook time: 15 mins | Servings: 3-4


Ingredients

The Seafood:

  • 1 lb (450g) White fish fillets (Cod, Halibut, or Sea Bass), cut into large chunks

  • 1/2 lb (225g) Large shrimp, peeled and deveined (tails on or off)

  • Salt and black pepper to taste

  • 2 tbsp Olive oil

The Creamy Sauce:

  • 4 tbsp Unsalted butter

  • 4 cloves Garlic, minced

  • 1/2 cup Heavy cream

  • 1/4 cup Chicken or vegetable broth (or dry white wine)

  • 1/4 cup Freshly grated Parmesan cheese

  • 1 tbsp Fresh lemon juice

  • 1 tsp Italian seasoning (or dried oregano)

  • Fresh parsley, chopped (for garnish)

  • Red pepper flakes (optional, for heat)


Instructions

  1. Season and Sear: Pat the fish and shrimp completely dry with paper towels (this is the secret to a good sear). Season both sides with salt and pepper.

  2. Cook the Seafood: Heat olive oil in a large skillet over medium-high heat. Add the fish chunks and cook for 2–3 minutes per side until golden and just cooked through. Remove and set aside. In the same skillet, sear the shrimp for 1–2 minutes per side until pink. Remove and set aside with the fish.

  3. Make the Aromatics: Lower the heat to medium. Melt the butter in the skillet. Add the minced garlic and cook for about 1 minute until fragrant (don’t let it brown).

  4. Deglaze and Simmer: Pour in the broth (or wine) to deglaze the pan, scraping up any tasty browned bits. Let it simmer for 2 minutes to reduce slightly.

  5. Cream and Cheese: Stir in the heavy cream and Italian seasoning. Bring to a gentle simmer, then stir in the Parmesan cheese. Continue to whisk until the cheese is melted and the sauce has thickened slightly (about 2–3 minutes).

  6. Combine: Stir in the lemon juice. Return the cooked fish and shrimp to the skillet. Gently spoon the sauce over the seafood to coat.

  7. Finish: Garnish with plenty of fresh parsley and red pepper flakes if you like a little kick.


Serving Suggestions

  • Low Carb: Serve over zoodles (zucchini noodles) or steamed asparagus.

  • Classic: Serve over linguine or with a side of crusty sourdough bread to soak up that extra sauce.

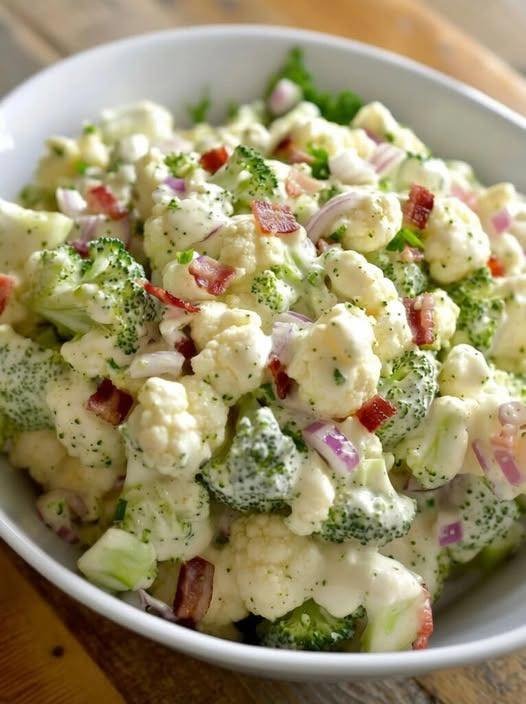
Creamy Broccoli Cauliflower Salad

Creamy Broccoli Cauliflower Salad

Crunchy • Creamy • Savory-Sweet • Perfect for Gatherings

This classic Creamy Broccoli Cauliflower Salad is a well-loved favorite for potlucks, picnics, and family meals. Crisp fresh vegetables are paired with smoky, crunchy bacon, sharp cheese, and a tangy-sweet dressing that coats every bite beautifully. It improves with time, making it ideal for preparing ahead.


Why This Recipe Works

  • Raw broccoli and cauliflower stay crisp and refreshing

  • Creamy dressing balances tang and sweetness

  • Bacon adds depth and crunch

  • Chilling time allows flavors to blend perfectly

  • Easy to customize for different diets


Ingredients

The Salad Base

  • 3 cups fresh broccoli florets, chopped into bite-sized pieces

  • 3 cups fresh cauliflower florets, chopped small

  • 6 slices bacon, cooked until crisp and crumbled

  • ¾ cup sharp cheddar cheese, freshly grated

  • ⅓ cup red onion, finely diced

  • ½ cup roasted sunflower seeds
    (or chopped almonds for a nutty variation)

  • Optional: ½ cup dried cranberries or raisins for gentle sweetness


The Creamy Dressing

  • ¾ cup mayonnaise, good quality

  • ¼ cup sour cream or plain Greek yogurt

  • 2 tablespoons apple cider vinegar

  • 2 tablespoons granulated sugar
    (or honey or maple syrup)

  • ½ teaspoon salt

  • ¼ teaspoon black pepper


Step-by-Step Instructions

1. Prepare the Vegetables

  • Wash broccoli and cauliflower thoroughly

  • Pat completely dry using a clean kitchen towel

Important Tip: Dry vegetables allow the dressing to cling properly instead of sliding off.

  • Chop into small, evenly sized pieces for the best texture and flavor in every bite


2. Cook the Bacon

  • Cook bacon in a skillet or oven until deeply crisp

  • Transfer to paper towels to cool

  • Crumble into small pieces

Make-Ahead Tip: Store bacon separately and add just before serving to keep it crunchy.


3. Make the Dressing

  • In a medium bowl, whisk together:

    • Mayonnaise

    • Sour cream (or yogurt)

    • Apple cider vinegar

    • Sugar

    • Salt

    • Black pepper

  • Whisk until smooth and creamy

  • Taste and adjust:

    • Add more vinegar for tang

    • Add a touch more sweetener if desired


4. Assemble the Salad

  • In a large mixing bowl, combine:

    • Broccoli

    • Cauliflower

    • Red onion

    • Cheddar cheese

    • Sunflower seeds

  • Pour dressing over the salad

  • Fold gently until all vegetables are evenly coated


5. Chill for Best Flavor

  • Cover and refrigerate for at least 30 minutes

  • For best results, chill 3–4 hours to allow flavors to blend

  • Stir in the crumbled bacon just before serving
    (or sprinkle on top for presentation)


Texture & Flavor Notes

  • Crisp vegetables with creamy coating

  • Savory, slightly sweet, and tangy balance

  • Bacon adds crunch and smoky depth


Customization & Variations

Lighter Version

  • Replace half the mayonnaise with Greek yogurt

  • Use honey or reduce sweetener

Low-Carb Version

  • Omit sugar and dried fruit

  • Add extra bacon or chopped hard-boiled eggs

Plant-Based Version

  • Use dairy-free mayonnaise

  • Replace bacon with toasted seeds or smoked seasoning


Storage & Make-Ahead Tips

  • Make Ahead:

    • Chop vegetables and prepare dressing up to 24 hours in advance

    • Store separately and combine 1–2 hours before serving

  • Leftovers:

    • Store in an airtight container in the refrigerator

    • Keeps well for up to 3 days

    • Stir before serving as some moisture may release

  • Freezing:

    • Not recommended due to texture changes