
🥔 Cheesy Baked Potato & Green Onion Sticks

🥔 Cheesy Baked Potato & Green Onion Sticks

Crispy on the outside, gooey on the inside, and bursting with fresh onion flavor.

Ingredients

The Potato Base:

  • Potatoes: 3 medium (approx. 500g), peeled and boiled until soft

  • Cornstarch (or Potato Starch): 2 tbsp (this is the secret to the crispy exterior)

  • Butter: 1 tbsp, melted

The Flavor & Fillings:

  • Cheese: 1 cup shredded Mozzarella (for the cheese pull) or a Mozzarella/Cheddar blend

  • Green Onions: ½ cup, finely chopped (chives also work beautifully)

  • Seasonings: ½ tsp garlic powder, ½ tsp salt, ¼ tsp black pepper

For the Finish:

  • Olive Oil: 1 tbsp (for brushing)

  • Optional: Extra Parmesan or Mozzarella for a golden crust topping


👩‍🍳 Instructions

  1. Mash & Cool: Boil the potatoes until fork-tender. Drain and mash them in a large bowl until completely smooth. Crucial Step: Let them cool for about 10 minutes; if they are too hot, the cheese will melt instantly and make the dough greasy.

  2. Create the Dough: Add the melted butter, starch, garlic powder, salt, and pepper to the mash. Mix thoroughly. Fold in the chopped green onions and shredded cheese until you have a soft, moldable dough.

  3. Shape the Sticks: Take a small handful of the mixture (about the size of a golf ball) and roll it between your palms into a log/stick shape, roughly the size of a large finger.

  4. Prep for Heat: Place the sticks on a baking sheet lined with parchment paper. Lightly brush each stick with olive oil. For extra crunch, sprinkle a little extra cheese on top now.

  5. Bake: Preheat your oven to 375°F (190°C). Bake for 20–25 minutes. You are looking for a deep golden brown color and a slight sizzle.

  6. Rest & Serve: Let them sit on the tray for 3–5 minutes after taking them out. This allows the cheese inside to set so they don’t break when you pick them up.


🍯 Dipping Sauce Ideas

These sticks are great plain, but even better dipped:

  • Garlic Mayo: Mayo + minced garlic + a squeeze of lemon.

  • Sour Cream & Chive: Sour cream + salt + more green onions.

  • Spicy Ketchup: Ketchup + a dash of Sriracha or cayenne.


💡 Quick Tip: Air Fryer Method

If you want them even crispier, pop them in the Air Fryer at 380°F (193°C) for 12–15 minutes, shaking the basket halfway through!
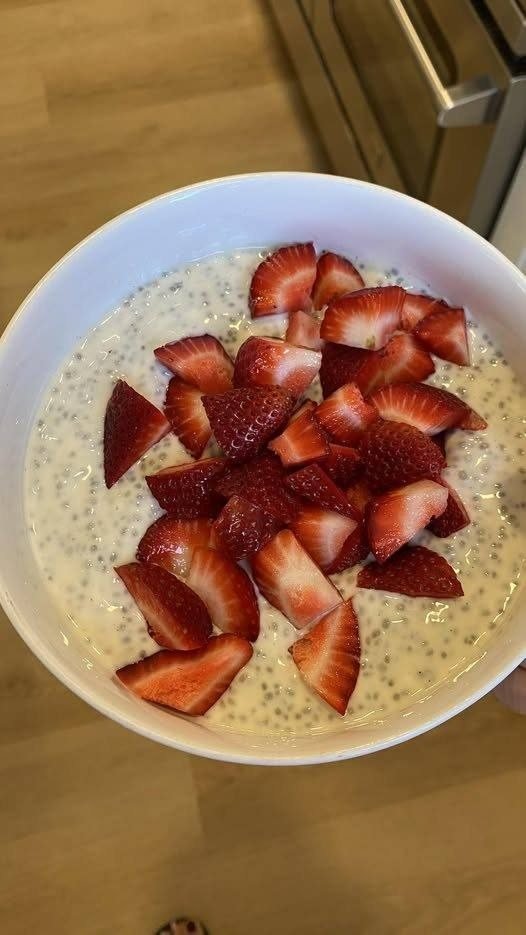

🍮 Sugar-Free Chia Seed Pudding (Low-Point & High-Fiber)

🍮 Sugar-Free Chia Seed Pudding (Low-Point & High-Fiber)

A creamy, naturally filling pudding made with chia seeds and unsweetened almond milk. Perfect for breakfast, snack, or light dessert.


🧺 Ingredients

  • ½ cup chia seeds (black or white)

  • 2 cups unsweetened almond milk (or other unsweetened plant-based milk)

  • 1–2 tbsp sugar-free sweetener (monk fruit, erythritol, or stevia, adjust to taste)

Optional Flavor Add-Ins (no extra points)

  • ½ tsp vanilla extract

  • Pinch of cinnamon or nutmeg

Optional Toppings (add separately)

  • Fresh berries (strawberries, blueberries)

  • Unsweetened coconut flakes

  • Chopped nuts (measure carefully)

  • Sugar-free syrup


👩‍🍳 Step-by-Step Instructions

Step 1: Mix the Liquid Base

In a large bowl or jar, stir together:

  • Almond milk

  • Sugar-free sweetener

  • Vanilla or spices (if using)

Mix until fully blended.


Step 2: Add Chia Seeds

Whisk in the chia seeds slowly while stirring to prevent clumps.


Step 3: Rest and Re-Mix

Let mixture sit for 10–15 minutes, then whisk again to break up any clumps.


Step 4: Refrigerate

Cover and refrigerate for at least 4 hours or overnight until thick and pudding-like.


Step 5: Serve

Spoon into bowls or jars.
Add toppings if desired and enjoy chilled.


🌿 Why This Recipe Works

  • Chia seeds absorb liquid and keep you full longer

  • Unsweetened almond milk keeps calories and points low

  • Sugar-free sweeteners allow sweetness without added sugar

  • Fully plant-based and vegan-friendly


🔁 Substitutions & Variations

  • Milk: Use any unsweetened plant-based milk (soy, oat, coconut almond blend)

  • Sweetener: Monk fruit, stevia, or erythritol all work

  • Natural option: Small amount of mashed banana or unsweetened applesauce (adds sweetness but increases points)

  • Flavor ideas: Cocoa powder, cinnamon, nutmeg, or lemon zest


🥄 Equipment Alternatives

  • No jar? Use a bowl and cover tightly

  • No whisk? A fork works well


🍓 Serving Ideas

  • Breakfast: Top with berries and a few chopped nuts

  • Snack: Add sugar-free chocolate or caramel syrup

  • Dessert: Layer with yogurt or fruit for a parfait

  • Drink pairing: Coffee or unsweetened tea


❄ Storage Tips

  • Store in airtight container up to 5 days in fridge

  • Best texture within 3–4 days

  • Freezing is not recommended (texture changes)

  • Serve chilled (no reheating needed)


📊 Nutrition (per ¾ cup serving – approximate)

  • Calories: ~120 kcal

  • Carbohydrates: 8 g

  • Protein: 4 g

  • Fat: 7 g

  • Fiber: 6 g

  • WW Points: ~3–4 per serving

Diet: Low-carb, high-fiber, vegan-friendly
Allergens: Contains seeds; check milk for nut allergens


❓ FAQs

Q: Can I use dairy milk?
Yes, but calories and points will increase depending on milk type.

Q: My pudding is too thin. What should I do?
Add 1–2 tbsp more chia seeds and refrigerate 1 more hour.

Q: Can I make single servings?
Yes. Divide mixture into small jars for grab-and-go portions.

Q: Can I add fruit before chilling?
It’s better to add fruit when serving so it doesn’t release extra liquid.

The “Don’t Lose It” Hearty Bean & Ham Soup


Conversation with Gemini

You said

One bite in, my husband said, “Whatever this is, don’t lose it.” I printed the recipe immediately 😂


Recipe in First (c.o.m.m.e.n.t ).👇


Gemini said

That looks like a bowl of pure comfort! Based on the image and the classic “don’t lose this” reaction, you’ve likely made a Hearty 15-Bean & Ham Soup. It’s the kind of meal that tastes even better the next day once the flavors have had a chance to marry.


Since you mentioned you never want to lose the recipe, here is a full, detailed version so you’ll always have it saved here.


The “Don’t Lose It” Hearty Bean & Ham Soup

This recipe uses a multi-bean mix and a savory ham bone (or hock) to create that thick, silky broth seen in your photo.


Ingredients

1 package (20 oz): 15-bean dried soup mix (discard the flavor packet if you prefer homemade seasoning)


1 lb: Leftover ham, diced (or a meaty ham bone/smoked hock)


1 large: Yellow onion, diced


3 cloves: Garlic, minced


2 stalks: Celery, diced


2 medium: Carrots, diced


6-8 cups: Chicken broth (or water, but broth is better!)


1 can (14.5 oz): Diced tomatoes (optional, omit if you want it purely creamy like the photo)


1 tsp: Dried oregano


1/2 tsp: Red pepper flakes (for a tiny kick)


2: Bay leaves


To taste: Salt and black pepper


Garnish: Fresh parsley and a squeeze of lemon juice (the “secret” to brightening the heavy flavors)


Instructions

Soak the Beans: Rinse the beans and place them in a large pot. Cover with water and soak overnight, OR do a “quick soak”: bring to a boil for 2 minutes, then remove from heat and let sit covered for 1 hour. Drain and rinse.


Sauté the Aromatics: In a large Dutch oven or pot, sauté the onion, celery, and carrots in a splash of oil until softened (about 5–7 minutes). Add the garlic and cook for 1 more minute.


Simmer: Add the soaked beans, ham (and/or ham bone), chicken broth, oregano, red pepper flakes, and bay leaves.


Cook: Bring to a boil, then reduce heat to low. Cover and simmer for 1.5 to 2 hours, or until the beans are tender.


Tip: If the soup is too thin, take a potato masher and mash a small portion of the beans directly in the pot to thicken the broth naturally.


Final Seasoning: Remove the bay leaves (and the bone, if used). Stir in the diced ham if you haven’t already. Taste before adding salt, as the ham and broth are often salty enough.


The Finish: Stir in fresh parsley and a squeeze of lemon just before serving.


Pro Tips for the Best Result

Creaminess: If you want that extra “velvety” look from the photo, stir in a splash of heavy cream or a tablespoon of butter at the very end.


Slow Cooker: You can do this on Low for 8 hours or High for 4–5 hours.

Cheesy Bacon Egg Toast Cups

🧀🥓 Cheesy Bacon Egg Toast Cups

A quick baked breakfast made with bread, eggs, cheese, and bacon.

⏱ Prep Time: 5 minutes

🔥 Bake Time: 12–15 minutes

🍽 Serves: 6


📝 Ingredients

  • 6 slices sandwich bread

  • 6 slices cheese (cheddar, mozzarella, or your choice)

  • 6 slices cooked bacon (chopped)

  • 4 large eggs

  • Salt, to taste

  • Black pepper, to taste

  • 1 tbsp fresh parsley, chopped

  • 1 tbsp green onion, chopped

  • Butter or oil (for greasing pan)


👩‍🍳 Instructions

  1. Preheat oven to 180°C (350°F). Grease a muffin tin.

  2. Flatten each slice of bread with a rolling pin.

  3. Press each slice of bread into the muffin tin to form a cup.

  4. Place one slice of cheese inside each bread cup.

  5. Sprinkle chopped bacon evenly into each cup.

  6. In a bowl, beat the eggs with:

    • salt

    • black pepper

    • parsley

    • green onion

  7. Pour the egg mixture evenly into each bread cup.

  8. Bake for 12–15 minutes, or until:

    • eggs are set

    • cheese is melted

    • edges are golden

  9. Let cool for 2–3 minutes, then remove gently.


🌟 Optional Add-Ins

  • Bell peppers

  • Mushrooms

  • Spinach

  • Tomatoes

  • Chili flakes


🧊 Storage

  • Refrigerate up to 3 days

  • Reheat in oven or air fryer for best texture

Crispy Roasted Cauliflower Steaks

Crispy Roasted Cauliflower Steaks

Gluten-Free, Low-Carb, and Budget-Friendly

Ingredients

  • 1 Large Head of Cauliflower: Fresh and firm.

  • 1/4 cup Olive Oil or Melted Butter: For that golden crispness.

  • 2 cloves Garlic: Minced (or 1 tsp garlic powder).

  • 1 tsp Smoked Paprika: Gives it that “better than meat” savory depth.

  • Salt and Black Pepper: To taste.

  • Optional Garnish: Fresh chopped parsley and a squeeze of lemon juice.

Instructions

  1. Prep the Oven: Preheat your oven to 400°F (200°C). Line a large baking sheet with parchment paper.

  2. Slice the “Steaks”: Remove the outer leaves from the cauliflower but keep the core intact (this holds the steaks together). Slice the head vertically into 3/4-inch thick slabs.

  3. Seasoning Blend: In a small bowl, whisk together the olive oil (or butter), minced garlic, paprika, salt, and pepper.

  4. The Coating: Lay the steaks on the baking sheet. Generously brush both sides of each steak with your seasoning blend.

  5. The Roast: Bake for 25–30 minutes, flipping halfway through. You want the edges to be dark golden brown and the center to be tender when pierced with a fork.

  6. The Finish: For extra crunch, you can broil them for the last 2 minutes. Sprinkle with fresh parsley and lemon juice immediately before serving.


Why this is a “Win” for your 22+ Day Streak:

  • Texture: When roasted at high heat, the cauliflower develops a meaty, satisfying texture that hits those savory cravings perfectly.

  • Affordability: This entire meal usually costs less than a few dollars but looks like a gourmet restaurant dish.

  • Versatility: You can dip these in the same garlic-lemon sauce shown in your photo for an extra layer of flavor.

1-Minute Savory Breakfast Egg Bowls

1-Minute Savory Breakfast Egg Bowls

A quick, flour-free, and sugar-free alternative for busy mornings.

Ingredients

  • 2 large Eggs

  • 1 tbsp Unsweetened almond milk or heavy cream (for fluffiness)

  • 1/4 cup Fresh spinach, chopped

  • 3-4 Cherry tomatoes, halved

  • 1 tbsp Feta or goat cheese crumbles

  • A pinch of salt and black pepper

  • Optional: A dash of red pepper flakes or fresh chives


Instructions

  1. Prep the Ramekin: Lightly grease a microwave-safe ramekin or small mug with a tiny bit of olive oil or butter to prevent sticking.

  2. Whisk: Crack the eggs directly into the ramekin. Add the milk (or cream), salt, and pepper. Whisk with a fork until well combined.

  3. Mix in Add-ins: Stir in the chopped spinach, cherry tomatoes, and cheese. Ensure the vegetables are slightly submerged in the egg mixture.

  4. Microwave: Place the ramekin in the microwave. Cook on high for 60 to 90 seconds.

    • Tip: Stop at 60 seconds to check the consistency. The eggs should be set but still look slightly moist on top—they will finish cooking with the residual heat.

  5. Rest and Serve: Let it sit for 30 seconds before eating. Top with fresh herbs or red pepper flakes if desired.


Meal Prep Tip

You can chop the vegetables and place them in the ramekins the night before. In the morning, just crack the eggs in, whisk, and microwave!