Easy Southern Salmon Patties

Easy Southern Salmon Patties

Yields: Approx. 6–8 patties | Prep time: 15 mins | Cook time: 10 mins

Ingredients

  • 18 oz Canned Pink Salmon (drained, bones/skin removed if preferred)

  • 30 Saltine crackers (divided: half for the mix, half for dredging)

  • 1 Large egg, beaten

  • ½ cup Real mayonnaise

  • ½ cup Green onions, finely chopped (about 5–6 stalks)

  • Juice of ½ Medium lemon

  • ½ tsp Worcestershire sauce

  • ½ tsp Creole seasoning (or Old Bay)

  • ¼ tsp Salt

  • ¼ tsp Coarse ground black pepper

  • Cooking Oil (Vegetable or Canola) for frying


Instructions

1. Prep the Skillet

Pour about 1 inch of cooking oil into a 12″ cast iron skillet. Place it over medium heat. You’ll know it’s ready when a drop of water flicked into the oil sizzles and pops immediately.

2. Mix the Base

In a large mixing bowl, flake the salmon with a fork. Add the mayonnaise, lemon juice, beaten egg, and Worcestershire sauce. Stir until well combined.

3. Season and Bind

Fold in the green onions, Creole seasoning, salt, and pepper.

  • Crush 13–15 saltines into coarse crumbs and mix them into the salmon.

  • Finely crush the remaining crackers onto a shallow plate or saucer—this will be your “breading” station.

4. Form the Patties

Gently shape the mixture into small-to-medium patties (about the size of a hockey puck, but slightly flatter).

  • Pro-Tip: If the mixture feels too wet, let it sit for 5 minutes so the crackers can absorb the moisture, or add 2–3 more crushed crackers.

5. Dredge and Fry

Carefully press each patty into the finely crushed saltines on the plate, coating both sides. Place the patties into the hot oil. Fry for 2–3 minutes per side until they reach a deep golden brown.

6. Drain and Serve

Remove the patties and let them drain on a wire rack with paper towels underneath to keep the bottoms from getting soggy. Serve warm with a lemon wedge or a dollop of remoulade.


A Quick “Chef’s Note”

If you have the time, chilling these patties in the fridge for 20–30 minutes before frying (as mentioned in your text) really helps them stay together in the pan, especially since this recipe uses mayo and egg for a very moist interior.
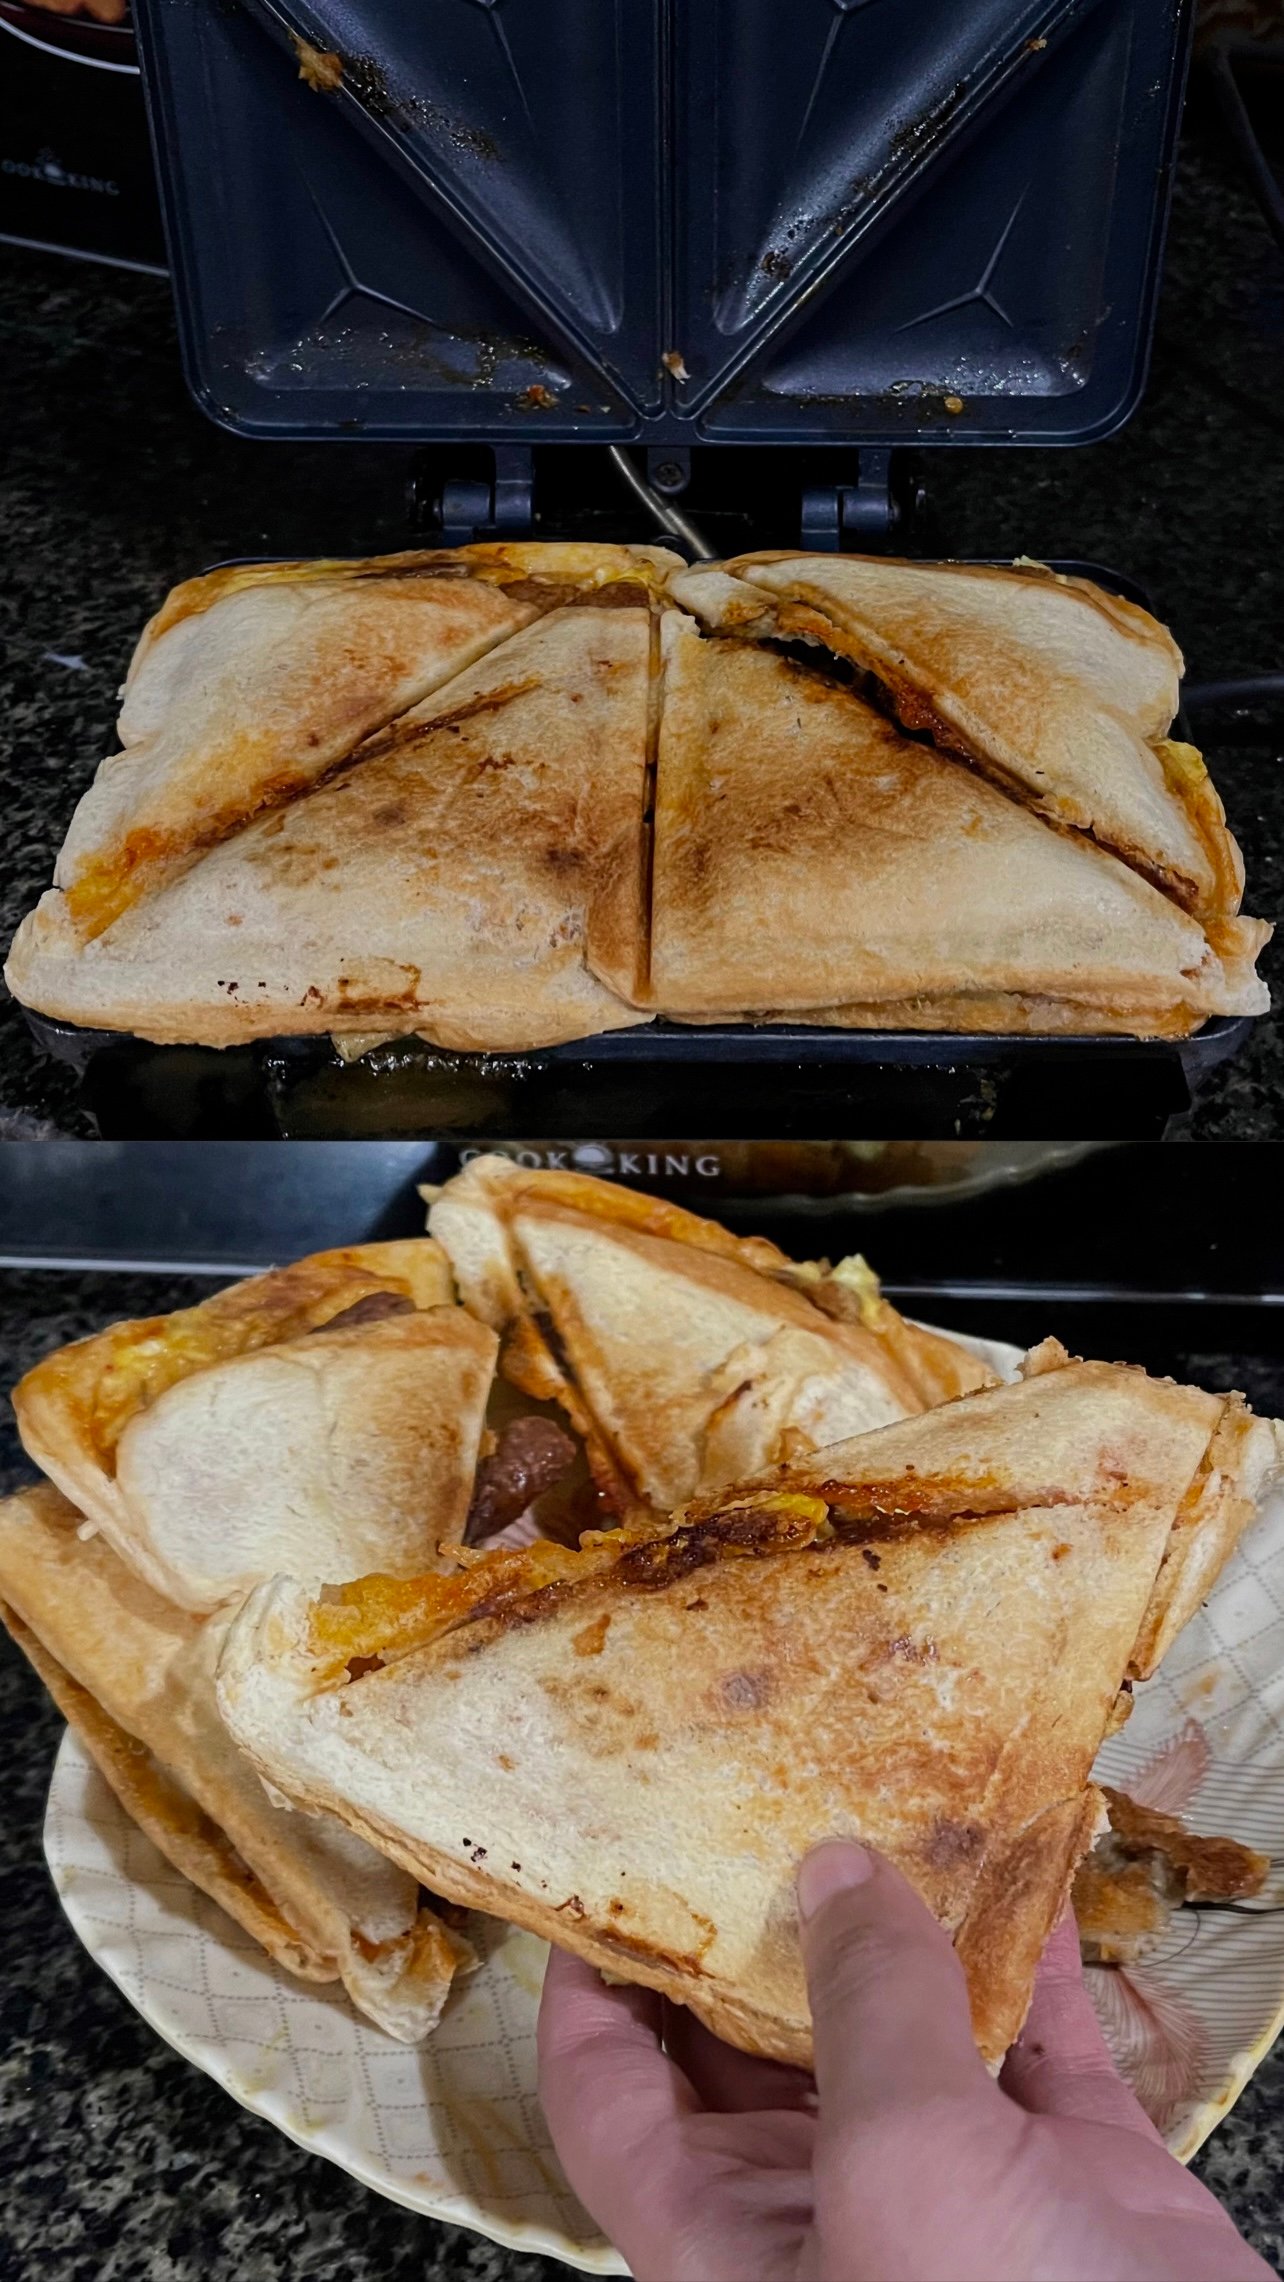
Triangle Toasted Sandwich (Sandwich Maker Style) – Step by Step

Triangle Toasted Sandwich (Sandwich Maker Style) – Step by Step

✅ Ingredients (for 2 sandwiches / 4 triangles)

Bread

  • 4 slices bread (white or brown)

Filling (you can choose)

Option A (like pizza style):

  • 2 tbsp pizza sauce / ketchup
  • 1 cup grated cheese (mozzarella or cheddar)
  • 1 small onion (chopped)
  • 1 small capsicum (chopped)
  • Chicken pieces / sausage / beef (optional)
  • Black pepper
  • Red chilli flakes
  • Salt (little)

Option B (simple spicy egg filling):

  • 2 boiled eggs mashed
  • Mayonnaise 2 tbsp
  • Salt + pepper
  • Chilli flakes

🍳 Step-by-Step Method (Exactly Like Picture)

Step 1: Prepare Filling

  1. Take a bowl.
  2. Add chopped onion + capsicum.
  3. Add chicken/sausage pieces (optional).
  4. Add pizza sauce or ketchup.
  5. Add black pepper + chilli flakes.
  6. Add grated cheese.
  7. Mix everything properly.

👉 Your filling should be thick, not watery.

Step 2: Preheat Sandwich Maker

  1. Plug in the sandwich maker.
  2. Let it heat for 2–3 minutes.

Step 3: Apply Butter

  1. Take bread slices.
  2. Apply butter on the outer side of bread (very important for golden color).

✅ Butter side must touch the sandwich maker plate.

Step 4: Place Bread in Maker

  1. Put 1 bread slice on the sandwich maker plate.
  2. Butter side should be down.

Step 5: Add Filling

  1. Put filling in the center.
  2. Spread evenly but don’t overfill.
  3. Leave edges empty a little, otherwise cheese comes out (like your pic 😅).

Step 6: Cover With Second Bread

  1. Place second bread slice on top.
  2. Butter side should be up.

Step 7: Close Sandwich Maker

  1. Close the lid slowly.
  2. Press lightly.

⏳ Cook for 4–6 minutes.

Step 8: Check Golden Color

  1. Open slightly and check.
  2. If bread is golden brown and crispy, it’s ready.

👉 If you want extra crispy, cook 1–2 minutes more.

Step 9: Remove Sandwich Carefully

  1. Use a spatula or spoon.
  2. Take out sandwich gently.
  3. Put on plate.

Step 10: Serve

  1. Your sandwich will automatically cut into 4 triangle pieces.
  2. Serve with:
  • ketchup
  • mayo garlic sauce
  • chilli sauce

⭐ Tips to Make It Perfect Like Your Picture

✅ Always butter outside bread

✅ Don’t add too much filling

✅ Use cheese for strong stickiness

✅ Cook on medium heat for crispy color

✅ Use thick sauce, not watery

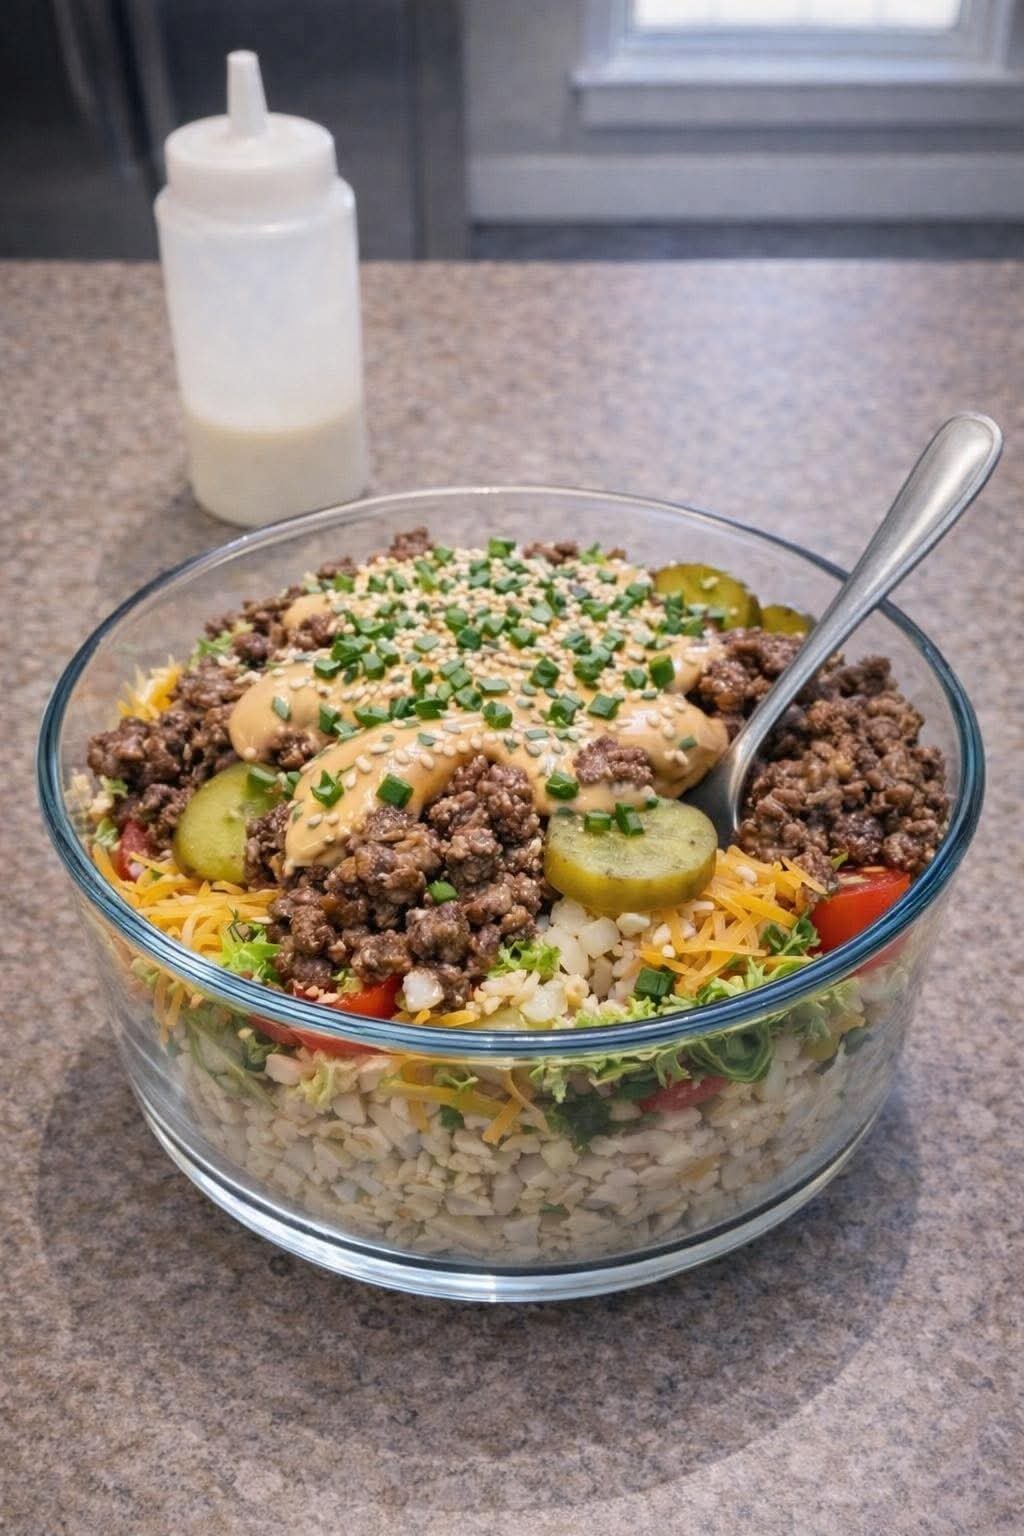
The Ultimate Big Mac Salad

The Ultimate Big Mac Salad

​Servings: 2 | Prep time: 15 mins | Cook time: 10 mins

​Ingredients

​The Salad Base:

  • ​1 lb Lean ground beef (90% or higher)
  • ​1 tsp Garlic powder & Onion powder
  • ​Salt & Pepper to taste
  • ​4 cups Romaine lettuce, chopped (shredded iceberg also works for that authentic fast-food crunch)
  • ​1/2 cup Shredded cheddar cheese
  • ​1/4 cup Red onion, finely diced
  • ​1/2 cup Dill pickle chips
  • ​1/2 cup Cherry tomatoes, halved
  • ​Optional: Sesame seeds for garnish

​The “Special Sauce” Dressing:

  • ​1/2 cup Light mayonnaise
  • ​2 tbsp Sugar-free ketchup
  • ​1 tbsp Yellow mustard
  • ​2 tbsp Dill pickle relish
  • ​1/2 tsp Smoked paprika
  • ​1/2 tsp Onion powder
  • ​1 tsp White vinegar

​Instructions

  1. ​Brown the Beef: In a skillet over medium-high heat, cook the ground beef until fully browned. Drain any excess fat. Season with garlic powder, onion powder, salt, and pepper. Set aside to cool slightly (so it doesn’t wilt the lettuce immediately).
  2. ​Whisk the Sauce: In a small bowl, combine all dressing ingredients. Whisk until smooth. If it’s too thick, add a teaspoon of water or pickle juice to reach your preferred consistency.
  3. ​Assemble: In a large bowl (or individual meal prep containers), layer your chopped lettuce first.
  4. ​Add Toppings: Top the lettuce with the seasoned beef, shredded cheese, diced onions, tomatoes, and pickles.
  5. ​Finish: Drizzle generously with the special sauce and sprinkle with sesame seeds to mimic that iconic bun flavor.

​Pro-Tips for the Best Bowl

  • ​The Crunch Factor: If you’re meal prepping this, keep the dressing and the warm beef in separate containers until you’re ready to eat to keep the lettuce crisp.
  • ​Low-Point Hack: To keep the points even lower, swap the ground beef for ground turkey or chicken seasoned with a drop of Worcestershire sauce

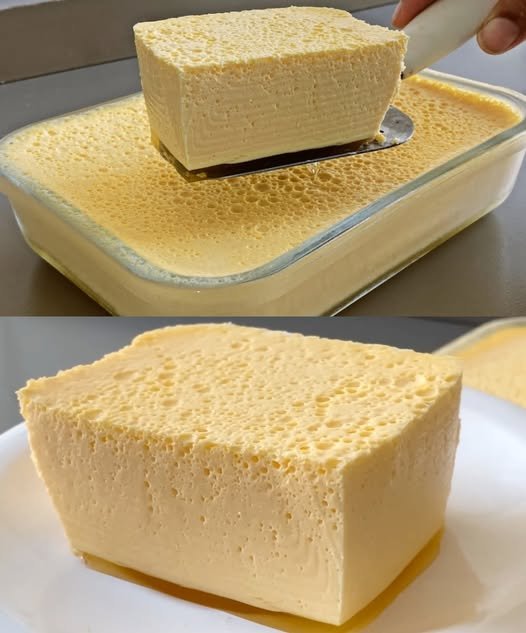
Zero Point Vanilla Cheesecake

🍰 Zero Point Vanilla Cheesecake

Description

This Zero Point Vanilla Cheesecake is light, creamy, and subtly sweet—a guilt-free treat you can enjoy any day of the week.
It’s made with protein-rich yogurt and eggs, flavored with vanilla, and baked to perfection.
Even without the heavy cream cheese and sugar of traditional cheesecake, it delivers that luscious, melt-in-your-mouth texture and flavor—so good, the family swears it tastes like fresh ricotta cheesecake.
The best part? It’s super easy and perfect for Weight Watchers or anyone wanting a low-calorie dessert.

Ingredients (8 servings)

  • 3 cups (680g) fat-free plain Greek yogurt
  • 1 box (1 oz / 28g) sugar-free, fat-free instant vanilla pudding mix
  • 3 large eggs
  • 1 tsp pure vanilla extract
  • 1–2 tbsp zero-calorie sweetener (like Stevia, monk fruit, or erythritol), optional for extra sweetness

Instructions

  1. Preheat oven to 350°F (175°C). Lightly spray a 9-inch round springform pan with nonstick cooking spray.
  2. Mix the batter
    In a large bowl, combine Greek yogurt, pudding mix, eggs, vanilla extract, and sweetener (if using). Beat with a hand mixer until smooth.
  3. Pour & smooth
    Pour the mixture into the prepared pan and smooth the top with a spatula.
  4. Bake
    Bake for 30 minutes, then reduce the temperature to 325°F (160°C) and bake another 20–25 minutes, until set but slightly jiggly in the center.
  5. Cool, completely
    Let the cheesecake cool to room temperature, then refrigerate for at least 4 hours (overnight is best) to set fully.
  6. Serve
    Slice into 8 portions and enjoy as-is, or top with fresh berries, a dusting of cinnamon, or a drizzle of sugar-free syrup.

Notes

  • Chilling is key—the flavor and texture improve after several hours in the fridge.
  • Use a springform pan for easy removal, but you can also use a pie dish.
  • Pudding mix adds flavor, sweetness, and stability—don’t skip it.

Tips

  • For extra flavor, swap vanilla extract for almond or lemon extract.
  • Avoid overbaking—the center should be slightly jiggly when you remove it from the oven.
  • If you prefer a sweeter cheesecake, taste the batter before baking and adjust the sweetener to preference.
  • Serve with a dollop of fat-free whipped topping for a fancier presentation.

Servings

Yield: 8 slices
Serving Size: 1 slice (~110g)

Nutritional Info (per serving, approx.)

  • Calories: 90 kcal
  • Protein: 11g
  • Fat: 1 g
  • Saturated Fat: 0g
  • Carbs: 8 g
  • Fiber: 0 g
  • Sugar: 4 g
  • Sodium: 130mg
  • Weight Watchers Points: 0 points (on most plans, check your app to confirm)

Benefits

  • Zero points on WW for most plans—enjoy guilt-free
  • High-protein for satiety and muscle support
  • Low-fat, low-sugar dessert option
  • Easy & quick to prepare
  • Customizable with different extracts or toppings

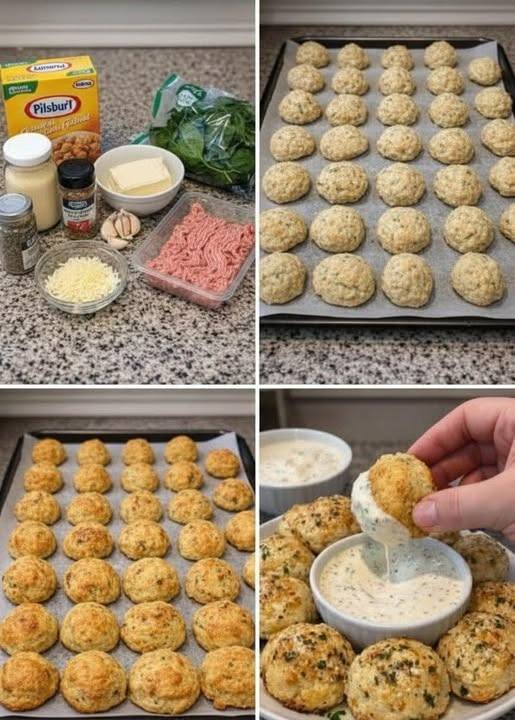
Spinach & Garlic Chicken Biscuit Bites

Spinach & Garlic Chicken Biscuit Bites

These are savory, cheesy, and much easier to pull off than the stuffing method!


Ingredients

  • 1 lb ground chicken (or Italian sausage for extra flavor)

  • 2 cups Bisquick or similar baking mix (This is the “Pillsbury” box shown in the photo)

  • 1 cup shredded mozzarella cheese

  • ½ cup grated Parmesan cheese

  • 1 cup fresh spinach, very finely chopped

  • 4 oz cream cheese, softened (half a block)

  • 2 cloves garlic, minced

  • 1 tsp dried oregano

  • ½ tsp red pepper flakes (optional)

  • ½ cup milk (adjust as needed for texture)

Instructions

  1. Prep: Preheat your oven to 375°F (190°C). Line a large baking sheet with parchment paper.

  2. Mix: In a large bowl, combine the ground chicken, baking mix, mozzarella, Parmesan, chopped spinach, garlic, oregano, and red pepper flakes.

  3. Bind: Add the softened cream cheese. Start mixing by hand or with a sturdy spoon. Gradually add milk a tablespoon at a time until the mixture is moist enough to hold together but not sticky.

  4. Scoop: Roll the mixture into 1-inch balls (about the size of a golf ball). Place them on the prepared baking sheet about an inch apart.

  5. Bake: Bake for 18–22 minutes until the bottoms are golden brown and the chicken is cooked through (internal temp 165°F).

  6. Finish: While hot, brush with a little melted garlic butter and parsley. Serve with ranch or marinara for dipping!


Quick Tip: Using a small cookie scoop helps keep them uniform so they all cook at the same rate.

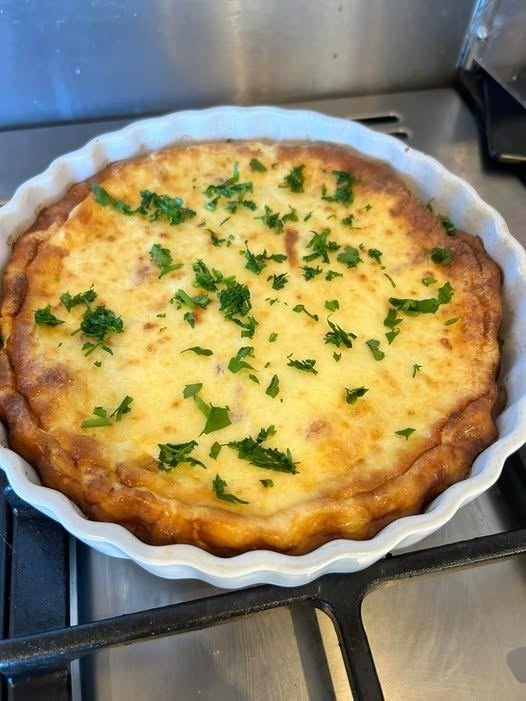
🍳 Low-Carb Crustless Quiche Lorraine

🍳 Low-Carb Crustless Quiche Lorraine

A rich, creamy, and high-protein breakfast or lunch option.

Ingredients

  • 3 Large eggs

  • 180ml Double cream

  • 75ml Sour cream

  • 75g Full-fat cream cheese

  • 65g Cheddar cheese, grated

  • 1 Pack Smoked bacon lardons

  • Small knob of butter (for frying)

  • Fresh parsley, chopped (for garnish)


Instructions

  1. Prep the Bacon: Fry the smoked bacon lardons in a little butter until fully cooked and crispy. Remove from heat and let them cool down before adding to the egg mixture.

  2. Combine the Base: In a mixing bowl, whisk together the eggs, double cream, sour cream, cream cheese, and grated cheddar until well combined.

  3. Assemble: Stir the cooled bacon lardons into the creamy egg mixture.

  4. Bake: Pour the mixture into a quiche dish or tart pan. Bake at 180°C for 25 minutes.

  5. The “Slow Finish”: Once the timer goes off, turn the oven off. Leave the quiche inside with the oven door slightly ajar for 15 minutes to allow it to finish setting perfectly.

  6. Serve: Garnish with fresh chopped parsley and enjoy.


Health Benefits for Your Success

  • Keto-Friendly: With zero flour or grains, this fits perfectly into your low-carb lifestyle.

  • High Satiety: The combination of healthy fats from the cream and cheese with the protein from eggs and bacon will keep you full for hours.

  • Versatile: This recipe is easily adaptable; you could add spinach or mushrooms to increase your micronutrient intake without adding many carbs.