Creamy Strawberry Ice cream Sweet, fruity, and perfectly refreshing

  • Servings: 2
  • Total Time: 5 minutes
  • Difficulty: Very Easy
  • Calories per Serving: 110 kcal
  • Macros: Protein: 3g / Carbs: 24g / Fat: 1g / Fiber: 4g

The Ultimate Guilt-Free Summer Refreshment

When the sun is out, the craving for a cold, creamy scoop of strawberry ice cream is almost impossible to ignore. However, most store-bought pints are hidden sugar bombs that lead to energy crashes. Our version—famously known as “Nice Cream”—is a nutritional masterpiece. It uses a base of frozen fruit to create a texture so thick and velvety, you’ll swear it came from a professional creamery.

This recipe is a staple for weight loss and clean eating followers because it provides a massive “volume” experience. You can eat a large bowl of this vibrant, pink treat for fewer calories than a single scoop of premium dairy ice cream. By focusing on whole-food ingredients, we’ve created a macro-friendly dessert that provides a boost of Vitamin C and antioxidants without any artificial dyes or stabilizers.

Whether you need a quick afternoon cool-down or a late-night treat that won’t derail your progress, this 5-minute strawberry ice cream is the answer. It’s dairy-free, vegan-friendly, and requires no expensive ice cream maker—just a high-speed blender and a love for fresh, fruity flavors.

Look at the Recipe

  • Sensory Appeal: A brilliant, soft-pink hue with a thick, “soft-serve” consistency.
  • Flavor Highlight: Pure, concentrated strawberry sweetness with a hint of natural vanilla.
  • Key Wellness Benefit: High in fiber and naturally fat-free, making it the perfect “volume eating” snack.

Ingredients Needed

  • 2 cups Frozen strawberries (slightly thawed for 5 minutes)
  • 1 Small frozen banana, sliced (this provides the “dairy-like” creaminess)
  • ¼ cup Unsweetened almond milk (or coconut milk for a richer taste)
  • 1 tsp Pure vanilla extract
  • Optional: A squeeze of fresh lemon juice to brighten the flavor

How to Make Our 5-Minute Strawberry Ice Cream

Prep the Fruit: Place your frozen strawberries and frozen banana slices into a high-speed blender or food processor. Letting them sit on the counter for 5 minutes before blending helps achieve a smoother, creamier texture.

Add the Liquids: Pour in the unsweetened almond milk and vanilla extract. The liquid acts as a lubricant for the blades, but don’t add too much—the goal is a thick, scoopable consistency, not a smoothie!

Pulse and Process: Start by pulsing the blender to break down the large frozen chunks. Then, switch to high speed. Use a tamper or stop to scrape down the sides as needed. Blend for 60–90 seconds until the mixture is completely uniform and looks like soft-serve.

Serve or Firm Up: You can enjoy this immediately for a soft-serve texture. For a more traditional “scoopable” ice cream, transfer the mixture to a container and freeze for an additional 30–60 minutes.


Storage & Serving Suggestions

  • Storing: This is best enjoyed fresh. If you store it in the freezer long-term, it will become very hard. If this happens, let it thaw on the counter for 15 minutes before scooping.
  • Serving: Serve in a chilled bowl. Top with a few fresh strawberry slices, a sprinkle of granola, or a dash of cacao nibs for a healthy crunch.
  • Pro-Tip: For a “protein boost,” stir in half a cup of non-fat Greek yogurt before the final blend.

Tips & FAQs

Can I make this without the banana? Yes. For a Keto-friendly version, swap the banana for 1/2 cup of frozen cauliflower rice and a few drops of liquid monk fruit sweetener. The cauliflower provides the bulk without the sugar or banana flavor.
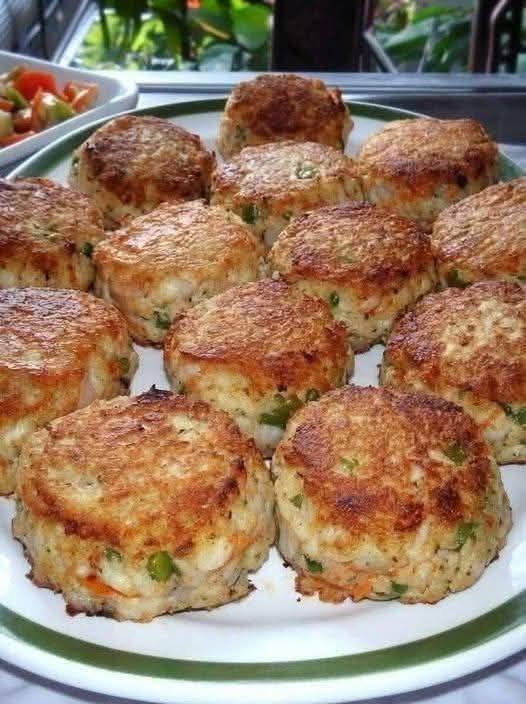
Crispy Golden Vegetable Patties

Crispy Golden Vegetable Patties

Prep time: 20 mins | Cook time: 15 mins | Serves: 4-6

Ingredients

The Base:

  • 4 large Potatoes, boiled, peeled, and mashed

  • 1/2 cup Green Peas, steamed (fresh or frozen)

  • 1/2 cup Carrots, finely diced and steamed

  • 1/4 cup Corn kernels (optional)

  • 2 tbsp Cilantro, fresh and finely chopped

The Binding & Texture:

  • 1/2 cup Breadcrumbs (plus extra for coating if you want more crunch)

  • 2 tbsp Cornstarch (for extra crispiness)

  • 1 Egg (optional; use a splash of milk or a “flax egg” for a vegan version)

The Flavor:

  • 1 tsp Garlic powder (or 2 cloves minced garlic)

  • 1 tsp Onion powder

  • 1/2 tsp Cumin powder

  • 1/2 tsp Paprika or Chili flakes (adjust for heat)

  • Salt and Black pepper to taste

  • Oil for pan-frying (Neutral oil like vegetable or canola)


Instructions

  1. Prep the Veggies: Ensure your boiled potatoes are mashed smoothly while still warm, but let them cool slightly before adding other ingredients so the mixture isn’t too sticky.

  2. Combine: In a large mixing bowl, combine the mashed potatoes, steamed peas, carrots, cilantro, and all the spices.

  3. Bind: Add the breadcrumbs, cornstarch, and egg. Mix thoroughly until the dough holds together. If it feels too wet, add another tablespoon of breadcrumbs.

  4. Shape: Grease your hands with a little oil. Take a golf-ball-sized portion of the mixture and flatten it into a thick disc (about 1 inch thick), just like the ones in your photo.

  5. Cook: Heat about 2–3 tablespoons of oil in a non-stick skillet over medium-high heat.

  6. Sear: Place the patties in the pan (don’t overcrowd them). Fry for 3–4 minutes per side until they develop that deep, golden-brown crust.

  7. Drain: Transfer to a plate lined with paper towels to remove excess oil.


Pro-Tips for Success

  • The “Soggy” Fix: If your veggies are very wet after steaming, pat them dry with a paper towel before adding them to the potatoes. Excess moisture is the enemy of a crispy patty.

  • Air Fryer Version: Lightly spray the patties with oil and air fry at 200°C (400°F) for 12–15 minutes, flipping halfway through.

  • Serving Suggestion: These go perfectly with a spicy yogurt dip, mint chutney, or even inside a bun as a veggie burger.

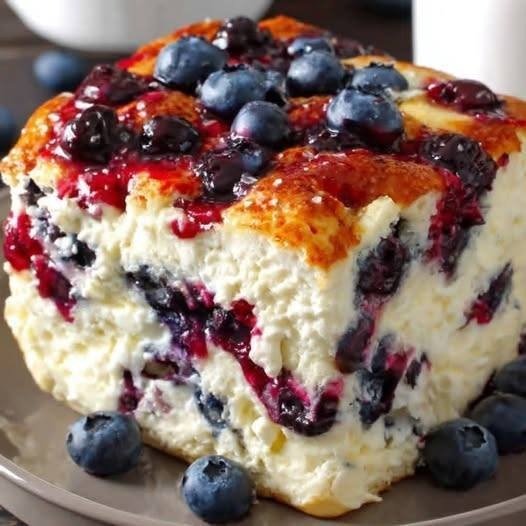
Blueberry Cheesecake Breakfast Bake

This Blueberry Cheesecake Breakfast Bake is creamy, lightly sweet, and packed with protein — the perfect balance between indulgent dessert and nourishing breakfast. With cottage cheese and cream cheese blended into a silky base, every bite tastes like cheesecake, while juicy blueberries add natural sweetness and freshness. It’s ideal for meal prep, weekend brunch, or a grab-and-go weekday breakfast.

 Ingredients

  • 2 cups (16 oz / 450 g) cottage cheese (full-fat for creamier texture)
  • 8 oz (225 g) cream cheese, softened
  • 2 large eggs
  • 1/3 cup (65 g) granulated sugar (or 1/4 cup honey/maple syrup)
  • 1 tsp vanilla extract
  • 1 tbsp lemon juice (optional but recommended)
  • 1 tbsp cornstarch (or 1 tbsp flour)
  • 1 1/2 cups fresh blueberries (reserve some for topping)
  • Pinch of salt

Instructions

Preheat your oven to 350°F (175°C). Lightly grease an 8×8-inch baking dish or line it with parchment paper for easy removal.

In a blender or food processor, combine the cottage cheese, softened cream cheese, eggs, sugar (or honey/maple syrup), vanilla extract, lemon juice, cornstarch, and a pinch of salt. Blend until completely smooth and creamy. This step is key to achieving that classic cheesecake texture without lumps.

Gently fold in about 1 cup of the blueberries using a spatula. Be careful not to overmix, as you want the berries to stay whole and juicy.

Pour the mixture into the prepared baking dish and spread it evenly. Sprinkle the remaining blueberries over the top for a beautiful finish.

Bake for 40–50 minutes, or until the center is set and the top turns lightly golden. The middle should have a slight jiggle but not appear wet.

See also  Spicy Garlic Parmesan Fries recipe

Allow the bake to cool at room temperature for 20–30 minutes. Then refrigerate for at least 2 hours before slicing. Chilling helps it firm up and makes clean, neat slices.

 Optional Add-Ons

Swirl in blueberry jam before baking for extra color and sweetness. Add fresh lemon zest for brightness. Top with Greek yogurt or drizzle with honey before serving. For a caramelized finish, sprinkle a little brown sugar on top before baking.


🥄 Storage

Store leftovers in an airtight container in the refrigerator for up to 4–5 days. This bake is perfect for meal prep — simply slice into portions and enjoy chilled or slightly warmed. It can also be frozen for up to 2 months. Thaw overnight in the refrigerator before serving.

Creamy, fruity, and satisfying — breakfast just got an upgrade.

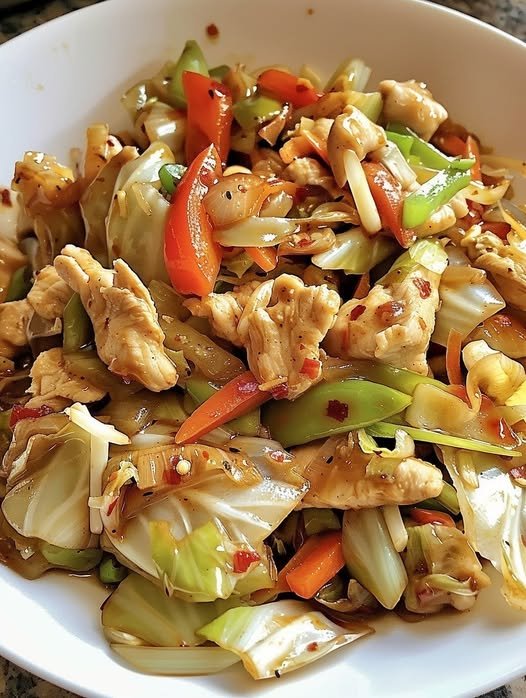
Chinese Chicken Cabbage Stir-Fry

🥬 Weight Watchers-Friendly Chinese Chicken Cabbage Stir-Fry

This Chinese Chicken Cabbage Stir-Fry is a quick, flavorful, and healthy dish that fits perfectly into the Weight Watchers lifestyle. Packed with lean protein and fiber-rich vegetables, it’s a low-point meal that keeps you full and satisfied without sacrificing taste.

Stir-fry recipes are ideal for busy days because they cook fast and require minimal prep. This version combines tender chicken, crunchy cabbage, and bold Asian-inspired flavors into a simple one-pan meal you’ll want to make again and again.


🧮 Nutritional Information

Serving Size: 1 cup (about 200g)

  • Calories: 250

  • Protein: 30g

  • Fat: 10g

  • Carbohydrates: 15g

  • Fiber: 5 g

  • Net Carbs: 10g

  • Sugar: 3 g

  • WW SmartPoints: 5 points per serving


🛒 Ingredients

  • 1 tbsp butter (or olive oil/butter substitute)

  • 1 medium onion, thinly sliced

  • 2 cloves garlic, minced

  • ½ head green cabbage, shredded (about 4 cups)

  • 2 chicken breasts, thinly sliced (about 1 lb)

  • ½ jalapeño, finely diced (optional, to taste)

  • 2 tbsp low-sodium soy sauce

  • 1 tsp fresh ginger, grated or minced

  • Salt and black pepper, to taste

  • Chopped green onions (optional garnish)


👩‍🍳 Instructions

1️⃣ Prepare Ingredients

Slice chicken thinly. Shred cabbage, slice onion, mince garlic, and dice jalapeño.


2️⃣ Sauté Onion & Garlic

Heat butter in a large skillet or wok over medium-high heat.
Add onion and cook 2–3 minutes until translucent.
Add garlic and cook 1 minute until fragrant.


3️⃣ Cook Chicken

Add chicken to the skillet. Cook 5–7 minutes, stirring often, until fully cooked and lightly browned.


4️⃣ Add Cabbage & Jalapeño

Stir in cabbage and jalapeño. Cook 3–4 minutes until cabbage wilts but stays slightly crisp.


5️⃣ Add Sauce & Ginger

Pour in soy sauce and add ginger. Stir well to coat everything evenly.


6️⃣ Season & Finish

Taste and adjust seasoning with salt and pepper if needed.
Cook another 2–3 minutes until vegetables are tender-crisp.


7️⃣ Serve

Remove from heat and garnish with green onions if desired. Serve hot.


✅ Tips for Success

  • Meal prep friendly: Stores well in the fridge up to 4 days

  • Vegetable swaps: Bell peppers, broccoli, or carrots work well

  • Protein options: Try shrimp or tofu instead of chicken

  • Heat level: Adjust jalapeño or add chili flakes to taste


💪 Health Benefits

This dish is high in protein and fiber, helping you stay full longer. Cabbage provides vitamins C and K, while ginger supports digestion and adds anti-inflammatory benefits.


🍽 Best Times to Serve

  • Weeknight dinners

  • Healthy family meals

  • Work lunches

  • Meal prep plans


📝 Final Thoughts

Eating healthy doesn’t have to be boring or complicated. This Chinese Chicken Cabbage Stir-Fry proves you can enjoy bold flavors while staying within your Weight Watchers points. It’s fast, flexible, and satisfying—perfect for anyone trying to eat smarter without giving up comfort food.

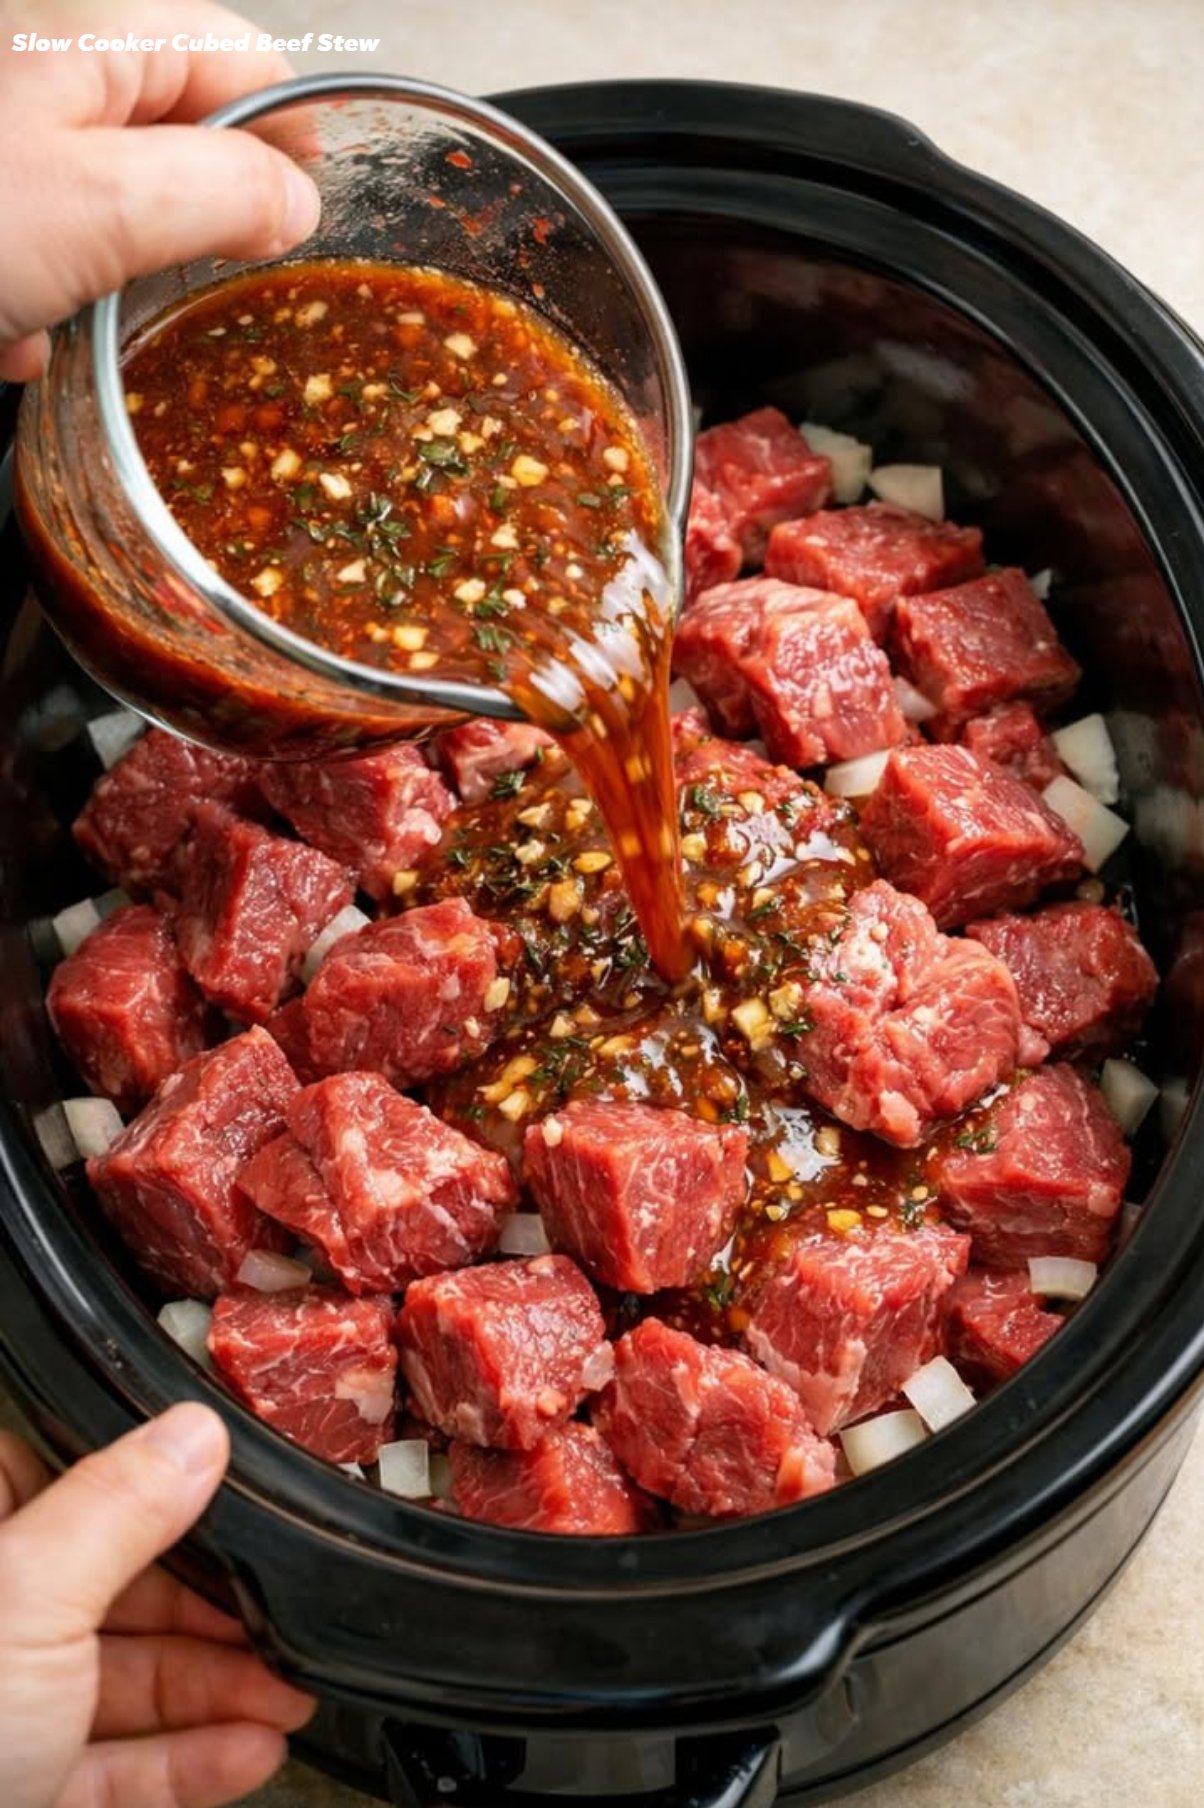
🥩 Slow Cooker Cubed Beef Stew (Rich & Tender)

🥩 Slow Cooker Cubed Beef Stew (Rich & Tender)

Ingredients

  • 2½–3 lbs beef stew meat (chuck, cubed)

  • 1 large onion, diced

  • 3 cloves garlic, minced

  • 3 carrots, sliced

  • 2–3 potatoes, cubed

  • 2 cups beef broth

  • ¼ cup soy sauce

  • 2 tbsp Worcestershire sauce

  • 1 tbsp tomato paste

  • 1 tsp dried thyme

  • 1 tsp paprika

  • ½ tsp black pepper

  • ½ tsp salt (adjust at end)

  • 2 tbsp olive oil

  • 1 tbsp cornstarch + 2 tbsp water (optional)


Instructions

1️⃣ Base layer
Add diced onion to the bottom of the slow cooker.
Place cubed beef on top.

(Optional but powerful upgrade: brown the beef in olive oil first for deeper flavor.)

2️⃣ Sauce mix
Whisk together:

  • Beef broth

  • Soy sauce

  • Worcestershire

  • Tomato paste

  • Garlic

  • Thyme

  • Paprika

  • Black pepper

Pour evenly over beef.

3️⃣ Add vegetables
Top with carrots and potatoes.

4️⃣ Cook

  • LOW: 8 hours

  • HIGH: 4–5 hours
    Cook until beef is fork-tender.

5️⃣ Thicken (optional)
Mix cornstarch + water.
Stir into stew during last 30 minutes on HIGH.


🔥 Flavor Boost Options

  • 1 bay leaf while cooking

  • Splash of balsamic vinegar or apple cider vinegar at the end

  • Fresh parsley before serving

  • Pinch of red pepper flakes for gentle heat

  • ½ tsp sugar or honey if broth tastes too salty


🍞 Serve With

  • Crusty bread

  • Mashed potatoes

  • Buttered rice

  • Warm dinner rolls

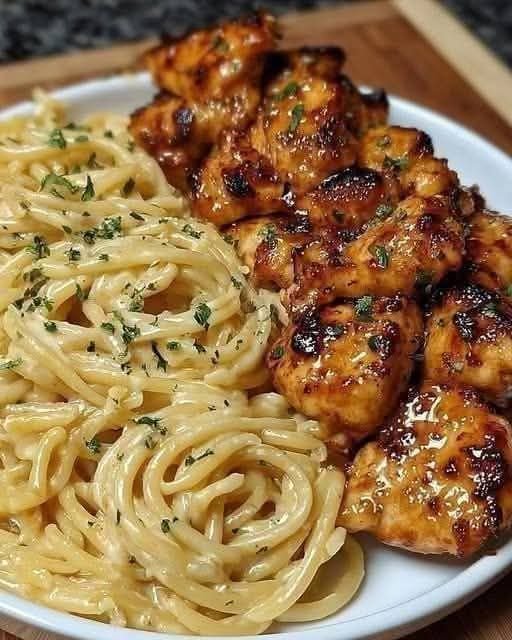
Lemon Garlic Butter Chicken & Creamy Parmesan Pasta

Lemon Garlic Butter Chicken & Creamy Parmesan Pasta

Ingredients

For the Chicken:

  • Chicken: 2 boneless, skinless chicken breasts

  • Olive oil: 1 tablespoon

  • Unsalted butter: 2 tablespoons

  • Garlic: 3 cloves, minced

  • Lemon juice: 1 tablespoon

  • Seasoning: Salt, black pepper, and paprika to taste

For the Pasta:

  • Pasta: 250g spaghetti or linguine

  • Heavy cream: 1 cup

  • Parmesan cheese: ½ cup, freshly grated

  • Garlic: 2 cloves, minced

  • Lemon zest: 1 teaspoon

  • Fresh parsley: 2 tablespoons, chopped


Detailed Instructions

1. Prepare the Chicken

  • Slice and Season: Cut the chicken breasts into bite-sized pieces. Season generously with salt, pepper, and a dash of paprika.

  • Sear: Heat 1 tablespoon of olive oil and 1 tablespoon of butter in a large skillet over medium-high heat. Add the chicken and cook until golden brown and cooked through (about 6–8 minutes).

  • Finish with Flavor: Reduce the heat to low. Add the remaining 1 tablespoon of butter, minced garlic, and 1 tablespoon of lemon juice to the pan. Toss the chicken to coat it in the garlic butter sauce, then remove the chicken from the pan and set it aside.

2. Cook the Pasta

  • Boil: Cook your pasta in a large pot of salted boiling water according to the package instructions until al dente.

  • Reserve Water: Before draining, save about ½ cup of the starchy pasta water.

3. Create the Creamy Parmesan Sauce

  • Sauté Garlic: In the same skillet used for the chicken (don’t wash it—those brown bits add flavor!), add a little more butter if needed and sauté the minced garlic for 30 seconds.

  • Simmer Cream: Pour in the heavy cream and bring to a gentle simmer.

  • Melt Cheese: Whisk in the ½ cup of Parmesan cheese until the sauce is smooth. If it’s too thick, add a splash of the reserved pasta water.

  • Add Zest: Stir in the lemon zest for that bright, zesty finish.

4. Combine and Serve

  • Toss: Add the cooked pasta to the skillet and toss thoroughly to coat every strand in the creamy sauce.

  • Plate: Serve the pasta topped with the lemon garlic chicken. Garnish with fresh parsley and extra Parmesan if desired.


Cooking Tip

To keep this meal balanced, try serving it with a side of steamed broccoli or a fresh green salad.