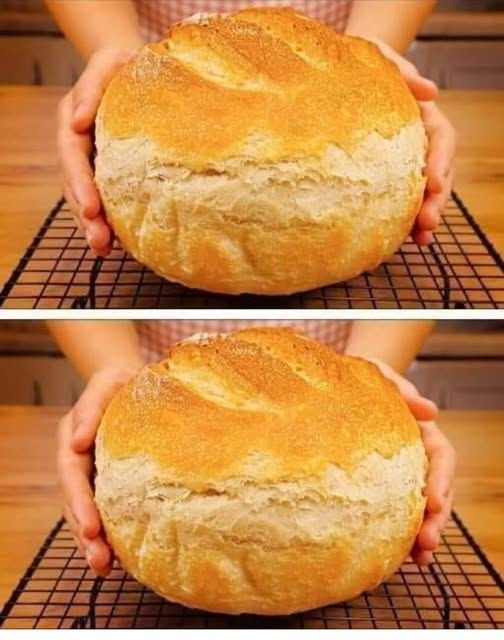
🥖 5-Minute German Bread (No-Knead)

🥖 5-Minute German Bread (No-Knead)

This recipe is a favorite because it requires only 5 minutes of active prep time. The “magic” happens during the long, slow rise which develops the flavor and crust.

Ingredients

  • 4 cups All-purpose or bread flour

  • 2 cups Warm water

  • 2 tsp Salt

  • 2 tsp Instant yeast

  • 1 tbsp Honey or sugar (optional, to help yeast)

Instructions

  1. Mix: In a large bowl, whisk together flour, salt, and yeast. Pour in the warm water (and honey if using).

  2. Stir: Stir with a wooden spoon until a shaggy dough forms and no dry flour remains. This should take about 2 minutes.

  3. First Rise: Cover the bowl with plastic wrap. Let it sit at room temperature for 2 to 3 hours until doubled in size and bubbly.

  4. Shape: With floured hands, gently pull the dough from the sides and form a rough ball. Place it on parchment paper. Let it rest for 30 minutes while the oven preheats.

  5. Bake: Preheat your oven to 450°F (230°C). For the best crust, bake inside a Dutch oven (with the lid on) for 30 minutes, then remove the lid and bake for another 10–15 minutes until deep golden brown.


🥣 Boat Dip (Rotel Ranch Dip)

A creamy, zesty dip perfect for parties or snacks.

Ingredients

  • 1 can (10 oz) Rotel diced tomatoes with green chilies, drained

  • 1 packet (1 oz) Ranch dressing mix

  • 8 oz Cream cheese, softened

  • 1 cup Shredded cheddar cheese

  • 1 cup Sour cream

  • 1/2 cup Mayonnaise

  • 1 tbsp Hot sauce (optional)

Instructions

  1. Combine: Mix softened cream cheese, sour cream, and mayo until smooth.

  2. Season: Stir in the ranch packet and optional hot sauce.

  3. Fold: Gently mix in the drained Rotel and shredded cheddar.

  4. Chill: Refrigerate for at least 30 minutes before serving with tortilla chips.


🍞 Bread Pudding with Vanilla Sauce

A classic, rich dessert using simple pantry staples.

Ingredients

  • 6 cups Day-old bread cubes

  • 3 cups Whole milk

  • 1/2 cup White sugar

  • 1/4 cup Melted butter

  • 3 Eggs, beaten

  • 1 tsp Cinnamon and 1 tsp Vanilla extract

  • Vanilla Sauce: 1/2 cup butter, 1/2 cup sugar, 1/2 cup heavy cream, 1 tsp vanilla

Instructions

  1. Soak: Pour milk over bread cubes and let sit for 10 minutes.

  2. Mix: Whisk sugar, butter, eggs, cinnamon, and vanilla; fold into the bread.

  3. Bake: Pour into a greased dish and bake at 350°F (175°C) for 45–50 minutes.

  4. Sauce: Simmer sauce ingredients in a pan for 2-3 minutes; pour over warm pudding.


🥧 Blueberry Pie Bombs

Quick, handheld treats filled with creamy sweetness.

Ingredients

  • 1 can Refrigerated biscuit dough

  • 1 cup Blueberry pie filling

  • 4 oz Cream cheese, softened

  • 2 tbsp Powdered sugar

Instructions

  1. Filling: Mix cream cheese and powdered sugar.

  2. Assemble: Flatten a biscuit, add a dollop of cheese and blueberry filling.

  3. Seal: Pinch edges shut to form a ball.

  4. Bake: Bake at 375°F (190°C) for 12–15 minutes.

🥣 Boat Dip (Rotel Ranch Dip)

🥣 Boat Dip (Rotel Ranch Dip)

A creamy, zesty crowd-pleaser that comes together in minutes.

Ingredients

  • 1 can (10 oz) Rotel diced tomatoes with green chilies, drained

  • 1 packet (1 oz) ranch dressing mix

  • 8 oz cream cheese, softened

  • 1 cup shredded cheddar cheese

  • 1 cup sour cream

  • ½ cup mayonnaise

  • 1 tablespoon hot sauce (optional)

  • Tortilla chips, for serving

Instructions

  1. Mix Base: In a medium bowl, combine the softened cream cheese, sour cream, and mayonnaise until smooth.

  2. Add Flavor: Stir in the ranch dressing packet and hot sauce (if using) until well incorporated.

  3. Fold In: Add the drained Rotel tomatoes and the shredded cheddar cheese. Stir gently until evenly distributed.

  4. Chill: For the best flavor, refrigerate for at least 30 minutes before serving to allow the seasonings to meld.

  5. Serve: Serve chilled with your favorite tortilla chips.

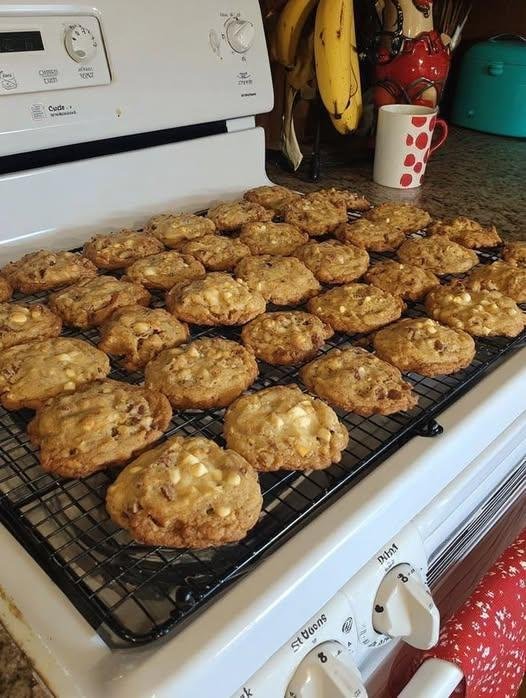
Keto White Chocolate Macadamia Nut Cookies

Keto White Chocolate Macadamia Nut Cookies

Prep time: 15 mins | Bake time: 9 mins | Yields: Approx. 24 cookies

Ingredients

  • 1/2 cup Unsalted butter, softened

  • 3/4 cup Brown Sugar Swerve (packed)

  • 1/2 cup Granular Swerve

  • 2 Large eggs (room temperature preferred)

  • 1 tsp Vanilla extract

  • 2 1/2 cups Super-fine almond flour

  • 1 tsp Baking soda

  • 1/2 tsp Salt

  • 1 cup Macadamia nuts, roughly chopped

  • 1 cup Lily’s White Chocolate Chips


Instructions

  1. Prep the Oven: Preheat your oven to 350°F (175°C). Line two large baking sheets with parchment paper or silicone baking mats.

  2. Cream the Fats & Sugars: In a large bowl, cream together the softened butter, Brown Swerve, and Granular Swerve until light and fluffy (about 2 minutes with a hand mixer).

  3. Incorporate Liquids: Beat in the eggs one at a time, followed by the vanilla extract. Scrape down the sides of the bowl to ensure everything is combined.

  4. Mix Dry Ingredients: In a separate medium bowl, whisk together the almond flour, baking soda, and salt to remove any large clumps.

  5. Combine: Gradually add the dry flour mixture to the wet sugar mixture. Mix on low speed or by hand until a thick dough forms.

  6. The Mix-ins: Gently fold in the chopped macadamia nuts and the white chocolate chips.

  7. Scoop: Drop rounded teaspoon-sized scoops (or use a small cookie scoop) onto the prepared baking sheets, spacing them about 2 inches apart.

  8. Bake: Bake for 9 to 9:30 minutes. Watch for a darker golden brown color on the edges. Note: They will look very soft, but they will firm up as they cool.

  9. Cool: Slide the entire parchment sheet onto a cooling rack. Do not move the cookies until they are completely cooled, as almond flour cookies are fragile while warm.


A Quick Tip

Since almond flour doesn’t spread quite as much as wheat flour, if you prefer a flatter cookie, you can gently press the tops of the dough balls down with a spoon before putting them in the oven.

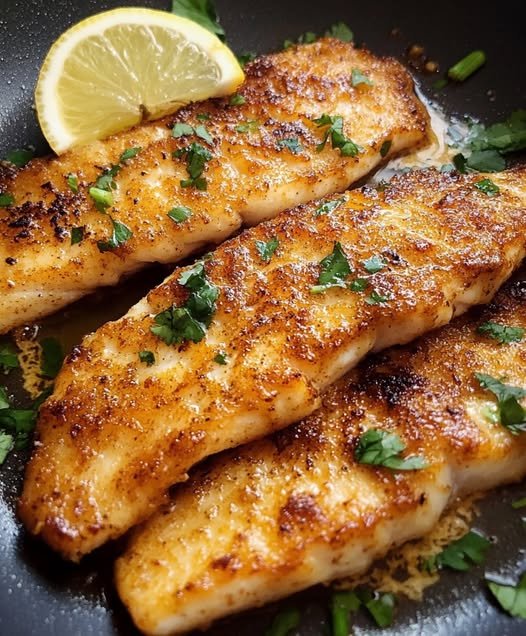
🐟 Crispy Pan Fried Fish (Ready in 5 Minutes)

🐟 Crispy Pan Fried Fish (Ready in 5 Minutes)

Quick, budget-friendly, and perfectly crispy on the outside with flaky, juicy fish inside. This method works great for both fresh and frozen fillets.


⭐ Why You’ll Love It

  • Ready in under 10 minutes

  • Uses simple pantry ingredients

  • No deep frying needed

  • Golden, crispy crust every time

  • Delicious with just lemon or any sauce you like


🛒 Ingredients (Serves 2)

  • 2 thin fish fillets (5–6 oz each) – tilapia, cod, or haddock

  • Salt & black pepper (to taste)

  • ¼ cup all-purpose flour (or rice flour)

  • 1 tsp paprika (optional)

  • 2–3 tbsp vegetable, canola, or peanut oil

  • Lemon wedges (for serving)

  • Chopped parsley or dill (optional garnish)


🍳 Instructions

  1. Dry the fish:
    Pat fillets completely dry using paper towels.

  2. Season:
    Sprinkle both sides with salt, pepper, and paprika if using.

  3. Coat with flour:
    Dredge fish in flour, pressing lightly. Shake off excess.

  4. Heat the pan:
    Heat a heavy skillet on medium-high until hot. Add oil to lightly coat the bottom.

  5. Cook:
    Place fish in pan without overcrowding.
    Cook 2–3 minutes without moving until golden and crispy.

  6. Flip:
    Gently turn and cook another 2 minutes until fully cooked and flaky.

  7. Serve:
    Remove from pan and serve hot with lemon wedges and herbs.


✅ Pro Tips

  • Always heat pan before adding oil

  • Do not move fish too soon — it will release naturally

  • Thicker fillets need 1–2 extra minutes per side

  • Fish is done when it flakes easily with a fork


🥣 Sauce Ideas (Optional)

  • Lemon butter sauce

  • Garlic mayo

  • Creamy dill sauce

  • Tartar sauce

  • White wine butter sauce


🕒 Make-Ahead Tip

You can coat the fish in flour and store in the fridge up to 24 hours before frying.


This crispy pan-fried fish pairs perfectly with:
✔ Rice
✔ Salad
✔ Roasted vegetables
✔ Mashed potatoes

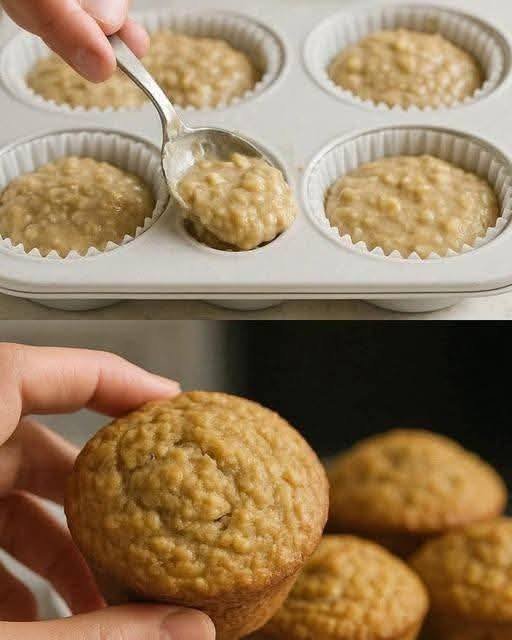
Sugar-Free 3-Ingredient Oatmeal Apple Muffins

Diabetic-friendly | No Added Sugar | Naturally Sweet | Low-Calorie

These soft, naturally sweet oatmeal apple muffins are made with just 3 wholesome ingredients. No added sugar, no flour, no oil, and no artificial sweeteners. Perfect for a light breakfast, snack, or healthy dessert.

⚠️ Note: While this recipe contains no added sugar, it is not zero-calorie. Apples and oats contain natural carbohydrates.

 Ingredients (Makes 6–8 muffins)

  1. 1 cup (90g) rolled oats

  2. 1 medium apple (about 150g), peeled & grated

  3. 1 large egg

 Instructions

  1. Preheat oven to 180°C (350°F). Line a muffin tin with paper liners or lightly grease it.

  2. Grind oats in a blender until they become oat flour (or use store-bought oat flour).

  3. In a bowl, combine:

    • Oat flour

    • Grated apple (with juices)

    • Egg

  4. Mix until fully combined. Batter will be thick.

  5. Spoon evenly into muffin cups (fill about ¾ full).

  6. Bake for 18–22 minutes or until tops are golden and a toothpick comes out clean.

  7. Cool for 5–10 minutes before serving.

 Description

These muffins are:

  • Naturally sweet from apples

  • Soft and slightly moist

  • Lightly dense like baked oatmeal

  • Kid-friendly and diabetic-conscious

No refined flour, no added sugar, no butter, no oil.

 Recipe Notes

  • Use sweet apples (Fuji, Gala) for better natural sweetness.

  • Do not squeeze out apple juice—it adds moisture.

  • Batter thick? Let it rest 5 minutes to hydrate oats.

Optional Add-Ins (Still Healthy!)

  • Cinnamon (½ tsp)

  • Vanilla extract

  • Chopped walnuts

  • Chia seeds

  • A pinch of salt

(These are optional and not included in the 3 main ingredients.)

 Servings

Makes 6–8 muffins
Serving size: 1 muffin

Approximate Nutritional Information (Per Muffin—based on 6 muffins)

  • Calories: ~70–85 kcal

  • Carbohydrates: 12–14g

  • Fiber: 2g

  • Protein: 3g

  • Fat: 2 g

  • Added Sugar: 0g

⚠️ Exact values depend on apple size and oat brand.

 Health Benefits

🩺 Diabetic-Friendly

  • No added sugar

  • Contains fiber to slow glucose absorption

  • Lower glycemic impact than refined desserts

🌾 Oats

  • Rich in beta-glucan fiber

  • Supports heart health

  • Helps maintain stable blood sugar

🍎 Apples

  • Natural sweetness

  • Contains antioxidants

  • Good source of fiber

🥚 Egg

  • Adds protein

  • Helps keep you full longer

  • Supports muscle maintenance

 Q & A

Q: Can diabetics eat this?
A: Yes, in moderation. It contains natural carbs, so portion control is important.

Q: Can I make it vegan?
A: Replace egg with:

  • 1 tbsp chia seeds + 3 tbsp water (let gel 5 min)

Q: Can I skip blending oats?
A: Yes, but the texture will be more like baked oatmeal.

Q: How to store?
A:

  • Room temp: 1 day

  • Fridge: 4–5 days (airtight container)

  • Freeze: Up to 2 months

Q: Can I make this in an air fryer?
A: Yes. Bake at 160°C (320°F) for 12–15 minutes.

🥔🧀 Chicken Hashbrown Casserole (Creamy & Crispy)

🥔🧀 Chicken Hashbrown Casserole (Creamy & Crispy)

A comforting casserole made with tender chicken, cheesy hash browns, and a crunchy cornflake topping.


🧺 Ingredients (Serves 8)

  • 20 oz frozen browns

  • 2 cups shredded cheddar cheese

  • 1 tsp salt

  • 1 tsp black pepper

  • 2 cups sour cream

  • 1 can (10.5 oz) cream of chicken soup (or homemade)

  • ½ cup milk

  • 1 lb cooked chicken, shredded

  • 2 cups cornflakes, crushed

  • 4 tbsp butter, melted


👩‍🍳 Step-by-Step Instructions

Step 1: Preheat Oven

Preheat oven to 350°F (180°C).
Lightly grease a 9×13-inch baking dish.


Step 2: Make the Creamy Base

In a large bowl, mix together:

  • Sour cream

  • Cream of chicken soup

  • Milk

  • Salt

  • Black pepper

Stir until smooth.


Step 3: Add Main Ingredients

Add to the bowl:

  • Shredded chicken

  • Shredded cheddar cheese

  • Frozen browns

Mix gently until everything is well coated.


Step 4: Transfer to Baking Dish

Spread the mixture evenly in the prepared dish.


Step 5: Prepare the Crunchy Topping

In a separate bowl:

  • Combine crushed cornflakes with melted butter

  • Mix until evenly coated

Sprinkle this mixture evenly over the casserole.


Step 6: Bake

Bake uncovered for 55–60 minutes, or until:

  • The top is golden brown

  • The casserole is bubbling at the edges


Step 7: Rest & Serve

Let it rest for 10 minutes before serving.


🍴 Why This Recipe Works

  • Hash browns add soft texture

  • Chicken adds protein

  • Cheese adds richness

  • Sour cream and soup make it creamy

  • Cornflakes give crispy contrast


🔁 Easy Variations

  • Rotisserie chicken for deeper flavor

  • Ritz crackers instead of cornflakes

  • Add-ins: onions, jalapeños, celery

  • Bacon bits for smoky taste

  • Extra creamy: use homemade cream of chicken soup


❄ Make-Ahead & Freezing

✔ Assemble casserole without topping
✔ Cover tightly and freeze up to 2–3 months
✔ Thaw overnight in fridge
✔ Add topping and bake normally

For single meals: freeze in individual containers.


🍽 Best Side Dishes

  • Steamed broccoli

  • Garden salad

  • Coleslaw

  • Green beans

  • Garlic bread or rolls

Light sides balance the rich casserole.


🧡 Final Note

This casserole stands out because it balances:
✔ creamy
✔ cheesy
✔ crispy
✔ filling

It’s easy, comforting, and perfect for family meals or gatherings.