​Cheesy Garlic Pull-Apart Bread


Cheesy Garlic Pull-Apart Bread

Prep time: 15 mins | Cook time: 20-25 mins | Serves: 4-6

Ingredients

The Bread:

  • 1 large sourdough or crusty Italian loaf (Round or oval works best)

The Garlic Butter:

  • 1/2 cup unsalted butter, melted

  • 3–4 cloves garlic, minced (or grated for more intense flavor)

  • 1/2 tsp salt

  • 1 tbsp fresh parsley, finely chopped

  • 1/4 tsp dried oregano or red pepper flakes (optional)

  • A pinch of cracked black pepper

The Cheese:

  • 1.5 cups Shredded Mozzarella (low-moisture for the best stretch)

  • 1/2 cup Monterey Jack or mild Provolone

  • 1/4 cup Grated Parmesan


Instructions

  1. Prep the Oven & Bread: Preheat your oven to 180°C. Line a baking sheet with parchment paper or aluminum foil.

  2. The “Hatch” Cut: Using a serrated bread knife, cut the loaf into a 1-inch diamond/grid pattern. Crucial step: Cut deep into the bread, but do not cut all the way through the bottom crust. The loaf must remain intact at the base.

  3. Mix the Butter: In a small bowl, whisk together the melted butter, minced garlic, parsley, salt, pepper, and optional red pepper flakes.

  4. Stuffing the Loaf: Use a pastry brush or spoon to drizzle the garlic butter into every crevice of the bread. Then, generously stuff the shredded cheese into the “cracks.” Don’t be shy—the more cheese you wedge in there, the better the final “pull” will be.

  5. Wrap & Bake: Wrap the entire loaf loosely in foil. This allows the cheese in the center to melt thoroughly without the top of the bread burning. Bake for 15 minutes.

  6. The Crisp: Open the foil (or remove it entirely) and bake for another 5–10 minutes until the cheese is bubbling and the bread edges are golden and crispy.

  7. Garnish: Sprinkle with a little extra fresh parsley and a final dusting of Parmesan. Serve immediately while the cheese is molten.


Pro-Tip for the Ultimate Stretch

To get that perfect “cheese pull,” avoid using pre-shredded cheese from a bag if possible. Store-bought shreds are coated in potato starch to prevent clumping, which can make the melt a bit “gritty” or dry. Grating your own mozzarella from a block ensures a much smoother, silkier stretch.
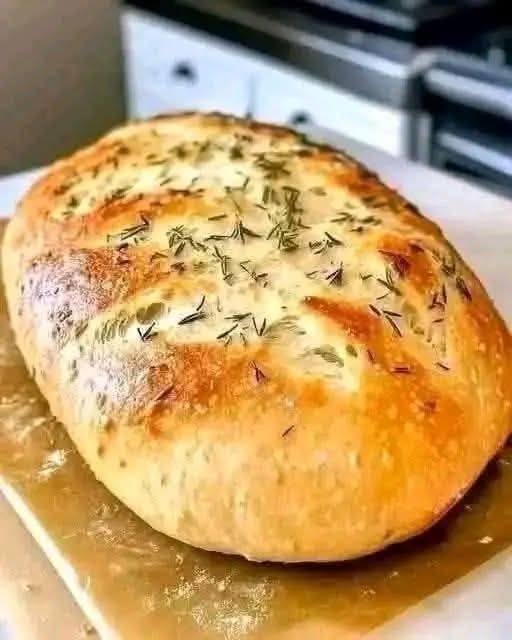
The Ultimate No-Knead Rosemary Bread

The Ultimate No-Knead Rosemary Bread

This recipe relies on time rather than muscle to develop the gluten. It’s cheap, foolproof, and yields a crispy crust with a soft, airy interior.

Ingredients

  • Flour: 3 cups all-purpose flour (or bread flour for more chew)

  • Salt: 1 ½ teaspoons

  • Yeast: ½ teaspoon active dry yeast (or instant yeast)

  • Water: 1 ½ cups warm water (about 100°F – 110°F)

  • Herbs: 1-2 tablespoons fresh rosemary, chopped (plus a bit more for the top)

  • Optional: 1 teaspoon garlic powder for extra flavor


Instructions

1. Mix the Dough

In a large bowl, whisk together the flour, salt, yeast, and chopped rosemary. Pour in the warm water and stir with a wooden spoon or spatula until a shaggy, sticky ball forms. Do not overmix; you just want no dry flour streaks left.

2. The Long Rise (The “No-Knead” Secret)

Cover the bowl tightly with plastic wrap or a damp cloth. Let it sit at room temperature for 12 to 18 hours. The dough will double in size and be covered in tiny bubbles. This long ferment is what creates the flavor!

3. Prep for Baking

Preheat your oven to 450°F (230°C). Place a heavy Dutch oven (with the lid) inside the oven as it heats for at least 30 minutes.

4. Shape the Loaf

While the pot heats, turn the dough out onto a well-floured surface. It will be sticky! Gently fold the edges toward the center to form a ball. Place it seam-side down on a piece of parchment paper. Sprinkle the top with more rosemary and a pinch of flaky salt.

5. Bake

  • Phase 1: Carefully lift the parchment paper and drop the dough (paper and all) into the hot Dutch oven. Cover with the lid. Bake for 30 minutes.

  • Phase 2: Remove the lid. Bake for another 10–15 minutes until the crust is deeply golden brown.

6. Cool

Resistance is hard, but let the bread cool on a wire rack for at least 30 minutes before slicing. Cutting it too early lets the steam escape, which can make the inside gummy.


Pro Tips for Success

  • No Dutch Oven? Use a heavy oven-safe pot with a tight lid, or place a pan of water on the bottom rack of the oven to create steam.

  • Crispier Crust: If you want an even thicker crust, spray the top of the dough with a little water right before putting the lid on.

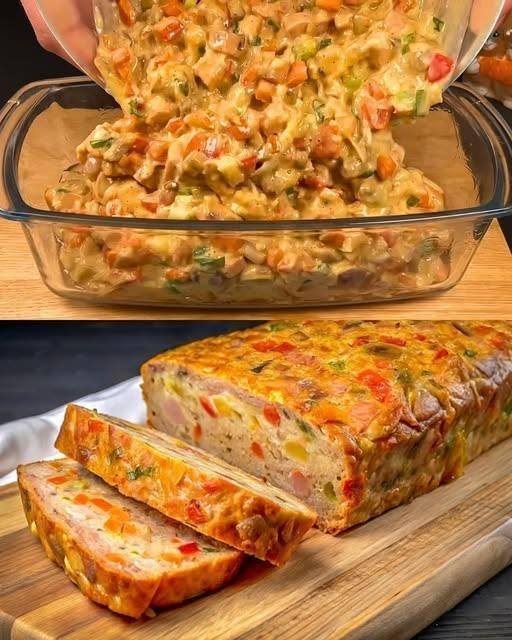
Savory Vegetable and Ham Dinner Loaf

Savory Vegetable and Ham Dinner Loaf

Ingredients

The Batter Base:

  • Eggs: 4

  • Milk: 100 ml (½ cup)

  • Flour: 130 g (1 cup)

  • Cheese: 50 g (⅓ cup), shredded

  • Seasoning: Salt, Paprika, and Black pepper to taste

The Filling:

  • Ham: 150 g, diced (inferred from the title and image)

  • Onion: 1, finely chopped

  • Carrot: 1, grated

  • Bell pepper: 1, diced

  • Vegetable oil: For frying and greasing

  • Green onions: 2 tbsp, chopped (optional, for color)


Instructions

1. Sauté the Vegetables

  1. Heat a tablespoon of vegetable oil in a pan over medium heat.

  2. Add the chopped onion and sauté until translucent.

  3. Add the grated carrots and diced bell pepper. Cook for 5–7 minutes until they are softened.

  4. Remove from heat and let them cool slightly so they don’t scramble the eggs in the next step.

2. Prepare the Batter

  1. In a large mixing bowl, whisk the 4 eggs with the milk, salt, paprika, and black pepper until well combined.

  2. Gradually whisk in the flour until the batter is smooth and free of lumps.

  3. Fold in the shredded cheese.

3. Combine

  1. Stir the sautéed vegetables and the diced ham into the batter. Ensure everything is evenly coated.

4. Bake

  1. Preheat your oven to 180°C (350°F).

  2. Grease a loaf pan or glass baking dish with vegetable oil or line it with parchment paper.

  3. Pour the mixture into the dish and smooth the top.

  4. Bake for 35–45 minutes. The loaf is done when the top is golden brown and a toothpick inserted into the center comes out clean.

5. Serve

  1. Let the loaf rest in the pan for 10 minutes before slicing. This helps it “set” so you get those beautiful, clean slices shown in the picture.


Variation Tip

If you want a bit more “crunch,” you can sprinkle extra cheese or breadcrumbs on top during the last 10 minutes of baking!

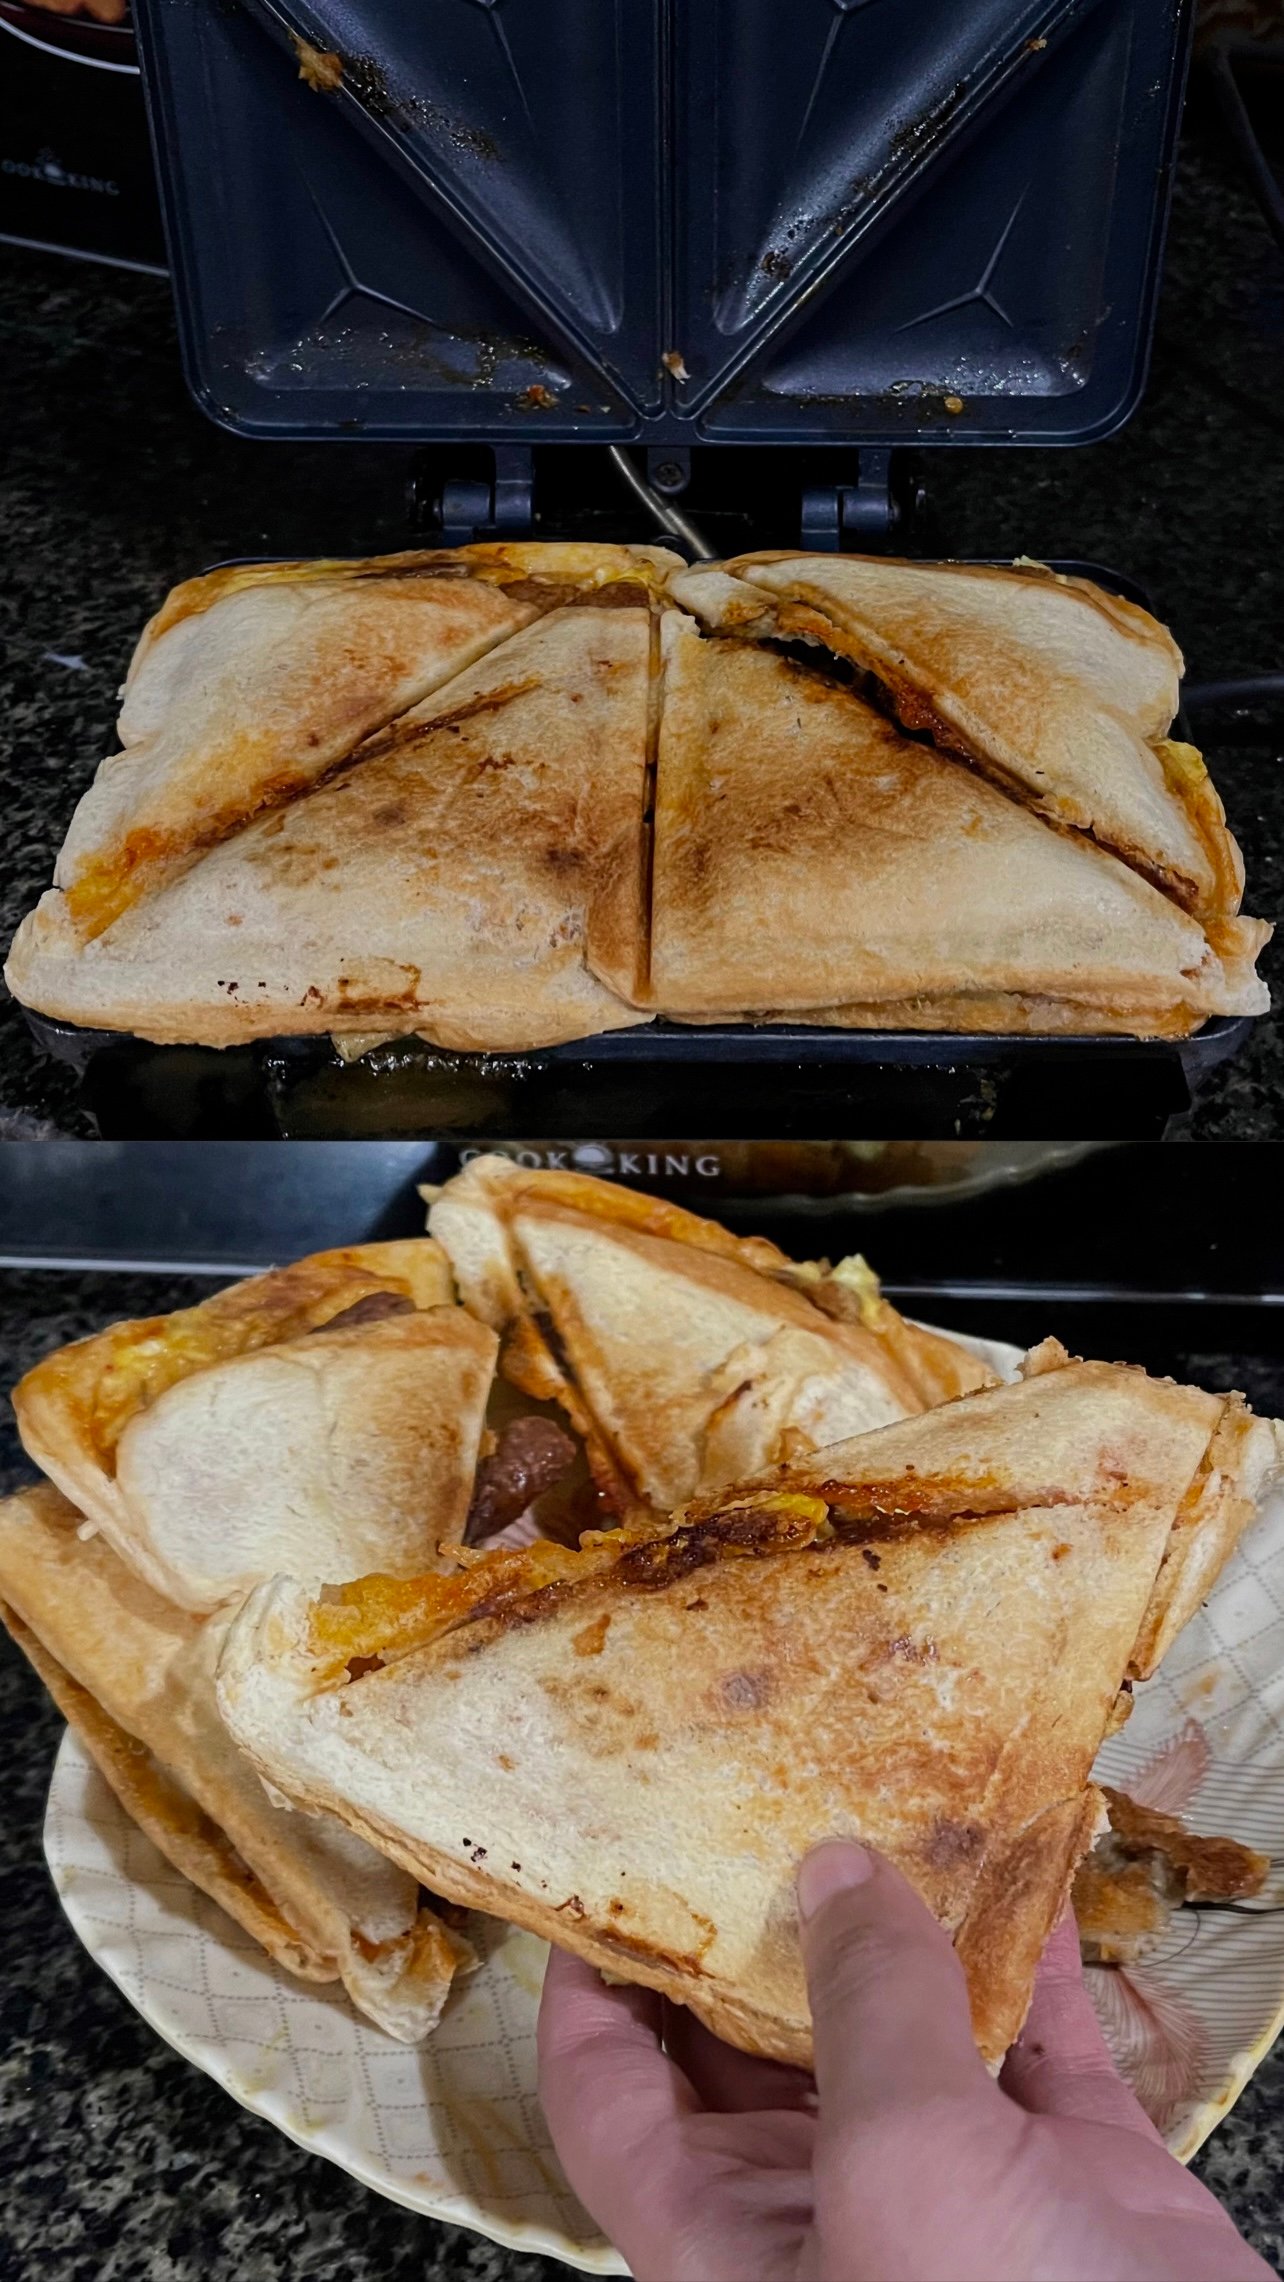
Triangle Toasted Sandwich (Sandwich Maker Style) – Step by Step

Triangle Toasted Sandwich (Sandwich Maker Style) – Step by Step

✅ Ingredients (for 2 sandwiches / 4 triangles)

Bread

  • 4 slices bread (white or brown)

Filling (you can choose)

Option A (like pizza style):

  • 2 tbsp pizza sauce / ketchup
  • 1 cup grated cheese (mozzarella or cheddar)
  • 1 small onion (chopped)
  • 1 small capsicum (chopped)
  • Chicken pieces / sausage / beef (optional)
  • Black pepper
  • Red chilli flakes
  • Salt (little)

Option B (simple spicy egg filling):

  • 2 boiled eggs mashed
  • Mayonnaise 2 tbsp
  • Salt + pepper
  • Chilli flakes

🍳 Step-by-Step Method (Exactly Like Picture)

Step 1: Prepare Filling

  1. Take a bowl.
  2. Add chopped onion + capsicum.
  3. Add chicken/sausage pieces (optional).
  4. Add pizza sauce or ketchup.
  5. Add black pepper + chilli flakes.
  6. Add grated cheese.
  7. Mix everything properly.

👉 Your filling should be thick, not watery.

Step 2: Preheat Sandwich Maker

  1. Plug in the sandwich maker.
  2. Let it heat for 2–3 minutes.

Step 3: Apply Butter

  1. Take bread slices.
  2. Apply butter on the outer side of bread (very important for golden color).

✅ Butter side must touch the sandwich maker plate.

Step 4: Place Bread in Maker

  1. Put 1 bread slice on the sandwich maker plate.
  2. Butter side should be down.

Step 5: Add Filling

  1. Put filling in the center.
  2. Spread evenly but don’t overfill.
  3. Leave edges empty a little, otherwise cheese comes out (like your pic 😅).

Step 6: Cover With Second Bread

  1. Place second bread slice on top.
  2. Butter side should be up.

Step 7: Close Sandwich Maker

  1. Close the lid slowly.
  2. Press lightly.

⏳ Cook for 4–6 minutes.

Step 8: Check Golden Color

  1. Open slightly and check.
  2. If bread is golden brown and crispy, it’s ready.

👉 If you want extra crispy, cook 1–2 minutes more.

Step 9: Remove Sandwich Carefully

  1. Use a spatula or spoon.
  2. Take out sandwich gently.
  3. Put on plate.

Step 10: Serve

  1. Your sandwich will automatically cut into 4 triangle pieces.
  2. Serve with:
  • ketchup
  • mayo garlic sauce
  • chilli sauce

⭐ Tips to Make It Perfect Like Your Picture

✅ Always butter outside bread

✅ Don’t add too much filling

✅ Use cheese for strong stickiness

✅ Cook on medium heat for crispy color

✅ Use thick sauce, not watery

Smoky Chipotle White Chicken Chili

Smoky Chipotle White Chicken Chili

This recipe swaps the traditional heavy cream for Greek yogurt and uses chipotle and roasted tomatillo to create a deep, smoky profile.


Ingredients

Proteins & Base

  • 1 lb smoked chicken sausage, sliced (substitute andouille for extra spice)

  • 1 lb boneless, skinless chicken breasts, cut into bite-sized pieces

  • 1 tbsp olive oil

Vegetables & Aromatics

  • 1 cup diced onion

  • 1 cup diced celery

  • 1 cup diced poblano pepper

  • 1 small chipotle pepper in adobo, minced

  • 4 cloves garlic, minced

Broth, Beans & Flavor

  • 4 cups chicken broth

  • 2 cans (15 oz each) cannellini beans, drained and rinsed

  • ½ cup roasted tomatillo salsa

  • 1 tsp smoked paprika

  • 1 tsp chipotle chili powder

  • 1 tsp ground cumin

  • 1 tsp oregano

  • To taste: Salt and freshly cracked black pepper

Creamy Finish & Garnishes

  • ½ cup Greek yogurt

  • ¼ cup crumbled queso fresco (or Parmesan)

  • For Serving: Fresh lime wedges, chopped cilantro, sliced radishes, and a drizzle of olive or avocado oil


Instructions

  1. Sear the Proteins: In a large pot over medium heat, sauté the sliced sausage until lightly browned. Remove the sausage and set aside. In the same pot, cook the chicken pieces until golden on all sides.

  2. Sauté Aromatics: Add the onions, celery, and poblano peppers to the pot. Cook for 5–7 minutes until softened. Stir in the garlic and minced chipotle pepper, cooking for 1 minute until fragrant.

  3. Simmer: Pour in the chicken broth. Add the beans, tomatillo salsa, smoked paprika, chipotle chili powder, cumin, oregano, salt, and pepper. Bring the mixture to a simmer and let it cook for 15 minutes.

  4. Make it Creamy: Stir in the Greek yogurt and crumbled queso fresco. Return the browned sausage to the pot and simmer for an additional 5 minutes to allow the flavors to meld. Taste and adjust seasoning with extra salt, pepper, or lime juice if needed.

  5. Serve: Ladle the chili into bowls. Top with fresh cilantro, crunchy radish slices, a squeeze of lime, and a light drizzle of oil.


Pro Tip: If you want a thicker texture, take a half-cup of the cannellini beans and mash them with a fork before adding them to the pot.

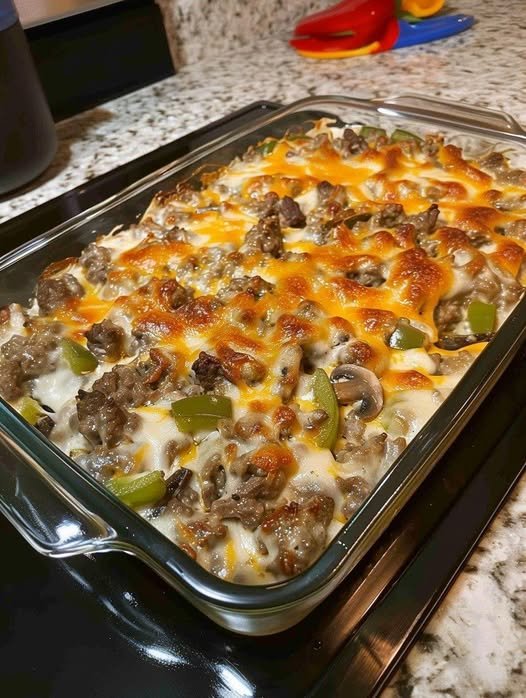
Keto Philly Cheesesteak Casserole


Keto Philly Cheesesteak Casserole

A rich, creamy, and high-protein bake that captures the classic flavors of a Philly cheesesteak without the bun.

  • Prep time: 15 minutes

  • Cook time: 20-25 minutes

  • Servings: 6 (Approx. 1 heaped cup each)

  • Calories: 495 kcal | Net Carbs: 7 g

Ingredients

The Base:

  • 907 g (2 lbs) Ground beef (90% lean recommended)

  • 3 large Bell peppers (any color), thinly sliced

  • 1 large Onion (yellow, red, or sweet), thinly sliced

  • 113 g (4 oz) Cream cheese

  • ¼ cup Chicken bone broth

The Seasoning:

  • 2 tsp Sea salt

  • ½ tsp Black pepper

  • ½ tsp Garlic powder

  • 1 tsp Smoked paprika

  • ½ tbsp Italian seasoning

The Topping:

  • 6 slices Provolone cheese (or 1.5 cups shredded Provolone, Mozzarella, or Monterey Jack)


Instructions

1. Preparation

  • Preheat your oven to 177°C (350°F).

  • Prepare a rectangular baking dish (ideally 8 x 11.5 inches). If using stoneware, no oil is needed; otherwise, lightly grease the dish with oil or butter.

2. Cook the Beef and Veggies

  • Place a large skillet over medium-high heat. Add the ground beef and cook, breaking it up with a spatula, until browned. Season with the sea salt and black pepper.

  • Once the beef is thoroughly cooked, add the sliced onions and bell peppers to the pan.

  • Sprinkle in the garlic powder, Italian seasoning, and smoked paprika. Sauté for a few minutes until the vegetables are slightly softened but still hold their shape.

3. Create the Creamy Sauce

  • Lower the heat slightly. Add the chicken bone broth and the cream cheese to the skillet.

  • Stir continuously until the cream cheese is fully melted and forms a smooth, creamy coating over the beef and vegetables. Tip: Remove from heat immediately once melted to prevent the sauce from drying out.

4. Bake

  • Transfer the beef mixture into your prepared baking dish, spreading it out evenly.

  • Lay the provolone cheese slices over the top, overlapping them slightly to cover the surface.

  • Bake in the oven until the cheese is completely melted and bubbly.

  • Optional: For a crispy brown top, move the dish to the top rack and broil for 2–3 minutes.

5. Rest and Serve

  • Let the casserole sit for 5 to 10 minutes before serving. This allows the juices to settle and the flavors to “lock in.“


Storage & Reheating

  • Fridge: Store in an airtight container for 5–6 days.

  • Freezer: Wrap tightly and freeze for up to 100 days. Thaw in the fridge for 24 hours before reheating.

  • Reheating: Microwave individual portions or warm the whole dish in the oven at 175°C (350°F) until heated through.

Nutritional Profile (Per Serving)