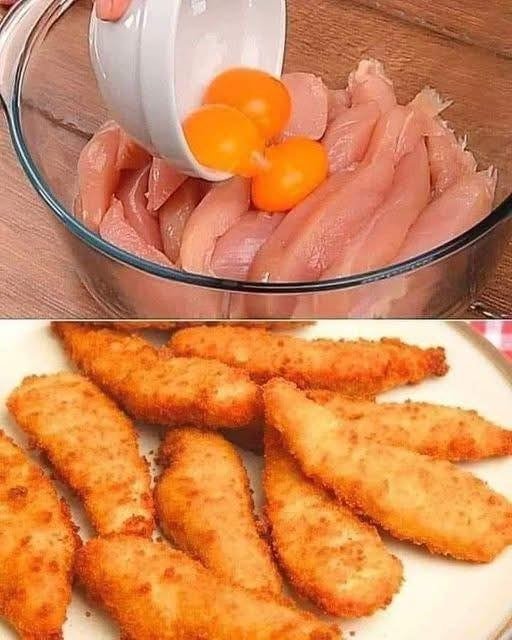
Crispy Golden Chicken Strips

Crispy Golden Chicken Strips

This recipe uses an egg-based marinade that locks in moisture and helps the coating stay attached for a satisfying crunch.

Ingredients

  • Chicken: 2 large chicken breast fillets (sliced into even strips).

  • The Coating Base: 3 large eggs.

  • Flavorings: 2 cloves of garlic (finely minced).

  • The Breadcrumbs: 1 ½ cups Panko breadcrumbs (best for crunch) or fine breadcrumbs.

  • Seasoning Mix: 1 tsp salt, ½ tsp black pepper, 1 tsp mild paprika, and ½ tsp onion powder.

  • Cooking Oil: Enough vegetable or canola oil to cover the bottom of your pan (about 1 inch deep).


Detailed Step-by-Step Instructions

1. Prepare the Chicken and Marinade

Place your chicken strips into a clean mixing bowl. Crack the 3 eggs directly over the chicken and add the minced garlic. Use a pair of tongs or a spoon to stir everything together until every piece of chicken is fully coated in the egg.

2. Initial Seasoning

Add half of your salt and pepper to the chicken and egg mixture. Stir again. Let this sit at room temperature for about 15 minutes. This allows the garlic and salt to flavor the meat before it is cooked.

3. Set Up Your Breading Station

In a wide, shallow dish or a pie plate, combine the breadcrumbs, paprika, onion powder, and the remaining salt and pepper. Use a fork to mix the spices evenly through the crumbs.

4. Apply the Coating

Take one chicken strip at a time from the egg bowl. Place it into the breadcrumb mixture. Use your hands to press the crumbs firmly onto all sides of the chicken. You want a thick, even layer of crumbs covering the entire surface. Set the coated strips on a clean plate.

5. Heat the Cooking Oil

Pour your oil into a large skillet and turn the heat to medium. To check if the oil is ready, drop a single breadcrumb into the pan; if it sizzles immediately, the oil is at the right temperature.

6. Cook Until Golden

Carefully lay the chicken strips into the warm oil. Work in small groups so the pan isn’t too full. Cook the strips for about 3 to 4 minutes on the first side. When the edges look golden brown, gently turn them over and cook for another 3 minutes.

7. Final Safety Check

Ensure the chicken is cooked through. The thickest part of the strip should be white and opaque all the way through, reaching an internal temperature of 74°C.

8. Drain and Serve

Lift the strips out of the oil and place them onto a plate lined with paper towels or a wire cooling rack. This helps remove any extra oil and keeps the bottom of the chicken from getting soft.


Helpful Success Tips

  • Uniform Slicing: Try to cut your chicken strips to a similar thickness so they all finish cooking at the same time.

  • Dry Hands/Wet Hands: Try to use one hand for touching the “wet” egg-soaked chicken and the other hand for pressing the “dry” breadcrumbs. This prevents your fingers from getting heavily coated in dough!
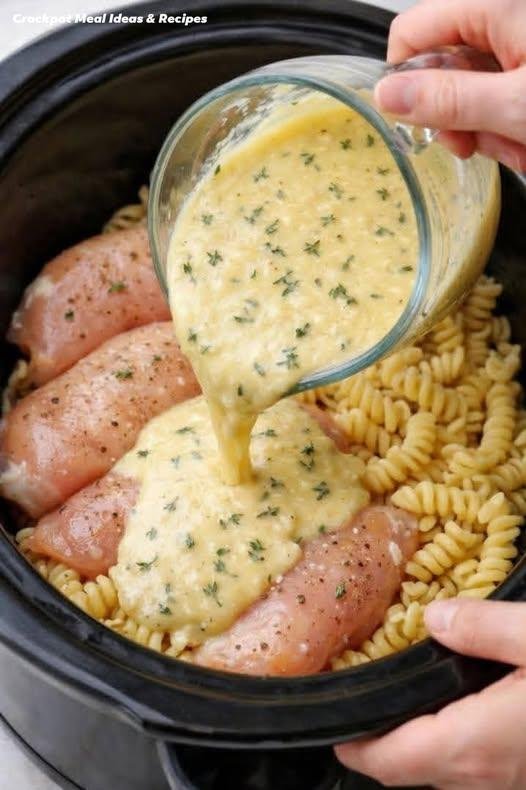
Creamy Crockpot Garlic Parmesan Chicken & Pasta

A rich, comforting slow-cooker meal made with tender chicken breasts, rotini pasta, garlic, cream, and freshly grated Parmesan. This is an easy dump-and-cook dinner that’s perfect for busy weeknights.

Ingredients

  • 4 boneless, skinless chicken breasts

  • 3 cups uncooked rotini pasta

  • 4 cloves garlic, minced

  • 2 cups heavy cream

  • 1 cup chicken broth

  • 1 ½ cups freshly grated Parmesan cheese

  • 4 oz cream cheese (softened)

  • 1 tsp Italian seasoning

  • ½ tsp salt (adjust to taste)

  • ½ tsp black pepper

  • 2 tbsp butter

  • 1 tbsp olive oil

  • Optional: chopped parsley for garnish

 Instructions

Step 1: Prepare the Chicken

  1. Season chicken breasts with salt, pepper, and Italian seasoning.

  2. Heat olive oil in a skillet over medium heat.

  3. Sear chicken for 2–3 minutes per side (optional but adds flavor).

Step 2: Layer in Crockpot

  1. Place chicken at the bottom of the crockpot.

  2. Add uncooked pasta around the chicken.

Step 3: Make the Sauce

  1. In a bowl, whisk together heavy cream, chicken broth, garlic, melted butter, cream cheese, and Parmesan.

  2. Pour sauce evenly over chicken and pasta.

Step 4: Cook

  • Cook on LOW for 4–5 hours or HIGH for 2–3 hours, until chicken is tender.

  • Remove chicken, shred or slice.

  • Stir pasta well. If needed, add ¼ cup warm broth to loosen sauce.

  • Return chicken to crockpot and cook 10–15 minutes more.

Step 5: Serve

  • Garnish with parsley and extra Parmesan.

  • Serve hot.

 Description

This dish combines creamy garlic-Parmesan sauce with tender slow-cooked chicken and perfectly coated pasta. The slow cooker allows flavors to meld beautifully while keeping the chicken juicy and flavorful.


💡 Notes

  • Freshly grated Parmesan melts smoother than pre-shredded.

  • If pasta absorbs too much liquid, add warm broth before serving.

  • For extra creaminess, stir in more cream cheese at the end.

Tips for Best Results

  • ✔ Sear the chicken first for deeper flavor.

  • ✔ Stir pasta once halfway through cooking if possible.

  • ✔ Use rotini or penne — they hold sauce well.

  • ✔ Avoid overcooking on HIGH to prevent mushy pasta.

Servings

  • Serves: 4–6 people

  • Prep Time: 15 minutes

  • Cook Time: 4–5 hours (LOW)

 Nutritional Information (Approx. Per Serving)

  • Calories: 650–750 kcal

  • Protein: 40–45g

  • Carbohydrates: 45–55g

  • Fat: 40–45g

  • Calcium: ~30% DV

(Values vary depending on ingredient brands and portion size.)

 Benefits

  • ✅ High in protein from chicken

  • ✅ Calcium from Parmesan cheese

  • ✅ Comforting, energy-rich meal

  • ✅ Family-friendly

  • ✅ Great for meal prep leftovers

Q & A

Q: Can I use frozen chicken?
A: Yes, but increase cook time and ensure internal temp reaches 165°F (74°C).

Q: Can I substitute milk for heavy cream?
A: Yes, but sauce will be thinner. Add 1 tbsp flour or cornstarch to thicken.

Q: Can I add vegetables?
A: Absolutely! Broccoli, spinach, or mushrooms work well. Add during the last hour.

Q: Can this be made gluten-free?
A: Yes, use gluten-free pasta and ensure broth is certified gluten-free.

Q: How do I store leftovers?
A: Refrigerate up to 3–4 days in an airtight container. Reheat with a splash of milk or broth.

Air Fryer Cheesy Toast

Air Fryer Cheesy Toast

A faster, crispier way to enjoy a classic melted cheese sandwich.

  • Prep time: 2 minutes

  • Cook time: 4–6 minutes

  • Servings: 2 (2 pieces each)

Ingredients

  • 4 slices sandwich bread (sourdough, white, or whole grain)

  • 1 ½ cups sharp cheddar cheese, shredded (or a blend of Mozzarella and Monterey Jack)

  • 2 tbsp butter, softened (room temperature)

  • 1 tsp Dijon mustard (optional, for a tangy kick)

  • ½ tsp garlic powder

  • Fresh parsley or chives, finely chopped (for garnish)

  • Pinch of paprika or black pepper


Detailed Directions

  1. Prep the Bread: Lightly butter one side of all four slices of bread. For extra flavor, mix the garlic powder into the softened butter before spreading.

  2. The “Secret” Layer: If using Dijon mustard, spread a very thin layer over the buttered side of the bread. This helps the cheese “grip” the bread and adds depth to the flavor.

  3. Add the Cheese: Pile the shredded cheese generously onto the buttered side of each slice. Press down slightly so the cheese stays in place when the air fryer fan starts blowing.

  4. Air Fry: Place the bread slices in a single layer in the air fryer basket. You may need to do this in two batches depending on the size of your air fryer.

  5. Cook: Set the air fryer to 375°F (190°C). Cook for 4–6 minutes.

    • At 4 minutes: The cheese will be melted and gooey.

    • At 6 minutes: The cheese will be bubbly with golden-brown “cheez-it” style crispy edges.

  6. Season: Carefully remove the toast using tongs. Immediately sprinkle with a pinch of paprika and fresh herbs.

  7. Serve: Let it sit for 60 seconds so the cheese doesn’t slide off, then slice diagonally and enjoy while hot.


Success Tips

  • Prevent “Flying” Cheese: If your air fryer has a very powerful fan, the cheese might blow off the bread. To prevent this, place a small metal rack over the bread or secure the cheese with a toothpick in the center (remember to remove it before eating!).

  • Extra Crunch: For the ultimate crunch, air fry the plain bread for 2 minutes at 375°F before adding the butter and cheese.

  • The “Weight Watchers” Twist: As you mentioned finding success with your 23.5 lb loss journey, you can make this more plan-friendly by using light bread (usually 1 point per slice) and reduced-fat cheddar or nutritional yeast for a cheesy flavor with fewer points.

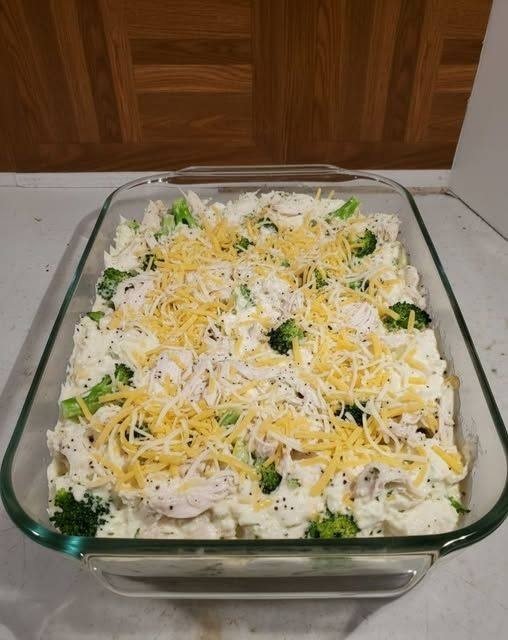
Cheesy Chicken Broccoli Protein Bake

Cheesy Chicken Broccoli Protein Bake

A comforting, one-dish meal that is high in protein and perfectly seasoned.

  • Prep time: 10 minutes

  • Bake time: 20–25 minutes

  • Servings: 4

Nutritional Profile (Per Serving)

  • Calories: 260

  • Protein: 38g

  • Net Carbs: 6g

  • Fat: 8g


Ingredients

  • 2 cups cooked chicken breast, shredded

  • 2 cups broccoli florets, steamed until tender-crisp

  • 1 cup low-fat cottage cheese (blended until completely smooth)

  • ½ cup plain Greek yogurt

  • ½ cup shredded cheddar cheese

  • ¼ cup grated Parmesan cheese

  • 1 tsp garlic powder

  • 1 tsp onion powder

  • Salt and black pepper to taste


Detailed Directions

  1. Preparation: Preheat your oven to 375°F (190°C). Lightly grease an 8×8-inch or similar-sized baking dish with non-stick spray or a touch of olive oil.

  2. Create the Creamy Base: If you haven’t already, place the cottage cheese in a blender or food processor and pulse until it reaches a smooth, sour cream-like consistency.

  3. Mix: In a large mixing bowl, combine the shredded chicken, steamed broccoli, blended cottage cheese, and Greek yogurt.

  4. Season: Stir in the garlic powder, onion powder, salt, and pepper. Ensure the chicken and broccoli are thoroughly coated in the creamy sauce.

  5. Assemble: Transfer the mixture into your prepared baking dish, spreading it out into an even layer.

  6. Top with Cheese: Sprinkle the shredded cheddar and grated Parmesan evenly over the top.

  7. Bake: Place in the oven and bake for 20–25 minutes. The edges should be bubbling, and the cheese on top should be melted and starting to turn golden brown.

  8. Serve: Let the dish stand for 5 minutes before serving to allow the sauce to set slightly.


Success Tips

  • Chicken Shortcuts: You can use a rotisserie chicken to save time; just remove the skin to keep the fat content lower.

  • Broccoli Texture: To avoid a watery bake, ensure your steamed broccoli is well-drained and patted dry before adding it to the mixture.

  • Meal Prep: This dish reheats beautifully in the microwave or oven, making it an excellent option for healthy lunches throughout the week.

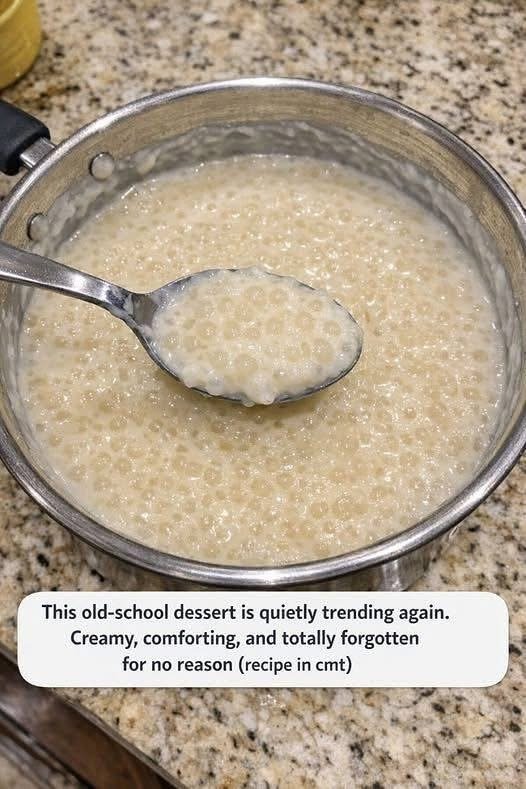
Classic Tapioca Pudding Recipe

Classic Tapioca Pudding Recipe

🥛 

Ingredients

  • Small pearl tapioca (not instant) – ⅓ cup
  • Milk (whole milk preferred) – 2¾ cups
  • Granulated sugar – ⅓ cup (adjust to taste)
  • Egg (beaten) – 1 large

👩‍🍳 

Step-by-Step Directions

Step 1: Soak the Tapioca

  • Take a medium saucepan.
  • Add ⅓ cup small pearl tapioca and 2¾ cups milk.
  • Mix gently.
  • Let it rest for 20–30 minutes.

✅ This helps the tapioca pearls soften and cook evenly.

Step 2: Cook the Tapioca Base

  • Place the saucepan on medium-low heat.
  • Add ⅓ cup sugar.
  • Stir continuously so it doesn’t stick to the bottom.
  • Cook for 10–15 minutes until:
    • mixture becomes hot/steamy
    • pearls look mostly translucent

⚠️ Keep the flame low to avoid burning the milk.

Step 3: Beat the Egg

  • In a separate small bowl, crack 1 egg.
  • Beat it well with a fork or whisk until smooth.

Step 4: Temper the Egg (Important Step)

  • Take 2–3 tablespoons of the hot tapioca mixture.
  • Slowly add it into the beaten egg while whisking continuously.

✅ This prevents the egg from cooking suddenly and forming lumps.

Step 5: Add Egg Back into the Pudding

  • Now pour the tempered egg mixture back into the saucepan.
  • Stir continuously while pouring.
  • Cook for 3–5 minutes on low heat.

✅ The pudding will become thicker and creamy.

Step 6: Rest the Pudding

  • Turn off the flame.
  • Remove the saucepan from heat.
  • Let it rest for 10 minutes.
  • Stir occasionally to avoid a thick skin forming on top.

Step 7: Serve & Enjoy

Option 1: Serve Warm

  • Serve immediately for a soft custard-like texture.

Option 2: Serve Chilled

  • Pour into bowls or jars.
  • Cover and refrigerate for 1–2 hours.
  • If it becomes too thick, add a splash of milk and stir.

⭐ 

Extra Tip

You can also add:

  • Vanilla essence
  • Cinnamon
  • Raisins

For extra flavor 😍

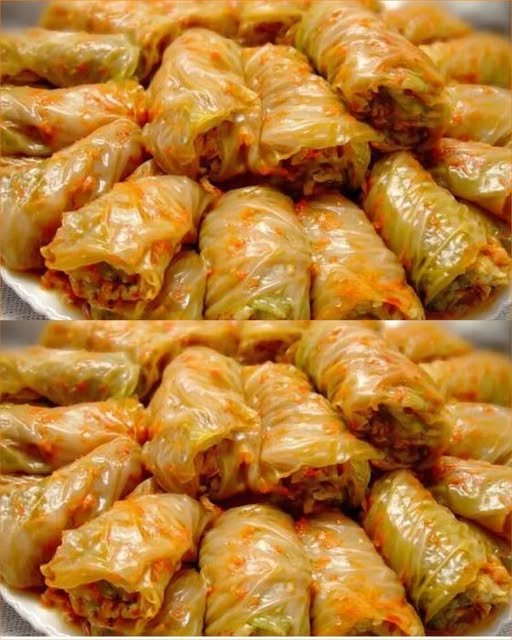
Cabbage Rolls

Ingredients

For the cabbage and cooking
  • 1 large white cabbage (cavolo bianco) Used for wrapping the filling
  • 1 tablespoon salt For blanching the cabbage
  • 2 cups cold water For making the sauce
  • 1/2 cup ghee (clarified butter) Used in the sauce
  • 2 teaspoons tomato paste
For the filling
  • 600 grams ground meat (beef or chicken) Primary protein in the filling
  • 2 medium onions, chopped and mixed into the filling
  • 1 large tomato, grated: adds moisture and flavor to the filling
  • 1/2 cup rice Provides texture in the filling
  • 1 tablespoon tomato paste Enhances flavor in the filling
  • 2 tablespoons melted butter Adds richness to the filling
  • to taste salt For seasoning the filling
  • to taste black pepper For seasoning the filling
  • to taste turmeric For color and flavor
  • to taste. Paprika adds flavor and color
  • Fresh dill to taste Should be chopped and mixed into the filling

Method

Preparation
  1. Start by removing the outer leaves from the cabbage. Blanch these leaves in lightly salted water for 1-2 minutes until they are softer and more manageable for rolling.
  2. Carefully remove the hard central vein from each leaf, keeping only the softer parts to use for wrapping the filling.
Make the Filling
  1. In a deep bowl, combine the ground meat, grated tomato, rice, salt, black pepper, turmeric, and paprika. Mix these ingredients together until well combined.
  2. Incorporate the tomato paste, melted butter, and chopped fresh dill into the mixture. Stir well until everything is evenly blended.
Assemble the Rolls
  1. Take one cabbage leaf, place a generous portion of the filling in the center, and roll it up, folding the sides inward to secure the filling inside.
Cooking
  1. To prevent the cabbage rolls from sticking, lay some chopped cabbage leaves at the bottom of a large pot.
  2. Place the cabbage rolls in the pot side by side, snugly fitting them together.
  3. In a separate bowl, mix together the tomato paste, melted ghee, and cold water to create a delicious sauce.
  4. Pour the sauce over the cabbage rolls in the pot, making sure they are well-covered.
  5. Cover the pot with a lid and let the rolls simmer over low heat for about an hour.
Serving
  1. Once cooked, carefully transfer the cabbage rolls to a plate and drizzle them with the remaining sauce for extra taste.

Notes

Cabbage rolls can be made in advance and stored in the refrigerator before cooking. For a vegetarian option, replace the meat with finely chopped mushrooms or lentils. Experiment with spices for a unique flavor.