Easy Apple Oatmeal Muffins

Easy Apple Oatmeal Muffins

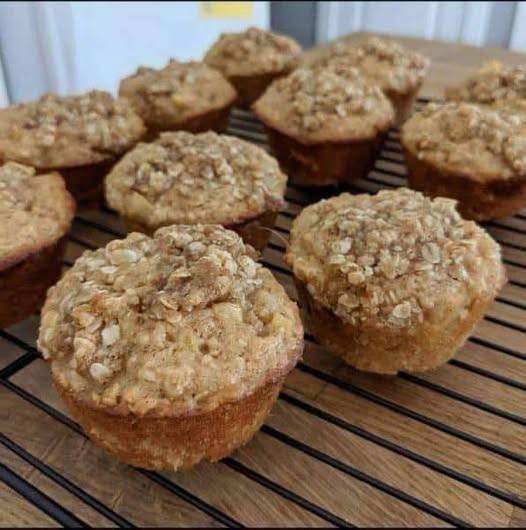
This recipe creates a dense, satisfying muffin with a lovely toasted oat topping.

Ingredients

  • 1 ½ cups All-purpose flour (or whole wheat flour for extra fiber)

  • 1 cup Rolled oats (plus a little extra for sprinkling on top)

  • ½ cup Brown sugar (packed)

  • 1 tbsp Baking powder

  • 1 tsp Cinnamon

  • ½ tsp Salt

  • 1 cup Milk (any variety)

  • 1 Large egg

  • ¼ cup Melted coconut oil or butter

  • 1 tsp Vanilla extract

  • 1 ½ cups Fresh apples (peeled and finely diced; Fuji or Honeycrisp work great)


Step-by-Step Instructions

  1. Preheat and Prep: Preheat your oven to 400°F (200°C). Grease a 12-cup muffin tin or line it with paper liners.

  2. Combine Dry Ingredients: In a large bowl, whisk together the flour, rolled oats, brown sugar, baking powder, cinnamon, and salt.

  3. Mix Wet Ingredients: In a separate medium bowl, whisk the milk, egg, melted oil/butter, and vanilla extract until well combined.

  4. Merge the Two: Pour the wet ingredients into the dry ingredients. Stir gently with a spatula just until combined. Tip: Do not over-mix; a few lumps are perfectly fine for a fluffy texture.

  5. Fold in Apples: Gently fold the diced apples into the batter.

  6. Fill the Tins: Spoon the batter into the prepared muffin tin, filling each cup about ¾ full.

  7. Add the Topping: Sprinkle a few extra rolled oats over the top of each muffin for that beautiful bakery-style look shown in your photo.

  8. Bake: Bake for 18–20 minutes, or until a toothpick inserted into the center comes out clean.

  9. Cool: Let the muffins cool in the tin for 5 minutes before transferring them to a wire rack.


Why This Recipe Works

  • Texture: The oats soften during baking but provide a hearty chew.

  • Beginner Friendly: This is a “one-bowl” style method that doesn’t require a heavy stand mixer.

  • Customizable: You can swap the apples for blueberries or add a handful of chopped walnuts for extra crunch.

KETO PERMASAN CRUSTED CHICKEN

Keto Parmesan Crusted Chicken

Crispy, golden, and juicy—without the carbs.


Ingredients

The Chicken:

  • 4 boneless, skinless chicken breasts (approx. 1.5 lbs / 680g)

  • ½ tsp salt (to taste)

  • ½ tsp black pepper

The Coating (Dredge):

  • 1 cup freshly grated Parmesan cheese

  • ½ cup finely ground almond flour

  • 1 tsp garlic powder

  • 1 tsp onion powder

  • 1 tsp dried Italian seasoning

The Binder (Egg Wash):

  • 2 large eggs

  • 2 tbsp heavy cream

For Cooking:

  • 1 tbsp olive oil

  • 1 tbsp unsalted butter

  • Fresh parsley (optional garnish)


Kitchen Tools

  • Two shallow bowls or plates (for dredging)

  • Large skillet (non-stick or stainless steel)

  • Tongs or spatula

  • Meat thermometer (highly recommended)

  • Paper towels or cooling rack


Instructions

  1. Prep the Chicken: Slice thick breasts horizontally into thinner fillets for even cooking. Season both sides with salt and pepper.

  2. Set Up Coating Station:

    • Bowl 1: Whisk eggs and heavy cream until smooth.

    • Bowl 2: Mix Parmesan, almond flour, garlic powder, onion powder, and Italian seasoning.

  3. Breading: Dip each chicken breast into the egg wash, then press firmly into the Parmesan mixture until fully coated on both sides.

  4. Heat the Pan: Add olive oil and butter to the skillet over medium heat. Wait until the butter is melted and shimmering.

  5. Cook: Place chicken in the pan. Cook for 4–5 minutes per side.

    Pro Tip: If the crust is browning too fast, lower the heat to medium-low. Chicken is safe to eat when it reaches an internal temperature of 165°F (74°C).

  6. Rest: Transfer to paper towels or a rack for 2–3 minutes. This keeps the crust crispy and the meat juicy.

  7. Serve: Garnish with parsley and enjoy!

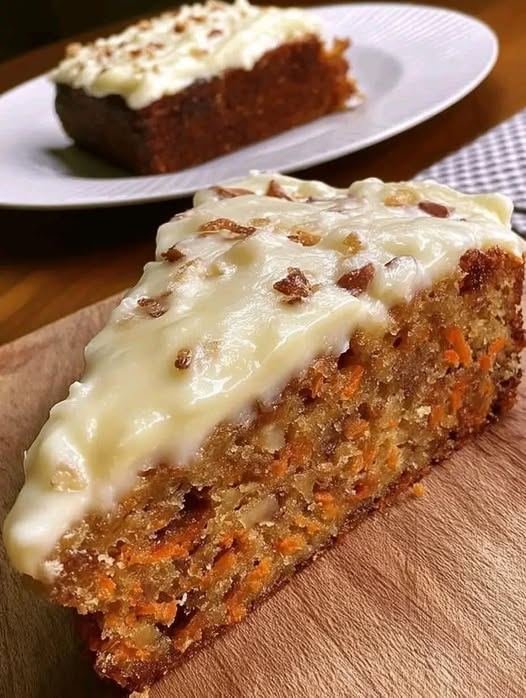
Carrot, Apple, and Oat Cake

Carrot, Apple, and Oat Cake

A nutrient-dense, flourless bake that is perfect for breakfast or a healthy snack.

Ingredients

  • 100g Oat flakes (whole grain or quick oats)

  • 1 Medium carrot (peeled and grated)

  • 1 Medium apple (peeled and grated)

  • 1 Ripe banana (mashed, acts as the primary natural sweetener)

  • 2 Large eggs

  • 1 tsp Baking powder

  • ½ tsp Cinnamon powder

  • ½ tsp Vanilla essence

  • 1 pinch Salt

  • Optional: A handful of chopped nuts or raisins for extra texture


Step-by-Step Instructions

1. Prepare the Base

Preheat your oven to 180°C (350°F). Grease a small cake pan or line it with parchment paper. In a large bowl, mash the ripe banana until smooth.

2. Combine Wet Ingredients

Whisk the two eggs into the mashed banana. Stir in the vanilla essence.

3. Prep the Fruit and Veg

Add the grated carrot and grated apple to the egg mixture. Stir until well combined. The moisture from the apple and carrot will help hydrate the oats.

4. Add Dry Ingredients

Fold in the oat flakes, cinnamon powder, baking powder, and salt. If you are using chopped nuts or raisins, fold them in now.

5. Let it Rest

Allow the batter to sit for about 5–10 minutes. This allows the oats to soften and soak up the liquid, ensuring your cake isn’t crumbly.

6. Bake

Pour the batter into your prepared pan. Bake for 30–35 minutes, or until a toothpick inserted into the center comes out clean and the top is golden brown.

7. Cool and Serve

Let the cake cool completely in the pan before slicing. Since this cake has no flour, it needs that cooling time to set its structure.


Pro-Tips

  • For the Frosting: While the cake is sugar-free, you can top it with a mix of Greek yogurt and a little honey (as seen in the photo) for a “cream cheese” style finish without the heavy calories.

  • Oat Texture: If you prefer a smoother, more cake-like texture rather than a rustic oat texture, you can pulse your oat flakes in a blender for a few seconds to create a coarse oat flour before adding them to the mix.

The Easiest “No-Everything” Bread

The Easiest “No-Everything” Bread

Prep time: 10 mins | Rise time: 1.5 – 2 hours | Bake time: 20 mins

Ingredients

  • 3 cups (375g) All-purpose flour or Bread flour

  • 1 ½ cups (355ml) Warm water (not hot!)

  • 1 tsp Active dry yeast

  • 1 tsp Salt

  • 1 tbsp Sugar (to help the yeast activate)

  • 2 tbsp Vegetable oil (optional, for a softer crust)


Step-by-Step Instructions

1. Mix the Dough

In a large bowl, whisk together the warm water, sugar, and yeast. Let it sit for about 5 minutes until it becomes slightly foamy. Add the salt and flour. Stir with a wooden spoon or spatula until a shaggy, sticky dough forms and no dry flour remains.

2. The First Rise

Cover the bowl with a damp cloth or plastic wrap. Let it sit in a warm, draft-free spot for 1.5 to 2 hours, or until the dough has doubled in size and looks bubbly.

3. Shape the Rolls

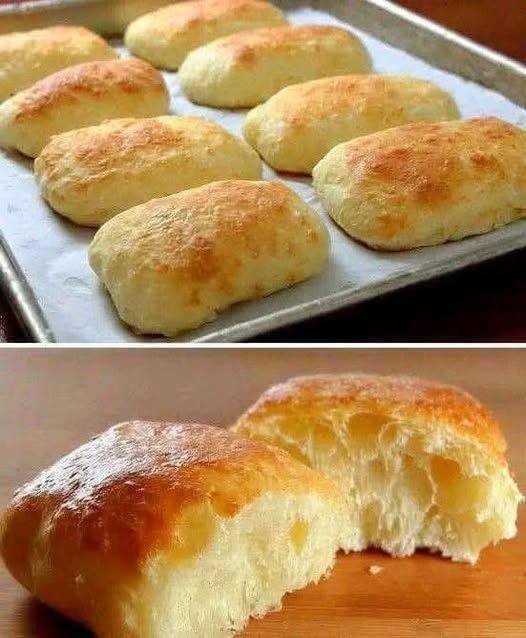
Don’t knead! Gently deflate the dough by folding it over itself a few times in the bowl. Heavily flour your work surface and your hands. Tip the dough out and divide it into 8 to 10 equal pieces. Gently tuck the edges under to form rectangular or oval rolls (like in your photo).

4. Second Rise

Place the rolls on a baking sheet lined with parchment paper. Cover lightly and let them rest for another 20–30 minutes while you preheat your oven to 200°C (400°F).

5. Bake

If you want a golden shine without eggs or butter, lightly brush the tops with a little water or milk right before baking. Bake for 18–22 minutes until the tops are golden brown and the rolls sound hollow when tapped on the bottom.


Tips for the Best Results

  • Steam is Key: For a professional “bakery” crust, place a small pan of water on the bottom rack of the oven while baking. The steam keeps the bread moist and helps it rise higher.

  • Don’t Over-Flour: The dough is supposed to be sticky! Use just enough flour on your hands to handle it; too much extra flour will make the bread dense.

Soft Turkish Bazlama

These are much thicker than a tortilla but lighter than a standard loaf of bread. They are perfect for dipping in olive oil or stuffing for sandwiches.

Ingredients

  • Warm Water: 2 cups (approx. 480ml) — should be lukewarm, not hot.

  • Warm Milk: 1 cup (240ml).

  • Active Dry Yeast: 1 packet (10g or about 1 tbsp).

  • Sugar: 1 tbsp (to feed the yeast).

  • Olive Oil: 2 tbsp.

  • All-Purpose Flour: 6 to 7 cups (add gradually until the dough is soft and slightly tacky).

  • Salt: 1 tbsp.


Instructions

1. Activate the Yeast In a large bowl, combine the warm water, warm milk, sugar, and yeast. Stir gently and let it sit for about 5–10 minutes until it becomes frothy.

2. Mix the Dough Add the olive oil and salt. Begin adding the flour one cup at a time, mixing with a wooden spoon or your hands. The dough should be very soft and slightly sticky; avoid over-flouring or the bread will be tough.

3. The First Rise Knead the dough on a lightly floured surface for about 5 minutes until smooth. Place it in a greased bowl, cover with a damp cloth, and let it rise in a warm spot for 1 hour or until doubled in size.

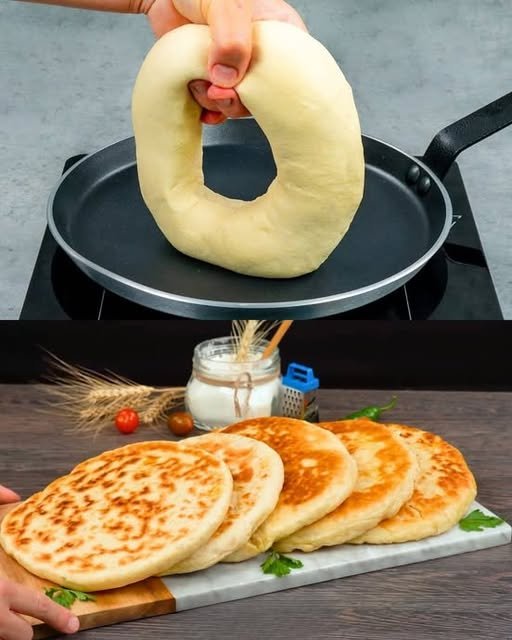
4. Shape the “Ring” Punch the dough down. To replicate the photo, poke a hole in the center of the dough ball and stretch it out into a large, even ring. This helps you pull off equal-sized pieces. Cut or pull the ring into 8–10 equal portions and roll them into smooth balls.

5. Second Rise & Flattening Cover the balls and let them rest for 15 minutes. On a floured surface, use your fingers or a rolling pin to flatten each ball into a circle about 1/2 inch (1cm) thick.

6. Cooking Heat a non-stick skillet or cast-iron pan over medium heat (no oil needed in the pan).

  • Place one flatbread in the pan.

  • Wait for small bubbles to appear on the surface (about 1 minute), then flip.

  • Flip every 30 seconds. This frequent flipping encourages the bread to steam internally and puff up like a balloon.

  • Cook until both sides have beautiful golden-brown “leopard spots.”


Quick Tips for Success

  • The Steam Factor: If your bread isn’t puffing up, your heat might be too low, or there might be a small tear in the dough letting steam escape.

  • Serving: Brush them with melted butter and chopped parsley immediately after taking them off the heat for that authentic “village” taste.

Homemade Oat and Chia Bread

Homemade Oat and Chia Bread

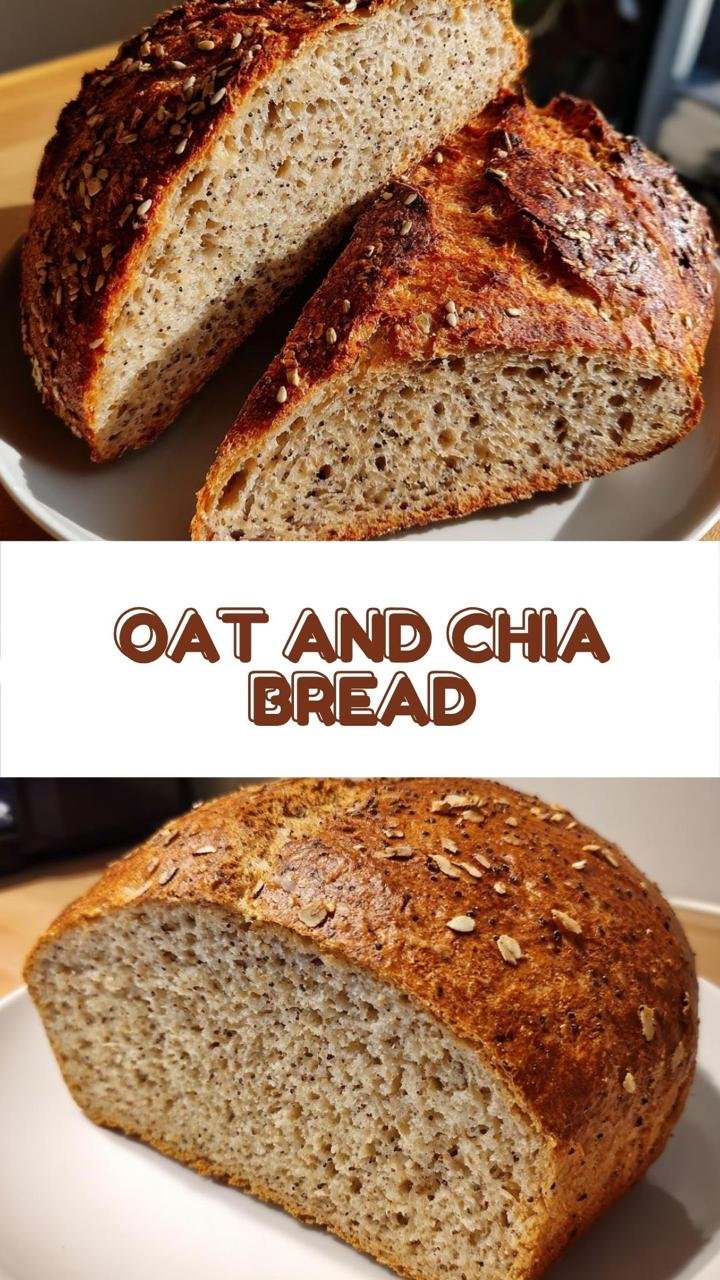
This hearty loaf is perfect for those who love a rustic, seed-heavy bread. It is incredibly satisfying, with a crunchy crust and a soft, nutrient-dense interior.

Ingredients

  • 3 cups Bread flour (or all-purpose flour)

  • 1 cup Rolled oats (plus extra for topping)

  • 3 tbsp Chia seeds

  • 1 packet (2 ¼ tsp) Active dry yeast

  • 1 ½ tsp Sea salt

  • 1 tbsp Honey or maple syrup

  • 1 ¼ cups Warm water (about 110°F)

  • 2 tbsp Olive oil


Detailed Instructions

  1. Activate the Yeast: In a small bowl, combine the warm water, honey, and yeast. Let it sit for 5–10 minutes until it becomes foamy on top.

  2. Mix Dry Ingredients: In a large mixing bowl, whisk together the flour, oats, chia seeds, and salt.

  3. Form the Dough: Pour the yeast mixture and olive oil into the dry ingredients. Stir until a shaggy dough forms.

  4. Knead: Turn the dough onto a floured surface and knead for about 8–10 minutes until smooth and elastic. (Alternatively, use a stand mixer with a dough hook for 5–7 minutes).

  5. First Rise: Place the dough in a lightly greased bowl, cover with a damp cloth, and let it rise in a warm, draft-free spot for 1 to 1.5 hours, or until it has doubled in size.

  6. Shape: Gently punch down the dough and shape it into a round boule or a traditional loaf. Brush the top lightly with water and sprinkle with extra oats and chia seeds.

  7. Second Rise: Place the shaped dough on a baking sheet or in a loaf pan. Cover and let rise again for 30–45 minutes.

  8. Bake: Preheat your oven to 375°F (190°C). Bake for 30–35 minutes, or until the crust is golden brown and the loaf sounds hollow when tapped on the bottom.

  9. Cool: Transfer to a wire rack and let the bread cool completely before slicing to ensure the interior sets properly.