Savory Green Onion & Egg Casserole

Savory Green Onion & Egg Casserole

Prep time: 15 mins | Bake time: 30-35 mins | Servings: 4-6

Ingredients

For the Filling (Inside):

  • 4 Hard-boiled eggs, chopped

  • 150g Green onions, finely chopped

  • 100g Cheese (Mozzarella or Cheddar), grated

  • 1 tbsp Greek yogurt

  • Salt, to taste

For the Batter (Pour-over):

  • 3 Raw eggs

  • 1 cup Greek yogurt or Sour cream

  • ½ cup Mayonnaise (optional, for extra richness)

  • 1 ½ cups All-purpose flour

  • 1 tsp Baking powder

  • Pinch of Salt

  • Sesame seeds (for topping)


Step-by-Step Instructions

1. Prepare the Filling

  • In a medium bowl, combine the 4 chopped hard-boiled eggs, the 150g of chopped green onions, and the 100g of grated cheese.

  • Stir in 1 tablespoon of Greek yogurt and salt. This yogurt acts as a binder to keep the filling moist.

2. Make the Batter

  • In a separate large bowl, whisk together the 3 raw eggs and the 1 cup of Greek yogurt (and mayonnaise if using).

  • Gradually sift in the flour, baking powder, and a pinch of salt. Whisk until you have a smooth, thick batter that is pourable but not watery.

3. Layer the Casserole

  • Preheat your oven to 180°C (350°F). Grease a glass baking dish (roughly 8×8 or 9×9 inch) with butter or oil.

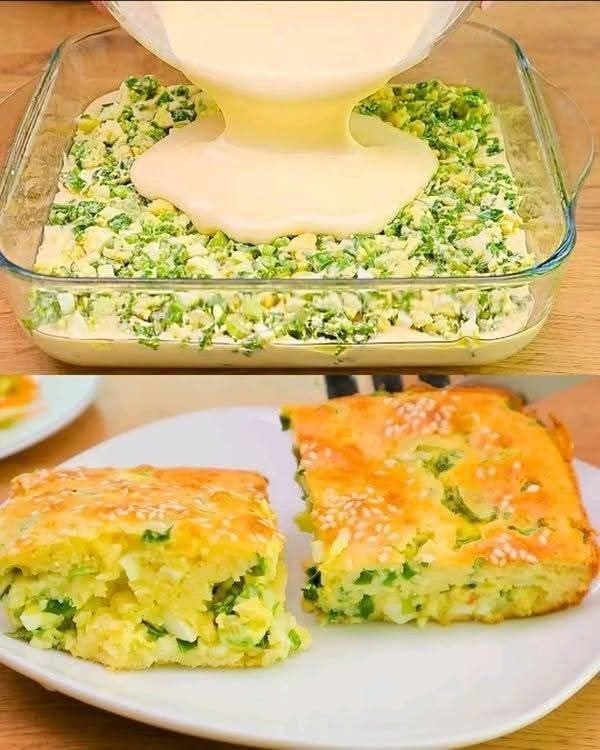
  • Pour half of your batter into the bottom of the dish and spread it evenly.

  • Spread the green onion and egg filling mixture in an even layer over the batter.

  • Pour the remaining half of the batter over the filling, ensuring all the green onions are covered.

4. Add the Finishing Touch

  • Sprinkle a generous amount of sesame seeds over the top of the batter. This provides the crunch and visual detail seen in your photo.

5. Bake

  • Place in the oven and bake for 30–35 minutes.

  • The casserole is done when the top is a deep golden brown and a toothpick inserted into the center comes out clean.

6. Serve

  • Allow it to cool for about 10 minutes before slicing into squares. This ensures the layers stay intact when served.


Tips for Success

  • Don’t Overbake: Keep an eye on the edges; you want them golden, not dark brown, to maintain that “melt-in-your-mouth” texture.

  • Cheese Choice: Using a cheese with good melting properties, like Gruyère or a mild white Cheddar, will improve the flavor of the center.
Healthy Oat Pancakes in 5 Minutes (No Sugar, No Flour)

Healthy Oat Pancakes in 5 Minutes (No Sugar, No Flour)

Soft, naturally sweet, and packed with protein and fiber, these healthy oat pancakes come together in minutes using simple pantry ingredients. No refined sugar, no flour — just wholesome goodness that keeps you full and energized.


Description

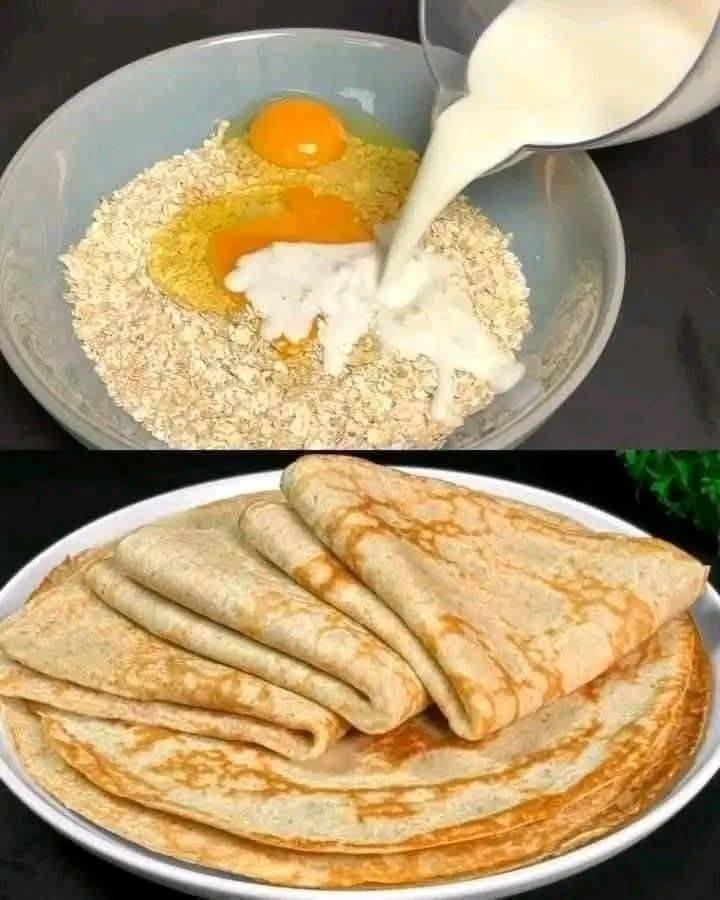
These oat pancakes are a nutritious alternative to traditional pancakes. Sweetened naturally with banana and made with oats instead of flour, they’re ideal for breakfast, post-workout meals, or a light dinner. The texture is tender and slightly nutty, similar to crepes or thin pancakes.


Ingredients

  • 1 ripe banana

  • 100 g Greek yogurt (plain, unsweetened)

  • 2 large eggs

  • 1 cup old-fashioned oats

  • A pinch of salt


Instructions

  1. Blend Batter
    Add banana, Greek yogurt, eggs, oats, and salt to a blender or food processor.
    Blend until smooth.

  2. Heat Pan
    Heat a non-stick pan over medium heat. Lightly grease if needed.

  3. Cook Pancakes
    Pour small ladles of batter into the pan.
    Cook 1–2 minutes per side until golden and set.

  4. Serve Warm
    Stack and enjoy immediately.


Tips for Best Results

  • Use a very ripe banana for natural sweetness

  • Let batter rest 1–2 minutes if too thick

  • Cook on medium-low heat to avoid burning

  • Blend oats fully for smoother pancakes

  • Works well as thin pancakes or crepes


Servings

  • Makes: 6–8 small pancakes

  • Serves: 2


Nutritional Information (Approx. per serving)

  • Calories: 220

  • Protein: 14 g

  • Carbohydrates: 26 g

  • Fiber: 4 g

  • Fat: 7 g

  • Sugar: 6 g (from banana only)

(Values may vary depending on yogurt brand)


Health Benefits

  • ✔ No refined sugar

  • ✔ No white flour

  • ✔ High in protein & fiber

  • ✔ Supports digestion

  • ✔ Keeps you full longer

  • ✔ Kid-friendly & diabetic-friendly (in moderation)


Q & A

Q: Can I make these without a blender?
A: Yes—use oat flour and mash the banana very well.

Q: Can I make them dairy-free?
A: Replace Greek yogurt with coconut or almond yogurt.

Q: Are these gluten-free?
A: Yes, if you use certified gluten-free oats.

Q: Can I store leftovers?
A: Refrigerate up to 3 days or freeze up to 2 months.

Q: What toppings go well with these?
A: Fresh berries, nut butter, honey, yogurt, or cinnamon.

Golden Crispy Cabbage Fritters

Golden Crispy Cabbage Fritters

Ingredients

  • 500 g Cabbage, finely shredded

  • 2 Onions, finely chopped

  • 3 Cloves of garlic, minced

  • 3 Eggs

  • 4 Tablespoons (60 g) All-purpose flour

  • Salt and black pepper to taste

  • Optional: 1/2 tsp paprika or chopped fresh parsley for extra color

  • Oil for frying (vegetable or sunflower oil works best)


Step-by-Step Instructions

1. Prep the Cabbage

Place your shredded cabbage in a large bowl. Sprinkle with a pinch of salt and massage it gently with your hands for about a minute. Let it sit for 10 minutes; this softens the cabbage and draws out excess moisture, ensuring your fritters aren’t soggy. Squeeze out any liquid before moving to the next step.

2. Create the Batter

Add the finely chopped onions and minced garlic to the cabbage. In a separate small bowl, lightly whisk the 3 eggs and pour them over the vegetables. Stir until the cabbage is well-coated.

3. Bind with Flour

Sprinkle the flour over the mixture. Add your salt, pepper, and any optional spices. Mix thoroughly until you have a thick, consistent batter. The flour and eggs act as the “glue” to hold the fritters together.

4. Heat the Pan

Pour enough oil into a large skillet to thinly coat the bottom. Heat over medium heat. To test if it’s ready, drop a tiny bit of batter into the pan; if it sizzles immediately, you’re ready to go.

5. Fry to Perfection

Using a large spoon, scoop the mixture into the pan, pressing down slightly with the back of the spoon to form a flat patty.

  • Fry for 3–4 minutes on the first side until deep golden brown.

  • Flip carefully and fry for another 3 minutes on the other side.

  • Note: Keep the heat at medium so the cabbage inside cooks through before the outside gets too dark.

6. Drain and Serve

Place the finished fritters on a plate lined with paper towels to remove any excess oil. This keeps them extra crispy!


Serving Suggestion

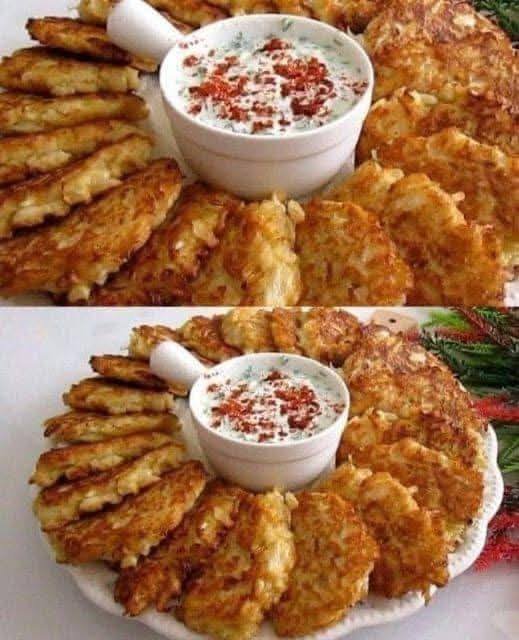
As seen in your second photo, these are incredible when served with a creamy yogurt or sour cream dip. Simply mix plain yogurt with a little lemon juice, dried herbs, and a pinch of chili flakes or paprika on top.

Zesty Lemon Butter Fish Fillets

Zesty Lemon Butter Fish Fillets

This recipe features tender white fish with a golden, seasoned crust and a bright, buttery citrus finish.

Ingredients

Category Ingredients
The Fish 4-6 White Fish Fillets (such as Cod, Tilapia, or Halibut)
The Seasoning 1 tsp Paprika, ½ tsp Garlic Powder, ½ tsp Onion Powder, Salt and Black Pepper to taste
The Zest & Butter 4 tbsp Unsalted Butter (melted), 2 tbsp Fresh Lemon Juice, 1 tsp Lemon Zest
The Garnish Fresh Parsley (finely chopped), Lemon slices for serving

Step-by-Step Instructions

1. Prepare the Fillets

Pat the fish fillets thoroughly dry with a paper towel. This is the most important step for achieving that beautiful golden-brown sear you see in the photo.

2. Season Generously

In a small bowl, mix the paprika, garlic powder, onion powder, salt, and pepper. Sprinkle this spice blend evenly over both sides of each fillet, pressing it slightly so it sticks.

3. Whisk the Lemon Butter

In another small bowl, combine the melted butter, fresh lemon juice, and lemon zest. Whisk until well blended.

4. The Cooking Process (Choose your method):

  • Pan-Sear (Stovetop): Heat a drizzle of oil in a large skillet over medium-high heat. Add the fillets and cook for 3–4 minutes per side until the fish flakes easily with a fork. During the last 2 minutes of cooking, pour half of the lemon butter mixture over the fish to glaze it.

  • Bake (Oven): Preheat your oven to 200°C (400°F). Place fillets in a greased baking dish, drizzle the lemon butter mixture over them, and bake for 12–15 minutes until opaque and tender.

5. The Finishing Touch

Once cooked, pour any remaining lemon butter from the pan over the fillets. Garnish with a generous sprinkle of fresh parsley and serve with extra lemon wedges on the side.


Serving Suggestions

  • Pairing: This fish pairs beautifully with the Rainbow Garden Vegetable Soup you’ve been making, providing a high-protein centerpiece to your meal.

  • Side: Serve alongside steamed asparagus or over a bed of fluffy quinoa to soak up that delicious lemon butter sauce.

Creamy Cheesy Chicken Bake (10-Minute Prep)

Creamy Cheesy Chicken Bake (10-Minute Prep)

🛒 Ingredients

  • 2 cups cooked chicken (shredded or chopped)

  • 1 cup cooked rice (white or brown)

  • 1 cup mayonnaise

  • 1 cup sour cream or fresh cream

  • 1½ cups shredded cheese (mozzarella + cheddar mix is best)

  • 1 teaspoon garlic powder

  • ½ teaspoon black pepper

  • ½ teaspoon salt (or to taste)

  • 1 teaspoon dried herbs (dill, parsley, or oregano)

  • 1 tablespoon butter (for greasing dish)


👩‍🍳 Step-by-Step Instructions

🔹 Step 1: Preheat Oven

Preheat your oven to 180°C (350°F).


🔹 Step 2: Grease Baking Dish

Take a loaf pan or small baking dish.
Grease it with butter so food does not stick.


🔹 Step 3: Prepare the Mixture

In a large bowl, add:

  • Cooked chicken

  • Cooked rice

  • Mayonnaise

  • Sour cream

  • Garlic powder

  • Salt

  • Black pepper

  • Herbs

Mix everything well until smooth and creamy.


🔹 Step 4: Add Cheese

Add 1 cup of shredded cheese into the mixture.
Mix again so cheese spreads evenly.


🔹 Step 5: Transfer to Dish

Pour the mixture into the greased baking dish.
Press gently so it is level.


🔹 Step 6: Top with Cheese

Sprinkle the remaining ½ cup cheese on top.

Add a little extra herbs if you like.


🔹 Step 7: Bake

Place in oven and bake for 25–30 minutes
Until:
✔ Top is golden
✔ Cheese is melted
✔ Edges look lightly crisp


🔹 Step 8: Rest & Serve

Remove from oven.
Let it rest 5 minutes before cutting.

Serve warm with:

  • Salad

  • Garlic bread

  • Or plain as it is


💡 Tips

  • You can replace chicken with tuna or vegetables.

  • You can use yogurt instead of sour cream.

  • Add sweet corn or mushrooms if you want more texture.


⏱ Time

Prep: 10 minutes
Bake: 25 minutes
Total: 35 minutes

Savory Cheese & Herb Pull-Apart Bread

Savory Cheese & Herb Pull-Apart Bread

 Description

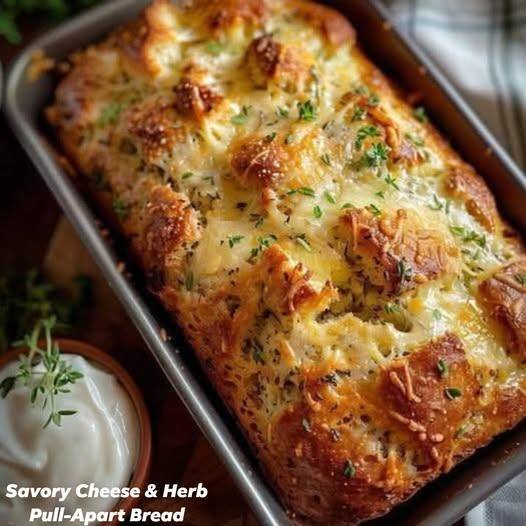
Savory Cheese & Herb Pull-Apart Bread is a warm, buttery, crowd-pleasing appetizer made from a crusty loaf sliced in a crosshatch pattern, filled with garlic herb butter and generous amounts of melted cheese. As it bakes, the cheese melts deep into the crevices while the crust turns golden and crisp. Each piece pulls apart easily, making it perfect for sharing at gatherings, holidays, or cozy family dinners.

Ingredients

For the Bread:

  • 1 large round or oval crusty loaf (sourdough or Italian bread)

  • ½ cup (1 stick) unsalted butter, melted

  • 3 cloves garlic, minced

  • 1 tbsp fresh parsley, finely chopped

  • 1 tsp fresh thyme (or ½ tsp dried)

  • 1 tsp fresh rosemary (or ½ tsp dried)

  • 2 cups shredded mozzarella cheese

  • ½ cup freshly grated Parmesan cheese

  • ½ tsp salt

  • ¼ tsp black pepper

Optional Add-Ins:

  • ½ tsp red pepper flakes (for heat)

  • ½ cup shredded cheddar, provolone, or Gruyère

  • 1 tbsp olive oil (for extra richness)

 Instructions

1️⃣ Preheat

Preheat oven to 375°F (190°C). Line a baking sheet with foil.

2️⃣ Slice the Bread

Using a serrated knife, cut the bread diagonally in one direction, then repeat in the opposite direction to create a crosshatch pattern.
Do not cut all the way through — leave about ½ inch at the bottom intact.

3️⃣ Make the Herb Butter

In a bowl, mix melted butter, garlic, parsley, thyme, rosemary, salt, and pepper.

4️⃣ Fill the Bread

Gently open the cuts and drizzle the herb butter evenly throughout the bread.
Stuff mozzarella and Parmesan into all the crevices.

5️⃣ Bake

Wrap loosely in foil and bake for 15 minutes.
Unwrap and bake an additional 10–15 minutes until cheese is melted and golden.

6️⃣ Serve

Garnish with extra herbs and serve immediately while warm and gooey.

 Servings

  • Serves: 6–8 people

  • Prep Time: 10 minutes

  • Cook Time: 25–30 minutes

  • Total Time: ~40 minutes

 Tips for Best Results

  • ✔ Use day-old bread for better structure.

  • ✔ Don’t overcut the loaf — keep the base intact.

  • ✔ For extra crispiness, broil for 1–2 minutes at the end (watch closely).

  • ✔ Let rest 5 minutes before serving to prevent cheese from sliding out.

  • ✔ Add cooked bacon bits for a heartier version.

 Nutritional Information (Approximate per serving, based on 8 servings)

  • Calories: 320–380 kcal

  • Protein: 12g

  • Carbohydrates: 28g

  • Fat: 20g

  • Saturated Fat: 11g

  • Fiber: 1g

  • Sodium: 450–550mg

Values vary depending on bread and cheese used.

 Benefits of This Recipe

  • ✔ Great for entertaining and sharing

  • ✔ Customizable with different cheeses and herbs

  • ✔ Quick and easy to prepare

  • ✔ Comfort food that pairs well with soups, pasta, and salads

  • ✔ Can be adapted to vegetarian-friendly diets

Q & A

Q: Can I make this ahead of time?
A: Yes! Assemble the bread, wrap tightly, and refrigerate up to 24 hours. Bake when ready.

Q: Can I freeze it?
A: You can freeze it unbaked. Wrap tightly and freeze up to 1 month. Bake from frozen, adding 10–15 extra minutes.

Q: What’s the best cheese combination?
A: Mozzarella for melt + Parmesan for flavor is classic. Add Gruyère for richness.

Q: How do I reheat leftovers?
A: Wrap in foil and reheat at 350°F for 10–15 minutes.

Q: Can I make it dairy-free?
A: Yes, use plant-based butter and dairy-free shredded cheese alternatives.