Spicy Carrot & Vegetable Salad for Jars

Spicy Carrot & Vegetable Salad for Jars

Table of Contents

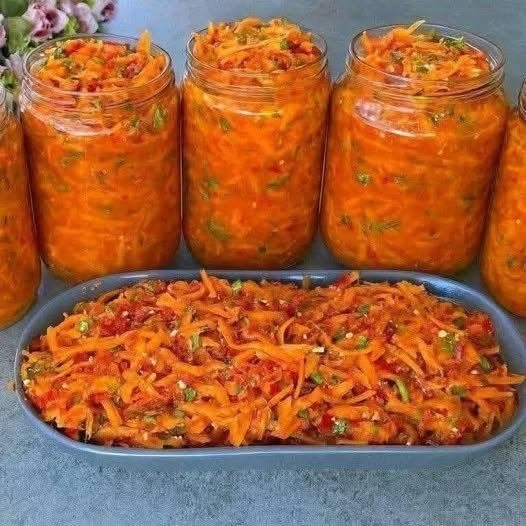
This Spicy Carrot & Vegetable Salad is a vibrant, tangy, and lightly sweet preserve that’s perfect for storing in jars and enjoying year-round. Inspired by Eastern European-style vegetable salads, it combines tender carrots, peppers, onions, and tomatoes with warm spices and vinegar for a bold, balanced flavor. Serve it as a side dish, sandwich topping, or quick appetizer straight from the jar.

INGREDIENTS (Makes 4–5 jars, 500 ml each)

  • 2 kg carrots, grated or julienned

  • 500 g onions, thinly sliced

  • 500 g bell peppers, thinly sliced

  • 1 kg tomatoes, grated or finely chopped (or 700 ml tomato purée)

  • 2–3 heads garlic, minced

  • 250 ml vegetable oil

  • 150 g sugar

  • 2 tablespoons salt (adjust to taste)

  • 80–100 ml vinegar (9%)

  • 1 teaspoon ground black pepper

  • 1–2 teaspoons chili flakes or hot pepper (optional)

  • 1 tablespoon paprika

  • 1 bunch fresh parsley or dill, finely chopped

INSTRUCTIONS

1. Prepare the Vegetables

Wash and peel the carrots, then grate them using a coarse or julienne grater. Slice the onions and bell peppers thinly so they soften evenly while cooking. Grate or finely chop the tomatoes and mince the garlic. Keep everything ready before cooking.

2. Cook the Base

In a large, heavy-bottomed pot, heat the vegetable oil over medium heat. Add the sliced onions and sauté until soft and lightly golden. Stir in the bell peppers and cook for about 5 minutes, allowing them to soften. Add the tomatoes and simmer for 10 minutes until the mixture thickens slightly and becomes fragrant.

See also  Garlic Herb Compound Butter

3. Add the Carrots

Stir in the grated carrots along with salt, sugar, black pepper, paprika, and chili flakes if using. Reduce heat to medium-low and cook for 25–30 minutes, stirring frequently to prevent sticking. The vegetables should become tender but not mushy.

4. Finish the Salad

Add the minced garlic and vinegar, then cook for an additional 5 minutes. Stir in the fresh herbs and remove from heat.

5. Jar and Store

Pack the hot salad into sterilized jars and seal tightly. For longer storage, sterilize the filled jars in boiling water for 10–15 minutes. Allow to cool completely and store in a cool, dark place. The salad is ready after 3–5 days and tastes even better after one week.
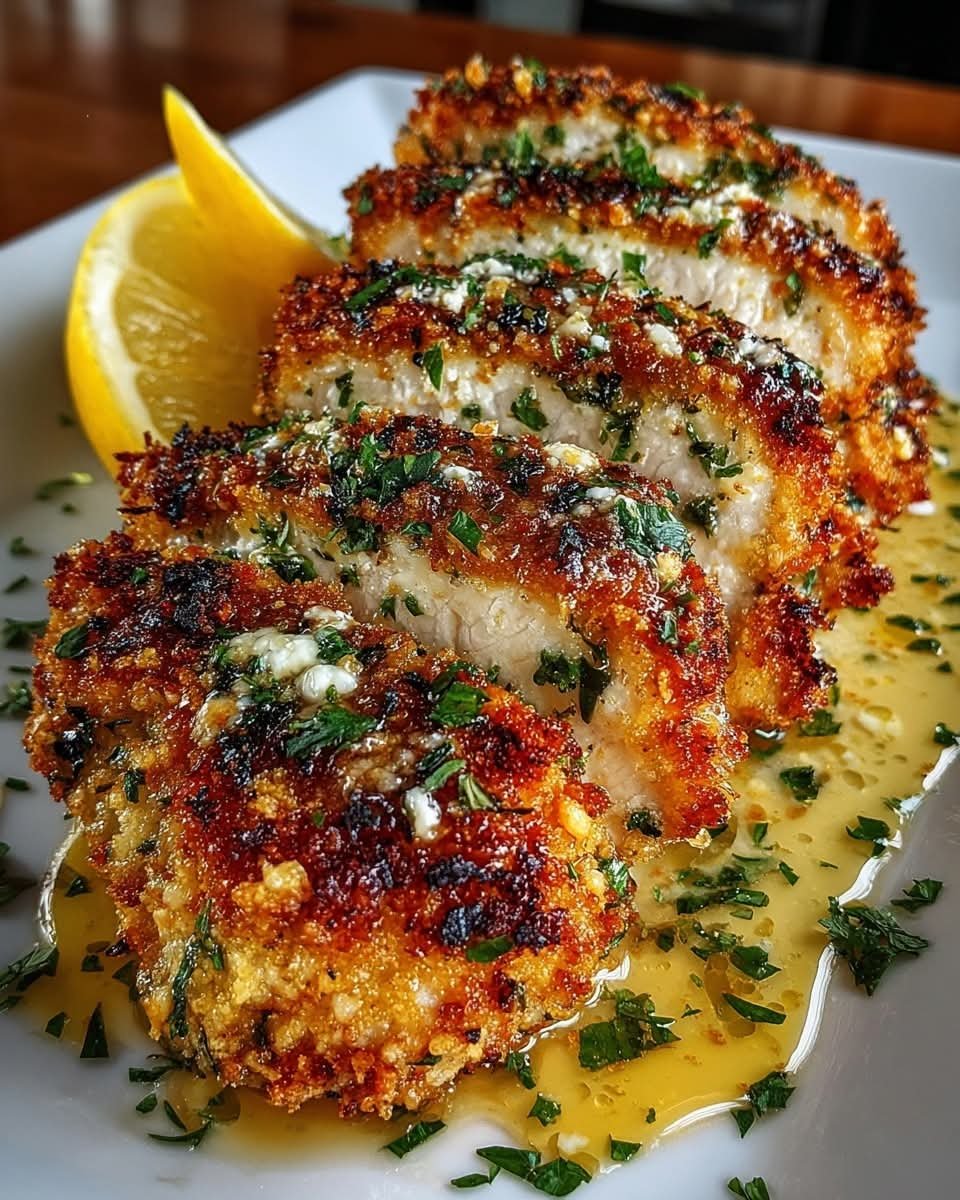
Spicy Crispy Hot Honey Lemon Feta Chicken with Parmesan Herb Crust

Spicy Crispy Hot Honey Lemon Feta Chicken with Parmesan Herb Crust

Ingredients

For the Chicken

  • 4 boneless, skinless chicken breasts
  • 1 teaspoon salt
  • 1 teaspoon black pepper
  • 1 teaspoon smoked paprika
  • 1 teaspoon garlic powder
  • ½ teaspoon crushed red pepper flakes
  • Zest of 1 lemon

For the Parmesan Herb Crust

  • 1 cup panko breadcrumbs
  • ½ cup freshly grated Parmesan cheese
  • 1 tablespoon chopped fresh parsley
  • 1 teaspoon dried oregano
  • ½ teaspoon dried thyme
  • 2 tablespoons olive oil

For the Hot Honey Lemon Feta Sauce

  • ½ cup crumbled feta cheese
  • ⅓ cup plain Greek yogurt
  • 2 tablespoons hot honey
  • 1 tablespoon fresh lemon juice
  • 1 teaspoon lemon zest
  • 1 small garlic clove, minced
  • 1–2 tablespoons warm water (to thin if needed)

Optional Garnish

  • Extra hot honey drizzle
  • Fresh chopped parsley
  • Lemon wedges

Directions

Step 1: Prepare the Chicken

Preheat your oven to 400°F (200°C). Line a baking sheet with parchment paper.

Pat the chicken breasts dry with paper towels.

Season both sides with salt, black pepper, smoked paprika, garlic powder, crushed red pepper flakes, and lemon zest.

Step 2: Make the Parmesan Herb Crust

In a bowl, combine panko breadcrumbs, Parmesan cheese, parsley, oregano, thyme, and olive oil.

Mix until the breadcrumbs are evenly coated and slightly moist.

Step 3: Coat the Chicken

Lightly brush each chicken breast with olive oil.

Press the Parmesan herb crust mixture firmly onto the top of each chicken breast, creating a thick coating.

Step 4: Bake Until Crispy

Place the coated chicken on the prepared baking sheet.

Bake for 22–28 minutes, or until the internal temperature reaches 165°F (74°C) and the crust is golden brown and crispy.

For extra crispiness, broil for 2–3 minutes at the end. Watch carefully to prevent burning.

Step 5: Prepare the Hot Honey Lemon Feta Sauce

In a small bowl, whisk together feta cheese, Greek yogurt, hot honey, lemon juice, lemon zest, and minced garlic.

Add warm water a tablespoon at a time until the sauce reaches a creamy, drizzle-able consistency.

Step 6: Assemble and Serve

Let the chicken rest for 5 minutes after baking.

Spoon or drizzle the hot honey lemon feta sauce over the crispy chicken.

Garnish with extra hot honey, chopped parsley, and fresh lemon wedges.

Serve with roasted vegetables, lemon rice, or a fresh Mediterranean salad for a complete meal.

Nutritional Information (Per Serving – Approximate)

Calories: 520 kcal

Protein: 48 g

Carbohydrates: 24 g

Fat: 26 g

Saturated Fat: 9 g

Fiber: 1 g

Sugar: 6 g

Sodium: 720 mg

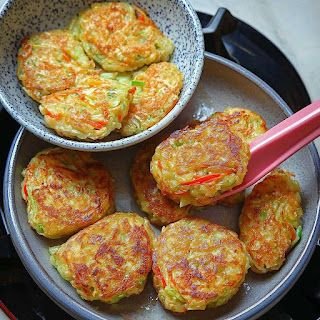
🍳 ‘Crispy Heaven’ Cabbage & Egg Fritters

🍳 ‘Crispy Heaven’ Cabbage & Egg Fritters

This 3-ingredient base is incredibly versatile and creates a snack that is golden and crispy on the outside while remaining tender inside.

Ingredients

  • Cabbage: 1/2 medium head, shredded thinly (about 4–5 cups).

  • Eggs: 3–4 large eggs, well-beaten.

  • Seasoning: Salt and black pepper to taste.

  • Optional: 1/2 cup flour (all-purpose or rice flour) for extra structure, or a pinch of garlic powder.

Instructions

  1. Prepare the Cabbage: Place the finely shredded cabbage in a large bowl.

  2. Mix: Pour the beaten eggs over the cabbage. Add your salt, pepper, and optional flour or spices. Mix thoroughly until the cabbage is completely coated.

  3. Heat the Pan: Heat 1–2 tablespoons of oil in a non-stick skillet over medium heat.

  4. Fry: Scoop the mixture into the pan to form small patties. Flatten them slightly with a spatula.

  5. Golden Finish: Cook for 3–5 minutes per side until they are deep golden brown and the eggs are fully set.

  6. Serve: Enjoy them hot as a snack or a light side dish.


🍓 Strawberry Wendy Frosty (Low Carb)

A creamy, bariatric-friendly treat that hits the spot without the extra carbs.

Ingredients

  • Yogurt: 1/2 cup Greek yogurt.

  • Cottage Cheese: 1/4 cup cottage cheese (for creaminess and protein).

  • Fruit: 1/2 cup frozen strawberries.

  • Protein: 1 scoop vanilla or strawberry protein powder.

  • Flavor: 1–2 tsp sugar-free strawberry syrup.

  • Texture: A few ice cubes.

Instructions

  1. Blend: Combine the yogurt, cottage cheese, strawberries, protein powder, and syrup in a blender. Process until smooth.

  2. Ice it up: Add ice cubes and blend again to achieve the thick, iconic Frosty texture.

  3. Garnish: Pour into a glass and top with zero-sugar whipped cream if desired.

Best Steak Marinade in Existence.

Ingredients

  • $1/2$ cup Soy Sauce

  • $1/4$ cup Olive Oil

  • $1/4$ cup Worcestershire Sauce

  • $2$ tablespoons Brown Sugar

  • $2 tablespoons Lemon Juice

  • $1$ tablespoon Dijon Mustard

  • $1$ teaspoon Garlic Powder

  • $1$ teaspoon Onion Powder

  • $1/2$ teaspoon Black Pepper

  • $1/2$ teaspoon Paprika


Instructions

  1. Whisk the Marinade: In a medium bowl or glass measuring cup, whisk together all the ingredients until the brown sugar is dissolved and the mustard is fully incorporated.

  2. Prep the Meat: Place your steaks (ribeye, strip, or flank work great) in a large resealable gallon bag or a shallow glass dish.

  3. Marinate: Pour the mixture over the steaks, ensuring they are completely coated. Seal the bag tightly, removing as much air as possible.

  4. Chill: Place in the refrigerator. For the best flavor, marinate for at least 2 hours, though 6 to 8 hours is ideal for maximum tenderness.

  5. Cook: Remove the steaks from the marinade (discard the leftover liquid) and grill or pan-sear to your desired doneness.

Ham and Cheese Sticks

Ingredients:

2 tubes crescent dough sheets

1 lb. deli-sliced ham

8 cheddar cheese sticks

¼ cup butter, melted 1 tsp Worcestershire sauce

½ Tbsp Dijon mustard

½ Tbsp dried minced onion or onion powder

½ Tbsp poppy seeds

Instructions:

Preheat oven to 350°F (175°C). Prepare a baking sheet by greasing it or lining it with parchment paper. Prepare the Dough: Roll out your crescent dough sheets and cut each one into 4 pieces, resulting in 8 pieces total. Assemble: Distribute the ham evenly among the 8 pieces of dough. Place a cheddar cheese stick on top of the ham on each piece. Fold in the ends of each piece and then roll to seal. Arrange: Place the prepared sticks on the prepared baking sheet. Make the Glaze: In a small bowl, mix together melted butter, Worcestershire sauce, Dijon mustard, onion, and poppy seeds. Glaze: Brush the butter mixture over each stick. Bake: Place in the oven for 12-15 minutes or until they turn golden brown. Serve: Enjoy your Ham and Cheese Sticks hot and fresh from the oven! Prep Time: 10 minutes | Cook Time: 15 minutes | Total Time: 25 minutes Servings: 8

Enjoy!

Keto Cheesy “No-Flour” Bread

Keto Cheesy “No-Flour” Bread

This recipe uses a base of eggs and cheese to create structure without any grains.

Ingredients

  • 2 cups Shredded Mozzarella cheese (low moisture is best)

  • 1 cup Shredded Sharp Cheddar cheese

  • 3 Large eggs

  • 1/2 cup Grated Parmesan cheese

  • 1 tsp Garlic powder (optional, for flavor)

  • 1 tsp Italian seasoning (optional)

  • 1/2 tsp Baking powder (helps with the “lift”)


Step-by-Step Instructions

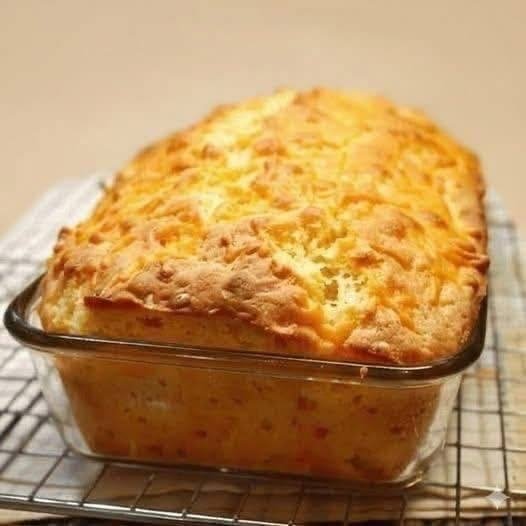
  1. Preheat and Prep: Preheat your oven to 350°F (175°C). Grease a standard glass loaf pan (like the one in the picture) thoroughly with butter or a non-stick cooking spray.

  2. Mix the Base: In a large mixing bowl, combine the shredded mozzarella, cheddar, and grated parmesan. Toss them together so the different cheeses are evenly distributed.

  3. Whisk the Eggs: In a separate small bowl, beat the 3 eggs vigorously until they are frothy. This air helps the bread rise since there is no yeast or flour.

  4. Combine: Pour the beaten eggs over the cheese mixture. Add the baking powder, garlic powder, and herbs. Stir everything together until the cheese is completely coated in egg and it forms a thick, chunky “dough.”

  5. Transfer: Press the mixture into your prepared glass loaf pan. Use a spatula to level the top, but don’t pack it down too tightly—you want some air pockets for texture.

  6. Bake: Place the pan on the center rack and bake for 30–35 minutes. You are looking for the top to be deeply golden brown and the edges to be pulling away slightly from the glass.

  7. The “Dry Out” Phase: This is the most important part for the texture! Turn off the oven and crack the door open, letting the bread sit inside for another 5–10 minutes. This helps the moisture evaporate so it isn’t “spongy.”

  8. Cooling: Remove from the oven and let it cool in the pan for at least 15 minutes before slicing. This allows the cheese to firm up so the loaf holds its shape.


Pro-Tips

  • The “Crunch”: For an extra crispy crust like the photo, sprinkle a little extra cheddar on top 10 minutes before the baking time is up.

  • Storage: Since this is primarily made of eggs and cheese, store any leftovers in the refrigerator for up to 5 days. It toasts up beautifully in a pan or toaster oven!