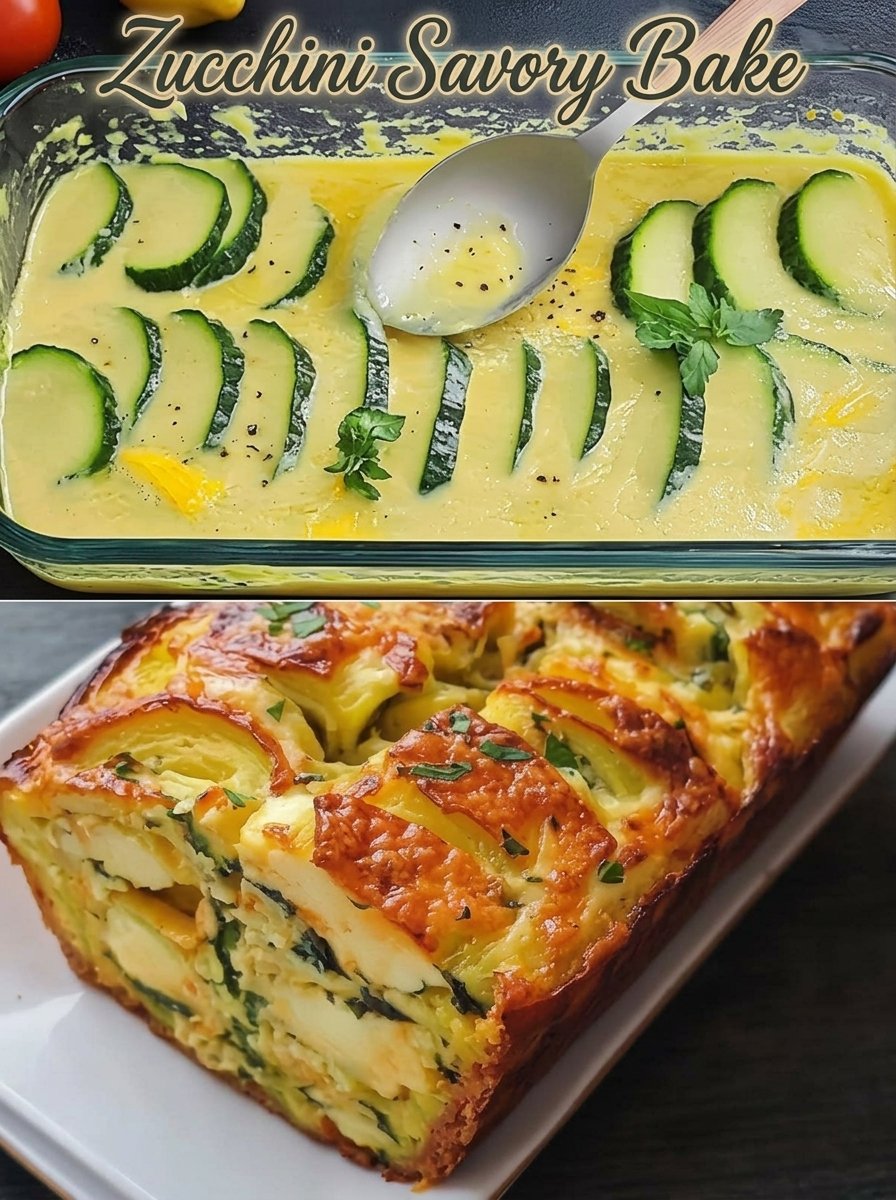
Zucchini Savory Bake (Soft & Cheesy Delight)

Zucchini Savory Bake (Soft & Cheesy Delight)


🛒 Ingredients

➡️ 2 zucchini (sliced)
➡️ Olive oil (for sautéing)
➡️ Salt & black pepper (to taste)
➡️ 4 eggs
➡️ 1 tsp sugar
➡️ 60 ml oil
➡️ 100 ml milk
➡️ 120 g flour
➡️ 11 g baking powder
➡️ 1 medium potato (grated)
➡️ 1 onion (finely chopped)
➡️ 2 tbsp grated Parmesan cheese
➡️ Fresh spreadable cheese (cream cheese or ricotta)
➡️ Extra Parmesan (for topping)


👩‍🍳 Step-by-Step Recipe

🔹 Step 1: Prepare Vegetables

➡️ Slice zucchini into thin rounds 🥒
➡️ Grate the potato and lightly squeeze out extra moisture
➡️ Finely chop the onion


🔹 Step 2: Sauté Zucchini

➡️ Heat a little olive oil in a pan
➡️ Add zucchini slices
➡️ Sprinkle salt & black pepper
➡️ Cook for 4–5 minutes until slightly soft and lightly golden ✨
➡️ Set aside to cool


🔹 Step 3: Prepare Batter

➡️ In a large bowl, crack 4 eggs 🥚
➡️ Add sugar and whisk well
➡️ Pour in oil and milk 🥛
➡️ Mix until smooth


🔹 Step 4: Add Dry Ingredients

➡️ Add flour and baking powder
➡️ Mix gently until you get a smooth batter (no lumps)


🔹 Step 5: Combine Everything

➡️ Add sautéed zucchini
➡️ Add grated potato and chopped onion
➡️ Mix everything well 🥄
➡️ Add grated Parmesan cheese 🧀


🔹 Step 6: Assemble

➡️ Grease a baking dish with oil
➡️ Pour half of the mixture
➡️ Spread a layer of fresh spreadable cheese
➡️ Pour the remaining mixture on top


🔹 Step 7: Final Touch

➡️ Sprinkle extra Parmesan on top 🧀✨


🔹 Step 8: Bake

➡️ Bake in a preheated oven at 180°C (350°F)
➡️ Bake for 35–40 minutes until golden and set
➡️ Let it cool slightly before slicing 😊


💡 Pro Tips

✨ Squeeze excess water from zucchini for better texture
✨ Add herbs like parsley for extra flavor 🌿
✨ Serve warm for best taste


❓ Q & A

Q1: Can I skip potato?
➡️ Yes, but potato makes it softer and more filling

Q2: Can I use another cheese?
➡️ Yes! Mozzarella or cheddar works great 🧀

Q3: How do I store it?
➡️ Keep in the fridge for up to 2 days 🧊

Q4: Can I make it without oven?
➡️ Yes! Cook in a covered pan on low heat like a thick pancake 🍳

Q5: How do I know it’s done?
➡️ The top turns golden and a toothpick comes out clean ✅
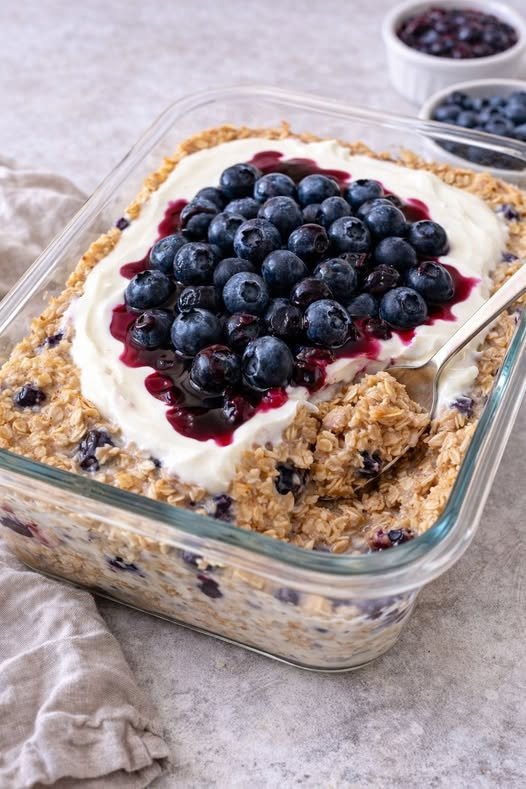
Blueberry Yogurt Baked Oatmeal (Creamy, Wholesome & Easy)

This cozy baked oatmeal is the perfect blend of creamy yogurt, hearty oats, and naturally sweet blueberries. It’s warm, comforting, and nourishing—ideal for breakfast, meal prep, or even a light dessert. The soft, custard-like texture paired with juicy berries makes every bite feel indulgent, while still being a balanced and healthy choice. Whether you’re feeding your family or preparing meals ahead of time, this recipe is simple, flexible, and always satisfying.

Ingredients
2 cups rolled oats
1 1/2 cups milk (dairy or plant-based)
1 cup Greek yogurt (or regular yogurt)
2 tablespoons honey or maple syrup
1 teaspoon vanilla extract
1/2 teaspoon cinnamon
1/2 teaspoon baking powder
Pinch of salt
1 cup fresh or frozen blueberries 🫐
Optional: 1 egg (for extra structure)

Instructions
Start by preheating your oven to 350°F (175°C) and lightly greasing a medium-sized baking dish. This ensures your oatmeal doesn’t stick and gives you clean slices when serving.

In a large mixing bowl, combine the rolled oats, baking powder, cinnamon, and a pinch of salt. Stir these dry ingredients together so the spices and leavening agent are evenly distributed.

In a separate bowl, whisk together the milk, yogurt, honey (or maple syrup), vanilla extract, and the egg if you’re using it. The yogurt adds a rich creaminess and slight tang that balances the sweetness beautifully.

Pour the wet mixture into the bowl of dry ingredients and mix until everything is fully combined. The oats will start to absorb the liquid, creating a thick, pourable batter. Gently fold in half of the blueberries, ensuring they are evenly spread throughout the mixture.

Transfer the mixture into your prepared baking dish and smooth out the top using a spatula. Sprinkle the remaining blueberries on top—this not only adds flavor but also gives the dish a beautiful, bakery-style finish.

Bake in the preheated oven for 30–35 minutes, or until the center is set and the edges turn lightly golden. You’ll know it’s ready when it feels firm to the touch and a knife inserted in the center comes out mostly clean.

Once baked, remove it from the oven and allow it to cool for a few minutes. For an extra creamy and visually appealing touch, spread a layer of yogurt on top and add a spoonful of blueberry compote or fresh berries before serving.

Serving Suggestions
Serve warm for a comforting breakfast, or enjoy it chilled straight from the fridge. It pairs wonderfully with a drizzle of honey, a sprinkle of granola, or even a handful of nuts for added crunch.

Tips & Variations
This recipe is highly customizable. Swap blueberries for strawberries, raspberries, or chopped apples depending on what you have on hand. If you prefer a sweeter taste, simply increase the amount of honey or maple syrup. For a richer texture, use full-fat yogurt. You can also add nuts, seeds, or chocolate chips for extra flavor and texture.

If you like a softer, more pudding-like consistency, add a little extra milk. Want to save time in the morning? Prepare everything the night before, cover, and refrigerate. In the morning, just bake and enjoy fresh.

Storage
Store leftovers in an airtight container in the refrigerator for up to 3 days. Reheat in the microwave or oven before serving. You can also freeze individual portions and thaw overnight for a quick, ready-to-eat meal.

Nutritional Benefits
This baked oatmeal is rich in fiber from oats, antioxidants from blueberries, and protein from yogurt. It helps support digestion, provides steady energy, and keeps you feeling full longer—making it a smart and delicious way to start your day.

Twice-Baked Loaded Potatoes

🥔 Twice-Baked Loaded Potatoes

Ingredients

  • 4 Large Russet Potatoes

  • 1/2 cup Sour Cream

  • 1/4 cup Milk

  • 4 tbsp Butter (softened)

  • 1 1/2 cups Shredded Sharp Cheddar Cheese (divided)

  • 6 strips Bacon (cooked until crispy and crumbled)

  • 2 tbsp Fresh Chives (finely chopped)

  • Salt & Black Pepper (to taste)


Step-by-Step Instructions

  1. Bake the Potatoes ➔ Preheat your oven to 200°C (400°F). Scrub the potatoes and pierce them a few times with a fork. ➔ Bake directly on the oven rack for 45–60 minutes until the skin is crisp and the insides are soft.

  2. Prep the Filling ➔ Once cool enough to handle, slice each potato in half lengthwise. ➔ Scoop out the warm centers into a medium bowl, leaving a thin shell of potato against the skin to maintain its shape.

  3. Mash and Mix ➔ Add butter, sour cream, and milk to the potato centers. ➔ Mash until smooth and creamy. ➔ Fold in 1 cup of the shredded cheddar, half of the crumbled bacon, and half of the chopped chives. Season with salt and pepper.

  4. Refill ➔ Spoon the creamy potato mixture back into the crispy skins, piling it high.

  5. Second Bake ➔ Place the filled potatoes on a baking sheet. Top with the remaining 1/2 cup of cheese and the rest of the bacon. ➔ Bake for another 10–15 minutes until the cheese is melted and bubbling.

  6. Final Flourish ➔ Garnish with the remaining fresh chives before serving hot. ➔ 🍽️✨


Q&A (Common Questions)

Q: Can I make these ahead of time? A: Absolutely! ➔ You can follow the steps through refilling (Step 4), then cover and refrigerate for up to 24 hours. When ready to eat, simply add the toppings and bake until heated through.

Q: How do I get the skin extra crispy? A: Before the first bake, rub the potato skins with a little olive oil and a sprinkle of salt. ➔ This helps the skin crisp up beautifully in the oven.

Q: Can I use a slow cooker for the initial bake? A: Yes! ➔ Much like layering potatoes with garlic herb sauce, you can cook whole potatoes in a slow cooker on High for 4 hours until soft. However, you’ll still want to finish them in the oven for that signature crispy skin.

Q: Are there any vegetarian alternatives for the bacon? A: Definitely! ➔ You can swap the bacon for smoked paprika roasted chickpeas or simply add more sun-dried tomatoes for a similar savory “umami” hit.


Pro Tip

For a “loaded” experience that mimics your favorite restaurant, add a dollop of cold sour cream right on top of the hot, melted cheese just before serving! 🥣🔥

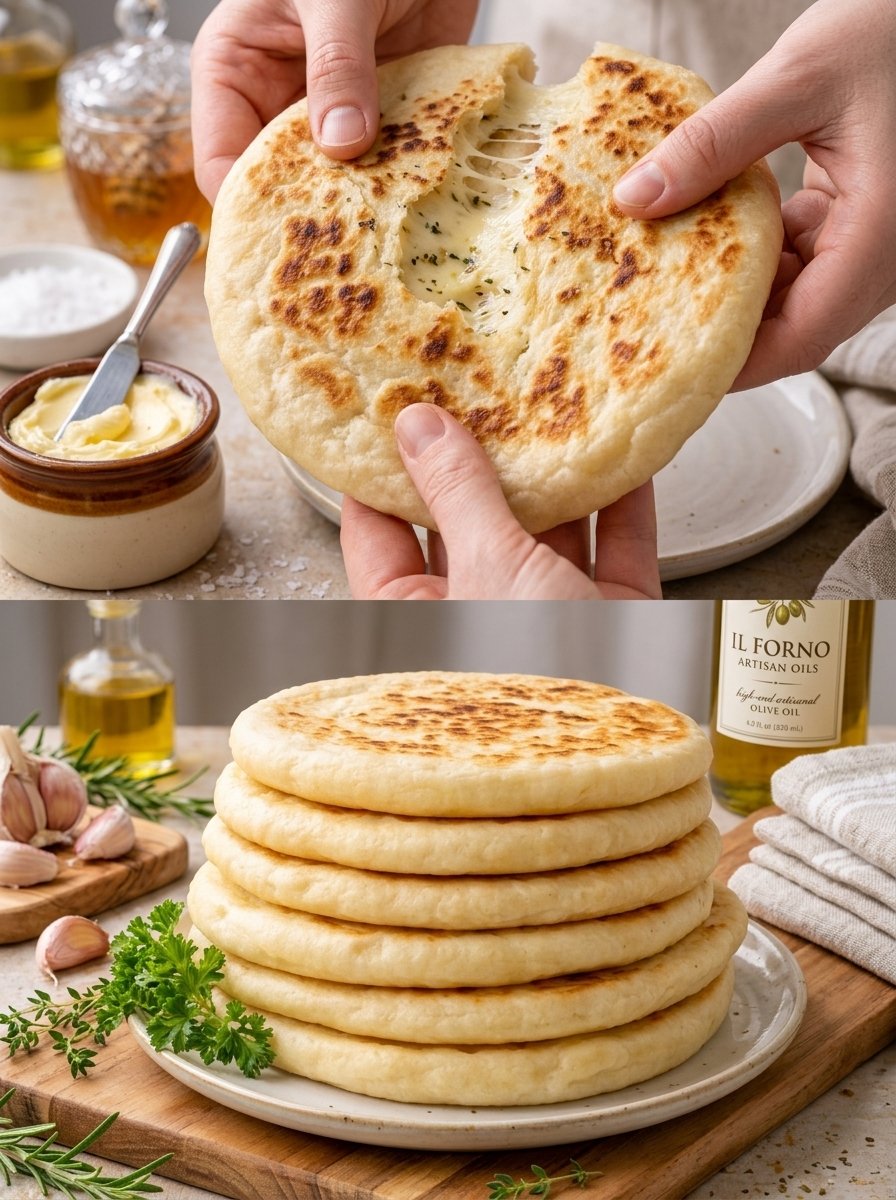
Stretchy Cheese-Stuffed Garlic Flatbread

Stretchy Cheese-Stuffed Garlic Flatbread

Ingredients

For the Dough:

  • 2 cups All-Purpose Flour

  • 3/4 cup Warm Water

  • 1 tsp Instant Yeast

  • 1 tsp Sugar

  • 1/2 tsp Salt

  • 2 tbsp Olive Oil

For the Filling & Topping:

  • 1 1/2 cups Shredded Mozzarella (or a blend of your favorite melting cheeses)

  • 2 cloves Garlic (minced)

  • 1 tbsp Fresh Parsley & Thyme (finely chopped)

  • 4 tbsp Butter (softened)

  • A pinch of Sea Salt


Step-by-Step Instructions

  1. Prepare the Dough ➔ Mix warm water, sugar, and yeast in a bowl. ➔ Add flour, salt, and olive oil. ➔ Knead for 5–7 minutes until smooth. ➔ Cover and let rise in a warm spot for 1 hour until doubled in size.

  2. Make Garlic Herb Butter ➔ In a small bowl, combine softened butter, minced garlic, and chopped fresh herbs. ➔ Set aside for later.

  3. Divide and Shape ➔ Punch down the risen dough and divide into 6 equal portions. ➔ Roll each piece into a small circle.

  4. Stuff with Cheese ➔ Place a generous mound of shredded cheese and a tiny dab of herb butter in the center of each circle. ➔ Gather the edges of the dough and pinch them tightly together to seal.

  5. Flatten ➔ Gently flatten the stuffed ball with your palm or a rolling pin until it is about 1/2 inch thick. ➔ Be careful not to tear the dough and let the cheese escape!

  6. Pan-Sear ➔ Heat a lightly oiled skillet over medium heat. ➔ Cook each flatbread for 3–4 minutes per side until golden brown and the cheese inside is fully melted.

  7. Final Brush ➔ Immediately brush the hot flatbreads with the remaining garlic herb butter and sprinkle with a touch of sea salt. ➔ Stack them up and serve while hot for the best cheese pull! ➔ 🍽️🔥


Q&A (Common Questions)

Q: Can I bake these in the oven instead? A: Yes! ➔ Bake at 200°C (400°F) for 10–12 minutes. However, pan-searing gives them that signature “toasted” look and flavor seen in the image.

Q: My flatbread is leaking cheese in the pan. What happened? A: This usually means the dough was rolled too thin or the seal wasn’t tight enough. ➔ Try using a little water on your fingertips to help “glue” the dough edges together when sealing.

Q: Can I use different types of cheese? A: Definitely! ➔ A mix of Mozzarella for stretch and Sharp Cheddar or Feta for flavor works beautifully.

Q: How do I store leftovers? A: Store in an airtight container for up to 2 days. ➔ To enjoy them again, reheat in a dry skillet or toaster oven to bring back the crispness and melt the cheese.

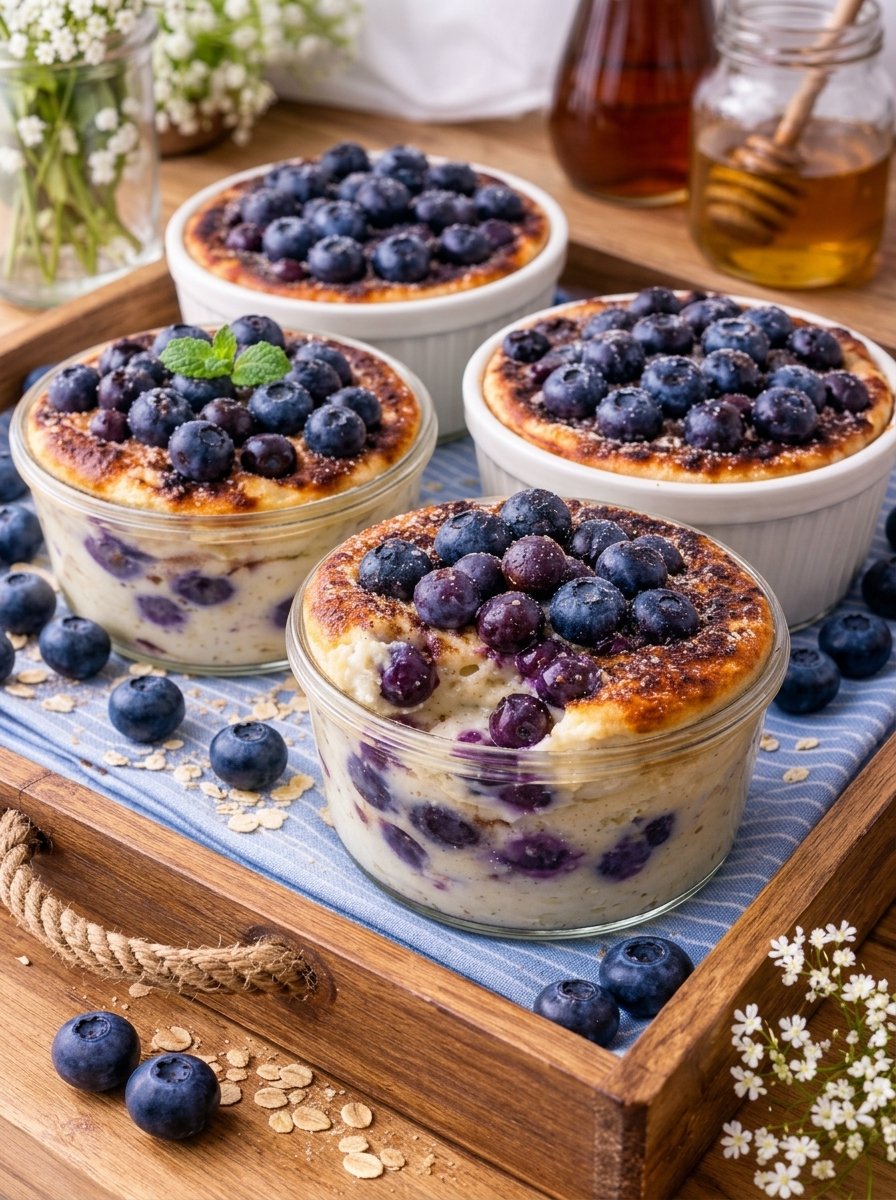
Individual Blueberry Baked Oatmeal

Individual Blueberry Baked Oatmeal

🛒 Ingredients

  • The Dry Base: 2 cups rolled oats, 1 tsp baking powder, 1 tsp cinnamon, 1/4 tsp salt ➡️

  • The Wet Mix: 2 ripe bananas (mashed), 1 ½ cups milk of choice, 1 large egg, 1 tsp vanilla extract ➡️

  • The Fruit: 2 cups fresh blueberries (divided) ➡️

  • The Sweetener: 2 tbsp honey or maple syrup ➡️

  • Garnish: Fresh mint leaves and a sprinkle of extra oats ➡️


👩‍🍳 Step-by-Step Instructions

  1. Prep and Preheat 🌡️ Preheat your oven to 180°C (350°F). Lightly grease four to six ceramic ramekins or small glass jars with coconut oil or butter ➡️.

  2. Combine Dry Ingredients 🥣 In a medium bowl, whisk together the rolled oats, baking powder, cinnamon, and salt until well combined ➡️.

  3. Mix Wet Ingredients 🥚 In a separate large bowl, mash the bananas until smooth. Whisk in the milk, egg, honey, and vanilla extract until the mixture is uniform ➡️.

  4. Merge the Batter 🌀 Pour the dry oat mixture into the wet ingredients. Stir gently until all the oats are thoroughly moistened. Fold in half of the blueberries ➡️.

  5. Fill the Ramekins 🥄 Divide the oatmeal mixture evenly among the prepared ramekins. Leave a little space at the top as they will rise slightly while baking ➡️.

  6. Top and Bake 🔥 Press the remaining blueberries into the top of each ramekin for that beautiful “jammy” look seen in your photo. Bake for 25–30 minutes until the tops are golden brown and the centers are set ➡️.

  7. Serve Warm ✨ Let them cool for 5 minutes. Garnish with a sprig of fresh mint and a drizzle of extra honey if desired ➡️.


❓ Common Questions (Q&A)

Q: Can I use frozen blueberries? A: Yes! ❄️ Just don’t thaw them before adding to the batter, or they might turn the entire mixture purple. You may need to add 2–3 minutes to the total bake time.

Q: Is this recipe gluten-free? A: It can be! 🌾 Simply ensure you are using certified gluten-free rolled oats.

Q: Can I prepare these the night before? A: Absolutely. ⏲️ You can assemble the ramekins and keep them covered in the fridge overnight. Bake them fresh in the morning for an easy, warm breakfast.

Q: How do I store leftovers? A: These stay fresh in the refrigerator for up to 4 days. They reheat beautifully in the microwave for about 45 seconds 🧊.

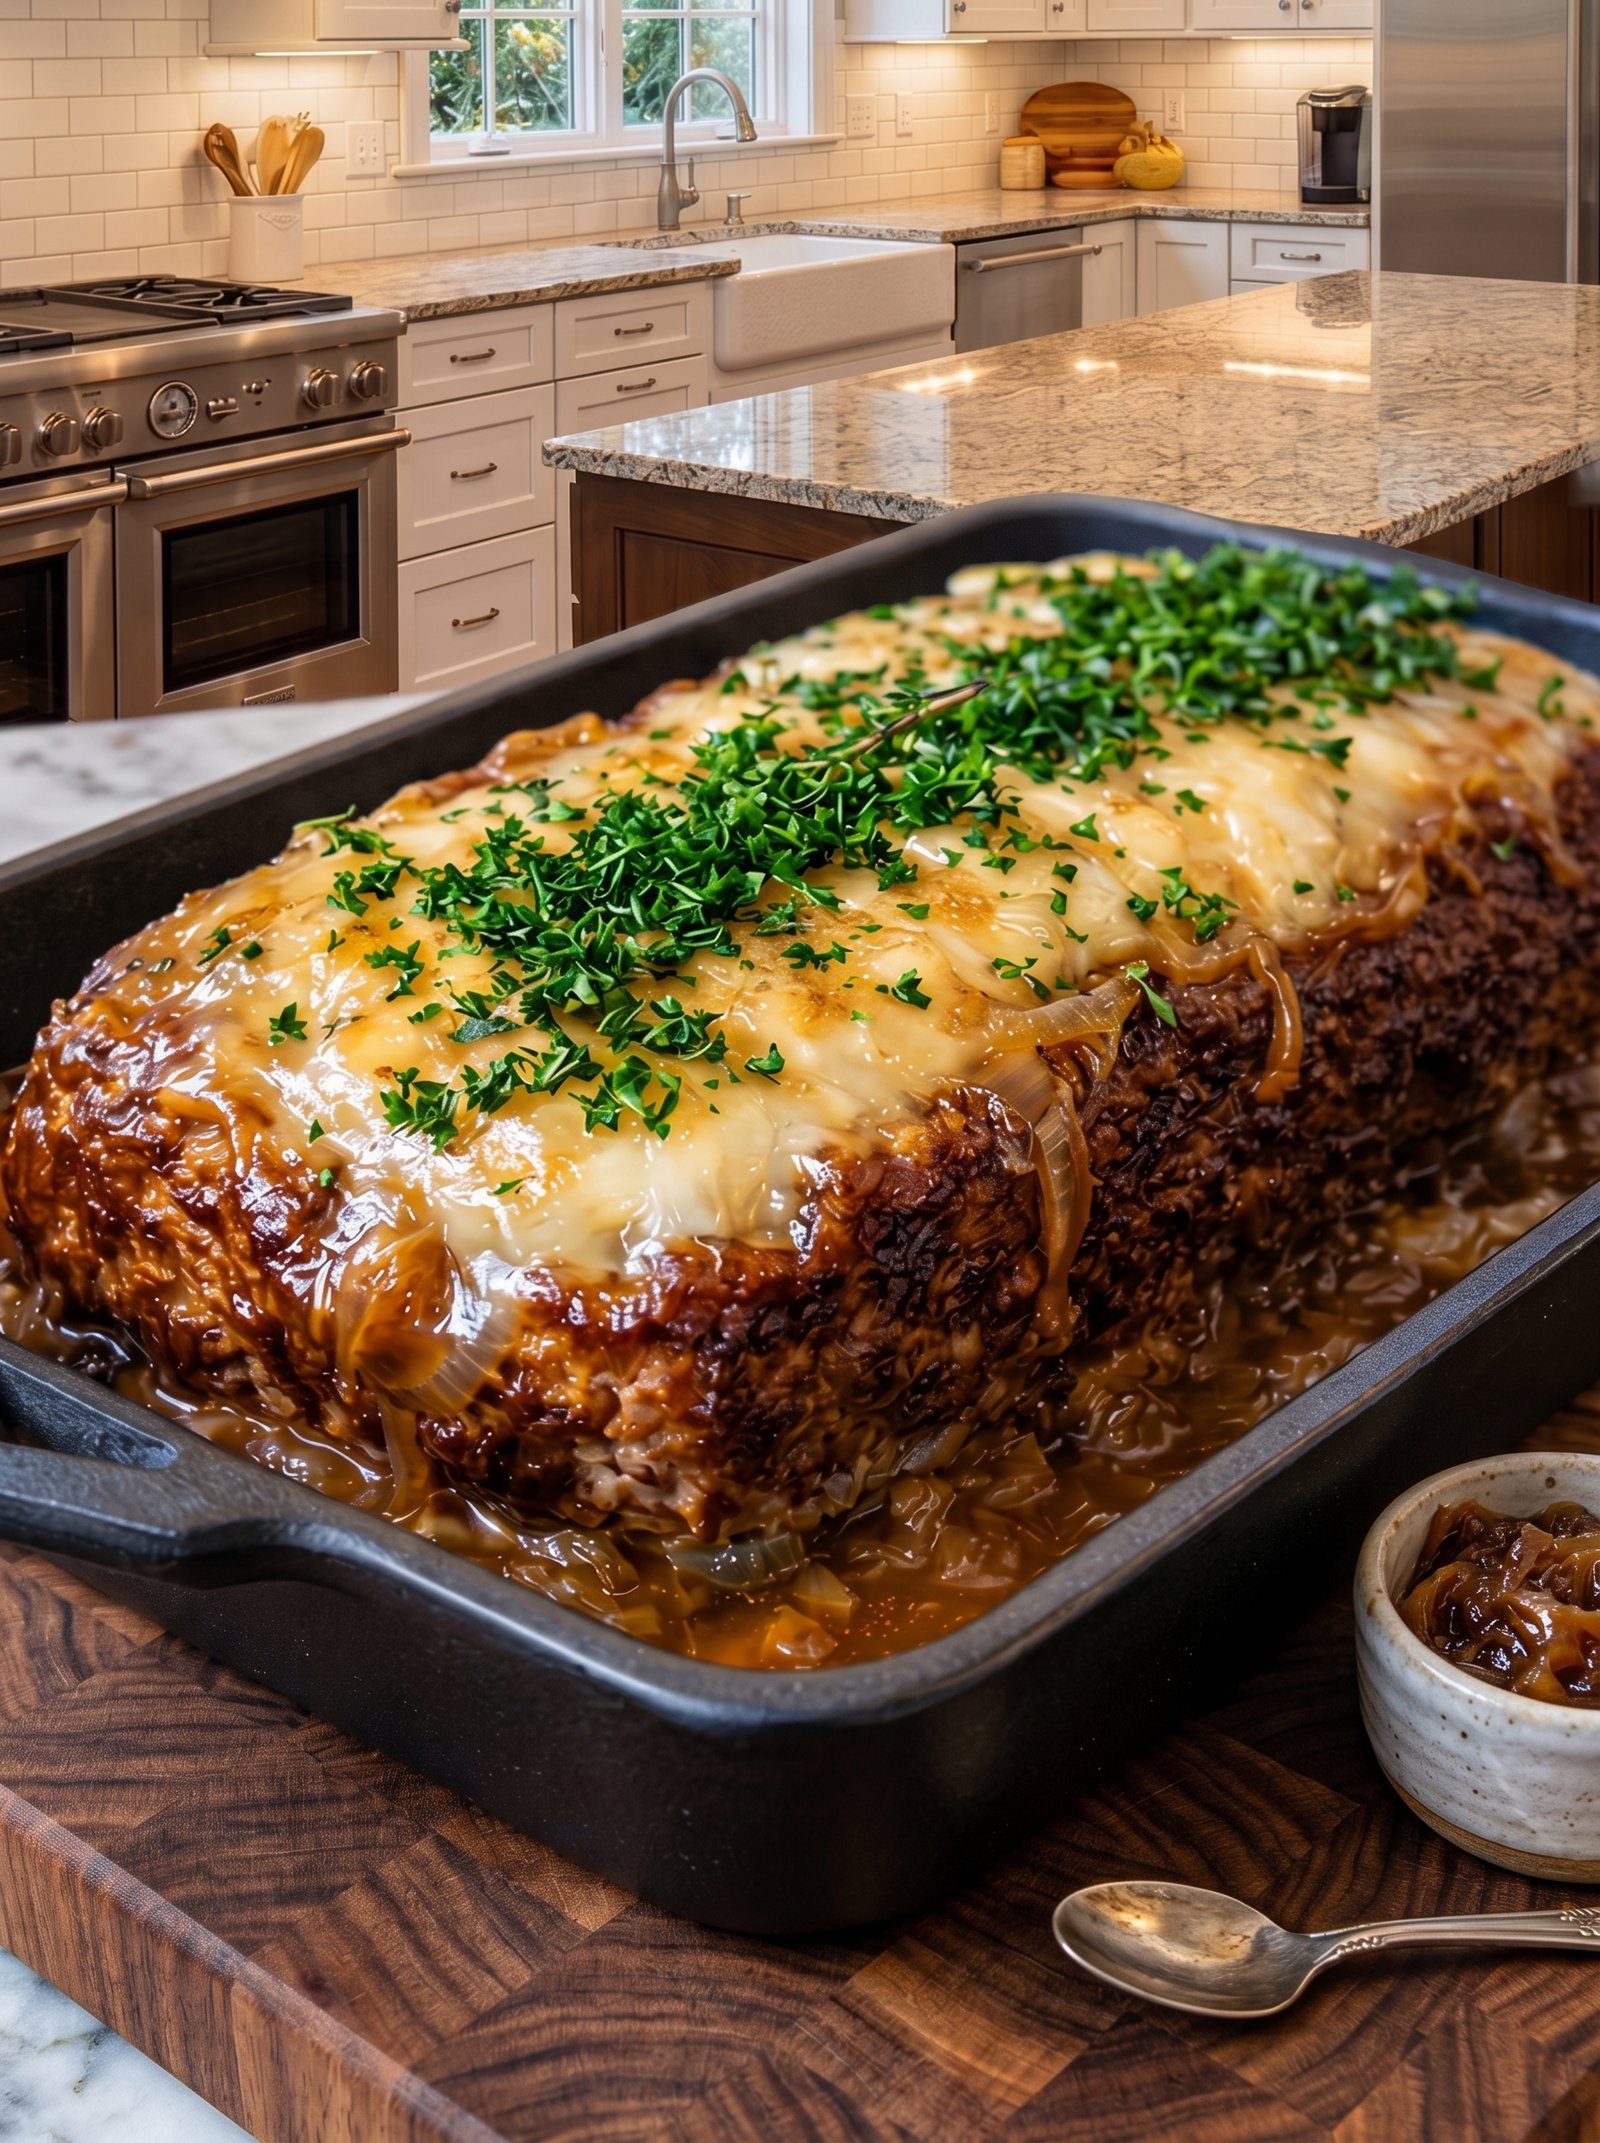
French Onion Meatloaf


🥘 French Onion Meatloaf

🛒 Ingredients

  • The Onions:

    • 3 large Yellow onions, thinly sliced 🧅

    • 2 tbsp Butter

    • 1 tsp Sugar (to help caramelization)

  • The Meatloaf:

    • 2 lbs Lean ground beef 🥩

    • 1 cup Panko breadcrumbs

    • 2 large Eggs 🥚

    • 1/4 cup Beef broth 🥣

    • 1 tbsp Worcestershire sauce

    • 2 cloves Garlic, minced 🧄

    • 1 tsp Dried thyme 🌿

    • Salt and Black Pepper to taste 🧂

  • The Topping:

    • 1.5 cups Shredded Gruyère or Swiss cheese 🧀

    • Fresh parsley, chopped (for garnish)


🥣 Step-by-Step Instructions

  1. Caramelize the Onions ➡️ Melt butter in a large skillet over medium heat. Add sliced onions and sugar. Cook, stirring occasionally, for 20–25 minutes until deep golden brown and soft. ➡️ Set aside half for the meatloaf and half for the topping. 🧅🔥

  2. Prep the Oven ➡️ Preheat your oven to 375°F (190°C). Grease a large baking dish or line a rimmed baking sheet.

  3. Mix the Meatloaf ➡️ In a large bowl, combine the ground beef, breadcrumbs, eggs, beef broth, Worcestershire sauce, garlic, thyme, salt, pepper, and half of your caramelized onions. 🥣➡️🥩

  4. Shape ➡️ Mix gently with your hands (don’t overwork the meat!). Shape into a large rectangular loaf and place it in the baking dish. ➡️📐

  5. Bake ➡️ Place in the oven and bake for 45–50 minutes. 🕒

  6. Add the “Soup” Layers ➡️ Remove from the oven. Spread the remaining caramelized onions over the top of the loaf. ➡️🧅

  7. Cheese Blanket ➡️ Sprinkle the shredded Gruyère cheese generously over the onions. ➡️🧀

  8. Broil ➡️ Return to the oven for another 5–10 minutes, or until the cheese is bubbly and starts to brown in spots.

  9. Rest ➡️ Let the meatloaf rest for 10 minutes before slicing. This ensures the juices stay inside and the loaf holds its shape. 🥩💤

  10. Garnish & Serve ➡️ Top with plenty of fresh parsley and serve with the pan juices. 🌿🍽️


❓ Common Questions (Q&A)

Q: Can I use ground turkey instead? A: Yes! Just be sure to add an extra tablespoon of olive oil to the mix, as turkey is leaner than beef and can dry out more easily. 🍗✅

Q: What if I don’t have Gruyère cheese? A: Swiss, Provolone, or even a sharp Mozzarella work perfectly for that gooey, melted finish. 🧀

Q: Why do I need to rest the meat? A: Cutting into the meat immediately causes all the juices to run out, leaving the loaf dry. 10 minutes of patience makes a huge difference! ⏳🥩

Q: Can I make this in a loaf pan? A: You can, but a flat baking dish (as seen in the image) allows the edges to get a bit crispier and provides more surface area for the cheese and onions! 🥘📐


✨ Pro-Tips for Success

  • Avoid the “Brick”: When mixing the meat, use a light touch. Over-mixing leads to a dense, tough texture. ☁️🥩

  • The Onion Secret: If the onions start to stick while caramelizing, add a splash of beef broth or water to the pan to loosen the flavor bits (fond). 🥣✨