Crispy Smashed Potatoes with Ricotta & Honey

Crispy Smashed Potatoes with Ricotta & Honey

🛒 Ingredients

  • 1.5 lbs Baby potatoes (Yukon Gold or Red potatoes work best) 🥔

  • 3 tbsp Olive oil

  • 1 tsp Garlic powder

  • Salt and Black Pepper to taste 🧂

  • For the Topping:

    • 1 cup Whole milk ricotta cheese 🧀

    • 1 tbsp Fresh thyme or parsley 🌿

    • 2 tbsp Honey 🍯

    • 1 tsp Red chili flakes (to make the “hot honey”) 🌶️

    • Optional: A pinch of lemon zest for the ricotta


🥣 Step-by-Step Instructions

  1. Boil the Potatoes ➡️ Place the whole baby potatoes in a large pot of salted water. Bring to a boil and cook for 15–20 minutes until fork-tender. ➡️ Drain and let them steam dry for 5 minutes. 💨

  2. Prep the Oven ➡️ Preheat your oven to 425°F (220°C). Line a baking sheet with parchment paper.

  3. The Smash ➡️ Place the potatoes on the baking sheet. Use the bottom of a heavy glass or a potato masher to gently press down on each potato until it is flattened but still holds together. ➡️ Aim for about 1/2-inch thickness. 🔨

  4. Season & Crisp ➡️ Drizzle the olive oil over the potatoes. Sprinkle with garlic powder, salt, and pepper. ➡️ Bake for 25–30 minutes, flipping halfway through, until the edges are deep golden brown and very crispy. 🔥

  5. Whip the Ricotta ➡️ While the potatoes bake, place the ricotta cheese in a small bowl. Whisk it vigorously with a spoon or a small hand mixer until it becomes light and airy. ➡️ Mix in a little lemon zest if using. 🧀🌀

  6. Infuse the Honey ➡️ In a tiny microwave-safe bowl, combine the honey and red chili flakes. Heat for 15 seconds to let the flavors meld. 🍯🌶️

  7. Assemble ➡️ Once the potatoes are out of the oven, place a generous dollop of the whipped ricotta onto each hot potato. 🥄

  8. Drizzle ➡️ Pour the warm hot honey over the ricotta. 🍯➡️🥔

  9. Garnish ➡️ Finish with fresh thyme leaves and an extra pinch of flaky salt. 🌿

  10. Serve ➡️ Enjoy immediately while the potatoes are hot and the ricotta is cool! 🍽️


❓ Common Questions (Q&A)

Q: Can I use large potatoes instead? A: Baby potatoes are best because they have a high skin-to-flesh ratio, which makes them extra crispy. If using large ones, cut them into chunks before boiling, but they won’t “smash” as perfectly. 🥔

Q: How do I get them really crispy? A: Make sure the potatoes are dry after boiling before you add the oil. Water creates steam, but oil creates crunch! 🚫💦

Q: Can I make these in an Air Fryer? A: Yes! Air fry the smashed potatoes at 400°F (200°C) for 15–20 minutes, flipping halfway through. ⚡

Q: What can I use instead of ricotta? A: Thick Greek yogurt, labneh, or even a small slice of goat cheese would provide a similar creamy, tangy contrast. 🥛


✨ Pro-Tips for Success

  • Steam Dry: After draining the boiled potatoes, let them sit in the hot pot for a minute to let the excess moisture evaporate. This is the secret to a crunchy skin! 💨

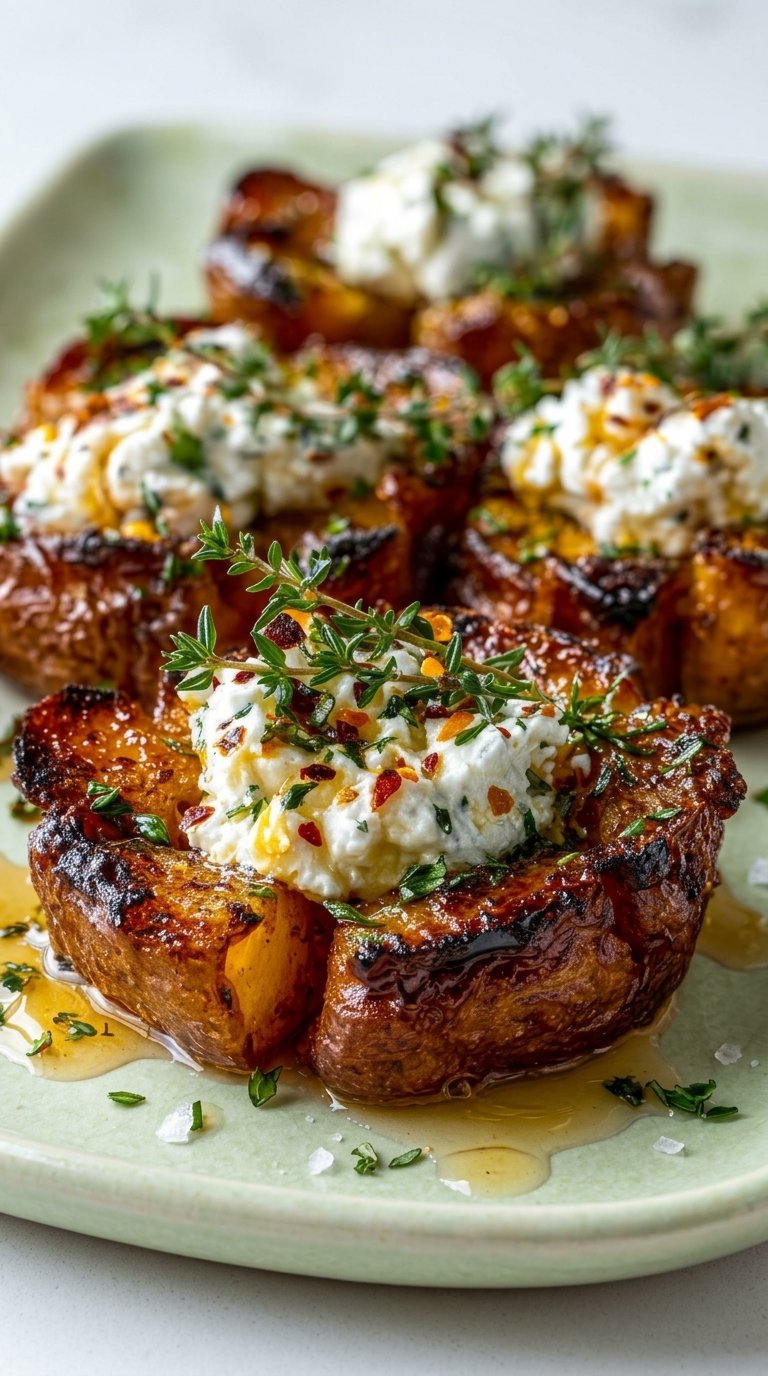
  • High Heat: Don’t be afraid of the high oven temperature; that’s what creates those delicious caramelized edges seen in the image. 📈
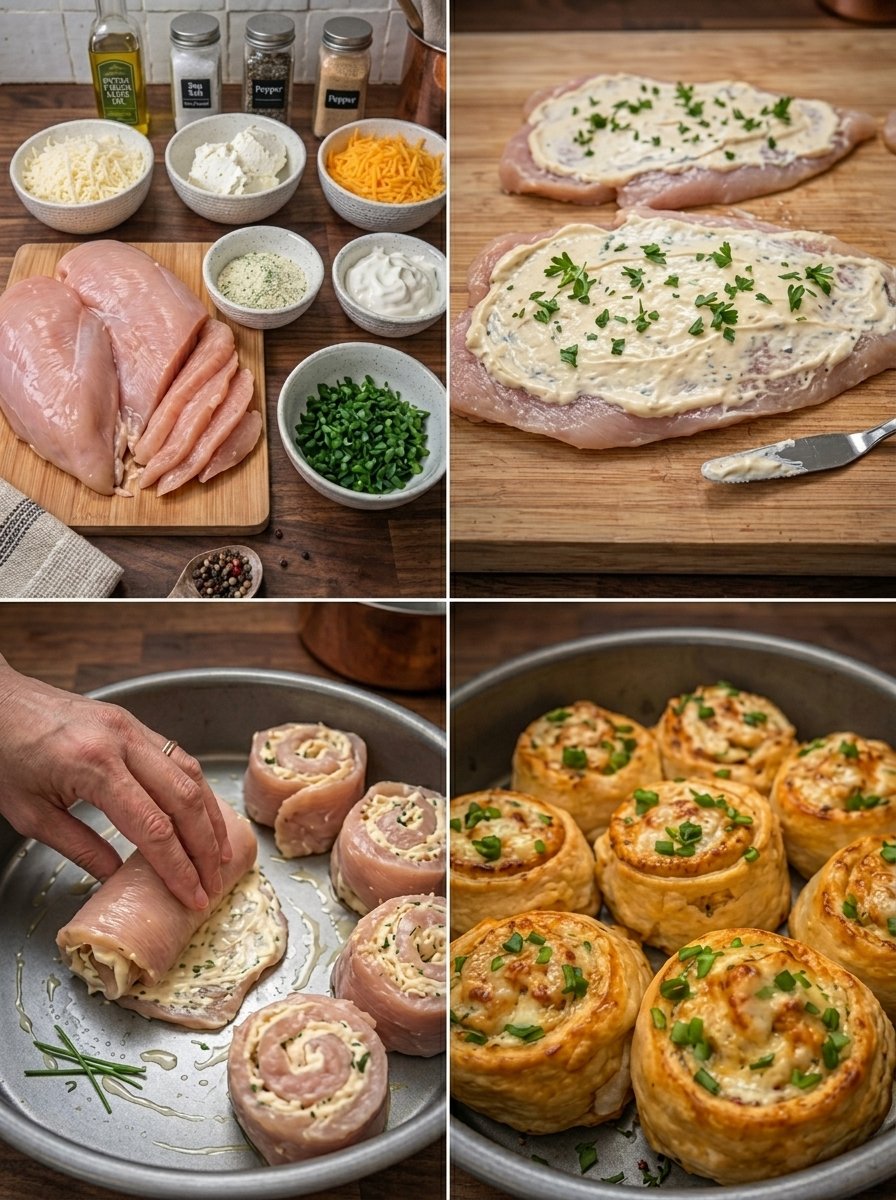

Creamy Cheesy Chicken Roll-Ups 

Creamy Cheesy Chicken Roll-Ups

📌 About This Dish

These baked chicken roll-ups are soft, juicy, and filled with a rich creamy cheese mixture. They’re rolled into spirals and baked until golden, making them perfect for dinner, lunch, or even special gatherings ✨


🥣 Ingredients (Serves 4–5)

🍗 For the Chicken

👉 4 large chicken breasts (boneless, skinless)
👉 ½ tsp salt
👉 ½ tsp black pepper


🧀 For the Creamy Filling

👉 ½ cup cream cheese (softened)
👉 ½ cup mozzarella cheese (shredded)
👉 ½ cup cheddar cheese (shredded)
👉 2 tbsp mayonnaise or thick yogurt
👉 2 tbsp green onions (finely chopped) 🌿
👉 1 tsp garlic powder
👉 ½ tsp black pepper
👉 ½ tsp salt


🛢️ For Baking

👉 1–2 tbsp olive oil or butter


🔪 Step-by-Step Instructions

🔹 Step 1: Prepare the Chicken

➡️ Place chicken breasts on a cutting board
➡️ Slice each breast horizontally OR gently flatten with a rolling pin
➡️ Aim for thin, even pieces (this helps rolling)

💡 Tip: Cover chicken with plastic while flattening to keep it neat


🔹 Step 2: Season the Chicken

➡️ Sprinkle salt and black pepper on both sides
➡️ Set aside for 5–10 minutes


🔹 Step 3: Prepare the Filling

➡️ Take a mixing bowl
➡️ Add:
✔ cream cheese
✔ mayonnaise or yogurt
✔ garlic powder
✔ salt + pepper

➡️ Mix until smooth and creamy


🔹 Step 4: Add Cheese & Herbs

➡️ Add mozzarella + cheddar
➡️ Add chopped green onions 🌿
➡️ Mix gently

👉 The mixture should be thick, creamy, and easy to spread


🔹 Step 5: Fill the Chicken

➡️ Take one chicken piece
➡️ Spread 2–3 tablespoons of filling evenly
➡️ Leave a little space at edges


🔹 Step 6: Roll the Chicken

➡️ Carefully roll from one side to the other
➡️ Keep it tight (like a spiral)
➡️ Place seam-side down

💡 Tip: You can use toothpicks to hold shape if needed


🔹 Step 7: Prepare Baking Dish

➡️ Grease a baking dish with olive oil or butter
➡️ Arrange all chicken rolls neatly


🔹 Step 8: Bake

➡️ Preheat oven to 180°C (350°F)
➡️ Bake for 25–30 minutes

👉 For extra golden top:
➡️ Bake 5 more minutes or use top heat


🔹 Step 9: Rest & Serve

➡️ Remove from oven
➡️ Let rest for 5 minutes
➡️ Garnish with green onions 🌿
➡️ Serve warm


😍 Texture & Taste

✔ Outside: light golden and slightly crisp
✔ Inside: creamy, cheesy, soft
✔ Flavor: rich, mild, and comforting


🍽️ Serving Ideas

👉 Serve with:
➡️ mashed potatoes 🥔
➡️ rice 🍚
➡️ fresh salad 🥗
➡️ garlic bread 🥖


❓ Q & A

❓ Q1: Can I use only one type of cheese?

➡️ Yes 👍
Use mozzarella for stretch OR cheddar for stronger flavor


❓ Q2: Can I make it ahead of time?

➡️ Yes 😊
✔ Prepare rolls
✔ Cover and refrigerate (up to 24 hours)
✔ Bake when needed


❓ Q3: How do I keep rolls from opening?

➡️ Roll tightly
➡️ Place seam side down
➡️ Use toothpicks if needed


❓ Q4: Can I cook without oven?

➡️ Yes 👇
➡️ Use a covered pan
➡️ Cook on low heat
➡️ Turn gently until done


❓ Q5: How to make it lighter?

➡️ Use yogurt instead of mayonnaise
➡️ Reduce cheese slightly
➡️ Add spinach or herbs 🌿


💡 Pro Tips

👉 Don’t overfill (prevents spilling)
👉 Thin chicken cooks better
👉 Let it rest before cutting
👉 Use fresh ingredients for best taste

Mini Elote Flan Cupcakes

Mini Elote Flan Cupcakes

🛒 Ingredients

  • 1 can (397g) Sweetened Condensed Milk

  • 1 can (354ml) Evaporated Milk

  • 1 cup Sweet corn kernels (fresh or canned/drained) 🌽

  • 4 Large Eggs 🥚

  • 1 tsp Vanilla extract

  • 1/2 tsp Ground cinnamon

  • For the Caramel Topping: 1/2 cup Sugar (melted) or Cajeta/Caramel sauce 🍯


👩‍🍳 Step-by-Step Instructions

  1. Prep the Caramel 🍯 Preheat your oven to 175°C. ➡️ Place a spoonful of melted sugar or caramel sauce into the bottom of each cupcake liner.

  2. Blend the Base 🌪️ In a blender, combine the sweetened condensed milk, evaporated milk, eggs, vanilla, and cinnamon. ➡️ Add the sweet corn kernels and blend until the mixture is very smooth.

  3. Strain for Silkiness 🥣 For the smoothest texture, pour the blended mixture through a fine-mesh strainer into a pitcher. ➡️ This removes any bits of corn skin, leaving you with a velvet-like custard.

  4. Fill the Liners 🧁 Pour the flan mixture into the prepared cupcake liners, filling them nearly to the top. ➡️

  5. The Water Bath (Bain-Marie) 🌊 Place the cupcake tin inside a larger baking pan. ➡️ Fill the larger pan with hot water until it reaches halfway up the sides of the cupcake tin. This ensures the flan cooks evenly without curdling.

  6. Bake and Cool ⏲️ Bake for 25–30 minutes until the centers are set but still have a slight jiggle. ➡️ Remove from the water bath and let them cool to room temperature.

  7. Chill to Set ❄️ Refrigerate for at least 3–4 hours (or overnight) before serving. This allows the flavors to develop and the texture to firm up.


❓ Common Questions (Q&A)

Q: Can I make these without the corn? A: Yes, you can omit it for a classic mini flan, but the elote flavor is what makes these special! 🌽➡️🍮

Q: How do I get them out of the liners? A: If you want to “unmold” them, it is best to use silicone liners. ➡️ If using paper, you can simply enjoy them straight from the cup with a small spoon!

Q: Why did my flans get bubbles on the inside? A: This usually means the oven was too hot or the water bath dried out. ➡️ Always make sure there is enough water in the pan to keep the temperature steady. 🌡️

Q: Can I use frozen corn? A: Absolutely! ➡️ Just make sure to thaw and pat the corn dry before blending so you don’t add extra water to the mix.


✨ Quick Tips

  • Corn Texture: If you like a little texture, don’t strain the mixture! The tiny bits of corn add a nice “sweet corn cake” feel. 🌽✨

  • Garnish: Top each cupcake with a tiny sprinkle of cinnamon or a single corn kernel for a beautiful presentation! ➡️🎨

Super Soft & Fluffy Dinner Rolls

Super Soft & Fluffy Dinner Rolls

🛒 Ingredients

  • 325g Flour (Bread flour or All-purpose) 🌾

  • 50g Butter (room temperature) 🧈

  • 1 Egg (large) 🥚

  • 150ml Milk (warm, but not hot) 🥛

  • 30g Sugar 🍬

  • 1 tsp Yeast (Instant or Active Dried) 🍞

  • 1 1/4 tsp Salt 🧂


👩‍🍳 Step-by-Step Instructions

  1. Activate the Yeast 🥛 In a large bowl, combine the warm milk, sugar, and yeast. ➡️ Let it sit for about 5–10 minutes until it becomes frothy.

  2. Mix the Dough 🥣 Add the egg, salt, and half of the flour to the yeast mixture. ➡️ Mix well, then gradually add the remaining flour. Add the softened butter and continue mixing until a sticky dough forms.

  3. Knead for Softness 👐 Transfer the dough to a floured surface. ➡️ Knead for about 8–10 minutes until the dough is smooth and elastic. If using a stand mixer, use the dough hook for about 5–7 minutes.

  4. First Rise 📈 Place the dough in a lightly greased bowl and cover with a damp cloth. ➡️ Let it rise in a warm spot for about 45–60 minutes, or until it has doubled in size.

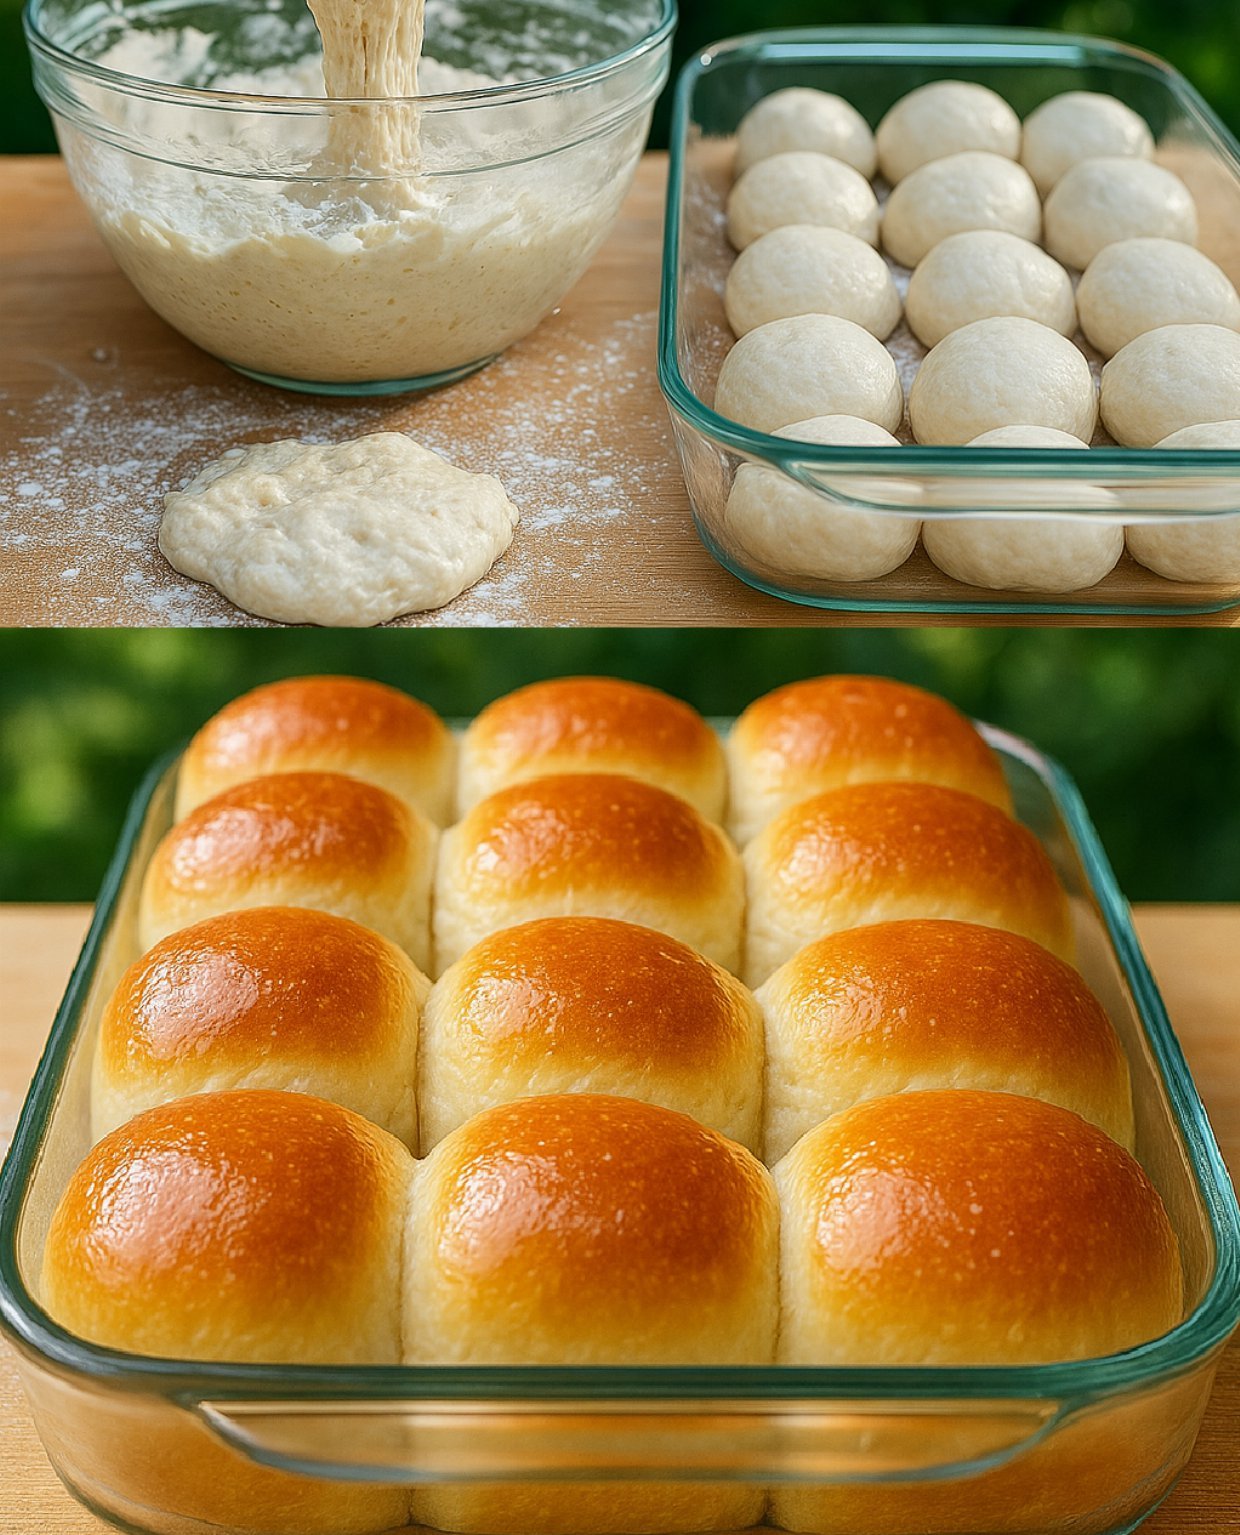
  5. Shape the Rolls 🥯 Gently punch down the dough to release the air. ➡️ Divide it into 12–15 equal pieces. Roll each piece into a smooth ball and place them in a greased baking dish (as seen in the photo).

  6. Second Rise & Bake 🔥 Cover the rolls and let them rise again for 20–30 minutes. ➡️ Preheat your oven to 180°C. Brush the tops with a little milk or egg wash, then bake for 15–20 minutes until the tops are beautifully golden brown.

  7. The Buttery Finish ✨ Immediately after removing from the oven, brush the tops with a little extra melted butter for that signature shine and softness. ➡️


❓ Common Questions (Q&A)

Q: My dough is very sticky, should I add more flour? A: Try to avoid adding too much extra flour! ➡️ A slightly sticky dough actually results in a softer roll. If kneading by hand, just lightly flour your fingers. 🧤

Q: Can I use water instead of milk? A: You can, but milk is what gives these rolls their “rich” flavor and soft, tender crumb. 🥛➡️🥐

Q: Why didn’t my rolls rise? A: This usually happens if the milk was too hot (which can kill the yeast) or if the yeast is expired. ➡️ Ensure the milk feels like a warm bath, not a hot tea. 🌡️

Q: How do I keep them soft for the next day? A: Once completely cooled, store them in an airtight bag or container. ➡️ You can reheat them for 10 seconds in the microwave to bring back that “just-baked” fluffiness! 🕒


✨ Quick Tips

  • Warm Spot: If your kitchen is cold, let the dough rise inside the oven (while it’s turned OFF) with the oven light turned on. 💡

  • Glass Dish: If using a glass baking dish like in the picture, keep an eye on the bottoms of the rolls to ensure they don’t brown too quickly! ➡️👀

🍳 Healthy Crustless Spinach & Cheese Quiche

🍳 Healthy Crustless Spinach & Cheese Quiche

This recipe is a fantastic high-protein, low-carb option that fits perfectly into a healthy lifestyle. Since it has no crust, it’s much lighter than a traditional quiche but remains incredibly filling.

Prep time: 15 mins | Bake time: 35–40 mins | Yields: 6 slices


Ingredients

  • 6–8 Large Eggs (depending on the depth of your dish)

  • 1/2 cup Milk (Low-fat, Skim, or Unsweetened Almond milk works great)

  • 2 cups Fresh Spinach (roughly chopped)

  • 1 cup Shredded Cheese (Cheddar, Mozzarella, or Feta)

  • 1 Small Onion (finely diced)

  • 2 Green Onions (sliced, for that fresh pop of color)

  • Salt & Black Pepper (to taste)

  • 1 tsp Garlic Powder (or 2 cloves of fresh minced garlic)

  • Non-stick Cooking Spray or Butter (to grease the dish)


Instructions

1. Preparation

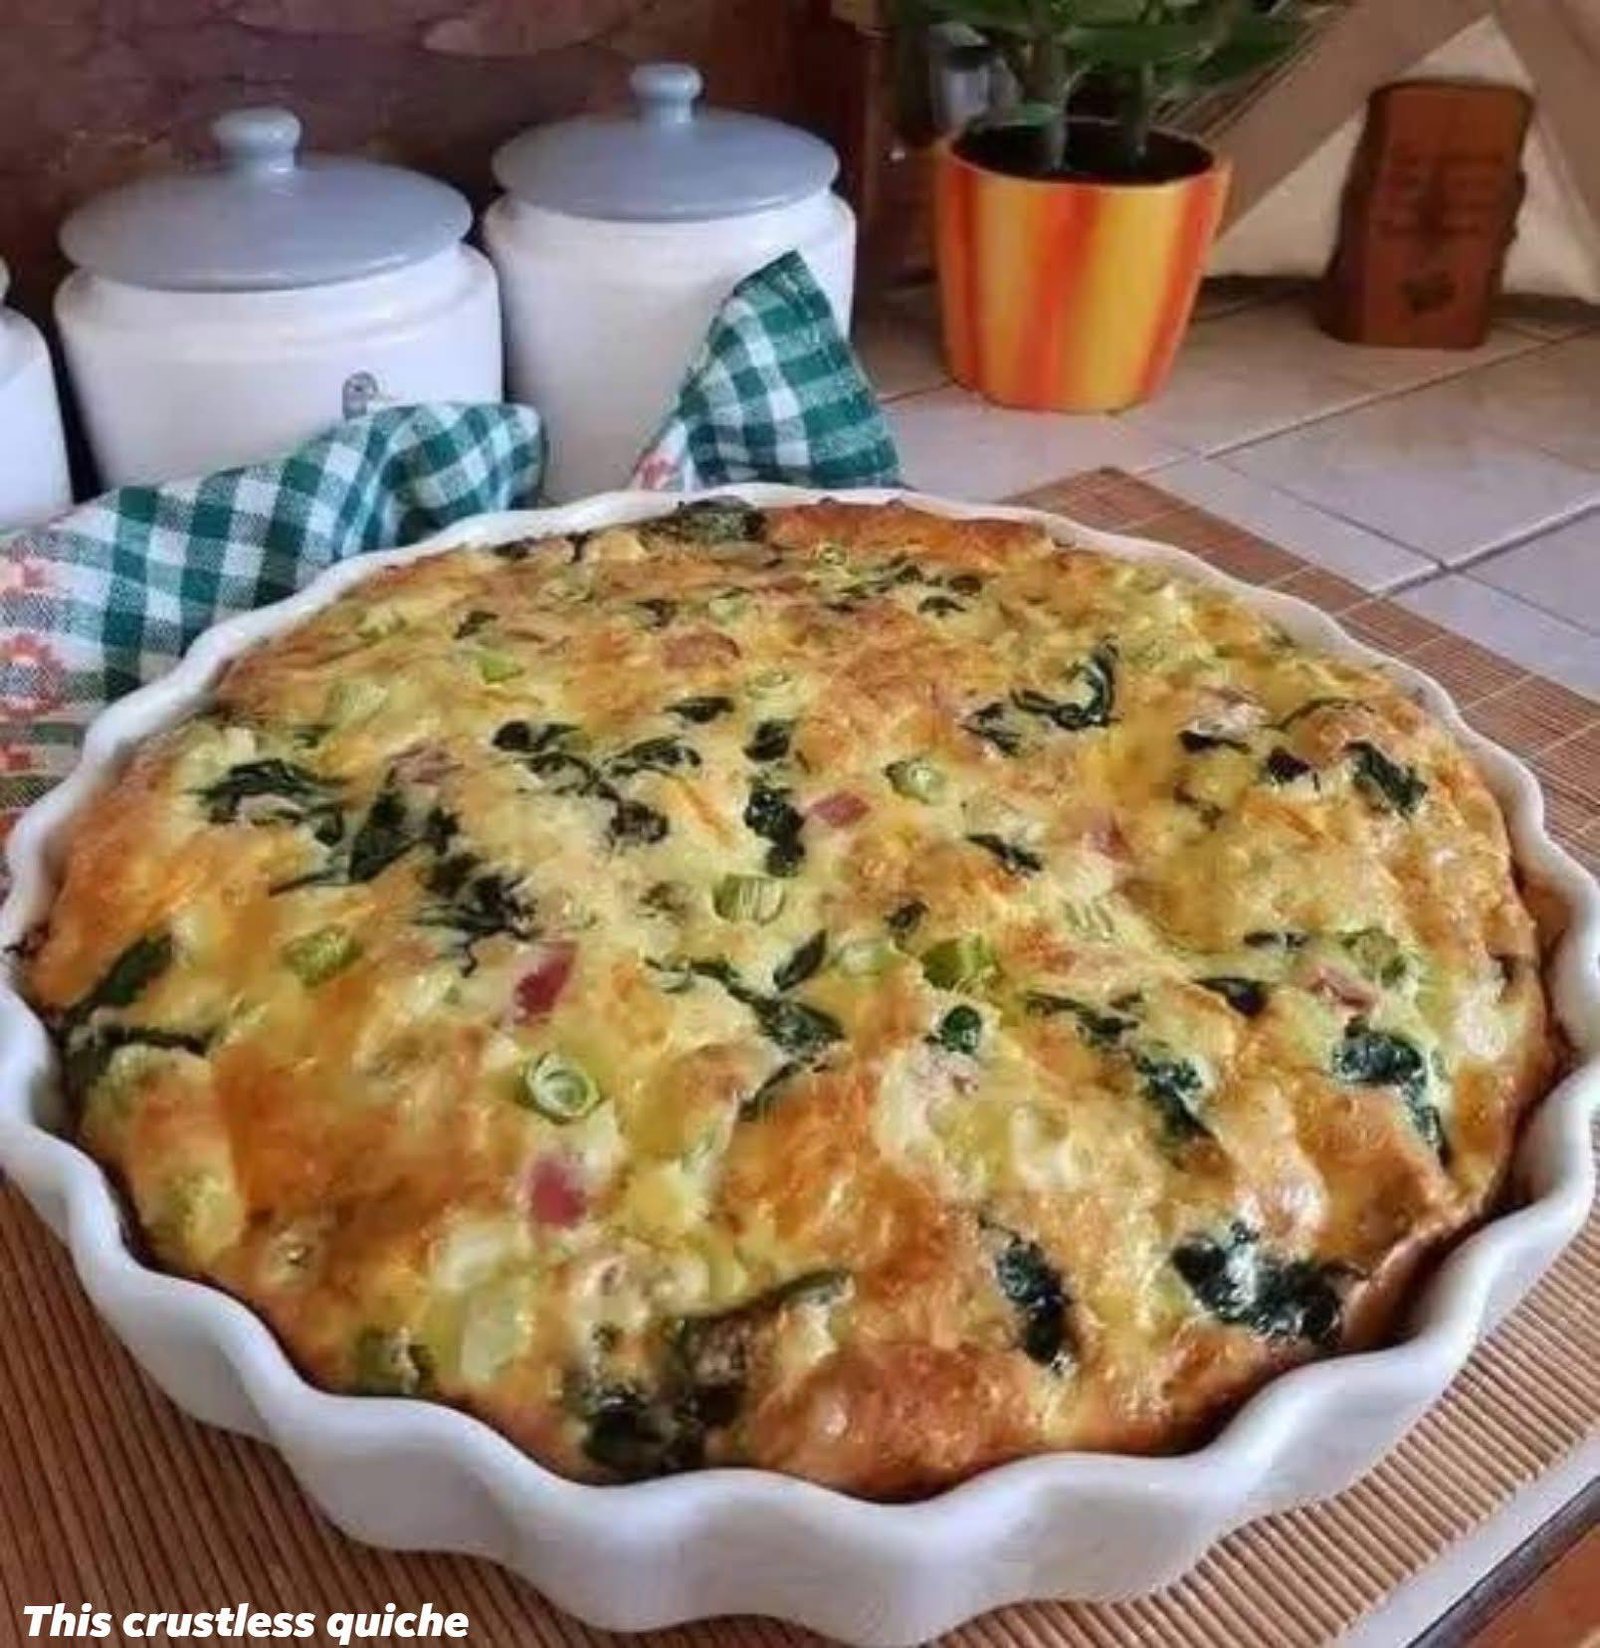
Preheat your oven to 190°C (375°F). Generously grease a 9-inch pie dish or tart pan (like the fluted white one in the photo) with cooking spray or a light coating of butter.

2. Sauté the Vegetables

In a skillet over medium heat, sauté the diced onions and spinach for about 3–4 minutes until the spinach is wilted and any excess moisture has evaporated.

Important: If the spinach is too watery, it will make the quiche soggy. Squeeze out any extra liquid if necessary.

3. Whisk the Base

In a large mixing bowl, whisk together the eggs, milk, garlic powder, salt, and pepper until well combined and slightly frothy.

4. Layer the Dish

Spread the sautéed spinach and onions evenly across the bottom of your prepared baking dish. Sprinkle about 3/4 of the cheese over the vegetables.

5. Pour and Top

Pour the egg mixture over the vegetables and cheese. Use a fork to gently move the ingredients around so the egg fills all the gaps. Sprinkle the remaining cheese and the sliced green onions on top.

6. Bake

Place in the oven and bake for 35–40 minutes. The quiche is done when the edges are golden brown and the center is firm (it shouldn’t jiggle when you move the pan).

7. Rest and Serve

Let the quiche rest for at least 5–10 minutes before slicing. This allows the eggs to set completely, making it easier to serve clean slices.


💡 Recipe Customizations

  • Protein Boost: Add cooked turkey bacon bits or diced lean ham to the filling.

  • Vegetable Variety: Feel free to add sautéed mushrooms, bell peppers, or steamed broccoli florets.

  • Weight Watchers Tip: Use egg whites for half of the eggs and fat-free cheese to significantly lower the Point value

Glazed Lemon Blueberry Loaf Recipe

Glazed Lemon Blueberry Loaf Recipe

🛒 Ingredients

For the Loaf:

  • 1 ½ cups All-purpose flour

  • 1 tsp Baking powder

  • ½ tsp Salt

  • 1 cup Granulated sugar

  • ½ cup Unsalted butter (softened)

  • 2 Large eggs

  • ½ cup Whole milk

  • 1 tsp Vanilla extract

  • 1 tbsp Lemon zest (freshly grated)

  • 1 cup Fresh blueberries (plus extra for topping)

  • 1 tsp Flour (to toss with berries)

For the Lemon Glaze:

  • 1 cup Powdered sugar

  • 2 tbsp Fresh lemon juice


👩‍🍳 Step-by-Step Instructions

  1. Prep the Oven & Pan ➡️ Preheat your oven to 350°F (175°C). Grease a 9×5 inch loaf pan or line it with parchment paper for easy removal.

  2. Mix Dry Ingredients ➡️ In a medium bowl, whisk together the 1 ½ cups flour, baking powder, and salt. Set aside.

  3. Cream Butter & Sugar ➡️ In a large bowl, beat the softened butter and sugar until light and fluffy.

  4. Add Wet Ingredients ➡️ Beat in the eggs one at a time, then stir in the vanilla extract and lemon zest.

  5. Combine ➡️ Gradually add the dry flour mixture and the milk, alternating between the two. Mix until just combined—do not over-mix! 🚫

  6. Prep the Berries ➡️ Toss the blueberries with 1 tsp of flour (this prevents them from sinking to the bottom). Gently fold them into the batter.

  7. Bake ➡️ Pour the batter into the prepared pan. Bake for 55–65 minutes, or until a toothpick inserted into the center comes out clean.

  8. Cool ➡️ Let the loaf cool in the pan for 10 minutes, then transfer to a wire rack to cool completely.

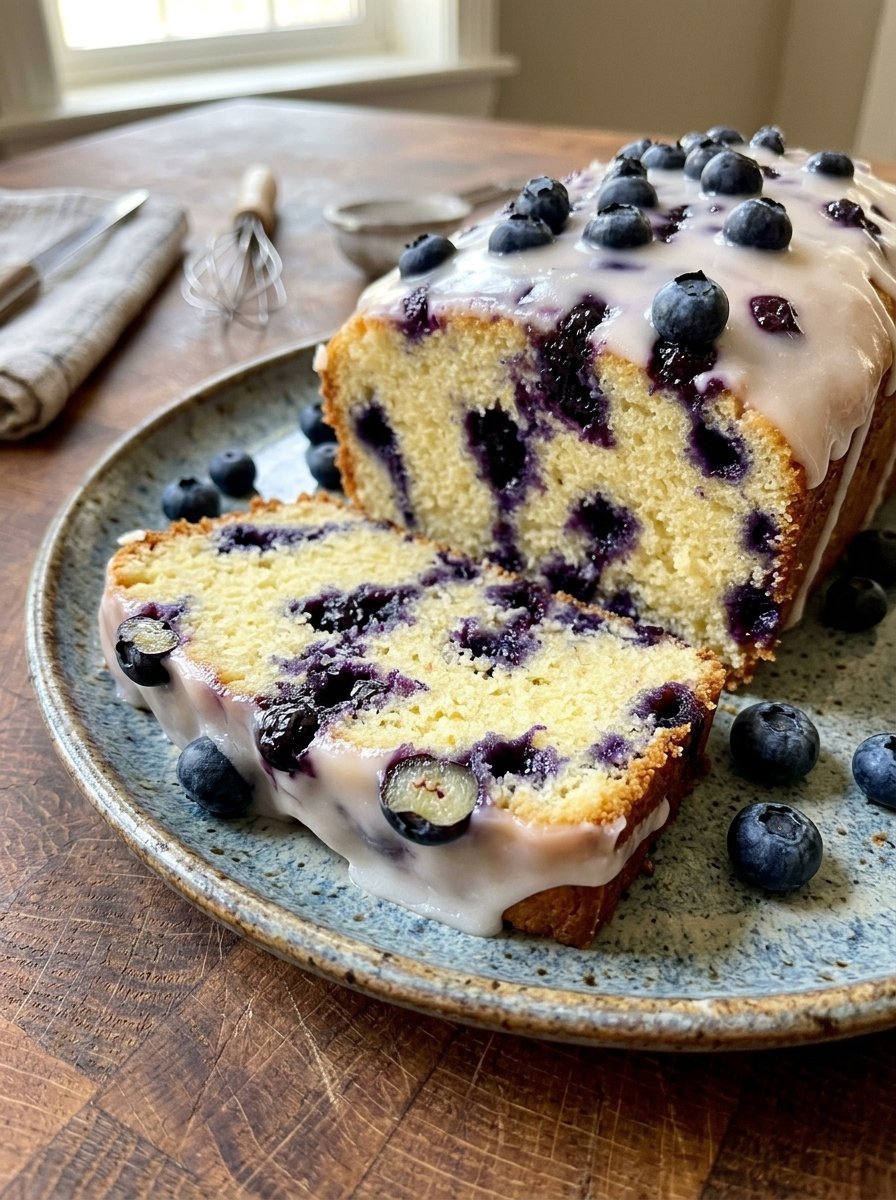
  9. Glaze ➡️ Whisk the powdered sugar and lemon juice until smooth. Pour over the cooled loaf and top with fresh blueberries. 🫐✨


❓ Q&A Section

Q: Why did my blueberries sink to the bottom? A: This usually happens if the batter is too thin or if the berries aren’t coated in flour. Tossing them in a little flour helps them “grip” the batter so they stay suspended throughout the loaf. ⬆️

Q: Can I use frozen blueberries? A: Yes! However, do not thaw them first, or they will streak the batter with purple. Toss them in flour while still frozen and fold them in quickly. ❄️

Q: How do I store this loaf? A: Wrap it tightly in plastic wrap or store in an airtight container. It stays fresh at room temperature for 2-3 days or in the fridge for up to 5 days. 🏠

Q: My glaze is too runny. How do I fix it? A: Add more powdered sugar, one tablespoon at a time, until it reaches a thick, pourable consistency. If it’s too thick, add a tiny drop of lemon juice. 🍋


💡 Pro-Tips

  • Zest first, juice second: It is much easier to zest a firm, whole lemon than a squeezed one! 🍋

  • Room Temp: Ensure your eggs and milk are at room temperature to create a smoother emulsion in the batter. 🌡️

Enjoy your baking! 🥧✨