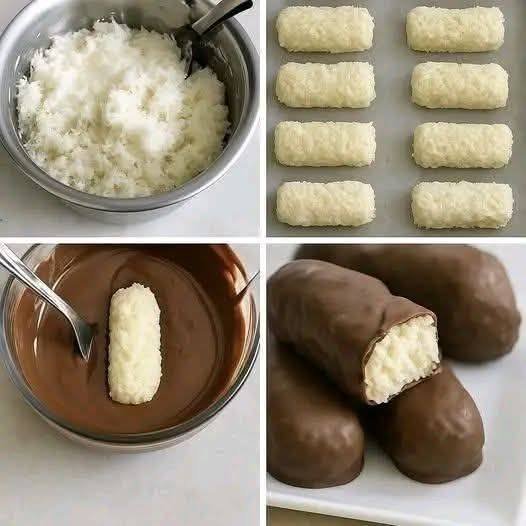
Homemade Coconut Chocolate Bars Recipe

Homemade Coconut Chocolate Bars Recipe

Ingredients

Coconut Filling

  • 3 cups shredded coconut
  • 1 can (14 oz / 395 g) sweetened condensed milk
  • 1 tsp vanilla extract
  • Pinch of salt

Chocolate Coating

  • 2 cups milk chocolate or dark chocolate
  • 1 tbsp coconut oil or butter (optional, for smoother coating)

Instructions

1. Make the Coconut Mixture

In a bowl, combine:

  • shredded coconut
  • sweetened condensed milk
  • vanilla
  • salt

Mix until thick and sticky.

2. Shape the Bars

Using your hands, form small logs/bars like in the photo.

Place them on a tray lined with parchment paper.

3. Freeze

Freeze for about 30–45 minutes until firm.

This helps them hold shape when dipping in chocolate.

4. Melt the Chocolate

Melt chocolate with coconut oil/butter:

  • in the microwave (30-second intervals), or
  • over a double boiler.

Stir until smooth.

5. Coat the Bars

Dip each frozen coconut bar into melted chocolate using forks/spoons.

Let excess chocolate drip off.

Place back on parchment paper.

6. Chill

Refrigerate for 15–20 minutes until chocolate hardens.


Optional Variations

  • Add chopped almonds inside for an Almond Joy version
  • Use dark chocolate for richer flavor
  • Add a few drops of coconut extract for extra coconut taste

Storage

  • Keep refrigerated up to 1 week
  • Freeze up to 2 months

Enjoy cold for the best texture!
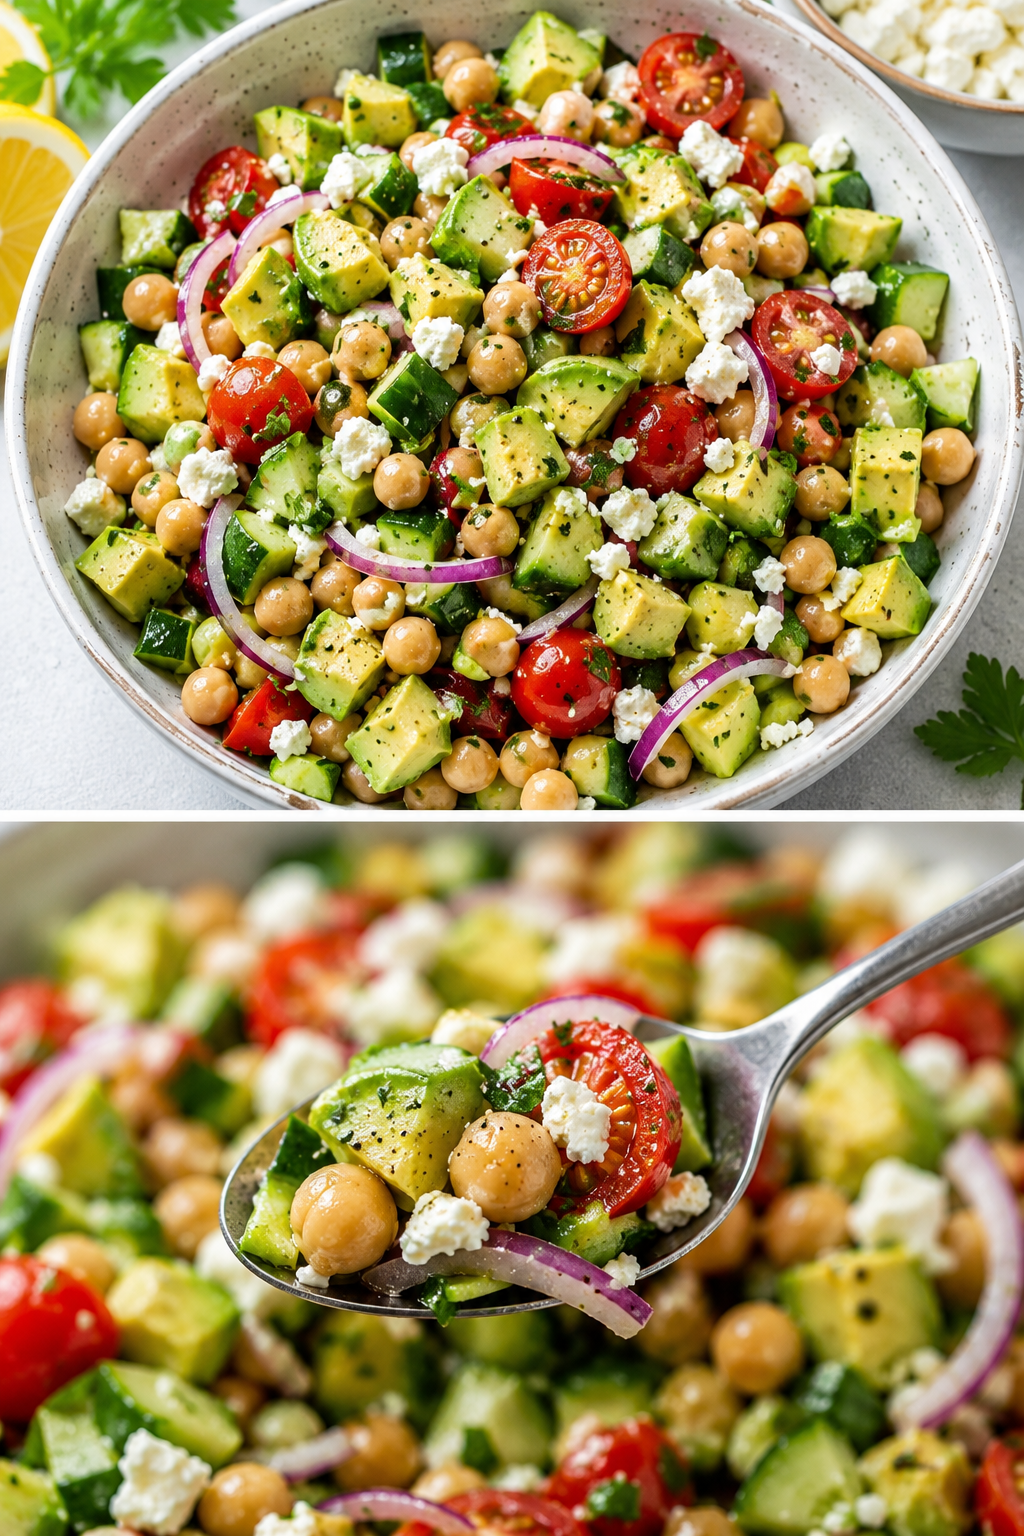
Chickpea Feta Avocado Salad 🥑🧀🥗

Chickpea Feta Avocado Salad 🥑🧀🥗

🛒 Ingredients

  • 1 can (15 oz) chickpeas, drained and rinsed
  • 1 avocado, diced
  • 1 cup cucumber, chopped
  • 1 cup cherry tomatoes, halved
  • 1/2 red onion, thinly sliced
  • 1/2 cup feta cheese, crumbled
  • 2 tbsp fresh parsley, chopped

Dressing

  • 3 tbsp olive oil
  • 1 tbsp lemon juice
  • 1 tsp red wine vinegar
  • 1 clove garlic, minced
  • Salt and black pepper to taste

👩‍🍳 Instructions

  1. In a large bowl, combine chickpeas, cucumber, tomatoes, onion, and parsley.
  2. Add diced avocado and crumbled feta cheese gently.
  3. In a small bowl, whisk olive oil, lemon juice, vinegar, garlic, salt, and pepper.
  4. Pour dressing over the salad and toss lightly.
  5. Chill for 10–15 minutes before serving for best flavor.

✨ Tips

  • Add grilled chicken for extra protein.
  • Sprinkle chili flakes for a spicy kick.
  • Best served fresh to keep avocado creamy and green.

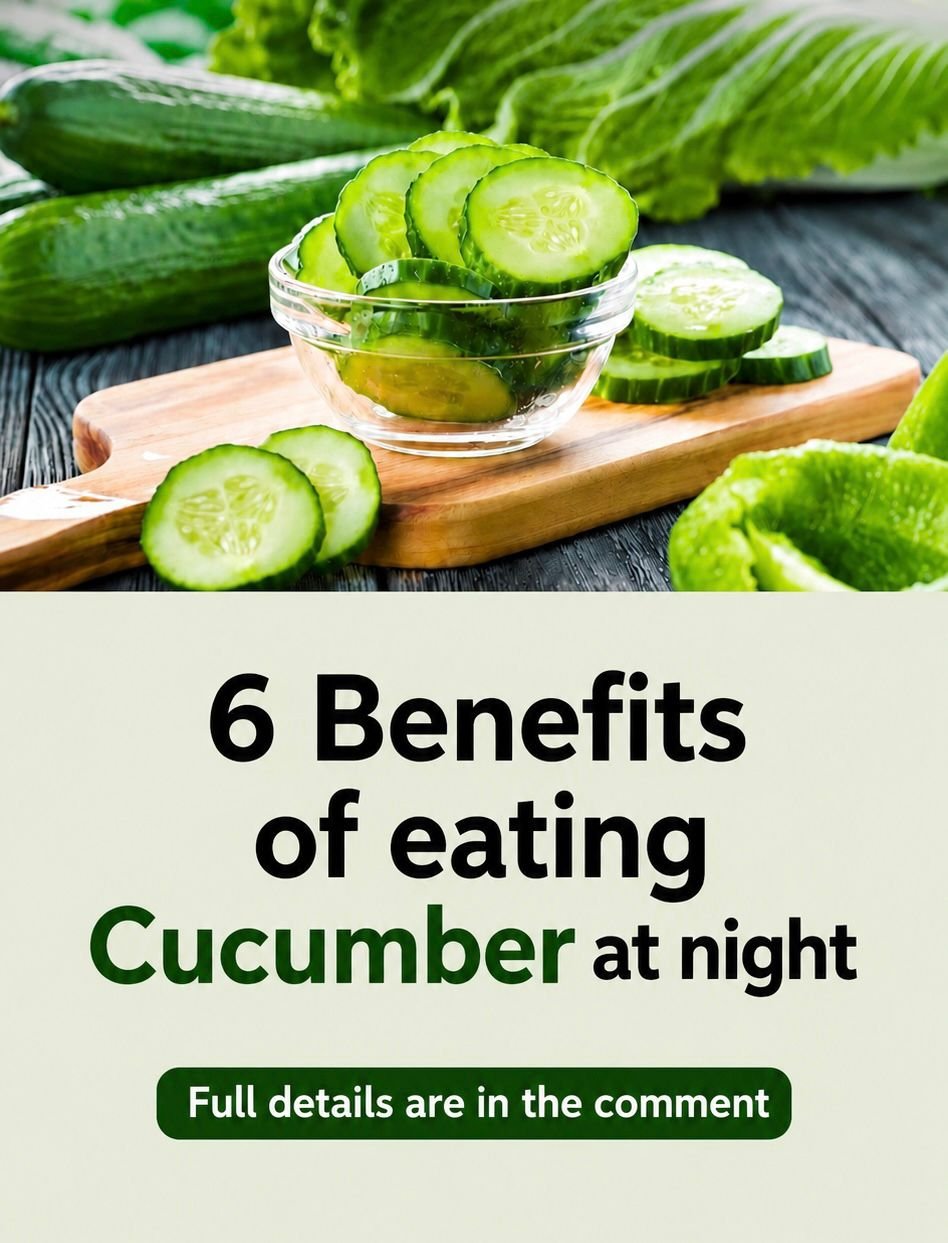
6 Benefits of Eating Cucumber at Night

6 Benefits of Eating Cucumber at Night

Cucumbers are incredibly low in calories but packed with essential vitamins, minerals, and water. Enjoying a few slices before bed can do wonders for your body while you sleep. Here is why it makes the perfect evening snack:

1. Promotes Deep Hydration

Cucumbers are made up of about 95% water. Eating them in the evening helps top off your hydration levels, ensuring your body stays refreshed and functions smoothly throughout the night.

2. Supports Better Digestion

Packed with soluble fiber and water, cucumbers help soothe the digestive tract. Eating them at night can promote regular bowel movements and help prevent that uncomfortable morning bloating.

3. Aids in Weight Management

If you get those late-night kitchen cravings, cucumbers are the ultimate guilt-free snack. They are extremely low in calories, meaning you can satisfy the urge to crunch without spiking your calorie intake or interrupting your health goals.

4. Flushes Out Toxins

The high water and potassium content in cucumbers acts as a natural diuretic. This helps your body flush out waste and excess sodium overnight, which can leave you feeling lighter and less puffy when you wake up.

5. Promotes Healthier, Glowing Skin

Cucumbers contain silica and antioxidants like vitamin C and beta-carotene. Nourishing your body with these nutrients before bed supports overnight skin cell rejuvenation, helping you wake up with a clearer, brighter complexion.

6. Helps Manage Blood Sugar Levels

Cucumbers have a very low glycemic index (GI), meaning they won’t cause a sudden spike in your blood sugar levels. Eating them at night helps keep your glucose stable, preventing late-night crashes and supporting overall metabolic health.


Quick Tip for Your Page: If you want to maximize the health benefits, encourage your followers to eat them with the peel on! Most of the fiber, vitamins, and minerals are packed right into that crisp green skin.

Golden Crispy Potato & Onion Cakes

🥔 Golden Crispy Potato & Onion Cakes ✨

These crispy potato cakes are golden on the outside, soft on the inside, and packed with savory onion flavor! Perfect as a snack, breakfast side, or cozy comfort meal. 😍🔥

🛒 Ingredients

  • 4 medium potatoes (boiled & mashed smoothly) 🥔
  • 1 large yellow onion (finely minced or grated) 🧅
  • 2 cloves garlic (minced) 🧄
  • 1 large egg 🥚
  • 3–4 tbsp cornstarch or almond flour
  • 2 tbsp fresh parsley or chives 🌿
  • 1 tsp salt 🧂
  • ½ tsp black pepper
  • ½ tsp paprika or onion powder ✨
  • 2–3 tbsp olive oil or butter (for frying) 🧈

👩‍🍳 Step-by-Step Instructions

🍳 Step 1: Sauté the Onion & Garlic

➡️ Heat a small splash of oil in a skillet over medium heat.

➡️ Add the minced onion and garlic.

➡️ Cook for 3–4 minutes until soft and lightly golden. ✨

😍 This step adds sweetness and removes extra moisture for crispier cakes!


🥣 Step 2: Make the Potato Mixture

➡️ In a large bowl, add:

  • mashed potatoes
  • sautéed onion & garlic
  • egg
  • cornstarch or almond flour
  • parsley
  • salt
  • pepper
  • paprika

➡️ Mix everything thoroughly until a thick, moldable mixture forms.

✨ The mixture should hold together easily when pressed.


✋ Step 3: Shape the Patties

➡️ Lightly grease your hands with oil.

➡️ Scoop a small portion of the mixture and roll into a ball.

➡️ Flatten gently into round or oval patties about ½-inch thick.

😍 Keeping them even helps them cook beautifully.


🔥 Step 4: Fry Until Crispy

➡️ Heat olive oil or butter in a skillet over medium-high heat.

➡️ Carefully place the patties into the hot pan without overcrowding.

➡️ Cook for 4–5 minutes on the first side until deeply golden and crispy.

➡️ Flip gently and cook another 3–4 minutes on the other side.

✨ Avoid moving them too early so a crispy crust can form!


🌿 Step 5: Garnish & Serve

➡️ Transfer the hot potato cakes to a serving plate.

➡️ Sprinkle with fresh parsley or chives. 🌿

➡️ Serve warm with:

  • sour cream
  • yogurt dip
  • ketchup
  • garlic sauce 😋

❓Q & A

❓How do I make them extra crispy?

➡️ Use medium-high heat and let them cook undisturbed for the first few minutes. This creates the perfect golden crust! 🔥

❓Can I add cheese?

➡️ Yes! Shredded cheddar or parmesan tastes amazing in these potato cakes. 🧀

❓What if the mixture feels too soft?

➡️ Add an extra tablespoon of cornstarch, almond flour, or breadcrumbs until easier to shape. 😊

❓Can I bake them instead of frying?

➡️ Absolutely! Bake at 400°F (200°C) for about 25–30 minutes, flipping halfway through. ✨

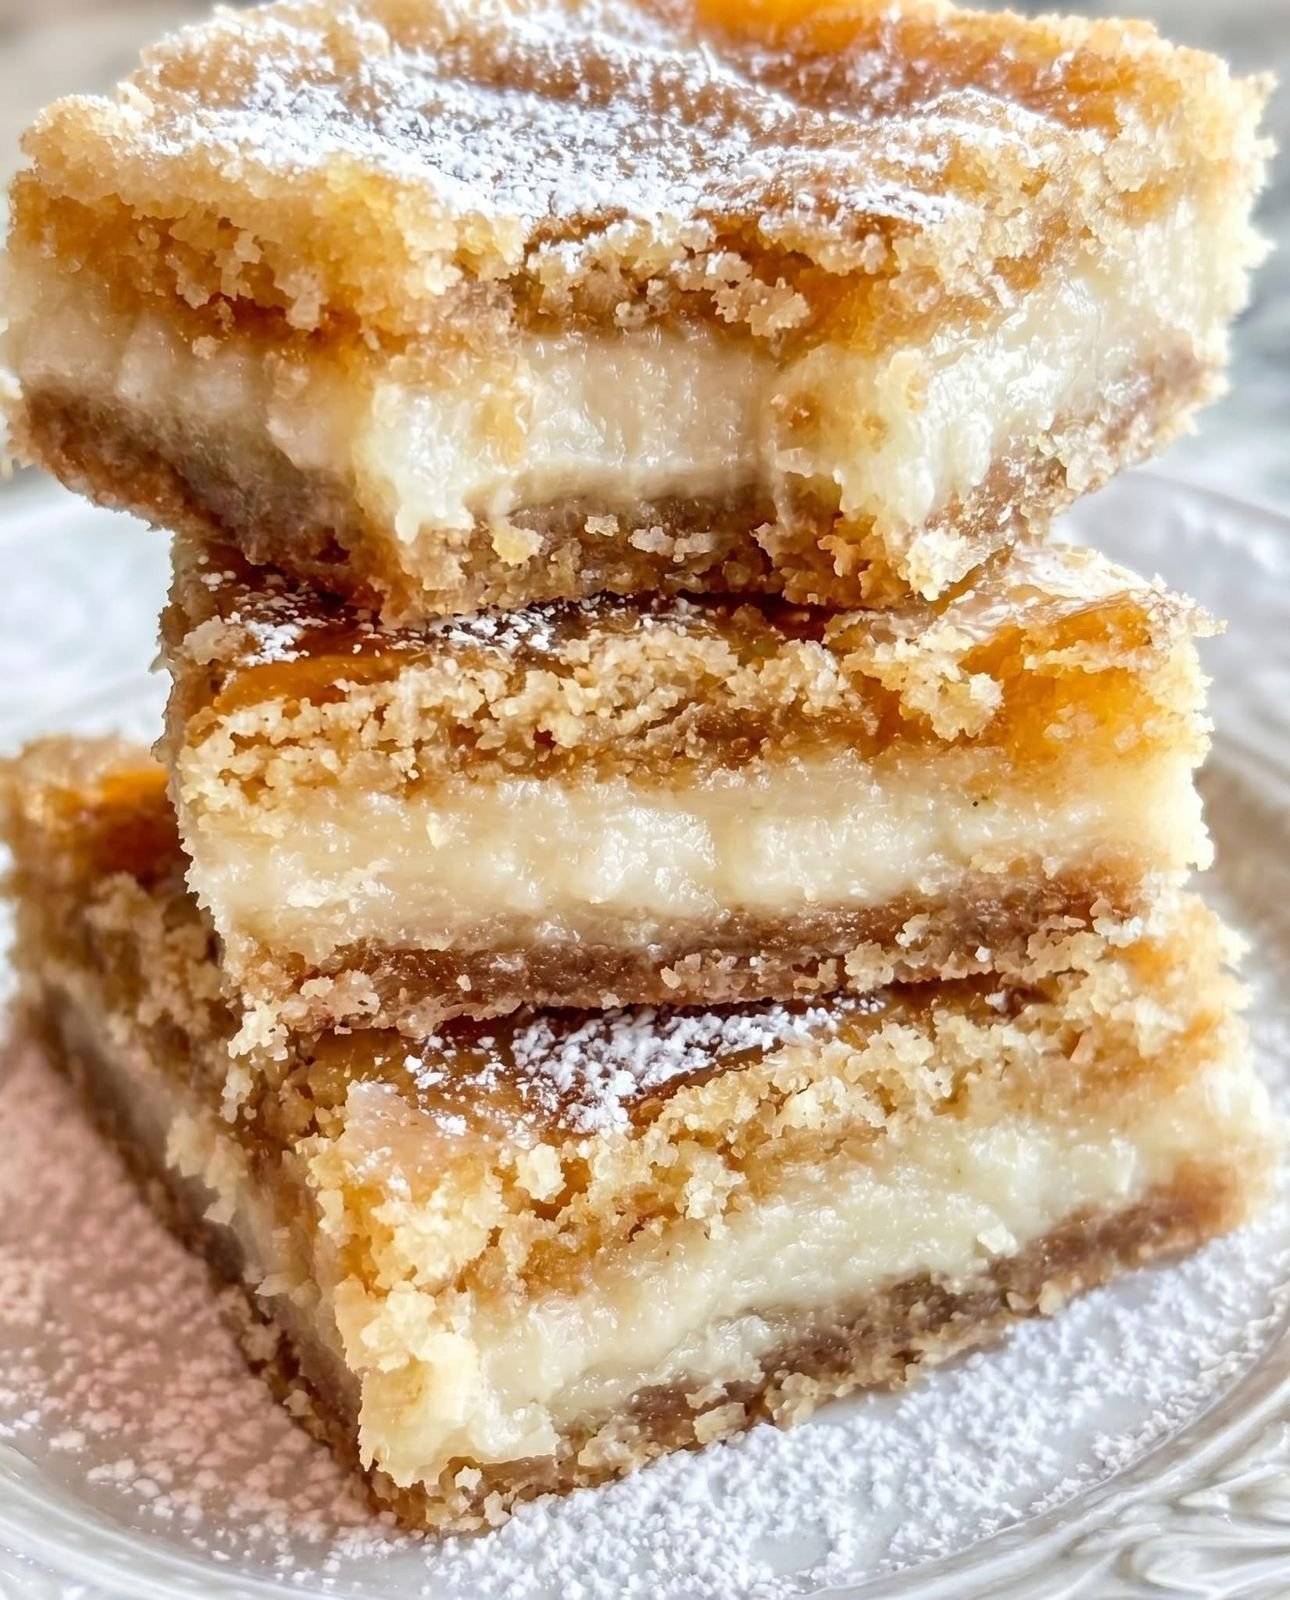
Creamy Banana Crumb Bars Recipe

Creamy Banana Crumb Bars Recipe

These soft dessert bars look like creamy banana cheesecake crumb bars with a buttery crumble topping and powdered sugar dusting. 😍

🛒 Ingredients

For the Crust & Crumble

  • 🧈 1 cup unsalted butter (melted)
  • 🍚 2 cups all-purpose flour
  • 🍬 ¾ cup brown sugar
  • 🧂 Pinch of salt

For the Creamy Banana Filling

  • 🍌 2 ripe bananas (mashed)
  • 🧀 8 oz cream cheese (softened)
  • 🍬 ½ cup sugar
  • 🥚 1 egg
  • 🌼 1 tsp vanilla extract

For Topping

  • ❄️ Powdered sugar

👩‍🍳 Step-by-Step Recipe

1️⃣ Prepare the Pan

  • Preheat oven to 175°C / 350°F.
  • Line an 8×8-inch baking pan with parchment paper.

2️⃣ Make the Crumble Mixture

  • In a bowl, mix:
    • flour
    • brown sugar
    • salt
    • melted butter
  • Stir until crumbly. ✨

3️⃣ Form the Bottom Crust

  • Press half of the crumble mixture firmly into the pan.
  • Bake for 10 minutes until lightly golden.

4️⃣ Prepare the Filling

  • In another bowl:
    • beat cream cheese and sugar
    • add egg and vanilla
    • mix in mashed bananas 🍌
  • Stir until smooth and creamy.

5️⃣ Assemble the Bars

  • Pour banana filling over the baked crust.
  • Sprinkle remaining crumble mixture evenly on top.

6️⃣ Bake

  • Bake for 30–35 minutes until the top is golden and center is set. 🔥

7️⃣ Cool & Serve

  • Let bars cool completely.
  • Chill for 1 hour for cleaner slices.
  • Dust with powdered sugar before serving ❄️

💡 Tips

  • Use ripe bananas for stronger flavor 🍌
  • Chill before slicing to keep layers neat.
  • Store in refrigerator for up to 4 days.

❓Q/A

❓Can I use graham crackers instead of flour crust?

✅ Yes, crushed graham crackers with butter work great.

❓Can I freeze these bars?

✅ Yes, freeze in an airtight container for up to 2 months.

❓How do I know they’re done baking?

✅ The edges should be golden and the center slightly firm.

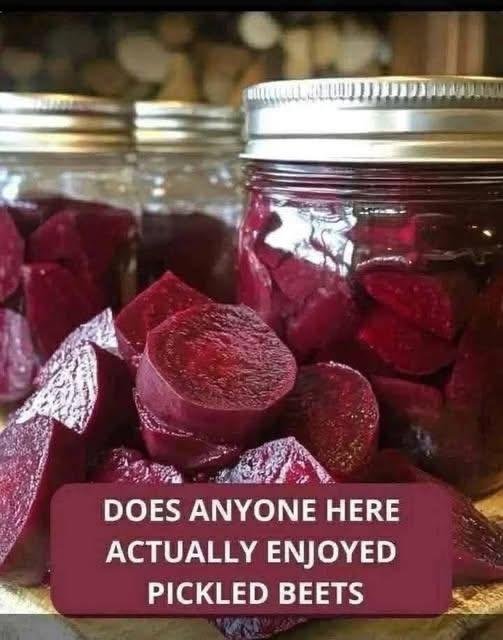
Vibrant Pickled Beets

Vibrant Pickled Beets

Ingredients

  • 6-8 Medium Beets (fresh) 🌿

  • 1 cup Apple cider vinegar 🍎

  • ½ cup Water

  • 1 tsp Salt

  • ½ tsp Whole peppercorns

  • 1 Cinnamon stick (optional, for warmth)

  • 2 Whole cloves (optional)

  • Note: You can skip the sugar entirely for a tart, natural flavor!


Step-by-Step Instructions

  1. Cook the Beets ♨️

    • Leave about an inch of the stems on to prevent the color from “bleeding” out. Boil the beets in a large pot of water for 25–35 minutes until fork-tender.

    • ➡️ Pro Tip: Once cooked, plunge them into cold water. The skins will slide right off with just a little pressure from your thumbs!

  2. Slice and Pack 🔪

    • Slice the peeled beets into rounds or wedges as shown in your photo.

    • ➡️ Pack them tightly into clean, sterilized mason jars.

  3. Prepare the Brine 🧪

    • In a small saucepan, combine the vinegar, water, salt, peppercorns, and spices.

    • ➡️ Bring the mixture to a rolling boil for about 2 minutes to let the flavors infuse.

  4. Fill the Jars 🫙

    • Carefully pour the hot brine over the beets in the jars, ensuring they are completely submerged.

    • ➡️ Leave about half an inch of “headspace” at the top of the jar.

  5. Cool and Cure ❄️

    • Let the jars cool to room temperature on the counter.

    • ➡️ Seal the lids and place them in the refrigerator. For the best flavor, wait at least 24 hours before eating!


Common Questions & Answers

Q: How long do these stay fresh? A: These refrigerator pickled beets will stay delicious for up to 3–4 weeks when kept chilled.

Q: Can I add other vegetables to the jar? A: Absolutely! Sliced red onions or even cloves of garlic are wonderful additions that soak up that beautiful pink brine.

Q: Are these beets crunchy or soft? A: Since they are boiled before pickling, they will have a tender, smooth texture with just a slight “snap.”

Q: Do I have to use apple cider vinegar? A: You can use white vinegar for a sharper tang, but apple cider vinegar provides a smoother, fruitier finish that complements the earthiness of the beets. 🥗