Golden Beef & Herb Pastry Rolls

πŸ₯ Golden Beef & Herb Pastry Rolls

Ingredients

For the Filling:

  • 500g Lean ground beef πŸ₯©

  • 1 Small onion (finely diced)

  • 2 cloves Garlic (minced)

  • 1 cup Shredded mozzarella or cheddar cheese πŸ§€

  • Β½ cup Fresh parsley (chopped) 🌿

  • 1 tsp Cumin

  • Β½ tsp Paprika

  • Salt & Pepper to taste

For the Pastry & Assembly:

  • 1 pack Phyllo pastry or very thin flour tortillas/flatbreads πŸ«“

  • ΒΌ cup Melted butter or olive oil (for brushing)

  • 1 Egg (beaten, for the egg wash)


Step-by-Step Instructions

  1. Prepare the Filling 🍳

    • In a pan over medium heat, brown the ground beef with the diced onions and garlic.

    • ➑️ Drain any excess liquid to keep the pastry from getting soggy.

    • ➑️ Stir in the cumin, paprika, salt, and pepper. Let the mixture cool slightly.

  2. Layer the Pastry πŸ“‹

    • Lay out your pastry sheet or flatbread on a clean wooden board.

    • ➑️ If using phyllo, stack 3–4 sheets, brushing a little melted butter between each layer for extra flakiness.

  3. Assemble the Roll πŸ‘©β€πŸ³

    • Spread a thin, even layer of the beef mixture over the pastry, leaving a small border at the edges.

    • ➑️ Sprinkle the shredded cheese and a generous amount of fresh parsley over the meat.

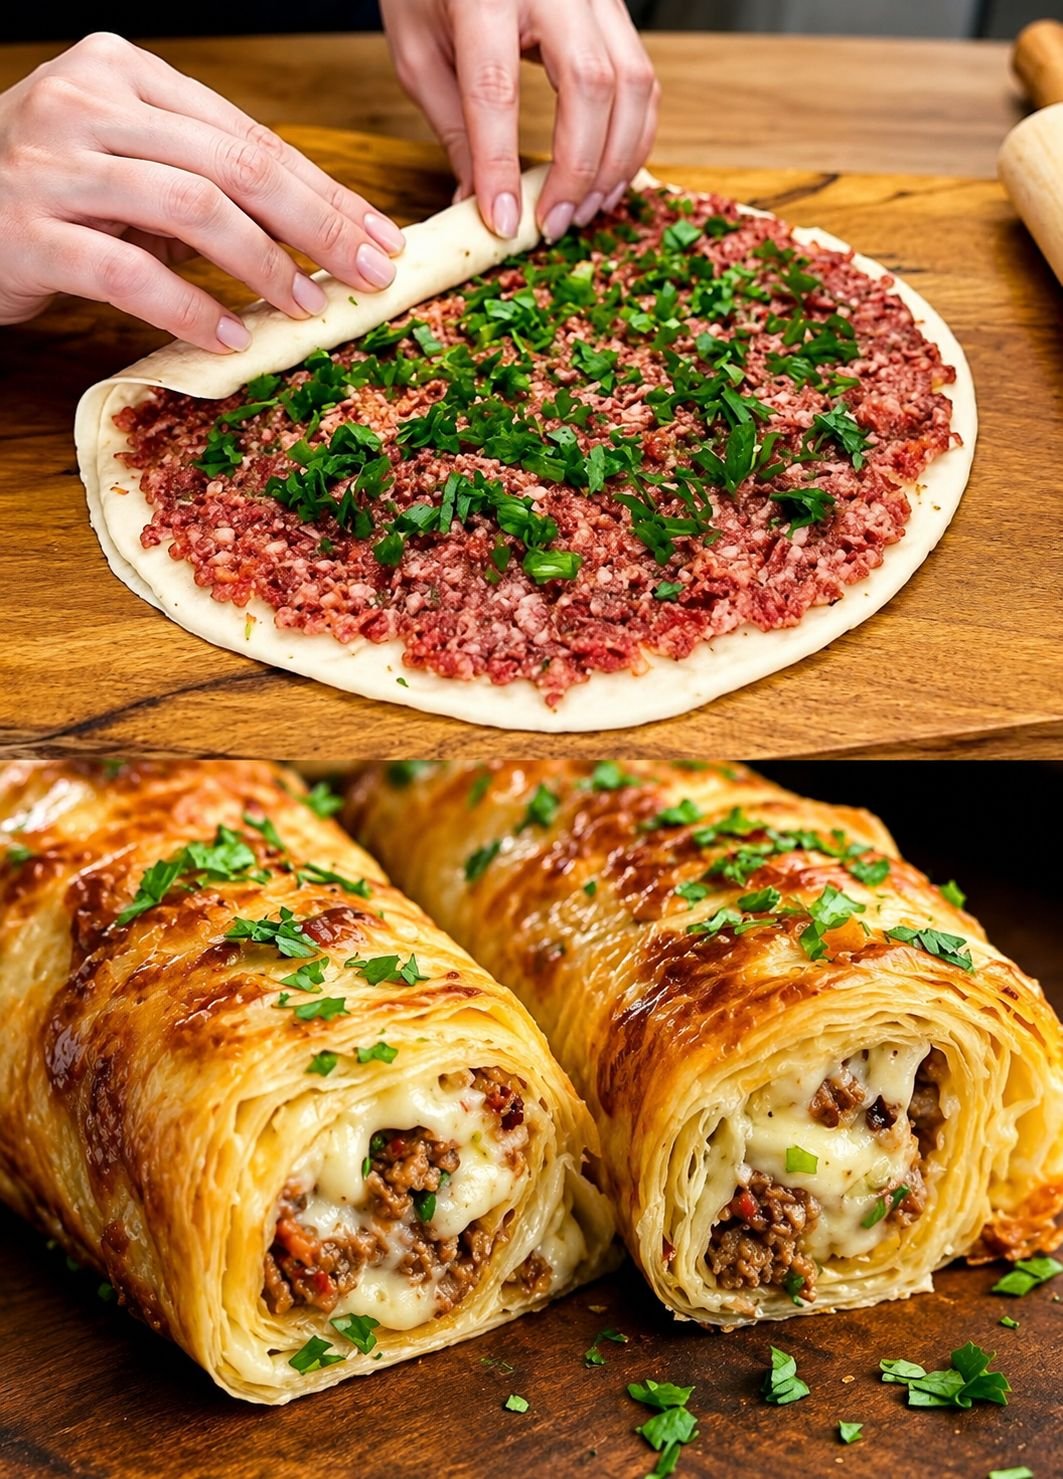
    • ➑️ Starting from one end, roll the pastry tightly (as shown in your top photo) to create a long log.

  4. Baking πŸ”₯

    • Place the rolls on a baking sheet lined with parchment paper.

    • ➑️ Brush the tops with the beaten egg wash for that shiny, golden finish.

    • ➑️ Bake at 190Β°C for 20–25 minutes until the pastry is puffed and deep golden brown.

  5. Slice and Garnish πŸ”ͺ

    • Let the rolls rest for 5 minutes before slicing. This helps the cheese set so it doesn’t run out.

    • ➑️ Garnish with more fresh parsley and serve warm.


Common Questions & Answers

Q: Can I use a different meat for the filling? A: Definitely! Ground turkey or chicken works beautifully here as well. For a vegetarian version, a mix of sautΓ©ed mushrooms and spinach is a great choice.

Q: My pastry is breaking when I roll it. What should I do? A: If using phyllo, keep it covered with a damp cloth while working so it doesn’t dry out. If using flatbreads, a very light brush of oil can make them more pliable.

Q: Can I prepare these in advance? A: Yes! You can roll them up and keep them in the fridge (covered) for a few hours before baking. Just add the egg wash right before they go into the oven.

Q: What dip goes well with these? A: A cool yogurt dip with garlic or a simple marinara sauce complements the savory beef perfectly! πŸ₯£

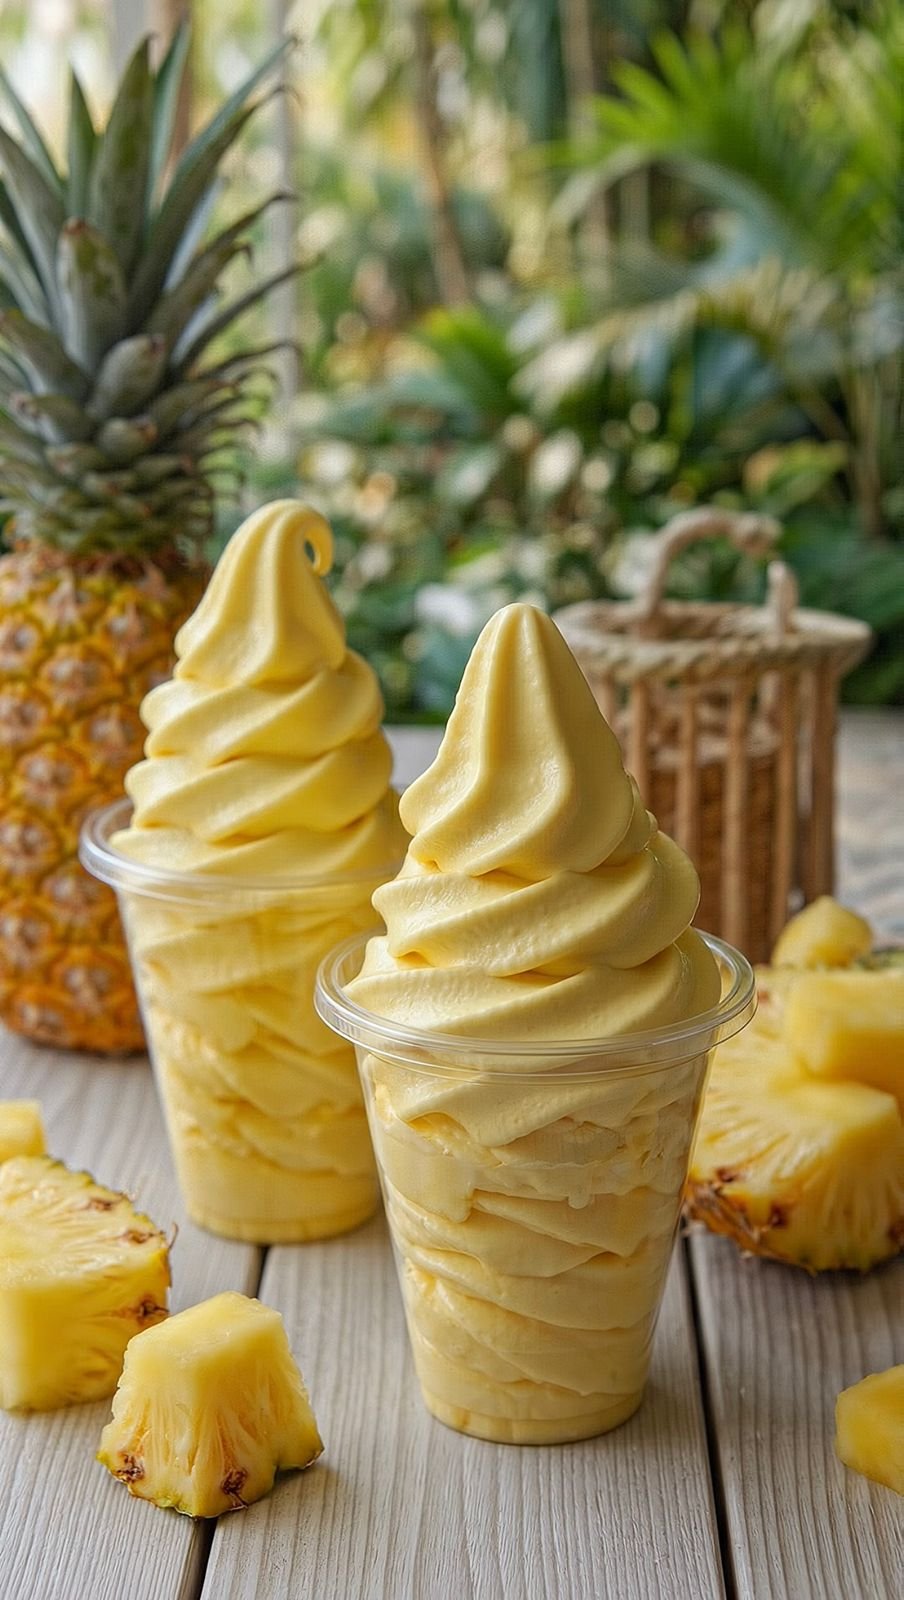
2-Ingredient Pineapple Soft Serve

🍦 2-Ingredient Pineapple Soft Serve (Creamy & Refreshing) 🍍✨

A quick, healthy frozen treat that tastes like tropical ice cream β€” made in just minutes with no ice cream machine needed! πŸŒ΄πŸ’›


πŸ›’ Ingredients

  • 2 cups frozen pineapple chunks 🧊🍍
  • Β½ cup unsweetened coconut milk πŸ₯₯

πŸ‘‰ Optional:

  • 1 tsp honey or maple syrup 🍯 (if extra sweetness is needed)
  • Tiny pinch of salt (enhances sweetness)

πŸ‘©β€πŸ³ Step-by-Step Instructions

1️⃣ Freeze the Pineapple 🍍

If using fresh pineapple:
Cut into small chunks and freeze for at least 4–6 hours until solid.
(Pre-frozen store-bought pineapple works perfectly too!)


2️⃣ Add to Blender πŸŒͺ️

Place frozen pineapple and coconut milk into a high-speed blender or food processor.


3️⃣ Blend Slowly First πŸ₯„

Start blending on low speed.
Stop occasionally to scrape down the sides so everything mixes evenly.


4️⃣ Make It Creamy ✨

Keep blending until the mixture becomes:

  • Smooth
  • Thick
  • Soft-serve texture 🍦

πŸ‘‰ If it’s too thick, add coconut milk 1 tablespoon at a time.


5️⃣ Adjust Taste 🍯

Taste and adjust:

  • Add a little honey if needed
  • Add a pinch of salt to enhance flavor

6️⃣ Serve Immediately 🍦✨

Scoop into bowls or glasses.
For a beautiful swirl look, pipe it using a star nozzle piping bag πŸŒ€


❓ Q & A

Q: Can I use another milk instead of coconut milk?

➑️ Yes! Almond or oat milk works, but coconut milk gives the creamiest texture.

Q: Why is my soft serve not blending?

➑️ Let the pineapple sit for 3–5 minutes or add a splash more liquid.

Q: Can I store it?

➑️ It’s best fresh, but you can freeze it and re-blend before serving.


🌟 Pro Tip

Add a tiny pinch of salt or a splash of lime juice πŸ‹ β€” it makes the pineapple taste even more vibrant and tropical!


Enjoy your refreshing homemade pineapple soft serve! πŸπŸ¦πŸ’›

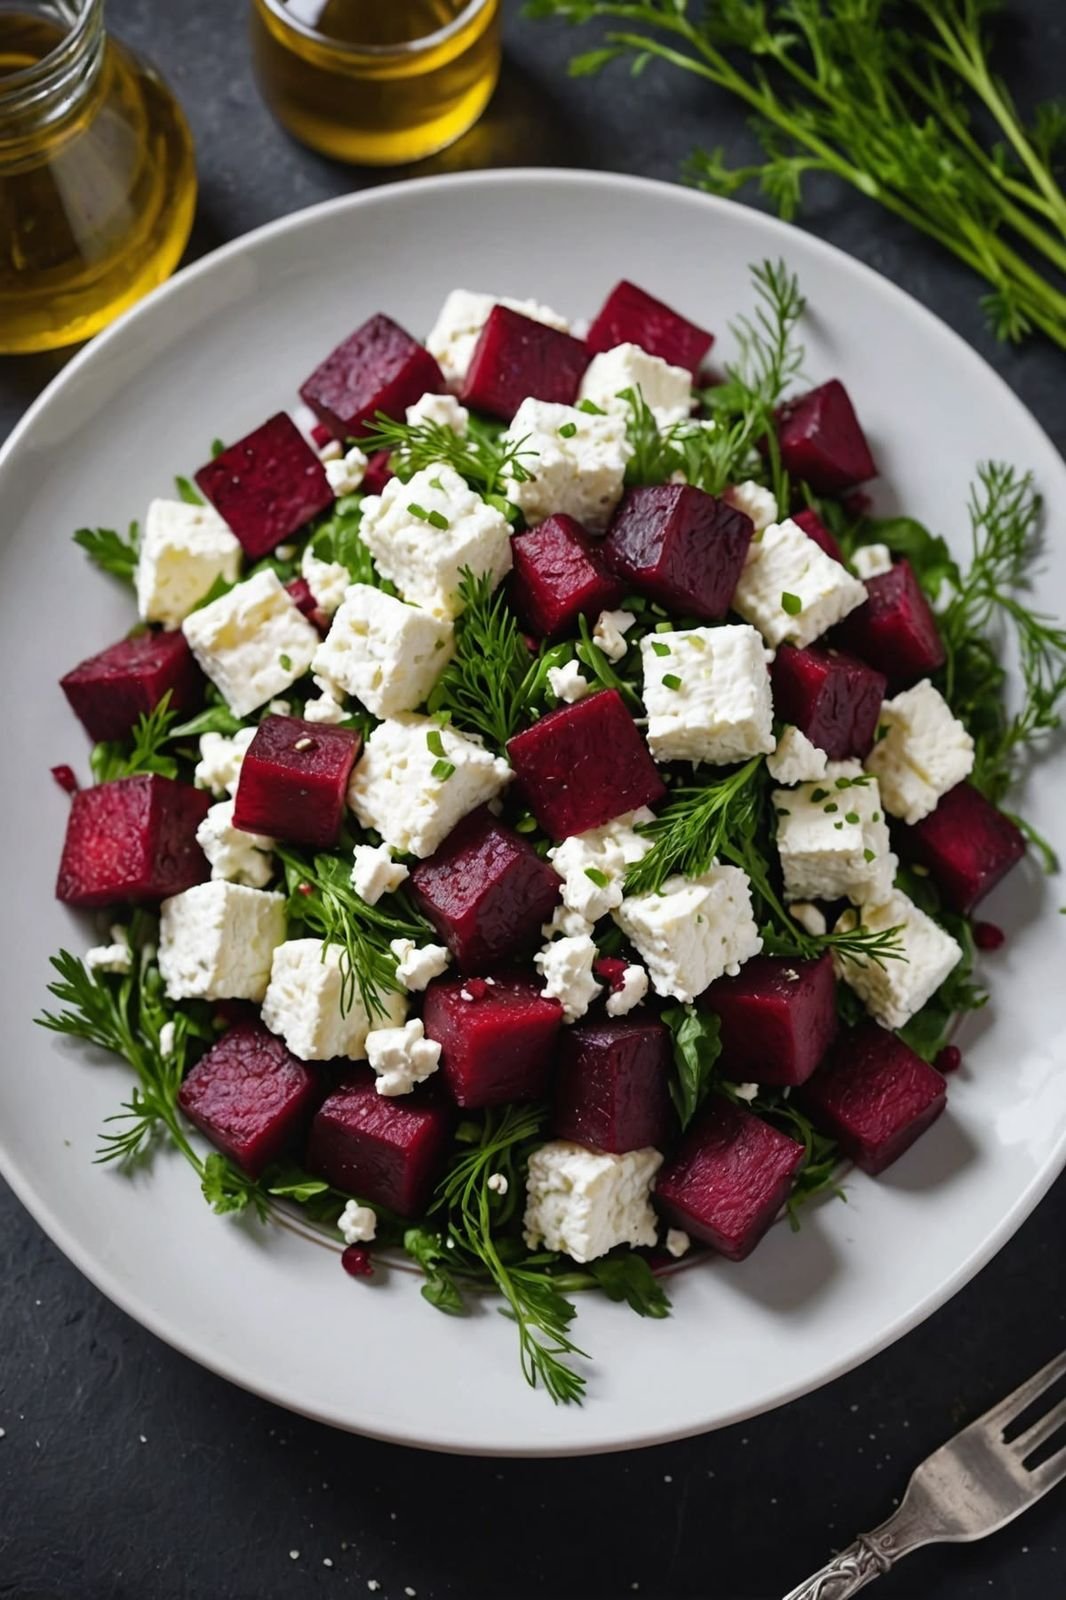
Roasted Beet & Feta Herb Salad

πŸ₯— Roasted Beet & Feta Herb Salad

πŸ›’ Ingredients

The Salad Base:

  • 3-4 medium Beets (peeled and cut into 1-inch cubes) ➑️ Red or golden beets work great!

  • 1 cup Feta cheese (cut into cubes or roughly crumbled) πŸ§€

  • 2 cups Fresh greens (arugula or mixed baby greens) πŸ₯¬

  • Β½ cup Fresh dill and parsley (roughly chopped) 🌿

The Simple Vinaigrette:

  • 3 tbsp Extra virgin olive oil πŸ«’

  • 1 tbsp Balsamic vinegar or lemon juice πŸ‹

  • 1 tsp Honey or maple syrup 🍯

  • Salt and black pepper to taste


πŸ‘©β€πŸ³ Step-by-Step Instructions

  1. Roast the Beets ➑️ Preheat your oven to 400Β°F (200Β°C). Toss the beet cubes with 1 tbsp of olive oil and a pinch of salt. Spread them on a baking sheet and roast for 35–45 minutes until tender when pierced with a fork. 🌑️πŸ”₯

  2. Cool Down ➑️ Let the beets cool to room temperature. This prevents the feta cheese from melting and the greens from wilting. ❄️

  3. Whisk the Dressing ➑️ In a small jar, combine the remaining olive oil, balsamic vinegar, honey, salt, and pepper. Shake well until combined. πŸ₯£βœ¨

  4. Layer the Greens ➑️ Place a bed of fresh greens on a large serving plate or in a shallow bowl. πŸ₯¬

  5. Assemble ➑️ Arrange the roasted beet cubes over the greens. Top with the feta cheese cubes. πŸ§€βž‘οΈπŸ₯—

  6. Garnish and Dress ➑️ Sprinkle the fresh dill and parsley generously over the top. Drizzle the vinaigrette evenly over the salad just before serving. 🌿🍯

  7. Serve ➑️ Toss lightly or serve as composed layers to maintain that striking color contrast! 🎨🍴


❓ Common Questions & Answers

Q: Can I use pre-cooked beets to save time? A: Absolutely! ➑️ You can find steamed or vacuum-packed beets in most grocery stores. Just cube them up and skip straight to the assembly! πŸ•’

Q: How do I stop the beets from staining the feta? A: To keep the white cheese looking bright, don’t toss the salad too vigorously. ➑️ Lay the beets down first, then place the feta on top right before serving. πŸ§€βœ¨

Q: Can I add some crunch to this? A: Definitely. ➑️ Toasted walnuts, pine nuts, or even pumpkin seeds add a wonderful texture to this dish. πŸ₯œ

Q: Is this salad good for meal prep? A: Yes! ➑️ Keep the roasted beets, feta, and dressing in separate containers. Combine them when you’re ready to eat to keep everything fresh and crisp. πŸ₯‘

Enjoy your vibrant, nutrient-packed salad! πŸ₯—πŸŒΏβœ¨

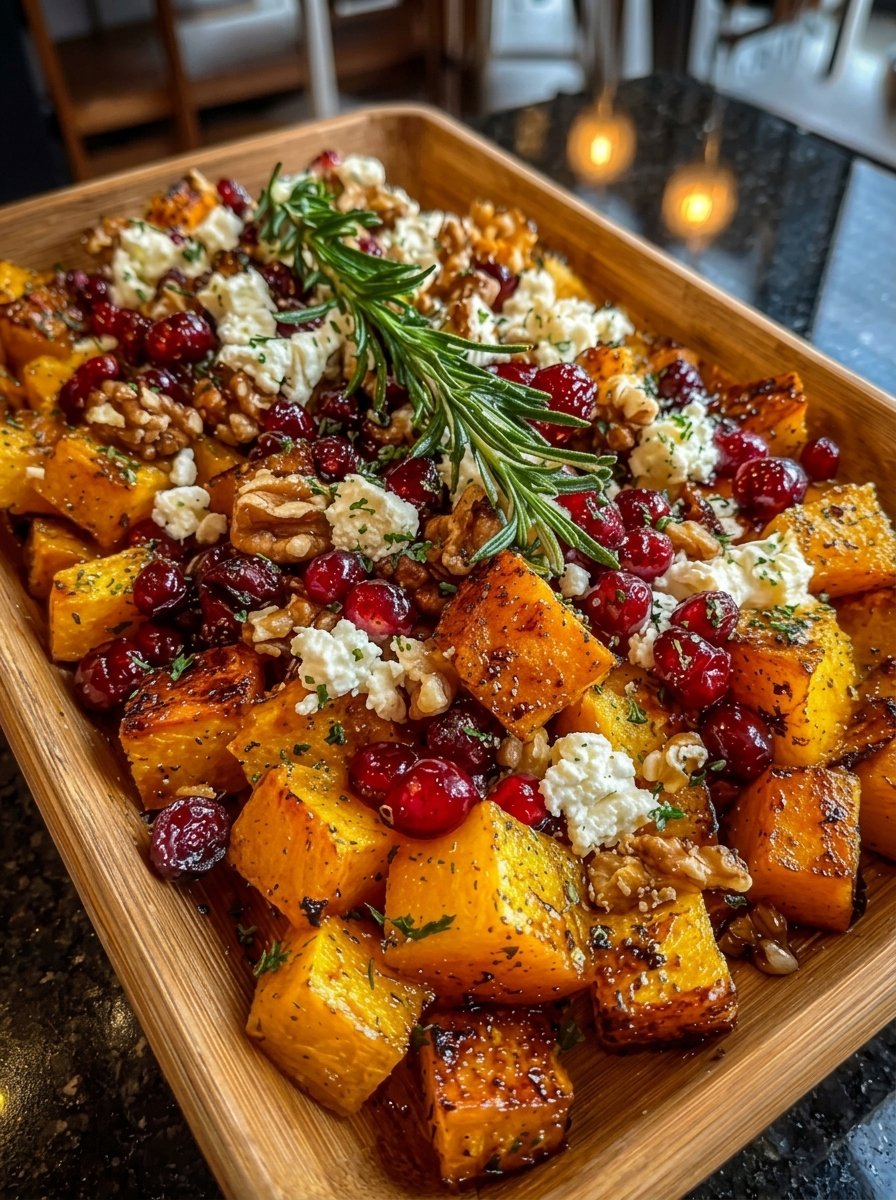
Roasted Butternut Squash & Cranberry Medley

Roasted Butternut Squash & Cranberry Medley

πŸ›’ Ingredients

The Roast:

  • 1 large Butternut squash (peeled and cubed into 1-inch pieces) ➑️ Look for a matte skin for the best ripeness!

  • 1 Β½ cups Fresh or frozen cranberries πŸ’

  • 2 tbsp Olive oil πŸ«’

  • 1 tbsp Maple syrup or honey 🍯

  • 1 tsp Dried thyme or rosemary (plus a fresh sprig for garnish) 🌿

  • Salt and black pepper to taste

The Toppings:

  • Β½ cup Feta cheese (crumbled) πŸ§€

  • Β½ cup Walnuts or pecans (toasted) πŸ₯œ

  • 2 tbsp Fresh parsley (chopped) 🌿


πŸ‘©β€πŸ³ Step-by-Step Instructions

  1. Heat it Up ➑️ Preheat your oven to 400°F (200°C). Line a large rimmed baking sheet with parchment paper. 🌑️

  2. Toss and Season ➑️ In a large bowl, combine the butternut squash cubes, olive oil, maple syrup, dried herbs, salt, and pepper. Toss until every piece is glistening. πŸ₯£βœ¨

  3. The First Roast ➑️ Spread the squash in a single layer on the baking sheet. Roast for 20 minutes. πŸŽƒπŸ”₯

  4. Add the Berries ➑️ Remove the tray and scatter the cranberries among the squash. Toss gently. Roast for another 10–15 minutes until the squash is tender and the cranberries have softened or burst. πŸ’βž‘οΈβ²οΈ

  5. Toast the Nuts ➑️ While the squash finishes, lightly toast your walnuts in a dry pan over medium heat for 3–5 minutes until fragrant. πŸ₯œπŸ³

  6. Assemble ➑️ Transfer the warm squash and cranberries to a serving platter. Sprinkle generously with crumbled feta, toasted walnuts, and fresh parsley. πŸ§€βœ¨

  7. Final Touch ➑️ Place a fresh rosemary sprig in the center for that beautiful professional look! πŸŒΏπŸ“Έ


❓ Common Questions & Answers

Q: Can I use Sweet Potato instead of Butternut Squash? A: Absolutely! ➑️ Sweet potatoes or even Kabocha squash work perfectly with these exact same flavors.

Q: My cranberries are very tartβ€”how can I balance that? A: You can toss the cranberries in a teaspoon of sugar or extra maple syrup before adding them to the tray. ➑️ This creates a lovely sweet-tart glaze! πŸ―πŸ’

Q: Can I make this dish ahead of time? A: You can roast the squash and berries ahead of time. ➑️ However, wait to add the feta and walnuts until just before serving to keep the cheese fresh and the nuts crunchy. πŸ§€πŸ₯œ

Q: Is this dish served hot or cold? A: It is delicious both ways! ➑️ It’s traditionally served warm as a side dish, but it also makes a fantastic cold salad the next day when tossed with some arugula or spinach. πŸ₯—

Enjoy this vibrant and flavorful autumn-inspired dish! πŸŽƒπŸ‚βœ¨

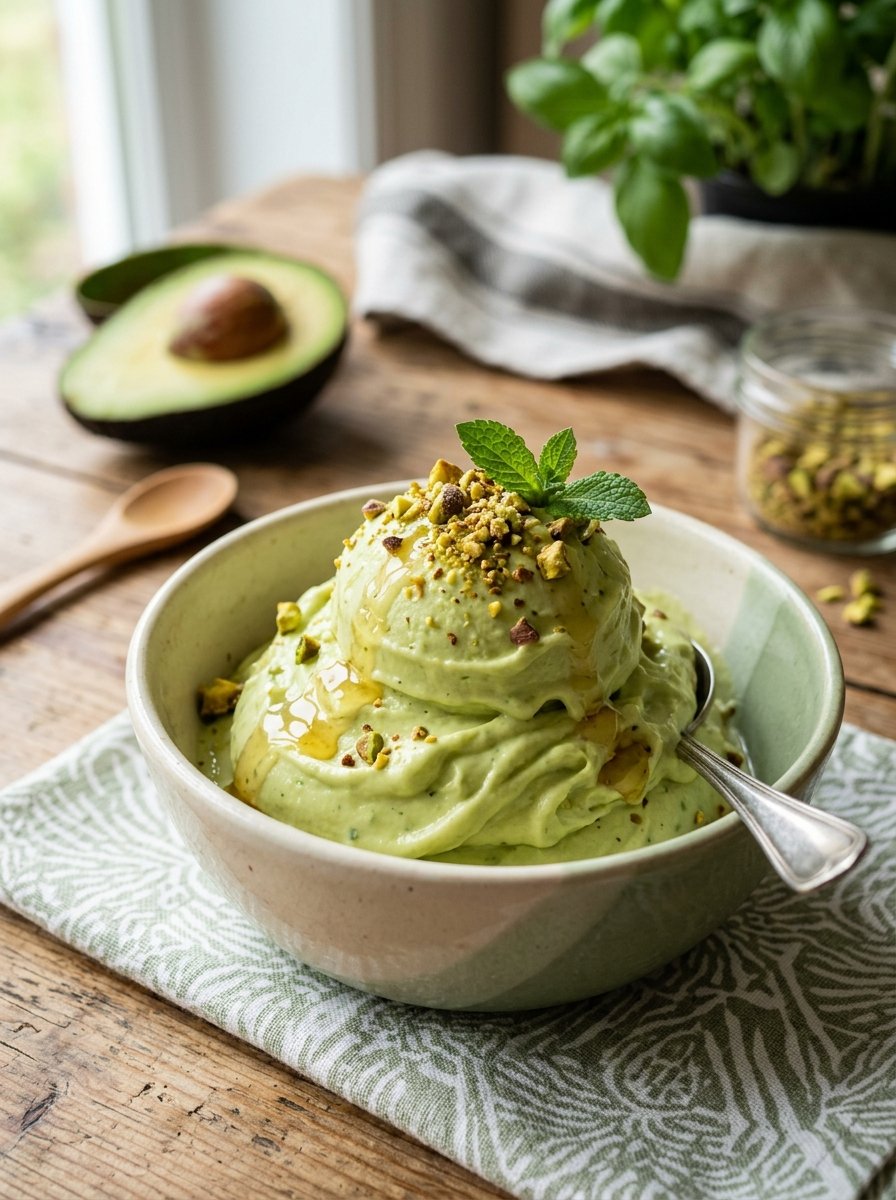
Healthy Creamy Avocado Ice Cream

Healthy Creamy Avocado Ice Cream πŸ₯‘πŸ¦βœ¨

Cool, silky, and naturally creamy β€” this avocado ice cream is a refreshing dessert packed with healthy fats and tropical flavor! πŸŒΏπŸ’š

πŸ›’ Ingredients

The Creamy Base πŸ₯‘πŸ₯₯

  • 2 ripe avocados
  • 1 can (13.5 oz) full-fat coconut milk, chilled overnight
  • Β½ cup honey or maple syrup
  • 1 tbsp lime juice
  • 1 tsp vanilla extract

Toppings 🌿

  • 2 tbsp chopped pistachios
  • Honey for drizzling
  • Fresh mint leaves

πŸ‘©β€πŸ³ Step-by-Step Instructions

1️⃣ Prepare the Coconut Cream πŸ₯₯

Open the chilled coconut milk can carefully.
Scoop out only the thick cream from the top and place it into a blender. Save the liquid for smoothies or drinks.

2️⃣ Add the Main Ingredients πŸ₯‘

Add:

  • Avocado flesh
  • Coconut cream
  • Honey or maple syrup
  • Lime juice
  • Vanilla extract

3️⃣ Blend Until Creamy πŸŒͺ️

Blend everything on high speed until the mixture becomes completely smooth and fluffy.
The texture should look rich and silky with no avocado chunks remaining.

4️⃣ Churn or Freeze 🍦

If using an ice cream maker:
➑️ Churn for about 15–20 minutes until thick and creamy.

For the no-churn method:
➑️ Pour the mixture into a shallow container and freeze for at least 4 hours.

5️⃣ Keep It Smooth ❄️

During the first 2 hours of freezing, stir the mixture every 45 minutes.
This helps create a softer and creamier texture.

6️⃣ Soften Before Serving πŸ₯„

Let the ice cream sit at room temperature for 5–10 minutes before scooping for the best texture.

7️⃣ Garnish & Enjoy 🌿✨

Top with chopped pistachios, honey drizzle, and fresh mint leaves before serving.


❓Q & A

Q: Does avocado make the ice cream taste savory?

➑️ No! The avocado mainly adds creaminess while the vanilla, honey, and lime create a sweet tropical flavor.

Q: Can I make this dairy-free?

➑️ Yes! This recipe is naturally dairy-free because it uses coconut milk instead of cream.

Q: How do I keep the green color bright?

➑️ Lime juice helps prevent browning and keeps the ice cream vibrant green.

Q: How long can I store it?

➑️ Keep it in the freezer for up to 1 week. Let it soften slightly before scooping.

Enjoy your creamy homemade avocado ice cream! πŸ₯‘πŸ¦πŸ’š

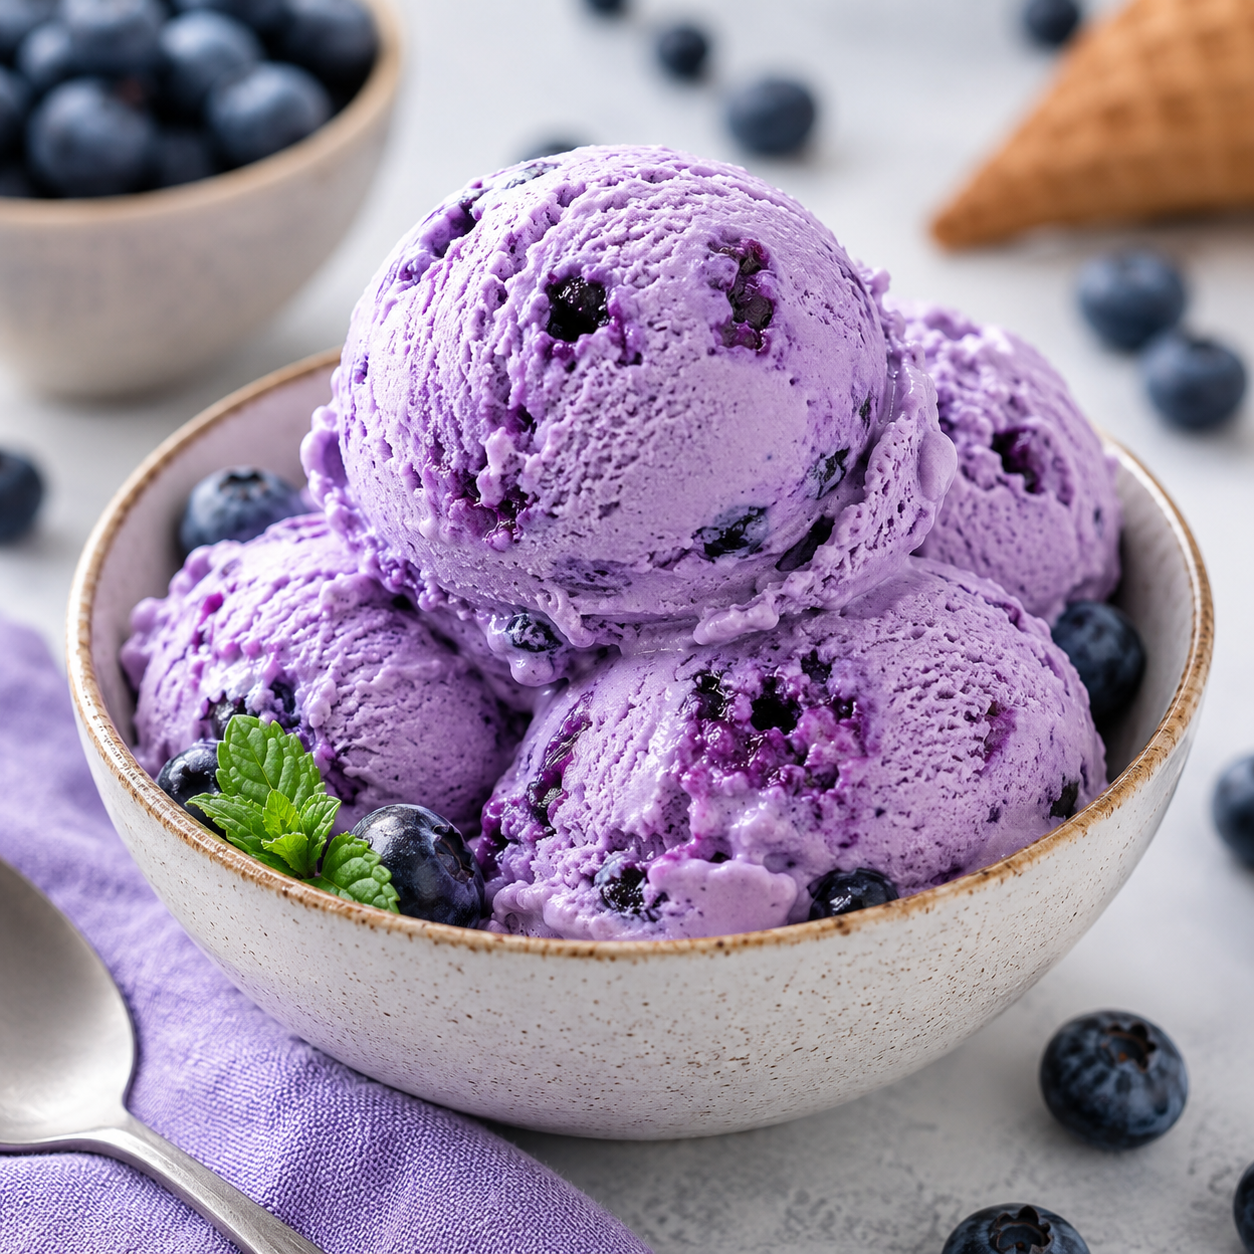
Keto Blueberry Ice Cream 🍦🫐

Ingredients

  • 2 cups fresh or frozen blueberries
  • 2 cups heavy whipping cream
  • 1 cup unsweetened almond milk
  • 1/2 cup powdered erythritol or monk fruit sweetener
  • 4 egg yolks
  • 1 teaspoon vanilla extract
  • 1 tablespoon lemon juice
  • Pinch of salt

Instructions

  1. In a saucepan, add blueberries and lemon juice. Cook for 5–7 minutes until soft. Mash slightly and set aside.
  2. In another saucepan, heat heavy cream and almond milk over medium heat until warm (do not boil).
  3. In a bowl, whisk egg yolks with sweetener until creamy.
  4. Slowly pour warm cream mixture into egg mixture while whisking continuously.
  5. Return mixture to saucepan and cook on low heat until it thickens slightly.
  6. Stir in vanilla extract and blueberry mixture.
  7. Let cool completely, then refrigerate for 2–3 hours.
  8. Churn in an ice cream maker according to manufacturer instructions.
  9. Freeze for 2 hours before serving for the best texture.

Optional Toppings

  • Fresh blueberries
  • Sugar-free chocolate chips
  • Crushed keto cookies
  • Whipped cream

Perfect low-carb summer dessert