Marry Me Chicken

🍗 Marry Me Chicken — 


📝 Ingredients

For the Chicken:

  • 4 boneless, skinless chicken breasts
  • 1 tsp salt
  • ½ tsp black pepper
  • 1 tsp Italian seasoning
  • ½ cup all-purpose flour, for lightly coating
  • 2 tbsp olive oil
  • 2 tbsp butter

For the Creamy Sauce:

  • 3–4 cloves garlic, minced
  • ½ cup sun-dried tomatoes, chopped
  • 1 cup heavy cream
  • ½ cup chicken broth
  • ½ cup freshly grated Parmesan cheese
  • 1 tsp Italian seasoning
  • ½ tsp red pepper flakes, optional
  • ½ tsp paprika
  • Salt and black pepper, to taste
  • 1 tbsp fresh basil or parsley, chopped

👩‍🍳 Instructions

1. Prepare the chicken

Pat the chicken breasts dry. Season both sides with salt, black pepper, Italian seasoning, and paprika. Lightly coat each piece with flour and shake off the excess.

2. Sear the chicken

Heat olive oil and butter in a large skillet over medium-high heat. Add the chicken and cook for about 4–5 minutes per side, until golden brown. Remove the chicken and set aside. It does not need to be completely cooked through yet.

3. Make the garlic-tomato base

Using the same skillet, add the minced garlic and chopped sun-dried tomatoes. Sauté for about 1 minute, until fragrant.

4. Make the creamy sauce

Pour in the chicken broth and scrape up the flavorful browned bits from the bottom of the pan. Add the heavy cream, Parmesan, Italian seasoning, paprika, and red pepper flakes. Stir well and let the sauce gently simmer for 2–3 minutes.

5. Return the chicken

Place the chicken breasts back into the skillet. Spoon the sauce over the chicken and reduce the heat to medium-low.

Cover loosely and simmer for 8–12 minutes, or until the chicken reaches an internal temperature of 165°F / 74°C and the sauce has thickened.

6. Finish and serve

Taste and adjust the seasoning. Sprinkle with fresh basil or parsley and extra Parmesan if desired.

🍝 Best Ways to Serve

Serve this creamy chicken with:

Pasta or spaghetti

Mashed potatoes

Rice

Garlic bread

Steamed vegetables

Roasted potatoes


⭐ Tips for the Best Marry Me Chicken

Don’t skip the sun-dried tomatoes—they give the sauce its signature sweet, tangy flavor.

Freshly grated Parmesan melts more smoothly into the sauce.

Keep the sauce at a gentle simmer rather than a rapid boil to prevent the cream from separating.

If the sauce becomes too thick, add a splash of chicken broth.

Pound very thick chicken breasts to an even thickness so they cook more evenly.

Prep Time: 15 minutes

Cook Time: 25 minutes

Total Time: 40 minutes

Servings: 4


Creamy, cheesy, garlicky, and packed with sun-dried tomato flavor—this Marry Me Chicken is perfect for an easy family dinner or a special date-night meal. ❤️🍗

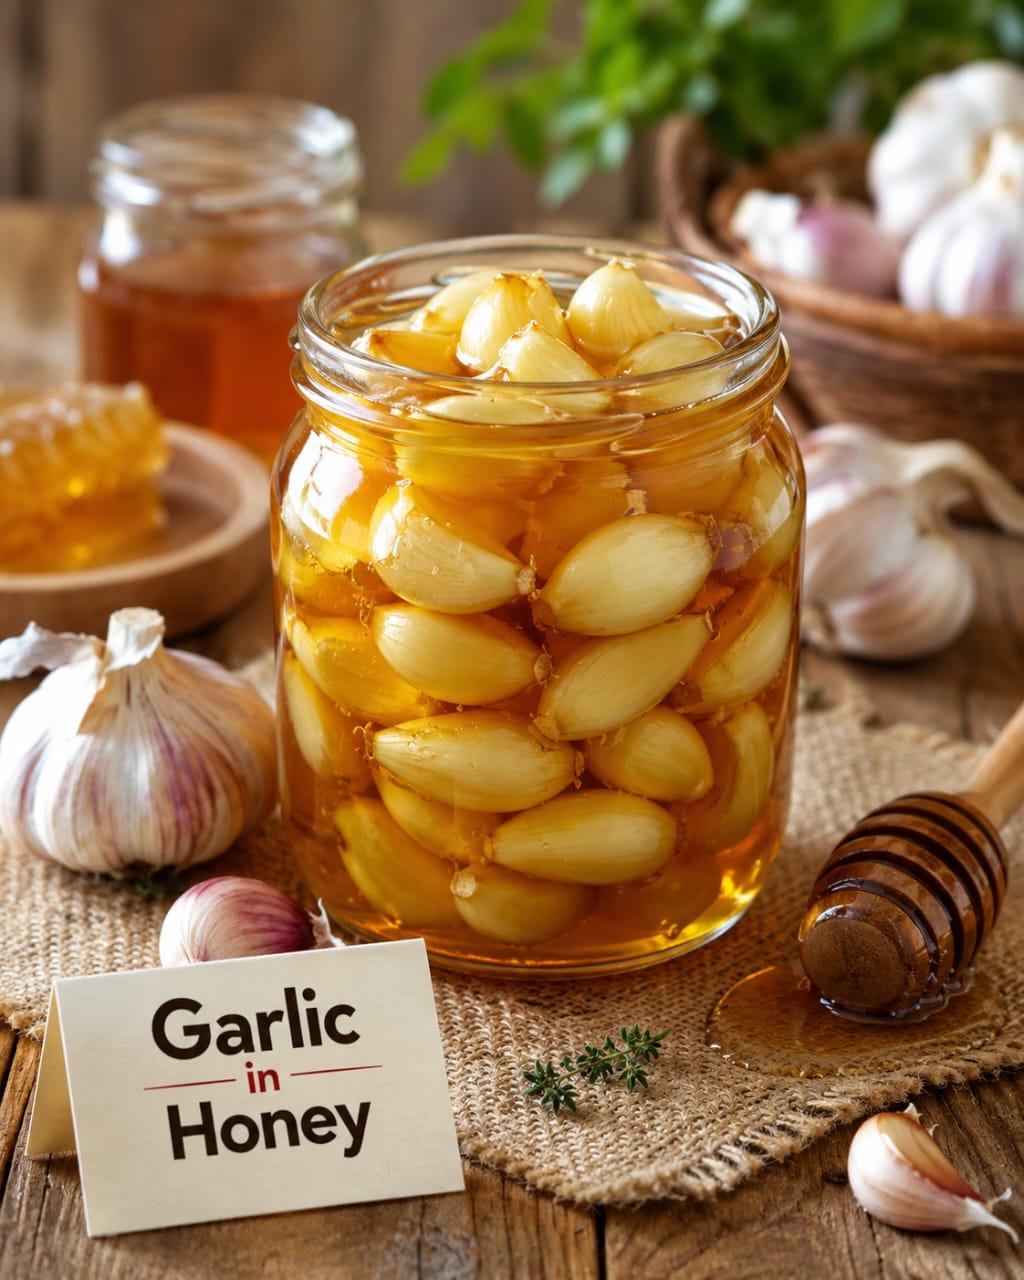
Garlic in Honey

Garlic in Honey: Benefits, How to Make It & Easy Ways to Use It

A Simple Garlic-and-Honey Mixture for Your Kitchen

Garlic in honey is a traditional homemade combination made by covering fresh garlic cloves with honey and allowing them to infuse over time. The result is a sweet, savory mixture with a mellow garlic flavor that can be used in dressings, marinades, sauces, toast, roasted vegetables, and other recipes.Garlic and honey are both well-known foods with interesting nutritional properties. Garlic contains sulfur compounds, including allicin-related compounds that are produced when garlic is crushed or chopped. Honey contains naturally occurring plant compounds and has been studied for its antioxidant properties.However, it’s important to separate traditional uses from proven medical effects. Garlic in honey can be a flavorful food, but it should not be considered a cure or treatment for infections, high blood pressure, diabetes, or other medical conditions.

Ingredients for Garlic in Honey

1 cup raw or pasteurized honey

10–15 fresh garlic cloves

Why People Like Garlic in Honey

Garlic in honey has become popular because it combines two simple ingredients into a versatile sweet-savory mixture.

People commonly enjoy it because:

Garlic provides strong savory flavor.

Honey adds natural sweetness.

The combination works well in marinades.

It can be added to salad dressings.

It makes roasted vegetables more flavorful.

Garlic becomes milder as it sits in honey.

It’s easy to prepare.

Both ingredients are widely available.

Potential Benefits of Garlic

Garlic has been studied for several aspects of health and nutrition.

Contains Sulfur Compounds

Garlic contains sulfur-containing compounds that contribute to its distinctive aroma and flavor. Crushing or chopping garlic activates enzymes that help produce compounds such as allicin.

These compounds are one reason garlic has attracted scientific interest.

Provides Antioxidant Compounds

Garlic contains various compounds with antioxidant activity.

Antioxidants help protect cells from oxidative stress, although eating garlic does not mean that it can prevent or cure a specific disease.

May Support Cardiovascular Health

Some research has investigated garlic and cardiovascular risk factors, including blood pressure and cholesterol.

The evidence is mixed and effects can vary depending on the form and amount of garlic consumed.

Garlic should therefore be viewed as part of a balanced diet rather than a replacement for prescribed treatment.

Potential Benefits of Honey

Contains Antioxidant Compounds

Honey contains naturally occurring polyphenols and other compounds that contribute to its antioxidant activity.

The exact composition varies depending on the floral source.

Provides Quick Energy

Honey primarily contains carbohydrates, so it provides a readily available source of energy.

Because honey is still an added sugar, portion size matters.

Soothes the Throat

Honey is commonly used in warm drinks for its soothing texture and sweetness.

It may also help relieve cough symptoms in some situations, particularly when used appropriately.

Honey should never be given to babies under 12 months of age because of the risk of infant botulism.

What About the Combination?

Garlic in honey is often promoted online as a natural remedy for immunity, infections, inflammation, cholesterol, and blood pressure.

Some of these claims are based on research into garlic or honey individually, while others come from traditional use or laboratory studies.

There is not enough clinical evidence to conclude that homemade garlic-in-honey preparations can prevent or cure diseases.

Think of it as a flavorful food rather than a medicinal treatment.

How to Make Garlic in Honey

Choose the Garlic

Select fresh, firm garlic cloves.

Avoid cloves that are moldy, damaged, soft, or visibly spoiled.

Peel the garlic carefully.

Lightly Crush the Garlic

Place each garlic clove on a cutting board and gently crush it with the flat side of a knife.

You don’t need to completely mince the garlic.

Lightly crushing the cloves helps release their flavor and allows the honey to surround them more easily.

Add Garlic to a Clean Jar

Place the garlic cloves into a clean, dry glass jar.

Don’t pack the jar completely full.

Leave enough room for the honey and for the contents to be stirred safely.

Add Honey

Pour honey over the garlic until the cloves are completely covered.

Use a clean spoon to gently move the garlic around and release trapped air bubbles.

Make sure the garlic remains submerged.

Refrigerate

For a homemade preparation, refrigerate the garlic-and-honey mixture.

Allow the flavors to develop for at least several days.

The garlic will gradually become softer and mellower as it sits.

For food safety, avoid treating homemade garlic-in-honey as a shelf-stable fermented product unless you are following a tested preservation/fermentation method with appropriate controls.

How to Use Garlic in Honey

Once the mixture has developed its flavor, there are many ways to use it.

Salad Dressing

Mix a small amount with olive oil, lemon juice, and black pepper.

Marinade

Use it as part of a marinade for chicken, salmon, or vegetables.

Roasted Vegetables

Drizzle a small amount over roasted carrots, sweet potatoes, or Brussels sprouts.

Toast

Spread softened garlic over toast and drizzle lightly with honey.

Stir-Fry

Add a small spoonful to a vegetable or chicken stir-fry toward the end of cooking.

Glaze

Brush a thin layer over roasted chicken or vegetables during the final minutes of cooking.

Important Food Safety Information

Garlic stored in an oxygen-free environment can create conditions favorable to Clostridium botulinum, the bacterium associated with botulism.

Honey does not automatically make raw garlic safe for long-term room-temperature storage.

For this reason, don’t assume that a jar of fresh garlic covered with honey is safe to keep indefinitely in a cupboard.

For homemade preparations:

Use clean equipment.

Use fresh garlic.

Keep the garlic covered by honey.

Refrigerate the mixture.

Discard it if you notice mold, unusual spoilage, or an unpleasant off odor.

Don’t rely on taste or smell alone to determine whether a potentially unsafe food is safe.

Don’t give honey to children younger than 12 months.

If you want a shelf-stable product, use a commercially prepared product made under appropriate food-safety controls.

Who Should Be Careful?

Honey is high in sugar, so people managing blood glucose should account for it within their overall carbohydrate intake.

People taking medications, especially medications that affect blood clotting or blood pressure, should talk with their healthcare professional before consuming large amounts of concentrated garlic preparations.

If you’re pregnant, breastfeeding, immunocompromised, or managing a medical condition, it’s best to discuss concentrated homemade preparations with your healthcare professional rather than using them as a treatment.

Storage for Garlic in honey

Keep homemade garlic in honey refrigerated in a clean, sealed container.

Use clean utensils whenever removing garlic or honey from the jar.

Do not keep homemade garlic-in-honey at room temperature for prolonged periods.

If you are uncertain about its safety, discard it.

Frequently Asked Questions

Can I eat garlic in honey every day?

Small culinary amounts can be incorporated into a normal diet, but there is no established medical dosage for homemade garlic in honey. It should be treated as a food, not a medicine.

Does garlic in honey boost immunity?

Garlic and honey contain compounds that have been studied for various biological effects, but there isn’t strong evidence that a homemade garlic-and-honey mixture can “boost” immunity in a clinically meaningful way.

How long should garlic sit in honey?

For flavor, several days can mellow the garlic, while longer periods produce a stronger infusion. However, longer storage does not automatically make a homemade mixture safer.

Can I use raw honey?

Yes, but using raw honey does not eliminate the food-safety concerns associated with storing fresh garlic in honey. Refrigeration is still important.

Can children eat garlic in honey?

Honey should never be given to children under 12 months old. For older children, ordinary culinary amounts may be appropriate, depending on their individual circumstances.

Can garlic in honey cure a cold?

No. Although honey may soothe a cough, garlic in honey has not been established as a cure for colds or other infections.

Final Thoughts for Garlic in honey

Garlic in honey is a simple and flavorful combination that has been used traditionally and has attracted scientific interest because both garlic and honey contain biologically active compounds. Garlic contributes sulfur compounds and savory flavor, while honey provides sweetness and naturally occurring antioxidant compounds.The most useful way to enjoy this combination is as a food ingredient rather than a medical remedy. Add small amounts to salad dressings, marinades, roasted vegetables, chicken, fish, or toast for a delicious sweet-and-savory flavor.Most importantly, homemade garlic submerged in honey should be handled carefully. Refrigerate it rather than assuming it is shelf-stable, use clean equipment, and never give honey to babies under one year of age.With proper food-safety precautions, garlic and honey can be a delicious addition to your kitchen and an easy way to create flavorful homemade sauces and marinades.

Golden Cabbage Patties

🥬 Golden Cabbage Patties

Crispy on the outside, tender and flavorful inside, these golden cabbage patties are packed with cabbage, onion, fresh dill, and simple seasonings. They make a delicious breakfast, snack, side dish, or light vegetarian meal.

Ingredients

For the patties:

  • 1 medium green cabbage, finely shredded
  • 1 small red onion, thinly sliced or finely chopped
  • 2 large eggs
  • ½ cup all-purpose flour
  • ½ cup breadcrumbs
  • ½ cup shredded cheddar or mozzarella cheese
  • 2–3 tablespoons fresh dill, chopped
  • 2 tablespoons fresh parsley, chopped
  • 2 cloves garlic, minced
  • 1 teaspoon salt
  • ½ teaspoon black pepper
  • ½ teaspoon paprika
  • ½ teaspoon dried oregano
  • ¼ teaspoon chili flakes, optional
  • 2–3 tablespoons olive oil or vegetable oil, for cooking

For serving:

  • Sour cream or Greek yogurt
  • Fresh dill or parsley
  • Lemon wedges, optional

Instructions

1. Prepare the cabbage:

Finely shred the cabbage. Place it in a large bowl, sprinkle with about ½ teaspoon salt, and gently massage it with your hands for 2–3 minutes to soften it.

2. Remove excess moisture:

Let the cabbage sit for about 10 minutes. Squeeze it firmly with your hands or place it in a clean kitchen towel and squeeze out as much liquid as possible. This step helps the patties hold together and become crispy.

3. Mix the ingredients:

Add the cabbage, red onion, eggs, flour, breadcrumbs, shredded cheese, dill, parsley, garlic, remaining salt, black pepper, paprika, oregano, and chili flakes to a large bowl.

4. Combine:

Mix everything thoroughly until you have a thick mixture that holds together when pressed. If it seems too wet, add 1–2 tablespoons more breadcrumbs. If it seems too dry, add a little beaten egg.

5. Shape the patties:

Take a portion of the mixture and shape it into a round patty about ½-inch thick. Repeat with the remaining mixture.

6. Pan-fry:

Heat the oil in a large skillet over medium heat. Carefully place the patties in the pan, leaving a little space between them.

7. Cook until golden:

Cook for about 4–5 minutes per side, or until deeply golden brown and crisp. Avoid turning them too early so they have time to form a good crust.

8. Drain:

Transfer the cooked patties to a plate lined with paper towels to absorb excess oil.

9. Serve:

Serve warm with sour cream or Greek yogurt. Garnish with fresh dill and parsley, and add a squeeze of lemon if desired.

🔥 Oven-Baked Version

For a lighter option, place the patties on a parchment-lined baking sheet and lightly brush or spray them with oil. Bake at 200°C / 400°F for 20–25 minutes, flipping halfway through, until golden and crisp.

Air Fryer Version

Air fry at 190°C / 375°F for 12–16 minutes, turning halfway through. Lightly spray the patties with oil before cooking.

Tips for Perfect Patties

Squeeze the cabbage very well—excess water is the biggest reason patties fall apart.

Don’t make the patties too thick; thinner patties become crispier.

Let the mixture rest for 5–10 minutes before shaping.

For extra crunch, use panko breadcrumbs.

You can add grated carrot, zucchini, or spring onions for variation.

A little Parmesan can add extra savory flavor.

Yield: About 8–10 patties

Prep time: 20 minutes

Cook time: 20 minutes

Total time: About 40 minutes

Fluffy Homemade Pancakes

🥞 Fluffy Homemade Pancakes


These classic pancakes are soft, thick, fluffy, and golden brown—perfect for a cozy breakfast or weekend brunch.

Ingredients

  • 2 cups all-purpose flour
  • 2 tablespoons granulated sugar
  • 1 tablespoon baking powder
  • ½ teaspoon salt
  • 2 large eggs
  • 1¾ cups milk
  • ¼ cup melted butter, plus extra for cooking
  • 1 teaspoon vanilla extract

Instructions

1. Mix the dry ingredients:

In a large bowl, whisk together the flour, sugar, baking powder, and salt.

2. Mix the wet ingredients:

In another bowl, whisk the eggs, milk, melted butter, and vanilla until well combined.

3. Combine:

Pour the wet ingredients into the dry ingredients. Gently whisk until just combined. A few small lumps are perfectly fine. Do not overmix, as this can make the pancakes tough.

4. Rest the batter:

Let the batter sit for 5–10 minutes. This helps create lighter, fluffier pancakes.

5. Heat the pan:

Heat a nonstick skillet or griddle over medium heat. Lightly grease it with butter.

6. Cook:

Pour about ¼ cup of batter onto the hot pan for each pancake.

7. Flip:

Cook for about 2–3 minutes, until bubbles appear on the surface and the edges look set. Flip and cook another 1–2 minutes, until golden brown.

8. Repeat:

Continue with the remaining batter, lightly greasing the pan as needed.

🍯 Serving Suggestions

Stack the warm pancakes and serve with:

Butter

Maple syrup

Fresh strawberries or blueberries

Banana slices

Honey

Whipped cream

Chocolate chips

Powdered sugar

⭐ Tips for Extra-Fluffy Pancakes

Don’t overmix the batter.

Make sure your baking powder is fresh.

Keep the heat at medium; excessive heat can brown the outside before the center cooks.

For especially thick pancakes, use slightly less milk—about 1½ cups.

Don’t press down on the pancakes after flipping.


Prep Time: 10 minutes

Resting Time: 5–10 minutes

Cook Time: 20 minutes

Total Time: About 40 minutes

Servings: 6–8

Makes: Approximately 12–14 pancakes

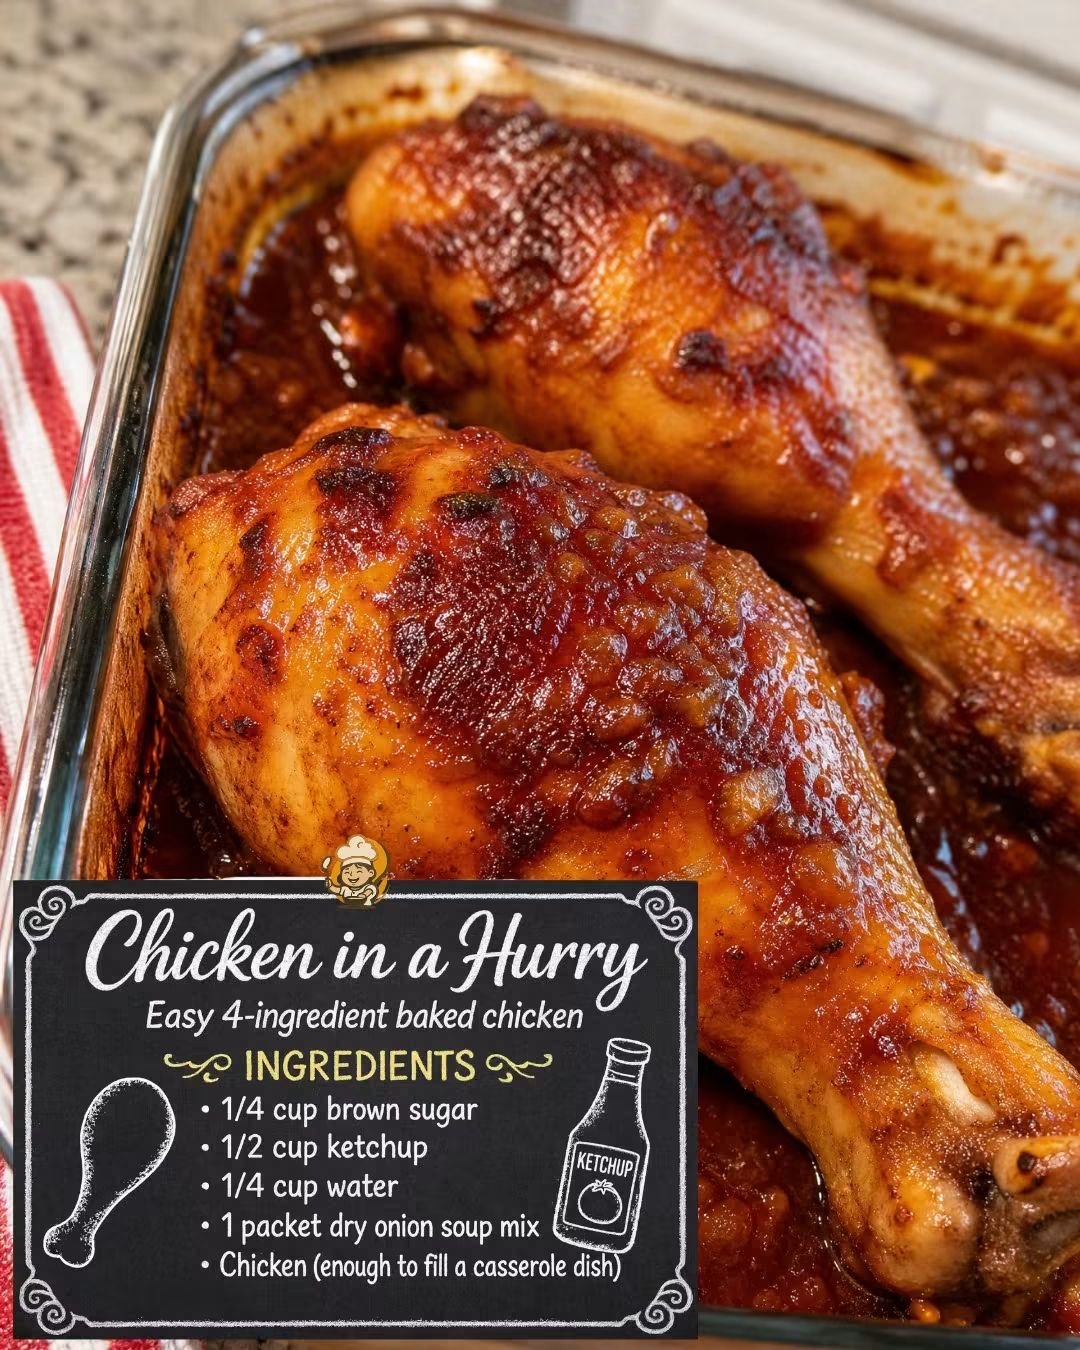
Chicken in a Hurry — Easy 4-Ingredient Baked Chicken

🍗 Chicken in a Hurry — Easy 4-Ingredient Baked Chicken


A deliciously simple baked chicken recipe with a sweet, tangy, savory sauce made from just a few pantry staples. The chicken turns beautifully caramelized and juicy while the sauce thickens around it.


Ingredients

  • 2½–3 lb chicken pieces — thighs, drumsticks, breasts, or a combination
  • ¼ cup brown sugar
  • ½ cup ketchup
  • ¼ cup water
  • 1 packet dry onion soup mix

Instructions

1. Preheat the oven to 350°F (175°C).

2. Lightly grease a 9×13-inch casserole dish or another baking dish large enough to hold the chicken in a single layer.

3. In a bowl, combine the brown sugar, ketchup, water, and dry onion soup mix. Stir until well blended.

4. Arrange the chicken pieces in the prepared casserole dish.

5. Pour the sauce evenly over the chicken, making sure the pieces are well coated.

6. Cover the dish loosely with aluminum foil and bake for about 45 minutes.

7. Remove the foil and continue baking for another 20–30 minutes, or until the chicken is completely cooked and nicely browned.

8. The chicken is done when the thickest part reaches 165°F (74°C) on a meat thermometer.

9. Let the chicken rest for 5–10 minutes before serving.

10. Spoon some of the delicious caramelized sauce from the pan over the chicken.

🍽️ Serving Suggestions

Serve this chicken with:

Mashed potatoes

White or brown rice

Roasted vegetables

Green beans

Corn

A fresh garden salad

Dinner rolls or crusty bread

⭐ Tips for the Best Chicken


Don’t overcrowd the dish so the chicken browns properly.


For extra caramelization, leave the chicken uncovered during the final 20–30 minutes.


Chicken thighs and drumsticks are especially juicy and flavorful with this sauce.


If using chicken breasts, choose pieces of similar size so they cook evenly.


Always check the internal temperature rather than relying only on cooking time.


Prep Time: 10 minutes

Cook Time: 1 hour 10–15 minutes

Total Time: About 1 hour 20 minutes

Servings: 4–6

Oven: 350°F (175°C)

Cheesy Creamy Potato Skillet Casserole

🥔Cheesy Creamy Potato Skillet Casserole


A delicious, comforting potato dish made with crispy golden potato slices, a creamy herbed egg mixture, and plenty of melted cheese. Perfect for breakfast, brunch, or a family dinner.

Ingredients

For the potatoes

  • 5–6 medium potatoes
  • 2–3 tbsp cooking oil
  • 1 tsp salt
  • ½ tsp black pepper
  • ½ tsp paprika
  • ½ tsp garlic powder

For the creamy mixture

  • 4 large eggs
  • ½ cup heavy cream or cooking cream
  • ½ cup milk
  • ½ cup mayonnaise or sour cream
  • ½ cup finely chopped green onions
  • ¼ cup chopped bell pepper
  • 2 tbsp chopped fresh parsley or coriander
  • ½ tsp salt
  • ½ tsp black pepper
  • ½ tsp Italian seasoning
  • ½ cup shredded mozzarella

For topping

  • 1–1½ cups shredded mozzarella or cheddar
  • 2 tbsp chopped parsley/coriander
  • A pinch of paprika or chili flakes

Instructions

1. Prepare the potatoes:

Peel the potatoes and slice them into thin, even rounds. Rinse and pat them very dry.

2. Season:

Place the potato slices in a bowl. Add salt, black pepper, paprika, garlic powder, and oil. Toss until evenly coated.

3. Cook the potatoes:

Heat a large oven-safe skillet over medium heat. Arrange the potato slices in a single layer and cook for about 4–5 minutes per side, or until golden brown and almost tender. Work in batches if necessary.

4. Make the creamy mixture:

In a large bowl, whisk together the eggs, cream, milk, mayonnaise or sour cream, salt, pepper, and Italian seasoning.

5. Stir in the green onions, bell pepper, parsley/coriander, and ½ cup mozzarella.

6. Combine:

Arrange the cooked potato slices evenly in the skillet. Pour the creamy mixture slowly over the potatoes, making sure it reaches between the slices.

7. Add cheese:

Sprinkle the remaining mozzarella or cheddar generously over the top.

8. Bake:

Transfer the skillet to a preheated oven at 180°C (350°F). Bake for approximately 25–30 minutes, until the egg mixture is completely set and the cheese is melted and golden.

9. Brown the top:

For a more golden, bubbly top, switch to broil/grill for 2–3 minutes, watching carefully.

10. Garnish and serve:

Let it rest for 5–10 minutes, then sprinkle with fresh parsley or coriander. Slice and serve warm.

⏱️ Quick Details

Prep: 20 minutes

Cook: 35–40 minutes

Total: About 1 hour

Servings: 6

💡 Tips

Slice the potatoes evenly so they cook at the same rate.

For extra flavor, add cooked chicken, beef, mushrooms, or turkey.

Cheddar gives a stronger flavor, while mozzarella makes the dish especially stretchy and creamy.

Don’t cut it immediately after baking; resting helps the creamy filling set properly.

Serving suggestion: Serve with a fresh salad, yogurt dip, or your favorite chutney for a delicious complete meal.