
BENEFITS OF EATING DATES

BENEFITS OF EATING DATES

1. Supercharge Your Digestion

Dates are one of the best natural sources of insoluble and soluble fiber.

  • How it works: Insoluble fiber adds bulk to your stool and helps move food through the digestive tract quickly, preventing constipation. Soluble fiber acts as a prebiotic, feeding the “good” bacteria in your gut.

  • The Result: Regularity and a healthier microbiome, which reduces bloating and improves nutrient absorption.

2. Elevate Your Energy

Unlike processed candy, dates provide a “slow-release” energy boost.

  • How it works: Dates are high in natural sugars (glucose, fructose, and sucrose), but they have a relatively low Glycemic Index (GI) because of their fiber content. This means the sugar is absorbed more slowly into your bloodstream.

  • The Result: You get an immediate pick-me-up without the “sugar crash” often associated with other sweets. They are excellent as a pre-workout snack.

3. Sharpen Your Mind

Dates contain specific nutrients that protect the brain from oxidative stress and inflammation.

  • How it works: They are rich in phenolic compounds and antioxidants (like flavonoids). Studies suggest these compounds help reduce the formation of amyloid beta proteins—the plaques that can build up in the brain and lead to cognitive decline.

  • The Result: Better focus in the short term and potential protection against neurodegenerative diseases in the long term.

4. Strengthen Your Bones

While we usually think of milk for bones, dates contain a “cocktail” of bone-building minerals.

  • How it works: Dates contain phosphorus, potassium, calcium, and magnesium. Most importantly, they contain boron, a trace element that helps the body absorb calcium more effectively and maintains bone health.

  • The Result: Improved bone density and a lower risk of conditions like osteoporosis as you age.


Nutritional Quick-Reference

A serving of 3 Medjool dates approximately contains: | Nutrient | Benefit | | :— | :— | | Potassium | Regulates blood pressure and heart health. | | Magnesium | Aids muscle function and sleep quality. | | Vitamin B6 | Helps the body produce serotonin (the “feel-good” hormone). | | Antioxidants | Fights free radicals to prevent cell damage. |

Pro Tip: To make this even healthier, try stuffing them with a few walnuts or almonds. The healthy fats and protein in the nuts will slow down the sugar absorption even further!

Turmeric & Ginger Wellness Soak

Turmeric & Ginger Wellness Soak

This formula creates a potent concentrate that can be added to warm water or tea to help reduce inflammation throughout the body.

Ingredients

  • 1 cup Raw Honey: Preferably local, raw, and unfiltered.

  • 4–5 inches Fresh Ginger Root: Sliced or grated.

  • 3–4 inches Fresh Turmeric Root: Sliced or grated (or 2 tablespoons high-quality turmeric powder).

  • 2 Whole Lemons: Sliced thinly or juiced.

  • 1 tsp Black Peppercorns: Whole or cracked (essential for helping the body absorb the curcumin in the turmeric).


Instructions

  1. Prepare the Roots: Scrub the ginger and turmeric thoroughly. You don’t necessarily need to peel them if they are organic, but slicing them thinly increases the surface area for the “soak”.

  2. Layer the Jar: In a clean glass quart jar, layer the sliced ginger, turmeric, and lemons.

  3. Add Activators: Add the black peppercorns to the jar.

  4. The Honey Soak: Pour the raw honey over the ingredients until they are completely submerged.

  5. The Infusion: Close the jar tightly and let it sit on your counter for 24 hours. The honey will draw out the juices from the lemon and roots, turning into a thinner, potent syrup.

  6. Store: After the initial 24 hours, move the jar to the refrigerator. It will keep for several weeks.


How to Use It

  • The Tonic: Add 1 to 2 tablespoons of the honey syrup (and a few slices of the ginger/lemon) to a mug of warm (not boiling) water.

  • The Timing: Many find it beneficial to drink this first thing in the morning or before bed to support the body’s natural anti-inflammatory processes.


A Peer-to-Peer Note on Health

While turmeric and ginger are fantastic for reducing systemic inflammation, thyroid health is often tied to specific minerals like iodine, selenium, and zinc. If you are experiencing symptoms like extreme fatigue, sudden weight changes, or hair loss, it’s a good idea to have a simple blood test with a doctor to check your actual hormone levels.

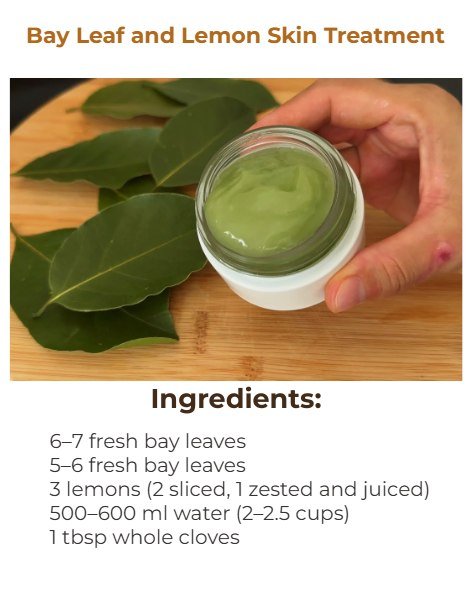
Bay Leaf and Lemon Skin Treatment

Easy Homemade Bay Leaf and Lemon Skin Treatment Recipe

If you’re looking for a soothing and refreshing way to care for your skin, this easy homemade bay leaf and lemon skin treatment recipe is just what you need. Combining the aromatic essence of bay leaves with the bright zing of lemons, this treatment is perfect for revitalizing your skin and hair. You’ll love how it feels: smooth, rejuvenating, and wonderfully fragrant. People adore this recipe not only for its effectiveness but also for its natural ingredients that bring a little bit of spa luxury right into your home.


Recipe Summary:

  • Prep Time: 10 minutes
  • Cook Time: 30 minutes
  • Total Time: 40 minutes
  • Servings: Varies
  • Estimated Calories: Approximately 70 per use

Ingredients:

  • 6–7 fresh bay leaves
  • 5–6 fresh bay leaves
  • 3 lemons (2 sliced, 1 zested and juiced)
  • 500–600 ml water (2–2.5 cups)
  • 1 tbsp whole cloves
  • 100 ml extra virgin olive oil
  • 1 tbsp cornstarch
  • 1 tsp fresh lemon juice
  • 1 tsp prepared bay leaf oil
  • 4–5 drops vitamin E oil

Instructions:

  1. Place 6–7 bay leaves and the 2 sliced lemons into a pot with 500–600 ml of water.
  2. Bring the mixture to a boil over high heat.
  3. Once boiling, reduce the heat to low and let it simmer for 6–7 minutes.
  4. Remove the pot from heat and allow it to cool.
  5. Strain the mixture and reserve the liquid.
  6. Pour 150 ml (approximately 2/3 cup) of the strained liquid into a saucepan.
  7. Whisk in 1 tablespoon of cornstarch until it’s fully dissolved.
  8. Cook over low heat for 2–3 minutes, stirring continuously until it thickens.
  9. Remove from heat and let it cool to form a cream.
  10. Pour the remaining strained liquid into a spray bottle and refrigerate. It can be stored for up to 1 month as a toner.
  11. Finely chop 5–6 bay leaves and place them in a heatproof glass jar.
  12. Grind 1 tablespoon of whole cloves and add them to the jar.
  13. Add the zest of 1 lemon and 100 ml of olive oil to the jar, mixing thoroughly.
  14. Set the jar in a towel-lined pot filled halfway with water.
  15. Heat the water to a gentle boil and keep it on low for 20 minutes to infuse the oil.
  16. Remove the jar, allow it to cool completely, and then strain the oil. Store it in a dark, cool place for up to 6 months.
  17. For a hair treatment, apply the oil to your scalp 1–2 times per week. Massage for 10 minutes, leave in for 30 minutes, and then shampoo.
  18. To prepare a face mask, mix 1 teaspoon of the thickened bay-lemon cream, 1 teaspoon of prepared oil, 1 teaspoon of fresh lemon juice, and 4–5 drops of vitamin E until smooth.
  19. Apply evenly to a clean face, neck, décolleté, and hands. Leave for 20–25 minutes.
  20. Rinse first with warm water and then follow with your cleanser. Use toner afterward, and apply moisturizer and sunscreen in the morning.
  21. Use the mask 3 times a week and the toner twice daily.

Why This Recipe Is Popular

People seek out this easy homemade bay leaf and lemon skin treatment recipe for its natural approach to skincare. It’s refreshing, invigorating, and utilizes ingredients that many already have at home. Whether for special occasions or everyday use, it’s a delightful addition to any beauty routine.


Serving Suggestions

This skin treatment is perfect for a pampering weekend at home. Use the toner after washing your face in the morning or evening for a bright glow. The cream and mask can be applied before a special event when you want your skin to look its best.


Tips and Variations

  • Storage: Keep the toner in the refrigerator for a refreshing chill and longer shelf life.
  • Texture: Adjust the thickness of the cream by modifying the cornstarch amount based on your preference.
  • Flavor Ideas: Experiment by adding a few drops of essential oils like lavender or tea tree oil for added benefits.
  • Simple Swaps: If you don’t have bay leaves, consider using dried rosemary for a different scent and properties.
  • Application: For best results, apply the hair treatment on damp hair and use a shower cap to enhance absorption.

FAQs

Q: How often should I use the toner?
A: Use the toner twice daily for optimal skin rejuvenation.

Q: Can I use this treatment on sensitive skin?
A: Always do a patch test first, as everyone’s skin can react differently.

Q: How long can I store the infused oil?
A: The infused bay leaf oil can be stored in a cool, dark place for up to 6 months.

Q: Can I skip the cornstarch step?
A: You can omit it, but the cream will not thicken as much.


Try this easy homemade bay leaf and lemon skin treatment recipe to give your skincare routine a delightful boost. You’ll love how fresh it feels and how naturally radiant your skin looks!

Anti-Inflammatory Liquid Gold (Green Juice)

 Anti-Inflammatory Liquid Gold (Green Juice)
Yields: ~2 large bottles (8–10 servings)
Prep Time: 10 minutes
Blend Time: 5 minutes
📝 Ingredients
2 large cucumbers
1 bunch celery (about 6–8 stalks)
1 large bunch fresh parsley
1 large bunch fresh cilantro
2 cups fresh spinach or kale
1–2 inch piece fresh ginger, peeled
1 lemon, peeled (or juice only)
1 green apple (optional, for mild sweetness)
1 tsp turmeric powder or 1-inch fresh turmeric root
Pinch of black pepper (boosts turmeric absorption)
2–3 cups cold filtered water (adjust for thickness)
👩‍🍳 Instructions
Wash & prep:
Thoroughly wash all produce. Roughly chop cucumbers, celery, greens, and apple.
Blend:
Add everything to a high-speed blender. Blend until completely smooth (1–2 minutes).
Strain (optional):
For a juice-like texture, strain through a nut milk bag or fine mesh sieve.
For maximum fiber, drink as-is.
Store:
Pour into airtight glass bottles or jars. Refrigerate up to 3–4 days.

Crispy Golden Cabbage & Carrot Fritters

Crispy Golden Cabbage & Carrot Fritters

Yields: 6–8 fritters | Prep time: 15 mins | Cook time: 10 mins

Ingredients

  • 1 small cabbage, shredded thinly (about 4–5 cups)

  • 1 large carrot, grated or julienned thinly

  • 1 onion, finely chopped

  • 2 large eggs, lightly beaten

  • 4 tbsp all-purpose flour (adjust if mixture is too wet)

  • Spices: Salt, black pepper, paprika, and dried garlic (to taste)

  • Olive oil for frying

  • Optional: 2 tbsp chopped green onions or parsley for extra freshness


Step-by-Step Instructions

  1. Prep the Vegetables: Shred the cabbage and grate the carrot. If the cabbage feels very tough, sprinkle it with a pinch of salt and let it sit for 5 minutes, then squeeze out any excess moisture. This ensures your fritters aren’t soggy.

  2. Create the Batter: In a large mixing bowl, combine the shredded cabbage, grated carrot, and finely chopped onion.

  3. Season and Bind: Add the eggs, flour, salt, pepper, paprika, and dried garlic. Mix thoroughly until the vegetables are well-coated. The mixture should be sticky enough to hold together when pressed.

    • Tip: If the mixture seems too loose, add one more tablespoon of flour.

  4. Heat the Pan: Heat 2–3 tablespoons of olive oil in a large non-stick skillet over medium heat.

  5. Fry the Fritters: Scoop about 1/4 cup of the mixture into the pan for each fritter. Flatten them slightly with the back of a spatula to form a patty.

  6. Cook to Perfection: Fry for 3–4 minutes per side. You are looking for a deep golden-brown crust and for the cabbage inside to become tender.

  7. Drain and Serve: Remove the fritters and place them on a paper towel-lined plate to remove any excess oil.


Serving Suggestions

These are delicious on their own, but they really shine with a dipping sauce!

  • Garlic Crema: Mix 1/2 cup sour cream or Greek yogurt with a squeeze of lemon and a grated clove of garlic.

  • Spicy Kick: A drizzle of Sriracha or sweet chili sauce pairs perfectly with the sweetness of the cooked cabbage and carrots.

Blood Sugar Balance Veggie Medley

Blood Sugar Balance Veggie Medley

 The 5 Vegetables & Why They Help

  1. Broccoli – Rich in sulforaphane, which improves insulin sensitivity

  2. Spinach – Low-carb, high magnesium → better glucose control

  3. Zucchini – High fiber, very low glycemic load

  4. Bell Peppers – Antioxidants + fiber without spiking sugar

  5. Cauliflower – Improves insulin response and gut health

 Description

A simple, savory vegetable sauté designed to slow glucose absorption, reduce blood sugar spikes, and keep you full longer. Great as a side dish or light main.

 Ingredients (Serves 2–3)

  • 1 cup broccoli florets

  • 1 cup cauliflower florets

  • 1 medium zucchini, sliced

  • 1 cup spinach

  • 1 bell pepper, sliced

  • 1 tbsp olive oil

  • 2 cloves garlic, minced

  • ½ tsp turmeric

  • ½ tsp black pepper

  • ¼ tsp sea salt (optional)

  • Lemon juice (to taste)

 Instructions

  1. Heat olive oil in a large pan over medium heat

  2. Add garlic, sauté 30 seconds

  3. Add broccoli & cauliflower, cook 5–6 minutes

  4. Add zucchini & bell pepper, cook another 3–4 minutes

  5. Stir in spinach until wilted

  6. Season with turmeric, pepper, salt

  7. Finish with a squeeze of lemon

Tips for Best Blood Sugar Control

  • Eat this with protein (eggs, fish, tofu, chicken)

  • Avoid adding sugary sauces

  • Eat slowly — digestion speed matters

  • Best eaten before or with carbs, not after

 Nutritional Info (Approx. per serving)

  • Calories: ~120

  • Carbs: ~10g

  • Fiber: ~4–5g

  • Sugar: ~3g

  • Protein: ~4g

  • Glycemic Load: Very Low

 Benefits

✔ Helps prevent blood sugar spikes
✔ Supports insulin sensitivity
✔ Improves gut health
✔ Anti-inflammatory
✔ Weight-friendly & diabetes-friendly

 Q & A

Q: Can this replace medication?
A: No. It supports blood sugar control but does not replace medical treatment.

Q: Is this good for diabetics?
A: Yes, generally safe and helpful — always follow personal medical advice.

Q: How often can I eat this?
A: Daily if you want. Rotate veggies for variety.

Q: Will this “remove sugar from blood”?
A: Not directly. It helps your body manage sugar better, which is what actually matters.