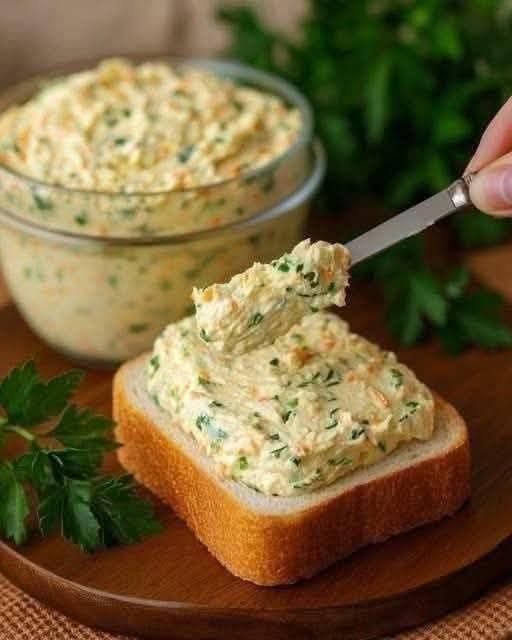
Cheesy Vegetable Egg Rolls

Cheesy Vegetable Egg Rolls are a fantastic way to pack fiber and protein into a delicious, handheld snack or meal. They are crispy on the outside, tender on the inside, and full of vibrant color! πŸ₯•πŸŒΏ


πŸ₯— Ingredients

  • 2 cups Zucchini (grated and squeezed dry) πŸ₯’

  • 1 cup Carrots (finely grated) πŸ₯•

  • 1 cup Mozzarella or Cheddar cheese (shredded) πŸ§€

  • 2 large Eggs πŸ₯š

  • Β½ cup Green onions (finely chopped) πŸ§…

  • Β½ cup All-purpose flour (or almond flour for a different texture) 🌾

  • Β½ tsp Garlic powder πŸ§„

  • ΒΌ tsp Black pepper πŸ§‚

  • 1 tbsp Olive oil (for pan-frying) 🍳

  • Optional: Fresh parsley or cilantro 🌿


πŸ‘©β€πŸ³ Step-by-Step Instructions

1️⃣ Prep the Vegetables: Grate the zucchini and carrots. ➑ Crucial Step: Place the grated zucchini in a clean kitchen towel and squeeze out as much liquid as possible. This prevents the rolls from becoming soggy.

2️⃣ Mix the Base: In a large glass bowl, combine the squeezed zucchini, grated carrots, shredded cheese, and chopped green onions. πŸ₯£

3️⃣ Add Binding Ingredients: Crack the two eggs into the bowl. Add the garlic powder and black pepper. ➑ Mix thoroughly with a fork until the eggs are well incorporated. πŸ₯š

4️⃣ Incorporate Flour: Fold in the flour gradually. The mixture should be thick enough to hold its shape but still moist. πŸ₯„

5️⃣ Shape the Rolls: Take a generous spoonful of the mixture and shape it into a log or “roll” using your hands or two spoons. πŸ₯–

6️⃣ Cook to Golden Perfection: Heat olive oil in a non-stick skillet over medium heat. ➑ Carefully place the rolls in the pan. ➑ Fry for 3–4 minutes per side, turning gently, until they are golden brown and the cheese is melted inside. 🍳

7️⃣ Drain and Serve: Place the cooked rolls on a paper towel to remove any excess oil. Serve warm with your favorite dipping sauce! 🍽️


πŸ’‘ Tips & Notes

  • Drain Well: The secret to the texture is removing the water from the zucchini. πŸ₯’

  • Low-Carb Swap: You can use almond flour or coconut flour if you prefer to avoid wheat flour. πŸ₯₯

  • Add Spice: If you enjoy a kick, add a pinch of red chili flakes to the batter. 🌢️


❓ Q & A

Q: Can I bake these instead of frying? 🧐 A: Yes! ➑ Place them on a parchment-lined baking sheet and bake at 400Β°F (200Β°C) for about 15–20 minutes, turning halfway through until crispy. πŸ₯¨

Q: How do I keep them from falling apart in the pan? 🍳 A: Make sure your pan is hot before adding the rolls, and don’t crowd the pan. Let the first side cook completely to form a “crust” before trying to flip them. πŸ›‘οΈ

Q: Can I store these for later? πŸ₯‘ A: These stay fresh in the fridge for up to 3 days. ➑ To regain the crunch, reheat them in an air fryer or dry skillet rather than the microwave. 🌑️


βœ… Health Benefits

  • High Fiber: Loaded with fresh zucchini and carrots for digestive health. πŸ₯•

  • Protein Packed: Eggs and cheese provide a great energy boost. πŸ₯š

  • Kid-Friendly: A wonderful way to encourage the whole family to eat more greens! πŸ§’

Category: Healthy Vegetable Recipes | Easy Daily Recipes πŸ₯—βœ¨

Healthy Avocado Power Bowl

Healthy Avocado Power Bowl

This bowl is a nutritional powerhouse, featuring heart-healthy monounsaturated fats, high fiber for digestion, and essential vitamins like B6, C, E, and K.


Ingredients

  • 1 large ripe avocado (sliced or cubed)

  • Β½ cup cooked brown rice or quinoa (provides complex carbs)

  • Β½ cup cucumber (chopped for crunch)

  • Β½ cup cherry tomatoes (halved)

  • 1 large boiled egg or 3 oz grilled tofu (for protein)

  • 1 tsp extra virgin olive oil

  • 1 squeeze fresh lemon juice

  • 1 pinch sea salt and cracked black pepper


Instructions

  1. Prepare the Base: Place your warm or chilled cooked rice (or quinoa) into a medium serving bowl.

  2. Prep the Avocado: Cut the avocado in half, remove the pit, and carefully slice the flesh into even pieces.

  3. Assemble the Bowl: Arrange the avocado slices, chopped cucumber, halved cherry tomatoes, and your choice of protein (egg or tofu) over the grain base.

  4. Dress the Dish: Drizzle the olive oil and fresh lemon juice evenly over the ingredients.

  5. Season: Lightly sprinkle with a pinch of salt and black pepper to taste.

  6. Serve: Mix gently to incorporate the flavors and enjoy immediately.


Tips & Notes

  • Calorie Conscious: If you are monitoring your total daily intake, use half an avocado and save the other half (stored with the pit and a bit of lemon juice) for the next day.

  • Boost the Fiber: Add a handful of leafy greens like spinach or arugula for extra volume and nutrients.

  • Texture Hack: Toast your quinoa slightly in the pan before boiling to add a nutty depth to the bowl.

  • Avoid Sugary Add-ons: Keep the dressing simple with oil and lemon to maintain the low-sugar benefits of the meal.


Nutritional Information (Per Serving)

  • Calories: ~350

  • Healthy Fats: ~22g

  • Fiber: ~10g

  • Protein: ~12g

  • Sugar: ~2g

Common Questions

  • Is avocado good for blood sugar? Yes, because the high fiber and healthy fats slow down digestion, which helps prevent sharp glucose spikes.

  • Can teens eat this daily? Absolutely! It provides the steady energy needed for growth and focus.

  • How often should I eat it? Including avocado in your meals 3–5 times per week is a healthy habit for most people.

Classic Fluffy Pancakes

Classic Fluffy Pancakes

These pancakes are light, airy, and perfectly golden with a melt-in-your-mouth texture. Whether for a lazy weekend breakfast or a cozy brunch, they are a guaranteed crowd-pleaser.


Ingredients

  • 1 Β½ cups (190g) all-purpose flour

  • 3 Β½ tsp baking powder

  • 1 tbsp sugar (adjust to taste)

  • ΒΌ tsp salt

  • 1 ΒΌ cups (300ml) milk (room temperature)

  • 1 large egg (room temperature)

  • 3 tbsp unsalted butter, melted (plus extra for cooking)

  • 1 tsp vanilla extract


Instructions

  1. Mix Dry Ingredients: In a large mixing bowl, whisk together the flour, baking powder, sugar, and salt.

  2. Combine Wet Ingredients: In a separate bowl, whisk the milk, egg, melted butter, and vanilla until smooth.

  3. Make the Batter: Pour the wet ingredients into the dry mixture. Gently whisk until just combined. Do not overmixβ€”small lumps are perfectly fine and actually help keep the pancakes fluffy.

  4. Heat the Pan: Place a non-stick skillet or griddle over medium heat. Lightly grease with a small amount of butter.

  5. Cook: Pour about ΒΌ cup of batter per pancake onto the skillet. Cook for 2–3 minutes, until bubbles form on the surface and the edges look set. Flip and cook for another 1–2 minutes until golden brown.

  6. Serve: Stack them high and top with butter, maple syrup, or fresh berries.


Tips for Success

  • The Fluff Factor: If your pancakes are coming out flat, ensure your baking powder is fresh. Also, remember the “lumpy batter” ruleβ€”overworking the gluten makes for a chewy, tough pancake.

  • Temperature Control: If the outside is burnt but the inside is gooey, your pan is too hot. Lower the heat and give them a bit more time.

  • Keep Them Warm: If cooking for a group, keep finished pancakes on a wire rack in a $200Β°F$ ($95Β°C$) oven to stay crisp and warm.

Nutritional Info (Per Pancake)

Calories Protein Carbs Fat Sugar
~130 4g 16g 5g

Vegetable Cream Cheese Spread

This Vegetable Cream Cheese Spread is the perfect way to add a burst of garden-fresh flavor and a satisfying crunch to your day. Whether you’re looking for a vibrant bagel topper or a creamy dip for your favorite snacks, this recipe is a versatile winner! 🌿✨


πŸ₯— Ingredients

  • 8 oz (225 g) cream cheese, softened πŸ§€

  • 2 tbsp mayonnaise or Greek yogurt (optional for extra creaminess) πŸ₯£

  • ΒΌ cup finely chopped red bell pepper πŸ«‘

  • ΒΌ cup finely chopped carrots πŸ₯•

  • 2 tbsp finely chopped green onions πŸ§…

  • ΒΌ cup finely chopped cucumber (be sure to remove seeds first) πŸ₯’

  • 2 tbsp finely chopped celery πŸ₯¬

  • 2 tbsp chopped fresh parsley or dill 🌿

  • Β½ tsp garlic powder (optional) πŸ§„

  • Salt and pepper to taste πŸ§‚

  • A squeeze of lemon juice (optional, for a bright finish) πŸ‹


πŸ‘©β€πŸ³ Detailed Preparation Steps

  1. Prepare the Vegetables: ➑️ Start by finely chopping all your fresh vegetables. Since excess water can make the spread runny, place the chopped cucumbers on a paper towel and gently pat them dry to remove extra moisture.

  2. Whisk the Base: ➑️ In a medium-sized mixing bowl, beat the softened cream cheese until it is completely smooth and free of lumps. If you are using mayonnaise or Greek yogurt, stir it in now and mix until the base is light and fluffy.

  3. Combine Everything: ➑️ Fold in the chopped bell peppers, carrots, green onions, celery, and herbs. Add the garlic powder, salt, pepper, and a splash of lemon juice. Stir well until the vegetables are evenly distributed throughout the cream cheese.

  4. The Chilling Phase: ➑️ Cover the bowl tightly with plastic wrap or transfer the mixture to an airtight container. Place it in the refrigerator for at least 1 hour. This allows the flavors of the fresh herbs and veggies to infuse into the cream cheese for the best taste.

  5. Serving: ➑️ Once chilled, give it a quick stir. Spread it generously onto toasted bagels, crackers, or use it as a delicious center for veggie wraps. πŸ₯―


πŸ’‘ Expert Tips for Success

  • Texture Choice: ➑️ If you prefer a very smooth, dip-like consistency, you can pulse the mixture a few times in a food processor. For a more traditional spread with a nice “bite,” stick to mixing by hand.

  • The Right Veggies: ➑️ Stick to “hard” vegetables like the ones listed. Avoid using very watery items like tomatoes, as they will release juice over time and make your spread soggy. πŸš«πŸ…

  • Make Ahead: ➑️ This is a fantastic meal-prep option! It stays fresh and delicious in the fridge for up to 5 days.


❓ Questions & Answers

Q: Can I make this dairy-free? A: Yes! You can easily swap the traditional cream cheese for your favorite plant-based cream cheese alternative and use a vegan-friendly mayo. 🌱

Q: Is this suitable for a low-carb lifestyle? A: Absolutely. This spread is naturally low in carbohydrates and high in flavor, making it a great choice when paired with celery sticks or low-carb crackers. πŸ₯’

Q: Can I freeze the leftovers? A: It is not recommended to freeze this spread. Cream cheese tends to change texture and become grainy once thawed. It is best enjoyed fresh from the refrigerator. 🧊

Q: How do I keep it from getting watery? A: The secret is in the “prep” step! Ensuring your cucumber and peppers are patted dry before mixing is the best way to keep the spread thick and creamy. 🧻

Detailed Golden Milk Recipe

Detailed Golden Milk Recipe

This warm, comforting drink is perfect for any time of day and is designed to maximize the absorption of turmeric’s beneficial properties.

Ingredients:

  • 1 Β½ cups unsweetened almond milk (or any milk of your choice) πŸ₯›

  • 1 tsp ground turmeric powder 🧑

  • ΒΌ tsp ground ginger or a small piece of fresh ginger, grated 🫚

  • ΒΌ tsp ground cinnamon πŸ‚

  • 1 pinch black pepper (essential for turmeric absorption!) πŸ§‚

  • 1 tbsp coconut oil or grass-fed butter πŸ₯₯

  • Sweetener to taste: 1-2 drops of liquid stevia or a sugar-free syrup (optional) ✨


πŸ₯£ Preparation Steps

  1. Combine Ingredients: ➑️ Pour the milk into a small saucepan over medium-low heat. Add the turmeric, ginger, cinnamon, and black pepper.

  2. Add Healthy Fats: ➑️ Whisk in the coconut oil or butter. Adding a healthy fat is crucial because turmeric is fat-soluble, meaning it needs fat to be properly processed by your body.

  3. Heat Gently: ➑️ Heat the mixture for about 5 to 7 minutes. Be careful not to let it reach a full boil; a gentle simmer is best to preserve the nutrients.

  4. Whisk for Texture: ➑️ Use a whisk or a milk frother to blend everything together until the liquid is smooth and slightly frothy on top.

  5. Strain and Sweeten: ➑️ Remove from heat. If you used fresh ginger, pour the milk through a fine-mesh strainer into your favorite mug. Stir in your preferred sugar-free sweetener at this stage.

  6. Enjoy: ➑️ Sprinkle a tiny bit of extra cinnamon on top and drink while warm. β˜•


❓ Common Questions & Answers

Q: Why is there black pepper in a sweet drink? A: Black pepper contains piperine, which has been shown to increase the absorption of curcumin (the good stuff in turmeric) by up to 2,000%! You only need a tiny pinch. πŸ“ˆ

Q: Can I drink this every day? A: Yes! Many people enjoy a cup in the evening to help with relaxation and to support a healthy inflammatory response overnight. πŸŒ™

Q: Is this suitable for a low-carb lifestyle? A: Absolutely. By using unsweetened nut milk and a sugar-free sweetener, this drink fits perfectly into a low-carb or keto-friendly routine. πŸ₯‘

Q: Can I make a large batch? A: Yes, you can double or triple the recipe and store it in a glass jar in the fridge for up to 3 days. Just shake well and reheat gently on the stove when you’re ready for more. 🧊


πŸ’‘ Pro Tip

For an extra flavor boost, you can add a tiny drop of pure vanilla extract. It pairs beautifully with the warm spices! 🍦

Bedtime Lemon Mint Drink

Bedtime Lemon Mint Drink” (Claimed Blood Sugar Support Tea)

This image is promoting a simple lemon–mint drink as a way to β€œlower sugar before sleeping.” Let’s turn it into a clear, realistic recipeβ€”with honest notes about what it can (and can’t) do.

Β Ingredients (1 serving)

  • 1 cup warm water (not boiling)
  • 2–3 slices fresh lemon
  • 5–7 fresh mint leaves
  • Optional:
    • Β½ tsp grated ginger
    • 1 tsp apple cider vinegar
    • Pinch of cinnamon

Β Instructions

  1. Warm the water until comfortably hot (not boiling).
  2. Add lemon slices and lightly crush mint leaves to release oils.
  3. Stir in optional ingredients if using.
  4. Let steep for 5–7 minutes.
  5. Drink 20–30 minutes before bedtime.

Β Description

This is a light herbal infusion with citrus and mint. It’s hydrating, low-calorie, and soothing before sleepβ€”but it isΒ not a medical treatment for blood sugar control.

Β Tips

  • UseΒ fresh ingredientsΒ for best flavor and aroma.
  • Avoid adding sugar or honey if your goal is stable blood sugar.
  • If you have acid reflux, reduce lemon or skip vinegar.
  • Drink it warmβ€”not hotβ€”to avoid irritation before bed.

Servings

  • Makes 1 serving
  • Can be doubled or tripled, but best consumed fresh

Nutritional Info (Approx. per serving)

  • Calories: 5–10
  • Carbs: ~2g
  • Sugar: ~1g (natural from lemon)
  • Fat: 0g
  • Protein: 0g

Β Potential Benefits

  • πŸ’§Β Hydration before sleep
  • 🌿 May aid digestion (mint & ginger)
  • πŸ‹Β Vitamin C from lemon
  • 🧘 Relaxing bedtime ritual

⚠️ Important:
There isΒ no strong scientific evidenceΒ that this drink significantly lowers blood sugar overnight. Managing blood sugar is more about:

  • Balanced meals
  • Regular activity
  • Medical guidance (if diabetic)

Β Q&A

Q: Can this replace diabetes medication?
πŸ‘‰Β No. Never replace prescribed treatment with home remedies.

Q: Does lemon lower blood sugar?
πŸ‘‰Β Lemon has a low glycemic impact, but it doesn’t directly β€œlower” blood sugar in a meaningful clinical way.

Q: Is it safe to drink every night?
πŸ‘‰Β Yes for most people, but:

  • Avoid if you have GERD/acid reflux
  • Be cautious with apple cider vinegar (can irritate stomach)

Q: Best time to drink it?
πŸ‘‰Β 20–30 minutes before bed for relaxation benefits.

Q: Can I add honey?
πŸ‘‰Β You can, but it defeats the β€œlow sugar” goal.