Fluffy Homemade Pancakes

🥞 Fluffy Homemade Pancakes


These classic pancakes are soft, thick, fluffy, and golden brown—perfect for a cozy breakfast or weekend brunch.

Ingredients

  • 2 cups all-purpose flour
  • 2 tablespoons granulated sugar
  • 1 tablespoon baking powder
  • ½ teaspoon salt
  • 2 large eggs
  • 1¾ cups milk
  • ¼ cup melted butter, plus extra for cooking
  • 1 teaspoon vanilla extract

Instructions

1. Mix the dry ingredients:

In a large bowl, whisk together the flour, sugar, baking powder, and salt.

2. Mix the wet ingredients:

In another bowl, whisk the eggs, milk, melted butter, and vanilla until well combined.

3. Combine:

Pour the wet ingredients into the dry ingredients. Gently whisk until just combined. A few small lumps are perfectly fine. Do not overmix, as this can make the pancakes tough.

4. Rest the batter:

Let the batter sit for 5–10 minutes. This helps create lighter, fluffier pancakes.

5. Heat the pan:

Heat a nonstick skillet or griddle over medium heat. Lightly grease it with butter.

6. Cook:

Pour about ¼ cup of batter onto the hot pan for each pancake.

7. Flip:

Cook for about 2–3 minutes, until bubbles appear on the surface and the edges look set. Flip and cook another 1–2 minutes, until golden brown.

8. Repeat:

Continue with the remaining batter, lightly greasing the pan as needed.

🍯 Serving Suggestions

Stack the warm pancakes and serve with:

Butter

Maple syrup

Fresh strawberries or blueberries

Banana slices

Honey

Whipped cream

Chocolate chips

Powdered sugar

⭐ Tips for Extra-Fluffy Pancakes

Don’t overmix the batter.

Make sure your baking powder is fresh.

Keep the heat at medium; excessive heat can brown the outside before the center cooks.

For especially thick pancakes, use slightly less milk—about 1½ cups.

Don’t press down on the pancakes after flipping.


Prep Time: 10 minutes

Resting Time: 5–10 minutes

Cook Time: 20 minutes

Total Time: About 40 minutes

Servings: 6–8

Makes: Approximately 12–14 pancakes

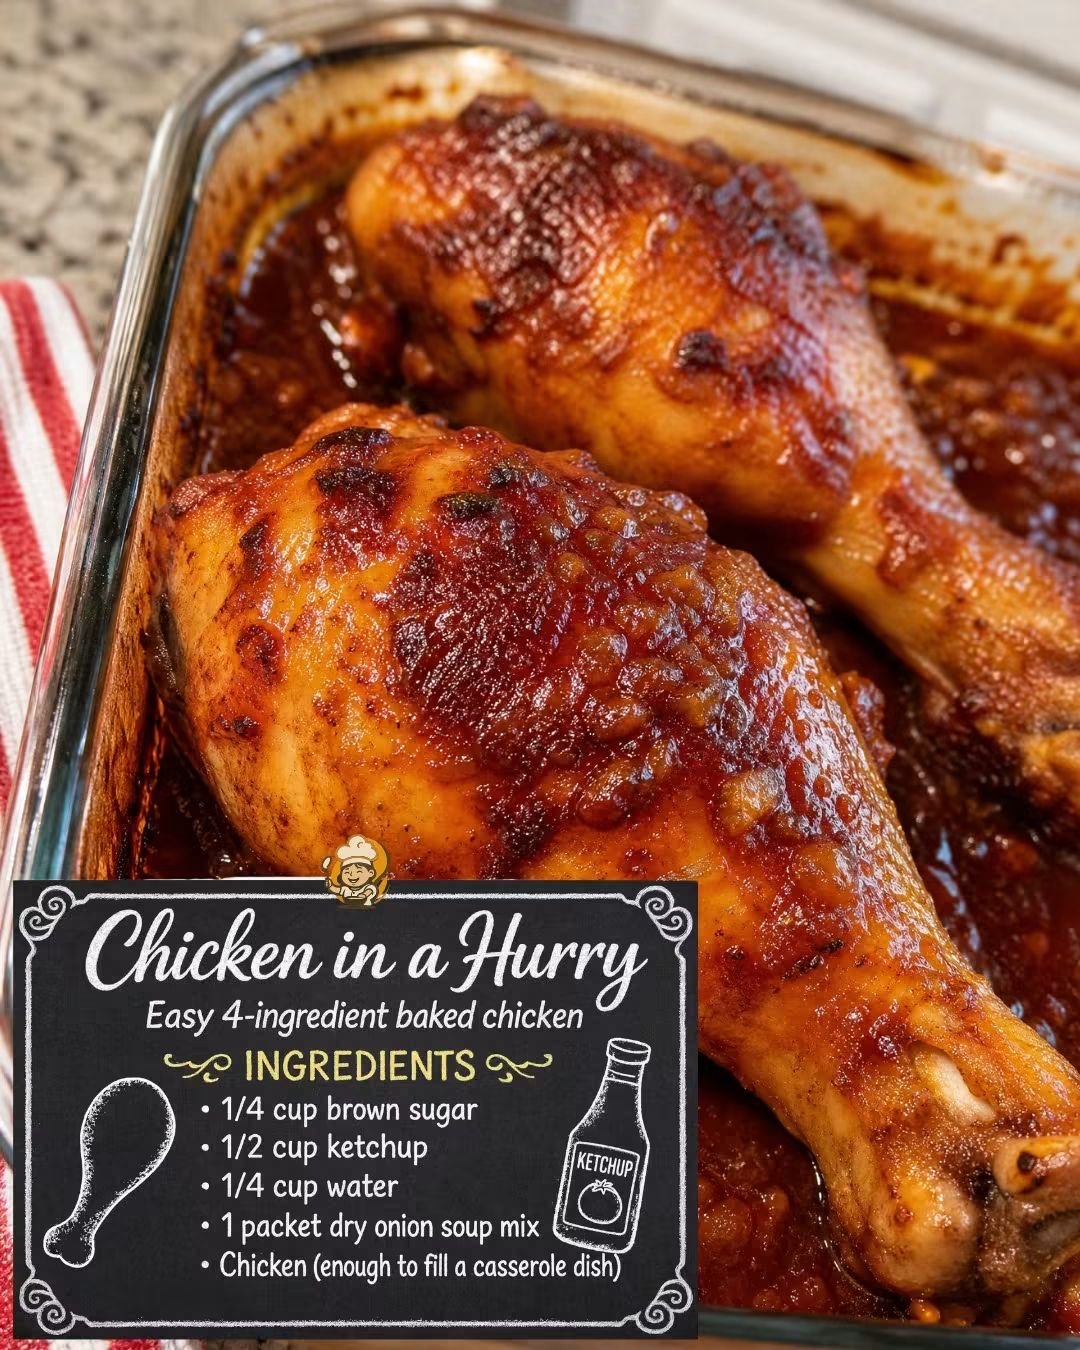
Chicken in a Hurry — Easy 4-Ingredient Baked Chicken

🍗 Chicken in a Hurry — Easy 4-Ingredient Baked Chicken


A deliciously simple baked chicken recipe with a sweet, tangy, savory sauce made from just a few pantry staples. The chicken turns beautifully caramelized and juicy while the sauce thickens around it.


Ingredients

  • 2½–3 lb chicken pieces — thighs, drumsticks, breasts, or a combination
  • ¼ cup brown sugar
  • ½ cup ketchup
  • ¼ cup water
  • 1 packet dry onion soup mix

Instructions

1. Preheat the oven to 350°F (175°C).

2. Lightly grease a 9×13-inch casserole dish or another baking dish large enough to hold the chicken in a single layer.

3. In a bowl, combine the brown sugar, ketchup, water, and dry onion soup mix. Stir until well blended.

4. Arrange the chicken pieces in the prepared casserole dish.

5. Pour the sauce evenly over the chicken, making sure the pieces are well coated.

6. Cover the dish loosely with aluminum foil and bake for about 45 minutes.

7. Remove the foil and continue baking for another 20–30 minutes, or until the chicken is completely cooked and nicely browned.

8. The chicken is done when the thickest part reaches 165°F (74°C) on a meat thermometer.

9. Let the chicken rest for 5–10 minutes before serving.

10. Spoon some of the delicious caramelized sauce from the pan over the chicken.

🍽️ Serving Suggestions

Serve this chicken with:

Mashed potatoes

White or brown rice

Roasted vegetables

Green beans

Corn

A fresh garden salad

Dinner rolls or crusty bread

⭐ Tips for the Best Chicken


Don’t overcrowd the dish so the chicken browns properly.


For extra caramelization, leave the chicken uncovered during the final 20–30 minutes.


Chicken thighs and drumsticks are especially juicy and flavorful with this sauce.


If using chicken breasts, choose pieces of similar size so they cook evenly.


Always check the internal temperature rather than relying only on cooking time.


Prep Time: 10 minutes

Cook Time: 1 hour 10–15 minutes

Total Time: About 1 hour 20 minutes

Servings: 4–6

Oven: 350°F (175°C)

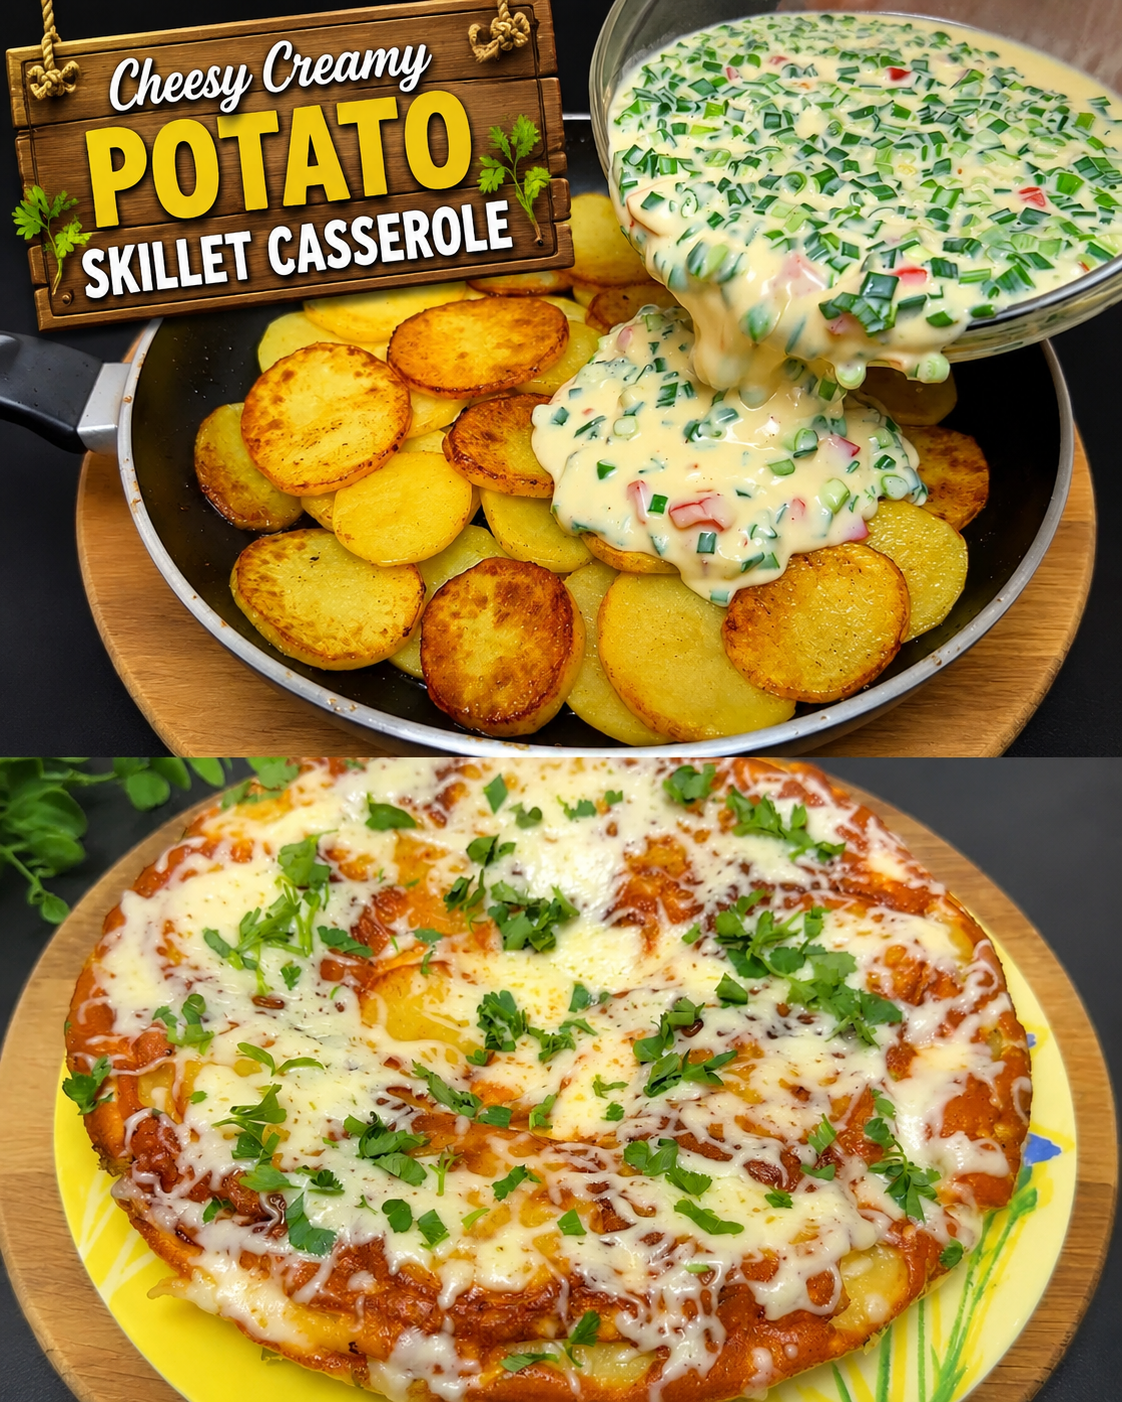
Cheesy Creamy Potato Skillet Casserole

🥔Cheesy Creamy Potato Skillet Casserole


A delicious, comforting potato dish made with crispy golden potato slices, a creamy herbed egg mixture, and plenty of melted cheese. Perfect for breakfast, brunch, or a family dinner.

Ingredients

For the potatoes

  • 5–6 medium potatoes
  • 2–3 tbsp cooking oil
  • 1 tsp salt
  • ½ tsp black pepper
  • ½ tsp paprika
  • ½ tsp garlic powder

For the creamy mixture

  • 4 large eggs
  • ½ cup heavy cream or cooking cream
  • ½ cup milk
  • ½ cup mayonnaise or sour cream
  • ½ cup finely chopped green onions
  • ¼ cup chopped bell pepper
  • 2 tbsp chopped fresh parsley or coriander
  • ½ tsp salt
  • ½ tsp black pepper
  • ½ tsp Italian seasoning
  • ½ cup shredded mozzarella

For topping

  • 1–1½ cups shredded mozzarella or cheddar
  • 2 tbsp chopped parsley/coriander
  • A pinch of paprika or chili flakes

Instructions

1. Prepare the potatoes:

Peel the potatoes and slice them into thin, even rounds. Rinse and pat them very dry.

2. Season:

Place the potato slices in a bowl. Add salt, black pepper, paprika, garlic powder, and oil. Toss until evenly coated.

3. Cook the potatoes:

Heat a large oven-safe skillet over medium heat. Arrange the potato slices in a single layer and cook for about 4–5 minutes per side, or until golden brown and almost tender. Work in batches if necessary.

4. Make the creamy mixture:

In a large bowl, whisk together the eggs, cream, milk, mayonnaise or sour cream, salt, pepper, and Italian seasoning.

5. Stir in the green onions, bell pepper, parsley/coriander, and ½ cup mozzarella.

6. Combine:

Arrange the cooked potato slices evenly in the skillet. Pour the creamy mixture slowly over the potatoes, making sure it reaches between the slices.

7. Add cheese:

Sprinkle the remaining mozzarella or cheddar generously over the top.

8. Bake:

Transfer the skillet to a preheated oven at 180°C (350°F). Bake for approximately 25–30 minutes, until the egg mixture is completely set and the cheese is melted and golden.

9. Brown the top:

For a more golden, bubbly top, switch to broil/grill for 2–3 minutes, watching carefully.

10. Garnish and serve:

Let it rest for 5–10 minutes, then sprinkle with fresh parsley or coriander. Slice and serve warm.

⏱️ Quick Details

Prep: 20 minutes

Cook: 35–40 minutes

Total: About 1 hour

Servings: 6

💡 Tips

Slice the potatoes evenly so they cook at the same rate.

For extra flavor, add cooked chicken, beef, mushrooms, or turkey.

Cheddar gives a stronger flavor, while mozzarella makes the dish especially stretchy and creamy.

Don’t cut it immediately after baking; resting helps the creamy filling set properly.

Serving suggestion: Serve with a fresh salad, yogurt dip, or your favorite chutney for a delicious complete meal.

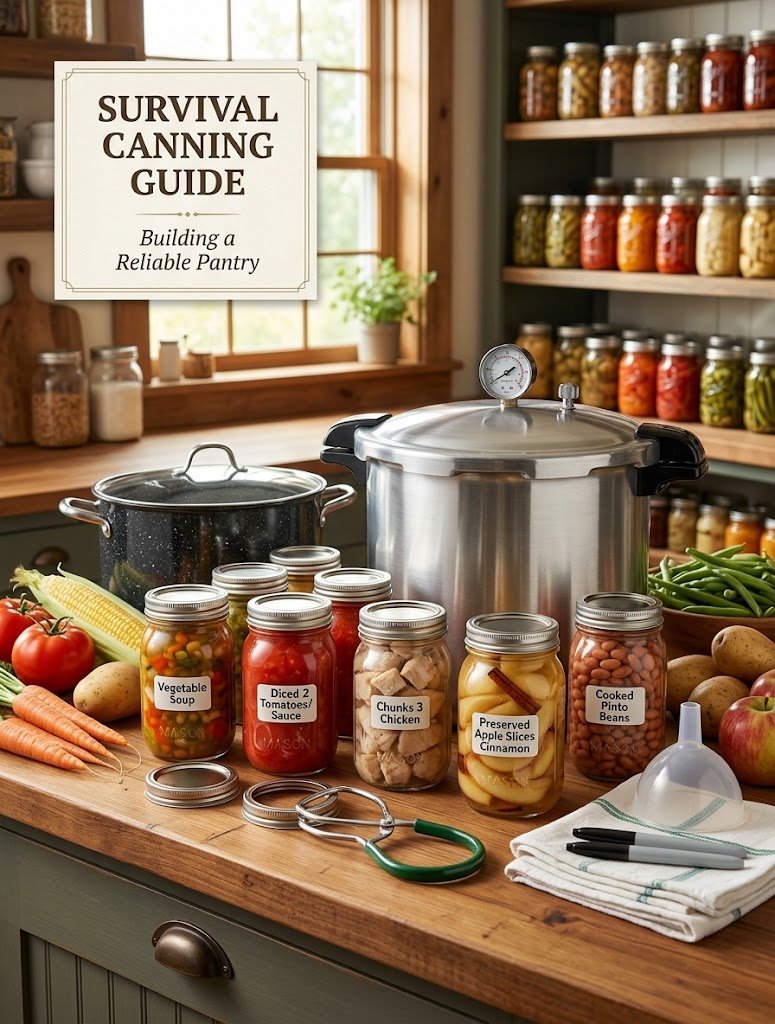
Canning Recipes That Will Help You Survive

Canning Recipes That Will Help You Survive

A Complete Guide to Preserving Food for Emergencies, Homesteading & Everyday Life

Canning has been a trusted food preservation method for generations, especially among families who value self-sufficiency, emergency preparedness, and having a well-stocked pantry. In uncertain times, a shelf full of homemade canned foods can provide comfort, nutrition, and security. Whether you are preparing for storms, power outages, economic challenges, or simply want to reduce grocery costs, learning how to can food is a valuable skill.

Unlike store-bought canned products, homemade canned foods allow you to control the ingredients, reduce preservatives, save money, and preserve seasonal produce when it is at its freshest. From hearty soups and savory meats to garden vegetables, fruits, sauces, and jams, there are countless recipes that can help you build a long-lasting food supply.

This guide covers essential survival canning recipes that are practical, delicious, and perfect for American households looking to create a reliable pantry.

Why Canning Is an Essential Survival Skill

Food shortages, natural disasters, supply chain problems, and unexpected emergencies can happen at any time. Having preserved food at home gives you independence and peace of mind.

Canned foods can:

Last for months or even years when stored properly

Reduce dependence on grocery stores

Help save money by buying seasonal ingredients in bulk

Provide quick meals during emergencies

Reduce food waste by preserving extra produce

A properly prepared canning pantry is like having a personal grocery store at home.

Essential Canning Equipment

Before starting, it is important to have the right tools:

Water Bath Canner

Used for high-acid foods such as:

Fruits

Pickles

Jams

Jellies

Salsa

Tomato products with added acid

Pressure Canner

Required for low-acid foods including:

Meat

Poultry

Beans

Vegetables

Soups and stews

Pressure canning reaches higher temperatures needed to safely preserve foods that can support harmful bacteria.

Other Supplies

Mason jars

New canning lids

Jar rings

Jar lifter

Funnel

Bubble remover tool

Clean towels

Labels and markers

Always follow tested food safety guidelines when preserving foods.

Recipe 1: Survival Vegetable Soup (Pressure Canned)

A homemade vegetable soup is one of the most useful foods to have stored. It provides a complete meal option that can be heated quickly during emergencies.

Ingredients

6 cups chopped tomatoes

4 cups diced carrots

4 cups chopped potatoes

3 cups green beans

3 cups corn kernels

2 cups chopped celery

2 cups chopped onions

8 cups vegetable broth

2 teaspoons salt

1 teaspoon black pepper

2 teaspoons dried Italian seasoning

Instructions

Wash and prepare all vegetables by cutting them into similar-sized pieces.

Combine vegetables, broth, and seasonings in a large stockpot.

Simmer for approximately 10 minutes until vegetables slightly soften.

Fill sterilized jars, leaving proper headspace.

Remove air bubbles and clean jar edges.

Apply lids and process using a pressure canner according to tested guidelines.

Allow jars to cool completely before checking seals.

This soup can become the base for quick dinners by adding rice, pasta, shredded chicken, or beans.

Recipe 2: Homemade Canned Tomato Sauce

A pantry staple, tomato sauce can transform simple ingredients into comforting meals.

Ingredients

20 pounds ripe tomatoes

4 tablespoons lemon juice per quart jar

2 tablespoons olive oil

4 cloves garlic

2 tablespoons dried basil

1 tablespoon oregano

Salt to taste

Instructions

Wash tomatoes and remove damaged areas.

Cook tomatoes until soft.

Blend or strain tomatoes to create a smooth sauce.

Simmer sauce until desired thickness.

Add herbs and seasoning.

Add lemon juice to jars for safe acidity.

Fill jars and process using a water bath canner following approved times.

This sauce is perfect for:

Pasta dishes

Pizza

Soups

Casseroles

Slow cooker meals

Recipe 3: Canned Chicken for Emergency Meals

Canned chicken is one of the most versatile survival foods. It can quickly become sandwiches, soups, casseroles, or protein-packed meals.

Ingredients

Fresh boneless chicken

Salt

Optional herbs

Instructions

Cut chicken into chunks.

Pack raw chicken into clean jars.

Add salt if desired.

Leave recommended headspace.

Remove air bubbles.

Process jars using a pressure canner.

Store canned chicken in a cool, dark pantry.

Recipe 4: Sweet Survival Apple Canning

Preserved apples are excellent for breakfasts and desserts.

Ingredients

Fresh apples

Sugar

Cinnamon

Lemon juice

Water

Instructions

Peel and slice apples.

Prepare a light syrup using water and sugar.

Add apples and lemon juice.

Pack into jars.

Process using a water bath canner.

Use canned apples for:

Apple pie filling

Oatmeal toppings

Pancakes

Desserts

Recipe 5: Canned Pinto Beans

Beans are affordable, nutritious, and extremely valuable for long-term food storage.

Ingredients

Dry pinto beans

Water

Salt

Instructions

Wash beans thoroughly.

Soak overnight or use a quick soak method.

Cook beans until partially tender.

Fill jars with beans and cooking liquid.

Process using a pressure canner.

Beans provide:

Protein

Fiber

Long-lasting energy

Building a Survival Canning Pantry

A balanced emergency pantry should include different food categories.

Protein Sources

Store:

Chicken

Beef

Beans

Chili

Fish

Vegetables

Include:

Green beans

Corn

Carrots

Potatoes

Mixed vegetables

Fruits

Examples:

Peaches

Apples

Pears

Berries

Ready Meals

Prepare:

Soups

Stews

Pasta sauces

Chili

A variety of foods prevents meal boredom and ensures better nutrition.

Storage Tips for Long-Term Canned Foods

Proper storage is important for maintaining quality.

Keep Jars Cool

Store canned foods away from heat sources and sunlight.

Label Everything

Write:

Food name

Date canned

Batch information

Use older jars first.

Check Before Eating

Do not use jars that show:

Bulging lids

Strange smells

Leakage

Mold

Broken seals

Food safety should always come first.

Beginner Canning Mistakes to Avoid

Many beginners make simple mistakes that affect quality.

Avoid:

Using damaged jars

Reusing old lids

Skipping proper processing times

Guessing measurements

Ignoring acidity requirements

Storing jars before they cool completely

Successful canning requires patience and attention to detail.

Conclusion

Canning is more than a cooking method; it is a valuable life skill that provides independence, savings, and security. A well-prepared pantry filled with homemade canned foods can help families handle emergencies while still enjoying comforting, nutritious meals.

Whether you are starting with a few jars of tomato sauce or creating a full survival pantry, every batch brings you one step closer to self-reliance. With fresh ingredients, proper equipment, and safe preservation practices, you can create a food supply that supports your family through every season.

A strong pantry is not built overnight. Start small, learn the process, and gradually build a collection of homemade canned foods that your future self will appreciate.

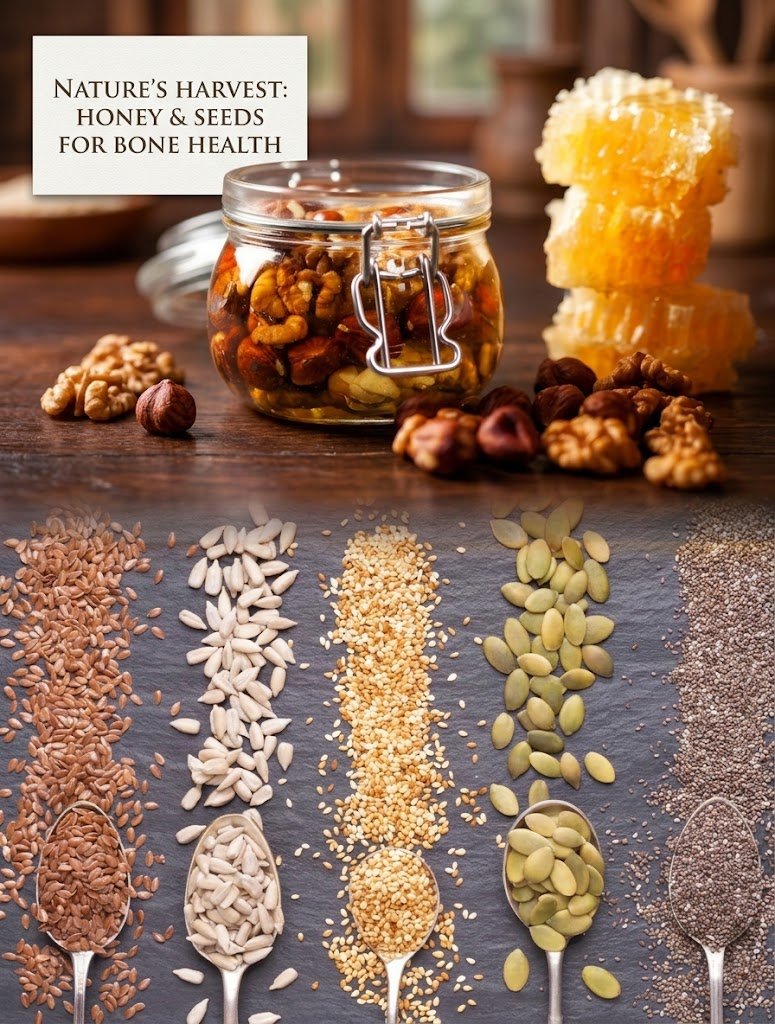
Natural Seed & Honey Bone Health Elixir

Natural Seed & Honey Bone Health Elixir

This traditional folk-remedy mixture pairs calcium-rich seeds, healthy fats, and minerals with raw honey to create a shelf-stable daily tonic designed to support overall bone density and joint function.

Prep Time: 10 minutes

Cook Time: 0 minutes

Yield: Approx. 2 cups (32 tablespoons)

Serving Size: 1 tablespoon daily

Ingredients & US Measurements:

Ingredient Metric Weight US Standard Volume US Weight (Avoirdupois)
Flax seeds (whole or ground) 30 grams ~3.5 tablespoons ~1.05 ounces
Pumpkin seeds (raw pepitas) 30 grams ~1/4 cup ~1.05 ounces
Sunflower seeds (raw hulled) 30 grams ~1/4 cup ~1.05 ounces
Sesame seeds (raw or unhulled) 30 grams ~3 tablespoons ~1.05 ounces
Raw organic honey 500 grams ~1.5 cups ~17.6 ounces (1.1 lbs)

Note: You can optionally add 30g (~1/4 cup) of chia seeds or raw walnuts, as pictured, to increase omega-3 content.

Comprehensive Nutritional Profile

Each seed in this mixture offers specific minerals essential for bone formation, maintenance, and structural integrity:

Sesame Seeds: Exceptionally high in plant-based calcium, copper, and zinc. Unhulled sesame seeds provide the highest concentration of calcium per gram.

Pumpkin Seeds (Pepitas): A rich source of magnesium, phosphorus, and zinc. Magnesium plays a critical structural role in bone matrix mineralization and assists in activating Vitamin D.

Flax Seeds: Packed with alpha-linolenic acid (ALA), a plant-based omega-3 fatty acid that helps reduce systemic inflammation and protects bone tissue from excessive resorption.

Sunflower Seeds: High in Vitamin E, manganese, and copper, which act as cellular antioxidants and support connective tissue formation within the bone joint matrix.

Raw Honey: Functions as a natural preservative and binding base while providing trace enzymatic compounds that aid digestion and mineral uptake.

Step-by-Step Preparation

Grind the Seeds (Recommended for Absorption): Whole flax seeds often pass through the digestive tract unabsorbed. Place the flax, pumpkin, sunflower, and sesame seeds into a clean coffee grinder, spice grinder, or food processor. Pulse a few times until crushed into a coarse meal. (If you prefer texture, you may leave pumpkin and sunflower seeds whole).

Combine Dry Ingredients: Transfer the ground or whole seed mixture into a clean, dry, wide-mouth glass Mason jar (16 oz or 24 oz capacity).

Add the Honey: Pour 500 grams (1.5 cups) of raw liquid honey slowly over the seeds.

Mix Thoroughly: Using a non-metallic spoon (wooden, silicone, or plastic is ideal when handling raw honey), stir the mixture continuously until all seeds are completely coated and suspended within the honey.

Seal & Settle: Secure the jar lid tightly. Let the jar sit at room temperature for 12 to 24 hours to allow the seed oils and honey to integrate fully.

Daily Dosage & How to Consume

Standard Dosage: Take 1 tablespoon (approx. 15–20 grams) every morning on an empty stomach, or 30 minutes prior to breakfast.

Serving Suggestions:

Eat directly off the spoon followed by a glass of warm water.

Stir into warm oatmeal or overnight oats.

Swirl into plain Greek yogurt for added protein and calcium synergy.

Spread onto a slice of whole-grain toast.

Storage, Shelf-Life & Safety Precautions

Storage: Store the sealed glass jar in a cool, dark pantry or cupboard away from direct sunlight and heat. Refrigeration is not strictly required due to honey’s low moisture content, but chilling will thicken the texture and extend seed freshness.

Shelf Life: Keeps well for up to 6 to 9 months at room temperature, or up to 12 months if refrigerated. If seeds begin to smell sour or rancid, discard the mixture.

Dietary Precautions:

Diabetes & Blood Sugar: Honey is high in simple sugars; consult your physician regarding carbohydrate intake if managing diabetes or insulin resistance.

Infants: Do not give raw honey to children under 1 year of age due to the risk of infant botulism.

General Medical Care: While rich in essential minerals, dietary supplements and folk remedies do not replace targeted medical therapy for advanced osteoporosis or severe osteopenia. Always consult with a primary healthcare provider for regular bone density scans (DEXA) and comprehensive bone health strategies.

Fluffy Japanese Soufflé Pancakes ✨

🥞✨ Fluffy Japanese Soufflé Pancakes ✨🥞


These thick, soft, and fluffy pancakes are golden on the outside and wonderfully tender inside. Perfect for breakfast or a sweet brunch! ❤️


🛒 Ingredients

For the Pancakes:

  • 2 large eggs, separated
  • 2 tbsp whole milk
  • ½ tsp vanilla extract
  • ¼ cup all-purpose flour
  • 1 tbsp cornstarch
  • 1½ tbsp granulated sugar
  • ½ tsp baking powder
  • Pinch of salt
  • ½ tsp lemon juice
  • Butter or oil, for cooking

For Serving:

  • Powdered sugar
  • Maple syrup or honey
  • Fresh berries
  • Whipped cream
  • Butter, optional

👩‍🍳 Instructions

1. Separate the eggs

Carefully separate the egg whites from the yolks. Place the whites in a clean, dry mixing bowl.

2. Make the yolk mixture

Whisk the egg yolks with milk and vanilla until smooth.

Add the flour, cornstarch, baking powder, and salt. Mix just until combined. Don’t overmix.

3. Whip the egg whites

Add lemon juice to the egg whites and beat until foamy. Gradually add the sugar while continuing to beat.

Whip until you have stiff, glossy peaks. This is the secret to getting tall, fluffy pancakes.

4. Fold gently

Add about one-third of the whipped egg whites to the yolk batter and gently fold.

Add the remaining egg whites in two additions. Fold carefully with a spatula until just combined. Avoid stirring or overmixing, as this will deflate the air.

5. Heat the pan

Lightly grease a nonstick skillet with butter or oil. Place it over very low heat.


6. Shape the pancakes

Spoon the batter into tall, thick rounds. You can use metal ring molds for perfectly round pancakes, or simply mound the batter carefully with a spoon.


Add a few drops of water to the empty area of the pan and immediately cover with a lid. The steam helps the pancakes cook gently and stay fluffy.


7. Cook slowly

Cook for about 4–6 minutes on low heat. Carefully check the bottom— it should be golden brown.


Flip gently using a spatula. Cover again and cook for another 4–6 minutes, or until the pancakes are cooked through.


8. Serve immediately

Transfer the pancakes to a plate and dust with powdered sugar. Serve with butter, maple syrup, honey, fresh berries, or whipped cream.


💡 Tips for Extra-Fluffy Pancakes


Use room-temperature eggs for better volume.


Make sure your mixing bowl is completely clean and dry before whipping the whites.


Don’t overmix the batter after adding the meringue.


Keep the pan on very low heat so the outside doesn’t brown before the center cooks.


Always cook with the lid on to create gentle steam.


Serve immediately for the best height and texture.

🥞 Serving Idea

Stack 2–3 fluffy pancakes on a plate, add a small pat of butter, drizzle generously with maple syrup, and finish with powdered sugar and fresh berries. 😍


Save this recipe and share it with someone who loves fluffy pancakes! ❤️


#JapanesePancakes #SoufflePancakes #FluffyPancakes #PancakeRecipe #BreakfastIdeas #BrunchRecipes #EasyBreakfast #HomemadePancakes #FluffyPancakesRecipe #Foodie #BreakfastRecipe #SweetBreakfast