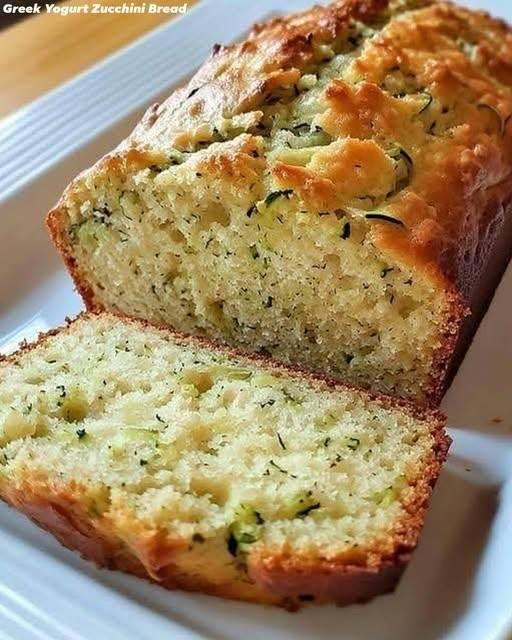
Vanilla Raisin Loaf Cake

Vanilla Raisin Loaf Cake

Prep Time: 15 minutes
Bake Time: 45–50 minutes
Servings: 8–10 slices

A soft, lightly sweet loaf cake flavored with vanilla and dotted with juicy raisins. Perfect for tea time or dessert.


🛒 Ingredients

  • 2 cups (250 g) all-purpose flour

  • 1½ teaspoons baking powder

  • ¼ teaspoon salt

  • ½ cup (115 g) unsalted butter, softened

  • ¾ cup (150 g) granulated sugar

  • 2 large eggs, at room temperature

  • 1 teaspoon vanilla extract

  • ½ cup (120 ml) milk

  • ½ cup (80 g) raisins
    (soaked in warm water for 10 minutes, then drained and patted dry)

Optional:

  • 1 tablespoon flour (for coating raisins)

  • Powdered sugar for dusting


👩‍🍳 Step-by-Step Instructions

1. Prepare the Pan

Preheat your oven to 180°C (350°F).

Grease a standard loaf pan (9×5 inch) with butter or oil and line with parchment paper for easy removal.


2. Mix Dry Ingredients

In a medium bowl, whisk together:

  • flour

  • baking powder

  • salt

Set aside.


3. Cream Butter and Sugar

In a large mixing bowl, beat:

  • softened butter

  • sugar

Mix until light and fluffy (about 2–3 minutes).

This step helps create a soft texture.


4. Add Eggs and Vanilla

Add eggs one at a time, mixing well after each addition.

Stir in vanilla extract.


5. Combine Wet and Dry

Add the flour mixture in two parts, alternating with milk:

  • Add half the flour → mix gently

  • Add milk → mix

  • Add remaining flour → mix just until combined

Do not overmix.


6. Add Raisins

Toss drained raisins with 1 tablespoon flour (optional, helps prevent sinking).

Fold raisins gently into the batter.


7. Bake

Pour batter into prepared pan and smooth the top.

Bake for 45–50 minutes, or until:

  • top is golden

  • a toothpick inserted in the center comes out clean


8. Cool

Let the loaf cool in the pan for 10 minutes, then transfer to a wire rack to cool completely.


🍽 Serving Ideas

  • Dust with powdered sugar

  • Serve plain or with butter

  • Pair with tea, coffee, or milk

  • Add sliced fruit on the side


💡 Helpful Tips

  • Soaking raisins keeps them soft and juicy.

  • Do not overmix the batter or the loaf may become dense.

  • You can replace raisins with chopped dates or dried apricots.

  • Store covered at room temperature for 2 days or refrigerate up to 5 days.

Cheesy Air Fryer Hasselback Potatoes

Cheesy Air Fryer Hasselback Potatoes

Prep time: 10 mins | Cook time: 45 mins | Servings: 2

Ingredients

  • 2 russet potatoes

  • 4 tbsp butter, melted

  • 1 tbsp garlic paste or minced garlic

  • 3 to 5 slices Colby Jack cheese (cut into fourths)

  • Kosher salt and black pepper to taste

  • Optional toppings: Sour cream and fresh chives


Instructions

  1. Prep the Potatoes: * Cut a thin slice from the bottom of each potato to create a flat, stable base.

    • Place the potato between two chopsticks. Use a sharp knife to cut 1/4-inch slices across the potato; the chopsticks will stop your knife from cutting all the way through.

  2. The “Lift” Trick: * Place the small slices you cut from the bottom into the air fryer basket.

    • Set the large sliced potatoes on top of these bottom slices. This helps the Hasselback layers fan open during cooking.

  3. Seasoning: * Mix the melted butter, garlic, salt, and pepper.

    • Gently fan out the potato slices and brush the garlic butter over the top, making sure it gets between the layers.

    • Sprinkle with a little extra salt and pepper.

  4. First Stage Air Fry: * Set your air fryer to 370°F and cook for 20 minutes.

  5. Second Stage Air Fry: * Brush any remaining garlic butter over the potatoes.

    • Cook for an additional 20 to 25 minutes at 370°F until the edges are crispy and golden.

  6. Add the Cheese: * Slide the small cheese pieces into the gaps between the potato slices (either every gap or every other gap depending on your preference).

    • Cook for 1 to 2 more minutes until the cheese is bubbling and melted.

  7. Serve: * Top with a dollop of sour cream and a sprinkle of fresh chives.


Pro Tips for the Best Hasselbacks

  • Butter is Key: Don’t be shy with the garlic butter; it’s what creates the “salty” and “cheesy” experience mentioned in your notes.

  • Potato Size: Try to choose russet potatoes of a similar size so they cook evenly at the same time.

How to Reduce Thigh, Arm, Back, Neck, and Belly Fat with Ginger Water

How to Reduce Thigh, Arm, Back, Neck, and Belly Fat with Ginger Water

When it comes to aiding weight loss and targeting stubborn fat in areas such as the abdomen, arms, back, and thighs, ginger water is a drink that is both natural and effective. The fact that it is abundant in antioxidants and anti-inflammatory chemicals, as well as the fact that it boosts metabolism and helps digestion, makes it an extremely beneficial supplement to your workout program. When paired with a healthy diet and consistent physical activity, ginger water has the potential to assist you in achieving your weight loss objectives while also enhancing your overall well-being overall.

Benefits of Drinking Ginger Water

Drinking this multipurpose beverage can help you lose weight in a number of different ways. Through the use of chemicals such as gingerol and shogaol, it stimulates the metabolism, so assisting the body in burning calories more effectively.

Ginger water has the ability to decrease appetite, which in turn reduces the need for excessive snacking.

Additionally, it helps improve digestion by minimizing bloating and gas. You will feel lighter and more invigorated as a result of its natural cleansing effects, which help drain out impurities and reduce inflammation.

A Guide to Making and Utilizing Ginger Water

Making ginger water is a straightforward process.

A tablespoon of grated or sliced fresh ginger should be added to four cups of water and brought to a boil.

Let it simmer for ten to fifteen minutes, and then strain it. Taste can be enhanced by the addition of honey or lemon juice.

Drink it first thing in the morning on an empty stomach to get your metabolism going, sip it before meals to control your hunger, or enjoy it throughout the day to stay hydrated and energized. These are the ideal ways to guarantee the best effects.

See also  The Lemon Water Diet: A Refreshing Approach to Slimming Down

Advice on How to Achieve the Best Possible Results

Ginger water, when combined with a healthy lifestyle, can provide the most effective benefits for fat loss. In addition to engaging in regular exercise, including both cardiovascular and strength training, you should prioritize a diet that is abundant in whole foods, lean proteins, and healthy fats.

The key to success is consistency; if you want to see obvious improvements, drink ginger water every day for a few weeks. You should, however, limit your consumption to two to three glasses per day and seek medical advice if you are pregnant or have any preexisting medical conditions.


Sugar-Free Apple Cocoa Cake

Sugar-Free Apple Cocoa Cake

Just Apples & Cocoa!

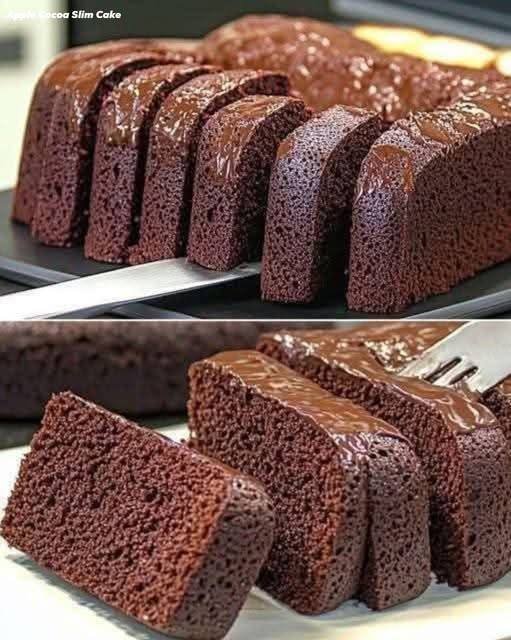
If you’ve been searching for a guilt-free dessert that’s naturally sweet, rich in flavor, and supports your health goals, this recipe is a game-changer. With only a few wholesome ingredients — apples, eggs, and cocoa — you can make a moist, chocolaty cake without a single grain of sugar. Perfect for breakfast, snacks, or dessert!

Ingredients

  • 4 medium sweet apples (Fuji, Honeycrisp, Gala) – naturally sweet and juicy.

  • 4 large eggs – for structure and protein.

  • 5 tablespoons unsweetened cocoa powder – deep chocolate flavor without sugar.

  • 1 teaspoon baking powder – for a light rise.

  • Olive oil – for greasing the baking mold.

Instructions

  1. Prepare the apples
    Wash, peel, and core the apples. Cut them into chunks and blend into a smooth purée.

  2. Make the batter
    In a large mixing bowl, combine the apple purée, eggs, cocoa powder, and baking powder. Whisk or blend until the mixture is lump-free and silky.

  3. Get the pan ready
    Lightly grease a baking pan with olive oil. Pour in the batter and smooth the top.

  4. Bake
    Preheat the oven to 180°C (350°F). Bake for 35–40 minutes, or until a toothpick inserted in the center comes out clean.

  5. Cool & enjoy
    Let the cake cool completely before slicing. Serve plain, or with a sprinkle of extra cocoa powder.

Why it’s great for weight loss

This cake is naturally sweet from apples, high in fiber, rich in protein, and low in calories. Cocoa adds flavor and antioxidants without sugar.

See also  Cabbage with Carrots

 Q&A

Q: Can I use green apples?
A: Yes, but they’re tart — the cake will be less sweet.

Q: How long does it keep?
A: Store in an airtight container in the fridge for up to 4 days, or freeze for 1 month.

Q: Can I make it vegan?
A: Replace each egg with 1 tbsp ground flaxseed + 3 tbsp water.

Q: Is it sweet like regular cake?
A: No, it’s mildly sweet — think of it as a healthy chocolate loaf.

Healthy cookies without flour and sugar! Energy dessert recipe

Healthy cookies without flour and sugar! Energy dessert recipe

Are you looking for a delicious and healthy dessert option that’s free from flour and sugar? Look no further! Our energy dessert recipe uses natural ingredients like nuts, seeds, and dried fruits to create a tasty and satisfying treat that’s perfect for anyone with dietary restrictions or preferences.
Yields: 10-12 cookies
Prep time: 20 minutes
Bake time: 15-20 minutes

Ingredients:

70g (2.5 ounces) dried apricots

50g (1.8 ounces) walnuts

70g (2.5 ounces) hazelnuts

30g (1 ounce) pumpkin seeds

40g (1.4 ounces) sunflower seeds

20g (0.7 ounces) sesame seeds

20g (0.7 ounces) flaxseeds

* 60g (2 ounces) almonds

20g (0.7 ounces) pine nuts

40ml (1.4 ounces) natural honey

1 egg white

A pinch of salt

Instructions:

Prep the nuts and seeds:

Preheat oven to 350°F (175°C). Line a baking sheet with parchment paper. Roughly chop the walnuts, hazelnuts, and almonds.

Combine ingredients:

In a large bowl, combine all the nuts, seeds, and dried apricots. Add the honey, egg white, and salt. Mix well until everything is evenly coated.

Shape the cookies:

Use your hands to form the mixture into round cookies, about 1 inch thick. Place them on the prepared baking sheet.

Bake:

Bake for 15-20 minutes, or until golden brown.

 Cool:

Let the cookies cool on the baking sheet for a few minutes before transferring them to a wire rack to cool completely.

Tips and Variations

Use different types of nuts and seeds to change up the flavor and texture of the cookies.

See also  Mediterranean Homemade Creamy Tahini dressing

Add in dried fruits like cranberries or cherries for extra sweetness and flavor.

Use coconut oil or almond butter to add healthy fats and creaminess to the cookies.

Experiment with different spices like cinnamon or nutmeg to add extra flavor.

Make the cookies into bars or energy balls for a convenient and portable snack.

Q&A

Q: What can I use instead of sugar in the recipe?
A: You can use natural sweeteners like honey, maple syrup, or stevia to sweeten the cookies.

Q: Can I use gluten-free flour instead of nuts and seeds?
A: Yes, you can use gluten-free flour, but keep in mind that it may change the texture and flavor of the cookies.

Q: Are these cookies suitable for vegans?
A: Yes, these cookies are vegan-friendly, but make sure to use vegan-friendly ingredients like coconut oil and maple syrup.

Q: How long do the cookies last?
A: The cookies can last up to 5 days when stored in an airtight container in the fridge.

Nutrition Information (per cookie)

Calories: 120
Fat: 8g
Saturated fat: 1g
Omega-3 fatty acids: 0.5g
Carbohydrates: 10g
Fiber: 2g
Sugar: 5g
Protein: 2g
Sodium: 50mg
Cholesterol: 0mg

Potato-Crusted Chicken and Mushroom Stuffed Dish

Potato-Crusted Chicken and Mushroom Stuffed Dish

Introduction

This dish combines the heartiness of chicken with the earthy richness of mushrooms, all wrapped in a crispy, golden potato crust. The texture contrast between the crunchy outside and the juicy, creamy filling makes it a crowd-pleaser. It’s a great comfort meal that can be served with a fresh salad, roasted veggies, or a creamy dipping sauce.

Prep Time: 25 minutes

Cook Time: 45 minutes

Total Time: 1 hour 10 minutes

Servings: 4–6

Ingredients

For the Potato Crust:

3 large potatoes, grated

1 egg

¼ cup all-purpose flour or breadcrumbs

½ teaspoon salt

½ teaspoon black pepper

½ teaspoon garlic powder

¼ teaspoon paprika (optional)

2 tablespoons olive oil

For the Chicken and Mushroom Filling:

2 cups cooked and shredded chicken (or ground chicken)

1 cup mushrooms, finely chopped (button, cremini, or shiitake)

1 small onion, finely chopped

2 cloves garlic, minced

½ teaspoon salt

½ teaspoon black pepper

½ teaspoon thyme or oregano

½ teaspoon smoked paprika (optional)

½ cup shredded mozzarella or cheddar cheese (optional)

1 tablespoon olive oil

For Garnish (Optional):

Fresh parsley, chopped

Grated Parmesan cheese

Instructions

 Prepare the Potato Crust

Preheat the oven to 375°F (190°C).

Grate the potatoes and squeeze out excess moisture using a clean kitchen towel.

In a mixing bowl, combine the grated potatoes, egg, flour (or breadcrumbs), salt, black pepper, garlic powder, and paprika. Mix well.

Grease a baking dish or line a baking sheet with parchment paper.

Spread the potato mixture evenly in the dish to create a crust-like layer. Press it down firmly.

See also  Mediterranean Greek Halloumi Mezze Platter with Lemon Herb Dressing

Bake for 15–20 minutes or until the edges start turning golden brown.

 Prepare the Chicken and Mushroom Filling

Heat 1 tablespoon olive oil  in a pan over medium heat.

Sauté chopped onions and garlic until soft and fragrant.

Add the chopped mushrooms and cook for 5–7 minutes until they release their moisture and become golden brown.

Stir in the shredded or ground chicken, salt, black pepper, thyme, and smoked paprika. Mix well.

Remove from heat and let it cool slightly. If using, stir in the shredded cheese.

 Assemble and Bake

Take the pre-baked potato crust out of the oven and evenly spread the chicken and mushroom filling on top.

If desired, sprinkle extra cheese on top.

Return to the oven and bake for another 20–25 minutes until the edges are crispy and golden brown.

Let the dish cool for 5 minutes before slicing.

 Serve and Enjoy

Garnish with fresh parsley and grated Parmesan cheese.

Serve warm with a side of sour cream, garlic yogurt sauce, or a light salad.

Tips 

Remove Moisture from Potatoes:

Squeeze out as much water as possible to achieve a crispy crust.

Cheese Variation:

Use smoked gouda, feta, or Parmesan for a unique twist.

Extra Crispiness:

Brush the top of the potato crust with  olive oil before baking.

Make it Creamier:

Add a spoonful of cream cheese or ricotta to the filling.

Pairing Ideas:

Serve with a fresh green salad or roasted vegetables.

Nutrition Facts (Per Serving)

Calories: ~320 kcal

Protein: ~25g

Carbohydrates: ~35g

Fat: ~10g

Fiber: ~4g

Sodium: ~450mg


Golden Turmeric Custard (Creamy Spiced Pudding)

Golden Turmeric Custard (Creamy Spiced Pudding)

Prep Time: 5 minutes
Cook Time: 10 minutes
Chill Time (optional): 2 hours
Servings: 2

A warm, silky custard made with almond milk (or coconut milk), gently spiced with turmeric and ginger, and lightly sweetened for a cozy dessert or snack.


🛒 Ingredients

  • 2 cups almond milk
    (or full-fat coconut milk for a richer texture)

  • 2 tablespoons cornstarch
    (or arrowroot powder)

  • 1 tablespoon honey or maple syrup
    (adjust to taste)

  • ½ teaspoon ground turmeric

  • ¼ teaspoon ground ginger

  • 1 pinch black pepper

  • ½ teaspoon vanilla extract

  • Optional topping: ground cinnamon


👩‍🍳 Step-by-Step Instructions

1. Mix the Base

In a medium saucepan (while still cold), add:

  • almond milk

  • cornstarch

  • turmeric

  • ginger

  • black pepper

Whisk very well until the cornstarch is fully dissolved and the mixture is smooth with no visible lumps.

👉 This step is important to prevent clumping later.


2. Heat and Thicken

Place the saucepan over medium-low heat.

Stir constantly using a whisk or wooden spoon, making sure to scrape the bottom and sides of the pan.

After about 5–8 minutes, the mixture will:

  • become hot

  • thicken gradually

  • coat the back of a spoon

Once thick and smooth, remove from heat immediately.


3. Sweeten and Flavor

Stir in:

  • honey or maple syrup

  • vanilla extract

Mix until fully blended and smooth.

Taste and adjust sweetness if needed.


4. Portion and Set

Pour the custard into small bowls or ramekins.

You can enjoy it:

  • Warm for a soft pudding texture
    OR

  • Chilled by refrigerating for about 2 hours for a firmer custard


5. Finish and Serve

Before serving, lightly sprinkle:

  • cinnamon
    or

  • a tiny pinch of turmeric for color

Serve plain or with:

  • sliced bananas

  • berries

  • crushed nuts

  • coconut flakes


💡 Helpful Tips

  • If lumps appear, strain the hot custard through a fine mesh sieve before pouring into bowls.

  • For extra creaminess, use coconut milk instead of almond milk.

  • Stir constantly to prevent burning.

  • Do not boil hard—gentle heat gives the smoothest texture.


🍮 Texture & Flavor

✔ Smooth and creamy
✔ Lightly sweet
✔ Warm spice aroma
✔ Naturally golden in color

Air Fryer Grilled Cheese

Air Fryer Grilled Cheese

I still remember the very first grilled cheese my mom made for me in a cast-iron skillet—golden, buttery bread with crisp edges and melted cheddar stretching endlessly with every bite. It was simple, comforting, and perfect in its own way. Fast-forward to today, and I’m making that same nostalgic sandwich, but with a modern twist that’s quicker, cleaner, and unbelievably crispy: the air fryer.

This Air Fryer Grilled Cheese delivers everything we love about the classic—gooey cheese, crunchy bread, rich buttery flavor—without standing over the stove or flipping nervously. No greasy pans. No uneven browning. Just consistently perfect grilled cheese every single time.

🧑‍🍳 Why Make Grilled Cheese in the Air Fryer?

The air fryer creates evenly crisp bread on the outside while gently melting the cheese inside. Because hot air circulates around the sandwich, you get uniform browning without babysitting the pan. It’s also ideal for making multiple sandwiches at once, making it perfect for families, quick lunches, or busy weeknights.

Another bonus? It’s beginner-friendly and safe for kids (with supervision), making it a fun way to get little hands involved in the kitchen. Plus, it works beautifully with all kinds of bread and cheeses, so you can customize it endlessly.

🧾 Ingredients

  • 2 slices of bread (white, sourdough, whole wheat, or brioche)
  • 1–2 slices of cheddar cheese (or mozzarella, gouda, Swiss, or American)
  • 1–2 tablespoons butter, softened
See also  Cottage Cheese Pasta Sauce  

🍽️ Instructions

Step 1: Preheat the Air Fryer
Preheat your air fryer to 370°F (190°C) for about 3 minutes. This ensures the bread starts crisping immediately when it hits the basket.

Step 2: Assemble the Sandwich
Butter one side of each slice of bread generously. Place the cheese between the non-buttered sides so the buttered sides face outward. This guarantees that golden, crunchy exterior.

Step 3: Air Fry
Place the sandwich carefully into the air fryer basket. If your air fryer runs strong, you can secure the sandwich with toothpicks to prevent the top slice from lifting.
Cook at 370°F (190°C) for 4–5 minutes, flip, then cook for another 3–4 minutes, or until both sides are golden brown and the cheese is fully melted.

Tip: For ultra-melty cheese, gently press the sandwich halfway through cooking using a spatula.

Step 4: Slice and Serve
Remove from the basket, let it cool for a minute, then slice diagonally for that classic grilled cheese look.

🧀 Variations

  • Three-Cheese Grilled Cheese: Cheddar, mozzarella, and pepper jack
  • Tomato Basil: Thin tomato slices and fresh basil leaves
  • Garlic Parmesan Crust: Mix grated Parmesan and minced garlic into the butter

💬 Final Thoughts

This Air Fryer Grilled Cheese is proof that comfort food can be both nostalgic and modern. It’s crisp, melty, effortless, and endlessly customizable. Whether you’re making a quick lunch, a midnight snack, or the perfect partner for a bowl of tomato soup, this method might just become your new favorite way to enjoy a timeless classic. 🧀✨

Spinach & Feta Egg Muffins

Spinach & Feta Egg Muffins

Introduction

Spinach and Feta Egg Muffins are a nutritious, protein-rich breakfast option that’s easy to make and incredibly versatile. These mini egg bakes are inspired by Mediterranean flavors, combining earthy spinach with tangy feta cheese for a savory, satisfying bite. They’re ideal for busy mornings, lunchboxes, or even as a light dinner when paired with salad. Best of all, they can be made ahead, stored, and reheated without losing flavor or texture.

Prep Time: 10 minutes

Cook Time: 18–22 minutes

Total Time: ~30 minutes

Yield: 10–12 egg muffins

Ingredients

6 large eggs

½ cup milk (regular or low-fat)

1 cup fresh spinach, finely chopped

½ cup feta cheese, crumbled

¼ cup onion, finely chopped (optional)

¼ tsp salt (adjust to taste)

¼ tsp black pepper

¼ tsp garlic powder (optional)

¼ tsp paprika or chili flakes (optional)

1 tbsp olive oil or butter (for greasing)

Step-by-Step Instructions

Preheat & Prepare

Preheat your oven to 180°C (350°F).

Grease a muffin tin thoroughly with olive oil or butter, or line with silicone or paper liners.

Prepare the Spinach

If using fresh spinach, rinse well and chop finely.

Lightly sauté in a dry pan for 1–2 minutes until just wilted (optional but prevents excess moisture).

Let cool slightly.

Whisk the Eggs

In a large bowl, crack the eggs.

Add milk, salt, pepper, garlic powder, and paprika.

Whisk until smooth and slightly frothy.

Add Fillings

Stir in chopped spinach, feta cheese, and onions (if using).

See also  Air Fried Fish Fillet

Mix gently so ingredients are evenly distributed.

Fill the Muffin Tin

Pour the egg mixture into each muffin cup, filling about ¾ full.

Bake

Place in the preheated oven.

Bake for 18–22 minutes, or until the centers are set and the tops are slightly golden.

Cool & Serve

Remove from oven and let rest for 5 minutes.

Carefully loosen edges and remove muffins.

Serving Suggestions

Serve warm with whole-grain toast, avocado slices, or fresh salad

Great with mint tea or fresh juice for breakfast

Perfect for meal prep — grab-and-go friendly

Storage & Reheating

Refrigerator: Store in an airtight container for up to 4 days

Freezer: Freeze up to 2 months

Reheat: Microwave for 20–30 seconds

Tips & Variations

Add bell peppers, olives, mushrooms, or sun-dried tomatoes

Use cheddar or mozzarella instead of feta

Make it spicy with green chilies or chili flakes

Final Thoughts

Spinach and Feta Egg Muffins are simple, wholesome, and full of flavor. They’re an excellent way to add vegetables and protein to your day without spending much time in the kitchen. Once you try them, they’ll become a regular in your weekly meal prep routine.

Creamy Cucumber Salad with Dill and Red Onion

Creamy Cucumber Salad with Dill and Red Onion

Creamy Cucumber Salad with Dill and Red Onion is a refreshing, cool, and lightly tangy side dish that’s perfect for warm weather meals. Crisp cucumbers are thinly sliced and tossed with delicate red onion, then coated in a creamy dressing flavored with fresh dill and a touch of acidity. This classic salad is simple, timeless, and incredibly satisfying, making it a great companion to grilled meats, sandwiches, or light summer dinners.

What makes this salad special is its balance of textures and flavors. The cucumbers stay crunchy, the red onion adds gentle sharpness, and the creamy dressing ties everything together without feeling heavy. It’s quick to prepare, requires minimal ingredients, and tastes even better after a short chill in the refrigerator.

Ingredients

2 large cucumbers, thinly sliced
½ small red onion, thinly sliced
¾ cup sour cream or Greek yogurt
1 tablespoon mayonnaise (optional, for extra richness)
1 tablespoon lemon juice or white vinegar
1–2 tablespoons fresh dill, finely chopped
Salt and black pepper, to taste

Instructions

Start by washing the cucumbers thoroughly. If the skin is thick or waxy, peel them lightly; otherwise, leaving the skin on adds color and texture. Slice the cucumbers thinly using a sharp knife or mandoliner and place them in a large bowl.

Add the thinly sliced red onion to the cucumbers. If you prefer a milder onion flavor, soak the onion slices in cold water for 5–10 minutes, then drain well before adding them to the bowl.

See also  Cheesy Baked Vegetable Casserole

In a separate mixing bowl, prepare the dressing by combining the sour cream or Greek yogurt with the mayonnaise, if using. Stir in the lemon juice or vinegar until smooth. Add the chopped fresh dill, along with salt and black pepper, and mix until fully blended.

Pour the dressing over the cucumber and onion mixture. Gently toss everything together until the vegetables are evenly coated in the creamy dressing. Be careful not to overmix, as cucumbers release water and can become soft.

For best flavor, cover the salad and refrigerate it for at least 20–30 minutes before serving. This allows the flavors to meld and the salad to become extra refreshing.

Serving Suggestions

Serve Creamy Cucumber Salad chilled as a side dish with grilled chicken, fish, or kebabs. It also pairs well with sandwiches, burgers, or picnic-style meals. For extra texture, you can add sliced radishes or a sprinkle of cracked black pepper on top just before serving.

Light, creamy, and herb-fresh, this cucumber salad is a simple dish that delivers classic comfort with every bite. 🥗💚

Crispy Garlic Parmesan Potato Wedges

Crispy Garlic Parmesan Potato Wedges

A crowd-pleasing side dish that’s baked to perfection.

Prep time: 10 minutes

Cook time: 30–35 minutes

Ingredients

  • 3–4 large Russet potatoes, scrubbed and cut into wedges

  • 3 tbsp Olive oil

  • 1/2 cup Grated Parmesan cheese

  • 1 tsp Garlic powder (or 3 cloves fresh minced garlic)

  • 1 tsp Dried parsley (plus fresh for garnish)

  • 1/2 tsp Onion powder

  • 1/2 tsp Paprika (optional, for color)

  • Salt and black pepper to taste

Instructions

  1. Preheat & Prep: Preheat your oven to 400°F. Line a large baking sheet with parchment paper or lightly grease it to prevent sticking.

  2. Soak (Optional Pro-Tip): For extra crispiness, soak your potato wedges in cold water for 15 minutes, then pat them completely dry with a paper towel.

  3. Season: In a large mixing bowl, toss the dried potato wedges with olive oil until evenly coated.

  4. The Coating: In a small bowl, whisk together the Parmesan cheese, garlic powder, parsley, onion powder, paprika, salt, and pepper. Sprinkle the mixture over the potatoes and toss until every wedge is well-coated.

  5. Arrange: Place the wedges on the baking sheet in a single layer, skin-side down. Make sure they aren’t touching so they can crisp up properly.

  6. Bake: Bake for 30–35 minutes. Flip them halfway through if you want even browning on all sides. They are done when they are fork-tender and deep golden brown.

  7. Serve: Sprinkle with extra fresh parsley and a dash more Parmesan while they are still hot.

Lemon Cheesecake Mousse (Light, Creamy & Egg-Free)

Lemon Cheesecake Mousse (Light, Creamy & Egg-Free)

This Lemon Cheesecake Mousse is a dreamy, no-bake dessert that combines the rich creaminess of cheesecake with the light, airy texture of mousse. Brightened with fresh lemon juice and zest, it delivers the perfect balance of tangy and sweet in every spoonful. Best of all, it’s completely egg-free, requires no oven, and comes together in just minutes—making it ideal for entertaining, summer gatherings, or when you want an elegant dessert without the fuss.

Ingredients (Serves 4–6)

  • 8 oz (225 g) cream cheese, softened to room temperature

  • 1 cup (240 ml) heavy whipping cream, cold

  • ½ cup (100 g) granulated sugar

  • 1 teaspoon vanilla extract

  • 3 tablespoons fresh lemon juice

  • 1 tablespoon fresh lemon zest

  • Optional garnishes: extra lemon zest, whipped cream, crushed graham crackers, or shortbread crumbs

Instructions

1. Prepare the Cream Cheese Base
Place the softened cream cheese in a large mixing bowl. Add the granulated sugar and beat using a hand mixer or stand mixer on medium speed for 2–3 minutes, until the mixture is completely smooth and creamy. Scrape down the sides of the bowl as needed to avoid lumps. This step is key to achieving a silky mousse texture.

2. Add the Lemon Flavor
Pour in the fresh lemon juice, lemon zest, and vanilla extract. Beat again on low speed until everything is well combined. The mixture should be creamy, fragrant, and lightly tangy. Taste at this stage and adjust sweetness or lemon if desired.

See also  The Delicious Blueberry Cobbler

3. Whip the Cream
In a separate chilled bowl, pour in the cold heavy whipping cream. Using clean beaters, whip on medium-high speed until stiff peaks form. The cream should hold its shape when the beaters are lifted—this is what gives the mousse its light, airy structure.

4. Fold Gently
Add the whipped cream to the cream cheese mixture in two or three batches. Using a spatula, gently fold it in with slow, sweeping motions. Take care not to overmix, as this can deflate the mousse. The final mixture should be fluffy, smooth, and pale yellow.

5. Chill to Set
Spoon or pipe the mousse into individual serving glasses, bowls, or dessert cups. Smooth the tops, cover loosely, and refrigerate for at least 2 hours, or overnight for best texture and flavor.

6. Garnish and Serve
Just before serving, garnish with a dollop of whipped cream, a sprinkle of lemon zest, or crushed graham crackers for that classic cheesecake feel. Serve chilled and enjoy every creamy bite.

Tips & Variations

  • For a less sweet version, reduce sugar to ⅓ cup and add extra lemon juice

  • Turn it into a cheesecake parfait by layering mousse with cookie crumbs

  • Make it ahead—it keeps beautifully in the fridge for up to 2 days

Light, luscious, and bursting with citrus freshness, this Lemon Cheesecake Mousse is proof that simple ingredients can create a truly elegant dessert 🍋✨

Spicy Carrot & Vegetable Salad for Jars

Spicy Carrot & Vegetable Salad for Jars

This Spicy Carrot & Vegetable Salad is a vibrant, tangy, and lightly sweet preserve that’s perfect for storing in jars and enjoying year-round. Inspired by Eastern European-style vegetable salads, it combines tender carrots, peppers, onions, and tomatoes with warm spices and vinegar for a bold, balanced flavor. Serve it as a side dish, sandwich topping, or quick appetizer straight from the jar.

INGREDIENTS (Makes 4–5 jars, 500 ml each)

  • 2 kg carrots, grated or julienned

  • 500 g onions, thinly sliced

  • 500 g bell peppers, thinly sliced

  • 1 kg tomatoes, grated or finely chopped (or 700 ml tomato purée)

  • 2–3 heads garlic, minced

  • 250 ml vegetable oil

  • 150 g sugar

  • 2 tablespoons salt (adjust to taste)

  • 80–100 ml vinegar (9%)

  • 1 teaspoon ground black pepper

  • 1–2 teaspoons chili flakes or hot pepper (optional)

  • 1 tablespoon paprika

  • 1 bunch fresh parsley or dill, finely chopped

INSTRUCTIONS

1. Prepare the Vegetables

Wash and peel the carrots, then grate them using a coarse or julienne grater. Slice the onions and bell peppers thinly so they soften evenly while cooking. Grate or finely chop the tomatoes and mince the garlic. Keep everything ready before cooking.

2. Cook the Base

In a large, heavy-bottomed pot, heat the vegetable oil over medium heat. Add the sliced onions and sauté until soft and lightly golden. Stir in the bell peppers and cook for about 5 minutes, allowing them to soften. Add the tomatoes and simmer for 10 minutes until the mixture thickens slightly and becomes fragrant.

See also  Mediterranean Carrot Walnut Cake

3. Add the Carrots

Stir in the grated carrots along with salt, sugar, black pepper, paprika, and chili flakes if using. Reduce heat to medium-low and cook for 25–30 minutes, stirring frequently to prevent sticking. The vegetables should become tender but not mushy.

4. Finish the Salad

Add the minced garlic and vinegar, then cook for an additional 5 minutes. Stir in the fresh herbs and remove from heat.

5. Jar and Store

Pack the hot salad into sterilized jars and seal tightly. For longer storage, sterilize the filled jars in boiling water for 10–15 minutes. Allow to cool completely and store in a cool, dark place. The salad is ready after 3–5 days and tastes even better after one week.

Cottage Cheese Chocolate Mousse

Cottage Cheese Chocolate Mousse

A smooth, creamy chocolate dessert made with blended cottage cheese and cocoa powder. High in protein and easy to prepare.

⏱ Prep Time: 5 minutes

🍨 Servings: 2–3


🧾 Ingredients

  • 1 cup cottage cheese (full-fat or low-fat)

  • ½ cup unsweetened cocoa powder

  • 3 tablespoons honey or maple syrup (adjust to taste)

  • 1 teaspoon vanilla extract

  • Pinch of salt

  • Optional topping: whipped cream, chocolate shavings, or berries


👩‍🍳 Instructions

1. Blend the Cottage Cheese

Place cottage cheese in a blender or food processor.
Blend for 1–2 minutes until completely smooth and creamy.
Scrape down the sides as needed.


2. Add Flavoring Ingredients

Add to the blender:

  • cocoa powder

  • honey or maple syrup

  • vanilla extract

  • salt

Blend again for 30–60 seconds until fully combined and silky.


3. Taste and Adjust

Taste the mousse.
Add more sweetener if desired or a splash of milk for a thinner texture.


4. Chill

Transfer mousse to serving cups.
Refrigerate for 30–60 minutes to improve texture and flavor.


5. Serve

Top with whipped cream or chocolate shavings if desired.
Serve cold.


📦 Storage

  • Store covered in the refrigerator for up to 3 days.

  • Stir before serving if needed.


🔄 Variations

  • Add 1 tablespoon peanut butter for a chocolate-peanut flavor

  • Add cinnamon or espresso powder for deeper chocolate taste

  • Blend with banana for natural sweetness

  • Use stevia or date syrup instead of honey


📝 Helpful Notes

✔ High in protein
✔ No baking required
✔ Can be dairy-free if made with plant-based cottage cheese
✔ Texture depends on blending — smoother blend = creamier mousse

Fluffy 3-Ingredient Breakfast Bake

Fluffy 3-Ingredient Breakfast Bake

Light, golden, and filling — perfect for a quick homemade breakfast.

Prep Time: 5 minutes
Cook Time: 15–20 minutes
Servings: 2–3


📝 Ingredients

  • 4 large eggs

  • 1 cup milk

  • 1 cup shredded cheese (cheddar, mozzarella, or a mix)

Optional (for flavor, not required):

  • Pinch of salt

  • Pinch of black pepper


👩‍🍳 Instructions

1. Preheat oven

  • Preheat oven to 180°C (350°F).

  • Lightly grease a small oven-safe baking dish or ramekin.


2. Mix the base

  • In a bowl, crack the eggs and whisk well until smooth and slightly frothy.

  • Add the milk and whisk again until fully combined.

  • Stir in the shredded cheese (reserve a little for topping if desired).

  • Add a small pinch of salt and pepper if using.


3. Bake

  • Pour mixture into the prepared baking dish.

  • Place in the center of the oven.

  • Bake for 15–20 minutes, until puffed and golden on top and set in the center.


4. Serve

  • Let rest for 2–3 minutes before slicing or scooping.

  • Serve warm with toast, fruit, or salad.


⭐ Tips & Variations

  • Extra protein: Add cooked chicken or turkey

  • Vegetables: Add chopped spinach, onions, or peppers

  • Creamier: Use half milk and half cream

  • Air fryer: 170°C (340°F) for 10–12 minutes

Baked Cabbage Steaks

Baked Cabbage Steaks

Oven-baked cabbage slices seasoned with oil and spices, cooked until tender inside and lightly browned on the outside.

Prep Time: 10 minutes
Bake Time: 25–30 minutes
Servings: 4


🧾 Ingredients

• 1 medium head of cabbage
• 50 ml (about 3 tablespoons) olive oil
• 1 teaspoon salt
• Ground black pepper, to taste
• Red pepper flakes or ground red pepper, to taste

Optional additions (as seen in photo style):
• Shredded cheese (mozzarella or cheddar)
• Garlic powder
• Paprika
• Dried herbs (oregano or thyme)


👩‍🍳 Instructions

1. Prepare the Oven

Preheat oven to 200°C (400°F).

Line a baking tray with parchment paper or lightly grease it with oil.


2. Slice the Cabbage

Remove any damaged outer leaves from the cabbage.

Cut the cabbage into thick round slices (about 2–3 cm / 1 inch thick).
Keep the core intact so the slices stay together.


3. Season the Cabbage

Arrange the cabbage slices in a single layer on the baking tray.

Brush both sides with olive oil.

Sprinkle evenly with:
• Salt
• Black pepper
• Red pepper

Add any optional seasonings if using.


4. Bake

Place the tray in the oven.

Bake for 20 minutes, then turn the slices carefully with a spatula.

Bake for another 10 minutes, until:
• Edges are lightly browned
• Centers are tender
• Surface is lightly crisped


5. Optional Cheese Topping

If using cheese:

Remove tray from oven.
Sprinkle shredded cheese on top of each cabbage slice.

Return to oven for 3–5 minutes until melted and lightly golden.


6. Serve

Serve warm as:
• A side dish
• A light main dish
• A vegetable snack


⭐ Helpful Tips

✔ Cut slices thick so they don’t fall apart
✔ Turn carefully using a wide spatula
✔ For softer cabbage, cover loosely with foil for the first 15 minutes
✔ For crispier edges, bake uncovered the whole time


🧊 Storage

• Store in an airtight container in the refrigerator for up to 2 days
• Reheat in oven or air fryer for best texture

Honey Lemon Turmeric Gummies

Honey Lemon Turmeric Gummies

These bright golden gummies are a soothing, immunity-supporting treat made with simple ingredients. Packed with turmeric, lemon, and honey, they offer gentle digestive support, natural anti-inflammatory benefits, and a comforting citrus sweetness. Perfect for kids and adults, they’re easy to make and store beautifully in the fridge.

Ingredients (Makes 30–40 Gummies)

  • 1 cup water
  • 1 cup fresh orange juice or lemon water (optional for more citrus flavor)
  • 2–3 tbsp fresh lemon juice
  • 2 tbsp honey (add 1 extra tbsp if you prefer sweeter gummies)
  • 1 tbsp ground turmeric
  • ½ tsp ground ginger (optional but boosts warmth & digestion)
  • ⅛ tsp black pepper (helps your body absorb turmeric)
  • 3 tbsp gelatin (grass-fed recommended)
  • ½ tsp vanilla extract (optional, for a smooth flavor)

Instructions

1. Warm the Base

In a small saucepan, combine:

  • Water
  • Lemon juice
  • Optional orange juice
  • Turmeric
  • Ginger
  • Black pepper

Heat on low only, stirring gently. Warm the mixture for 2–3 minutes—avoid boiling because high heat reduces the natural nutrients in lemon and turmeric.

2. Add Honey

Remove the pot from heat and wait 1 minute so the mixture is warm but not hot.
Whisk in the honey until fully dissolved. Adding honey at a cooler temperature keeps its natural enzymes and antioxidants intact.

3. Bloom the Gelatin

Slowly sprinkle the gelatin over the warm liquid while whisking continuously.
Let it rest for 1 minute to “bloom,” then whisk again until smooth and fully melted. This step is key to getting firm, springy gummies without graininess.

See also  Apple Oat Pancakes Recipe

4. Pour Into Molds

Carefully pour the mixture into silicone molds (bears, hearts, or simple squares) or into a shallow glass dish.

5. Chill

Refrigerate for 2 hours or until fully set.

6. Unmold

Pop gummies out of the molds, or if using a dish, slice into small cubes.

Storage

Store gummies in an airtight container in the refrigerator for up to 10 days.
They can also be frozen and thaw instantly in seconds.

Benefits (Natural & Safe)

  • Turmeric + pepper → increased absorption & anti-inflammatory properties
  • Lemon → vitamin C & digestive support
  • Honey → soothing, antibacterial sweetness
  • Gelatin → gut-friendly, helps hair/skin/nails

Pumpkin Seeds benefits for Your Body:

Pumpkin Seed Benefits for Your Body:

Even a Handful of Pumpkin Seeds Can Start an Irreversible Reaction in Your Body. Despite their small size, pumpkin seeds are incredibly beneficial to your health. These nutrient-dense seeds include vital vitamins, minerals, and antioxidants that can positively impact your body with just a handful. Here’s how eating pumpkin seeds might cause your body to go through an “irreversible” reaction and why you should think about including them in your regular diet.

1. Promotes Heart Health

  • Magnesium is abundant in pumpkin seeds and is necessary for heart function. A few can help lower the risk of heart disease, enhance circulation, and control blood pressure.

2. Encourages Appropriate Blood Sugar Levels

  • As a wonderful snack for diabetics or anyone trying to avoid blood sugar spikes, pumpkin seeds have been demonstrated to help manage blood sugar. Their low glycemic index contributes to blood sugar regulation by stabilizing insulin levels.

3. Concealed Antioxidants

  • Antioxidants like vitamin E and carotenoids, which are abundant in pumpkin seeds, help shield your cells from harm caused by free radicals. This increase in antioxidants promotes general health and may delay the aging process.

4. Enhances the Quality of Sleep

  • Pumpkin seeds are a great source of tryptophan, an amino acid that your body uses to produce melatonin and serotonin. Having a handful of pumpkin seeds for dinner may help you sleep better and longer.

5. Encourages Health of the Prostate

  • Pumpkin seeds are especially good for guys since they help with prostate health. Zinc, which is present in the seeds, helps to keep the prostate healthy and may lower the chance of prostate-related problems.
See also  Coffee and Ginger Mix

6. Boosts Adaptability

  • Pumpkin seeds are rich in antioxidants and zinc, which naturally strengthen your immune system. Consistent intake can support your body’s defense against infections and illnesses, promoting year-round health.

7. Promotes Better Digestion

  • A fantastic source of fiber that supports gut health and facilitates digestion is pumpkin seeds. By keeping your digestive tract functioning properly, a handful of seeds can lower your chance of constipation and other digestive problems.

8. Combats Irritation

  • Pumpkin seeds are a great option for lowering inflammation in the body because of their anti-inflammatory qualities. Frequent consumption can support general joint health and aid in the management of diseases like arthritis.

9. Lifts the Spirit and Eases Stress

  • Pumpkin seeds include magnesium, which is good for your heart and helps control your mood. This mineral has been demonstrated to improve mental health by lowering stress, anxiety, and even depressive symptoms.

10. Encourages Bone Health

  • Pumpkin seeds contribute to the maintenance of strong bones because of their high magnesium concentration. Together with calcium, magnesium increases bone density and lowers the risk of osteoporosis and fractures.

In conclusion, a tiny seed can have a big impact.

  • A small quantity of pumpkin seeds can initiate a series of advantageous effects on your health. Pumpkin seeds are a nutritional powerhouse that can improve blood sugar regulation, digestion, sleep quality, and heart health. Take advantage of the “irreversible” wonderful benefits they bring about by including them in your diet now!

Simple Celery Hydration Juice

Simple Celery Hydration Juice

 Description

A fresh, light vegetable juice that supports hydration and digestion and provides antioxidants and minerals. Best used as a morning hydration drink, not a detox cure.

 Ingredients (1 serving)

  • 6–8 fresh celery stalks (organic if possible)

  • ½ cup water (optional, if blending)

  • Optional add-ins (gentle, not detox):

    • ½ cucumber

    • Small squeeze of lemon (for taste, not “cleansing”)

 Instructions

  1. Wash celery thoroughly.

  2. Juicer method: Juice celery directly.
    Blender method: Blend with water, then strain.

  3. Drink immediately for best taste and nutrient retention.

 How to Use It (this matters)

  • Drink on an empty stomach if it feels good to you

  • 1 small glass (200–250 ml) is enough

  • Not more than 3–4 times per week

  • Stop if you experience bloating, dizziness, or diarrhea

Servings

  • 1 serving per recipe

 Approximate Nutritional Info (per serving)

  • Calories: ~40

  • Water: ~95%

  • Fiber: Low (most removed during juicing)

  • Potassium: Moderate

  • Vitamin K: High

  • Antioxidants: Present (flavonoids)

 Real Benefits (no exaggeration)

✔ Supports hydration
✔ May help reduce bloating (for some people)
✔ Provides antioxidants that support general skin health
✔ Low-calorie, sugar-light vegetable option

❌ Does NOT detox organs
❌ Does NOT cure disease
❌ Does NOT replace medical treatment

 Who Should Be Careful

  • Kidney disease (high potassium risk)

  • Low blood pressure

  • On diuretics

  • History of kidney stones (celery contains oxalates)

If that’s you, talk to a doctor first

 Q & A

Q: Does celery juice clean the blood?
A: No. Your liver and kidneys already do that job 24/7.

Q: Can it improve skin?
A: Indirectly—hydration and nutrients may help over time, not instantly.

Q: Is it better than eating celery?
A: Eating whole celery is better for digestion because of the fiber.

Q: Can I drink it daily?
A: Not necessary and not ideal for everyone.

Cheesy Taco Sticks

Cheesy Taco Sticks

Baked dough sticks filled with seasoned ground beef and melted cheese, brushed with garlic butter and served with dipping sauces.

Prep Time: 12 minutes
Bake Time: 12–15 minutes
Yield: 8 sticks


🧾 Ingredients

• 1 lb (450 g) lean ground beef
• 1 packet taco seasoning (about 28 g / 1 oz)
• ¼ cup water
• 1 tube refrigerated pizza dough or classic refrigerated dough (about 13.8 oz / 390 g)
• 1½ cups shredded cheddar cheese (or cheese blend)

For topping:
• 2 tablespoons butter, melted
• ½ teaspoon garlic salt
• 1 teaspoon dried parsley

For serving (optional):
• Salsa
• Sour cream
• Guacamole
• Cheese dip


👩‍🍳 Instructions

1. Prepare the Oven and Pan

Preheat oven to 200°C (400°F).

Line a large baking sheet with parchment paper or a silicone baking mat.


2. Cook the Beef

Heat a skillet over medium-high heat.

Add ground beef and cook until fully browned, breaking it up with a spoon.

Drain excess fat from the pan.

Add taco seasoning and water.
Simmer for 3–5 minutes, stirring, until the liquid is absorbed.

Remove from heat and allow the meat to cool slightly.


3. Prepare the Dough

Unroll the dough onto a lightly floured surface.

Cut into 8 equal rectangles.


4. Fill the Dough

Place each rectangle flat on the work surface.

Add:
• A strip of shredded cheese down the center
• A spoonful of the beef mixture on top of the cheese

Do not overfill.


5. Seal the Sticks

Fold the long sides of the dough over the filling.

Pinch the seam tightly closed.

Pinch the ends shut and tuck them slightly underneath.

Place seam-side down on the prepared baking sheet.


6. Add Butter Topping

In a small bowl, mix:
• Melted butter
• Garlic salt
• Dried parsley

Brush this mixture over the tops of each stick.


7. Bake

Bake for 12–15 minutes, until:
• Dough is fully cooked
• Tops are golden
• Cheese inside is melted


8. Serve

Allow to cool for 3–5 minutes before serving.

Serve warm with dipping sauces if desired.


⭐ Helpful Tips

✔ Let beef cool before filling dough
✔ Do not overfill or the seams may open
✔ Always place seam-side down on the pan
✔ Use parchment paper for easy cleanup
✔ Bake with space between sticks for even cooking


🧊 Storage & Reheating

• Refrigerate in an airtight container for up to 3 days
• Reheat in oven or air fryer at 175°C (350°F) for 5–7 minutes
• Freezer storage: up to 1 month
• Reheat from frozen at 190°C (375°F) for 12–15 minutes

Banana Protein Pancakes

Banana Protein Pancakes

Soft pancakes made from banana, eggs, and protein powder with a light, tender texture.

Prep Time: 5 minutes
Cook Time: 10 minutes
Yield: 4–6 small pancakes


🧾 Ingredients

• 1 large ripe banana
• 2 large eggs
• 1 scoop vanilla protein powder
• ¼ teaspoon baking powder
• ½ teaspoon vanilla extract
• Pinch of ground cinnamon

Optional additions:
• Fresh blueberries
• Chocolate chips


👩‍🍳 Instructions

1. Mash the Banana

Place the banana in a medium bowl.

Mash with a fork until:
• Completely smooth
• No large lumps remain

This helps create a uniform batter.


2. Add the Eggs

Crack the eggs into the mashed banana.

Whisk until:
• Fully combined
• Pale and slightly frothy


3. Add Dry Ingredients

Add to the bowl:

• Protein powder
• Baking powder
• Vanilla extract
• Cinnamon

Mix until:
• Batter is smooth
• No dry pockets remain

The batter will be thinner than traditional pancake batter.


4. Heat the Pan

Lightly coat a non-stick pan or griddle with oil or cooking spray.

Heat over medium-low heat.

Lower heat helps the pancakes cook through without over-browning.


5. Cook the Pancakes

Spoon 2–3 tablespoons of batter into the pan for each pancake.

If using optional add-ins, place them onto the batter after pouring.

Cook for 2–3 minutes, until:
• Small bubbles appear
• Edges look set

Flip carefully with a thin spatula.

Cook the second side for 1–2 minutes, until lightly golden and firm.


6. Serve

Serve warm as-is or with:

• Yogurt
• Fresh fruit
• Nut butter
• Honey or syrup


⭐ Helpful Tips

✔ Use very ripe bananas for better texture
✔ Keep heat low to prevent burning
✔ Flip gently — these pancakes are soft
✔ Cook in small sizes for easier handling


🧊 Storage

• Store in an airtight container in the refrigerator for up to 2 days
• Reheat in a pan, microwave, or toaster
• Can be frozen for up to 1 month

Refreshing Pink Salt & Ginger Tonic

Refreshing Pink Salt & Ginger Tonic

This drink combines citrus, ginger, and pink Himalayan salt for a crisp flavor that supports hydration.

  • Prep time: 5 minutes

  • Serves: 1 large serving (approx. 24 ounces)


Ingredients

  • 24 ounces (3 cups) Water

  • 2 tablespoons Lemon juice (freshly squeezed for best flavor)

  • 1 tablespoon Apple cider vinegar (with “the mother” preferred)

  • 1/4 teaspoon Pink Himalayan salt

  • 1/4 teaspoon Ground ginger


Instructions

  1. Prepare Your Base: Pour the 24 ounces of water into a large glass, mason jar, or water bottle. You can use room-temperature water or chilled water depending on your preference.

  2. Add the Flavorings: Stir in the 2 tablespoons of lemon juice and the 1 tablespoon of apple cider vinegar.

  3. Incorporate the Spices: Add the 1/4 teaspoon of pink Himalayan salt and the 1/4 teaspoon of ground ginger.

  4. Mix Thoroughly: * If using a glass, stir vigorously with a long spoon until the salt and ginger are completely dissolved.

    • If using a mason jar or bottle, secure the lid and shake well for about 30 seconds.

  5. Serve: Drink immediately or store in the refrigerator. The ginger may settle at the bottom over time, so give it a quick stir or shake before each sip.


Tips for Best Results

  • Adjusting Flavor: If the apple cider vinegar is too strong for your palate, you can start with 1-2 teaspoons and gradually work your way up to a full tablespoon.

  • Temperature: Some people prefer this drink served warm in the morning (like a tea), while others enjoy it poured over ice as a refreshing afternoon beverage.

Whipped Chocolate Dessert

Whipped Chocolate Dessert

A chilled chocolate dessert with a soft, airy texture made by folding whipped topping into prepared pudding.

Prep Time: 5 minutes
Chill Time: 30 minutes
Servings: 4


🧾 Ingredients

• 1 box (about 1 oz / 28 g) chocolate instant pudding mix
• 2 cups milk (dairy or plant-based)
• 1 cup whipped topping, thawed

Optional garnish:
• Chocolate shavings
• Cocoa powder


👩‍🍳 Instructions

1. Mix the Pudding Base

In a large mixing bowl, add:

• Chocolate pudding mix
• Milk

Whisk vigorously for about 2 minutes, until:
• The mixture thickens
• Texture becomes smooth
• No dry powder remains


2. Fold in the Whipped Topping

Add the whipped topping to the thickened pudding.

Using a spatula:
• Gently fold it in
• Use slow, sweeping motions
• Avoid stirring hard

This keeps the dessert light rather than dense.


3. Portion the Dessert

Divide the mixture evenly into:
• 4 small bowls
• Or dessert cups
• Or ramekins

Smooth the tops if desired.


4. Add Garnish (Optional)

Sprinkle lightly with:
• Chocolate shavings
• Or a small amount of cocoa powder


5. Chill

Place in the refrigerator for at least 30 minutes, until:
• Slightly firm
• Spoonable
• Fully chilled


⭐ Helpful Tips

✔ Fold gently to keep texture airy
✔ Chill before serving for best structure
✔ Serve in clear cups for a layered look
✔ Add fresh fruit or crushed biscuits if desired


🧊 Storage

• Keep covered in the refrigerator
• Best consumed within 2 days
• Do not leave at room temperature for long periods

Chocolate Quinoa Crunch Clusters (No-Bake)

Chocolate Quinoa Crunch Clusters (No-Bake)

Simple no-bake clusters made with quinoa, oats, almond butter, and chocolate.

Prep Time: 15 minutes
Chill Time: 1 hour
Yield: 18–20 clusters


🧾 Ingredients

• 1 cup cooked quinoa (cooled and dry)
• 1 cup rolled oats
• 1 cup almond butter
• ½ cup honey or maple syrup
• ½ cup cocoa powder
• ½ cup dark chocolate chips
• ¼ teaspoon salt
• 1 teaspoon vanilla extract

Optional additions:
• ¼ cup chopped nuts
• ¼ cup shredded coconut


👩‍🍳 Instructions

1. Prepare the Dry Base

In a large mixing bowl, add:

• Cooked quinoa
• Rolled oats

If using optional nuts or coconut, add them now.

Stir to evenly distribute all dry ingredients.


2. Warm the Almond Butter Mixture

In a microwave-safe bowl or small saucepan over low heat, combine:

• Almond butter
• Honey or maple syrup

Heat gently until:
• The mixture is smooth
• Easy to stir
• Warm but not boiling

Remove from heat.


3. Make the Chocolate Mixture

Add to the warm almond butter mixture:

• Cocoa powder
• Vanilla extract
• Salt

Whisk until fully blended and glossy.


4. Combine Wet and Dry Ingredients

Pour the chocolate mixture over the quinoa and oats.

Using a spatula or wooden spoon, stir thoroughly until:
• All quinoa and oats are coated
• No dry patches remain
• Mixture is thick and sticky


5. Add Chocolate Chips

Fold in the dark chocolate chips.

If the mixture is still warm, the chips may soften slightly — this helps the clusters hold together.


6. Shape the Clusters

Line a baking tray with parchment paper.

Using a tablespoon or small scoop:
• Drop rounded portions onto the tray
• Press lightly to form compact clusters

Leave a small gap between each cluster.


7. Chill to Set

Place the tray in the refrigerator for at least 1 hour, until clusters are firm and hold their shape.


⭐ Helpful Tips

✔ Use fully cooled quinoa so excess moisture does not soften the mixture
✔ Stir thoroughly so coating is even
✔ Press clusters firmly so they don’t crumble
✔ If mixture feels loose, chill the bowl for 10 minutes before shaping


🧊 Storage

• Store in an airtight container in the refrigerator for up to 7 days
• Freeze for up to 1 month
• Best served chilled

Cheesy Breakfast Toasts (5-Minute Style)

Cheesy Breakfast Toasts (5-Minute Style)

Golden toasted bread topped with creamy white sauce, cheese, and savory meats — quick, filling, and perfect for breakfast or brunch.

Prep Time: 5 minutes
Cook Time: 8–10 minutes
Servings: 3


📝 Ingredients

  • 6 slices bread

  • 30 g butter

  • 3 tablespoons all-purpose flour

  • 1/2 cup milk

  • A pinch of nutmeg

  • 3 slices bacon, chopped

  • 100 g hunter sausage, thinly sliced

  • 3 slices cheese (cheddar, mozzarella, or processed cheese)

  • Fresh parsley, finely chopped


👩‍🍳 Instructions

1. Prepare the creamy sauce

  • In a small pan over medium heat, melt the butter.

  • Add flour and stir constantly for 1 minute to form a smooth paste.

  • Gradually pour in the milk while whisking to avoid lumps.

  • Cook until thick and creamy (about 2–3 minutes).

  • Add a pinch of nutmeg and salt to taste.

  • Remove from heat and set aside.


2. Cook the meats

  • In a frying pan, cook the chopped bacon until lightly crisp.

  • Add sliced hunter sausage and sauté for 1–2 minutes.

  • Remove from heat.


3. Assemble the toasts

  • Place bread slices on a baking tray.

  • Spread a layer of creamy sauce on each slice.

  • Add cooked bacon and sausage evenly.

  • Place cheese slices on top.

  • Sprinkle chopped parsley.


4. Bake or toast

  • Bake in a preheated oven at 200°C (400°F) for 5–8 minutes,
    OR

  • Cook in an air fryer at 180°C (350°F) for 5 minutes,
    OR

  • Cover and toast in a pan on low heat until cheese melts.


5. Serve

  • Remove once cheese is melted and lightly golden.

  • Serve hot with tea, coffee, or fresh juice.


⭐ Optional Variations

  • Vegetarian: Skip meat and add mushrooms or bell peppers

  • Spicy: Add black pepper or chili flakes

  • Extra creamy: Mix cheese into the sauce

  • Healthier: Use whole wheat bread and turkey slices


🍽 Serving Ideas

  • Serve with boiled eggs or fruit

  • Add tomato slices on top

  • Pair with fresh juice or milk