Classic Fluffy Pancakes

Classic Fluffy Pancakes

These pancakes are light, airy, and perfectly golden with a melt-in-your-mouth texture. Whether for a lazy weekend breakfast or a cozy brunch, they are a guaranteed crowd-pleaser.


Ingredients

  • 1 ½ cups (190g) all-purpose flour

  • 3 ½ tsp baking powder

  • 1 tbsp sugar (adjust to taste)

  • ¼ tsp salt

  • 1 ¼ cups (300ml) milk (room temperature)

  • 1 large egg (room temperature)

  • 3 tbsp unsalted butter, melted (plus extra for cooking)

  • 1 tsp vanilla extract


Instructions

  1. Mix Dry Ingredients: In a large mixing bowl, whisk together the flour, baking powder, sugar, and salt.

  2. Combine Wet Ingredients: In a separate bowl, whisk the milk, egg, melted butter, and vanilla until smooth.

  3. Make the Batter: Pour the wet ingredients into the dry mixture. Gently whisk until just combined. Do not overmix—small lumps are perfectly fine and actually help keep the pancakes fluffy.

  4. Heat the Pan: Place a non-stick skillet or griddle over medium heat. Lightly grease with a small amount of butter.

  5. Cook: Pour about ¼ cup of batter per pancake onto the skillet. Cook for 2–3 minutes, until bubbles form on the surface and the edges look set. Flip and cook for another 1–2 minutes until golden brown.

  6. Serve: Stack them high and top with butter, maple syrup, or fresh berries.


Tips for Success

  • The Fluff Factor: If your pancakes are coming out flat, ensure your baking powder is fresh. Also, remember the “lumpy batter” rule—overworking the gluten makes for a chewy, tough pancake.

  • Temperature Control: If the outside is burnt but the inside is gooey, your pan is too hot. Lower the heat and give them a bit more time.

  • Keep Them Warm: If cooking for a group, keep finished pancakes on a wire rack in a $200°F$ ($95°C$) oven to stay crisp and warm.

Nutritional Info (Per Pancake)

Calories Protein Carbs Fat Sugar
~130 4g 16g 5g

Vegetable Cream Cheese Spread

This Vegetable Cream Cheese Spread is the perfect way to add a burst of garden-fresh flavor and a satisfying crunch to your day. Whether you’re looking for a vibrant bagel topper or a creamy dip for your favorite snacks, this recipe is a versatile winner! 🌿✨


🥗 Ingredients

  • 8 oz (225 g) cream cheese, softened 🧀

  • 2 tbsp mayonnaise or Greek yogurt (optional for extra creaminess) 🥣

  • ¼ cup finely chopped red bell pepper 🫑

  • ¼ cup finely chopped carrots 🥕

  • 2 tbsp finely chopped green onions 🧅

  • ¼ cup finely chopped cucumber (be sure to remove seeds first) 🥒

  • 2 tbsp finely chopped celery 🥬

  • 2 tbsp chopped fresh parsley or dill 🌿

  • ½ tsp garlic powder (optional) 🧄

  • Salt and pepper to taste 🧂

  • A squeeze of lemon juice (optional, for a bright finish) 🍋


👩‍🍳 Detailed Preparation Steps

  1. Prepare the Vegetables: ➡️ Start by finely chopping all your fresh vegetables. Since excess water can make the spread runny, place the chopped cucumbers on a paper towel and gently pat them dry to remove extra moisture.

  2. Whisk the Base: ➡️ In a medium-sized mixing bowl, beat the softened cream cheese until it is completely smooth and free of lumps. If you are using mayonnaise or Greek yogurt, stir it in now and mix until the base is light and fluffy.

  3. Combine Everything: ➡️ Fold in the chopped bell peppers, carrots, green onions, celery, and herbs. Add the garlic powder, salt, pepper, and a splash of lemon juice. Stir well until the vegetables are evenly distributed throughout the cream cheese.

  4. The Chilling Phase: ➡️ Cover the bowl tightly with plastic wrap or transfer the mixture to an airtight container. Place it in the refrigerator for at least 1 hour. This allows the flavors of the fresh herbs and veggies to infuse into the cream cheese for the best taste.

  5. Serving: ➡️ Once chilled, give it a quick stir. Spread it generously onto toasted bagels, crackers, or use it as a delicious center for veggie wraps. 🥯


💡 Expert Tips for Success

  • Texture Choice: ➡️ If you prefer a very smooth, dip-like consistency, you can pulse the mixture a few times in a food processor. For a more traditional spread with a nice “bite,” stick to mixing by hand.

  • The Right Veggies: ➡️ Stick to “hard” vegetables like the ones listed. Avoid using very watery items like tomatoes, as they will release juice over time and make your spread soggy. 🚫🍅

  • Make Ahead: ➡️ This is a fantastic meal-prep option! It stays fresh and delicious in the fridge for up to 5 days.


❓ Questions & Answers

Q: Can I make this dairy-free? A: Yes! You can easily swap the traditional cream cheese for your favorite plant-based cream cheese alternative and use a vegan-friendly mayo. 🌱

Q: Is this suitable for a low-carb lifestyle? A: Absolutely. This spread is naturally low in carbohydrates and high in flavor, making it a great choice when paired with celery sticks or low-carb crackers. 🥒

Q: Can I freeze the leftovers? A: It is not recommended to freeze this spread. Cream cheese tends to change texture and become grainy once thawed. It is best enjoyed fresh from the refrigerator. 🧊

Q: How do I keep it from getting watery? A: The secret is in the “prep” step! Ensuring your cucumber and peppers are patted dry before mixing is the best way to keep the spread thick and creamy. 🧻

Detailed Golden Milk Recipe

Detailed Golden Milk Recipe

This warm, comforting drink is perfect for any time of day and is designed to maximize the absorption of turmeric’s beneficial properties.

Ingredients:

  • 1 ½ cups unsweetened almond milk (or any milk of your choice) 🥛

  • 1 tsp ground turmeric powder 🧡

  • ¼ tsp ground ginger or a small piece of fresh ginger, grated 🫚

  • ¼ tsp ground cinnamon 🍂

  • 1 pinch black pepper (essential for turmeric absorption!) 🧂

  • 1 tbsp coconut oil or grass-fed butter 🥥

  • Sweetener to taste: 1-2 drops of liquid stevia or a sugar-free syrup (optional) ✨


🥣 Preparation Steps

  1. Combine Ingredients: ➡️ Pour the milk into a small saucepan over medium-low heat. Add the turmeric, ginger, cinnamon, and black pepper.

  2. Add Healthy Fats: ➡️ Whisk in the coconut oil or butter. Adding a healthy fat is crucial because turmeric is fat-soluble, meaning it needs fat to be properly processed by your body.

  3. Heat Gently: ➡️ Heat the mixture for about 5 to 7 minutes. Be careful not to let it reach a full boil; a gentle simmer is best to preserve the nutrients.

  4. Whisk for Texture: ➡️ Use a whisk or a milk frother to blend everything together until the liquid is smooth and slightly frothy on top.

  5. Strain and Sweeten: ➡️ Remove from heat. If you used fresh ginger, pour the milk through a fine-mesh strainer into your favorite mug. Stir in your preferred sugar-free sweetener at this stage.

  6. Enjoy: ➡️ Sprinkle a tiny bit of extra cinnamon on top and drink while warm. ☕


❓ Common Questions & Answers

Q: Why is there black pepper in a sweet drink? A: Black pepper contains piperine, which has been shown to increase the absorption of curcumin (the good stuff in turmeric) by up to 2,000%! You only need a tiny pinch. 📈

Q: Can I drink this every day? A: Yes! Many people enjoy a cup in the evening to help with relaxation and to support a healthy inflammatory response overnight. 🌙

Q: Is this suitable for a low-carb lifestyle? A: Absolutely. By using unsweetened nut milk and a sugar-free sweetener, this drink fits perfectly into a low-carb or keto-friendly routine. 🥑

Q: Can I make a large batch? A: Yes, you can double or triple the recipe and store it in a glass jar in the fridge for up to 3 days. Just shake well and reheat gently on the stove when you’re ready for more. 🧊


💡 Pro Tip

For an extra flavor boost, you can add a tiny drop of pure vanilla extract. It pairs beautifully with the warm spices! 🍦

Bedtime Lemon Mint Drink

Bedtime Lemon Mint Drink” (Claimed Blood Sugar Support Tea)

This image is promoting a simple lemon–mint drink as a way to “lower sugar before sleeping.” Let’s turn it into a clear, realistic recipe—with honest notes about what it can (and can’t) do.

 Ingredients (1 serving)

  • 1 cup warm water (not boiling)
  • 2–3 slices fresh lemon
  • 5–7 fresh mint leaves
  • Optional:
    • ½ tsp grated ginger
    • 1 tsp apple cider vinegar
    • Pinch of cinnamon

 Instructions

  1. Warm the water until comfortably hot (not boiling).
  2. Add lemon slices and lightly crush mint leaves to release oils.
  3. Stir in optional ingredients if using.
  4. Let steep for 5–7 minutes.
  5. Drink 20–30 minutes before bedtime.

 Description

This is a light herbal infusion with citrus and mint. It’s hydrating, low-calorie, and soothing before sleep—but it is not a medical treatment for blood sugar control.

 Tips

  • Use fresh ingredients for best flavor and aroma.
  • Avoid adding sugar or honey if your goal is stable blood sugar.
  • If you have acid reflux, reduce lemon or skip vinegar.
  • Drink it warm—not hot—to avoid irritation before bed.

Servings

  • Makes 1 serving
  • Can be doubled or tripled, but best consumed fresh

Nutritional Info (Approx. per serving)

  • Calories: 5–10
  • Carbs: ~2g
  • Sugar: ~1g (natural from lemon)
  • Fat: 0g
  • Protein: 0g

 Potential Benefits

  • 💧 Hydration before sleep
  • 🌿 May aid digestion (mint & ginger)
  • 🍋 Vitamin C from lemon
  • 🧘 Relaxing bedtime ritual

⚠️ Important:
There is no strong scientific evidence that this drink significantly lowers blood sugar overnight. Managing blood sugar is more about:

  • Balanced meals
  • Regular activity
  • Medical guidance (if diabetic)

 Q&A

Q: Can this replace diabetes medication?
👉 No. Never replace prescribed treatment with home remedies.

Q: Does lemon lower blood sugar?
👉 Lemon has a low glycemic impact, but it doesn’t directly “lower” blood sugar in a meaningful clinical way.

Q: Is it safe to drink every night?
👉 Yes for most people, but:

  • Avoid if you have GERD/acid reflux
  • Be cautious with apple cider vinegar (can irritate stomach)

Q: Best time to drink it?
👉 20–30 minutes before bed for relaxation benefits.

Q: Can I add honey?
👉 You can, but it defeats the “low sugar” goal.

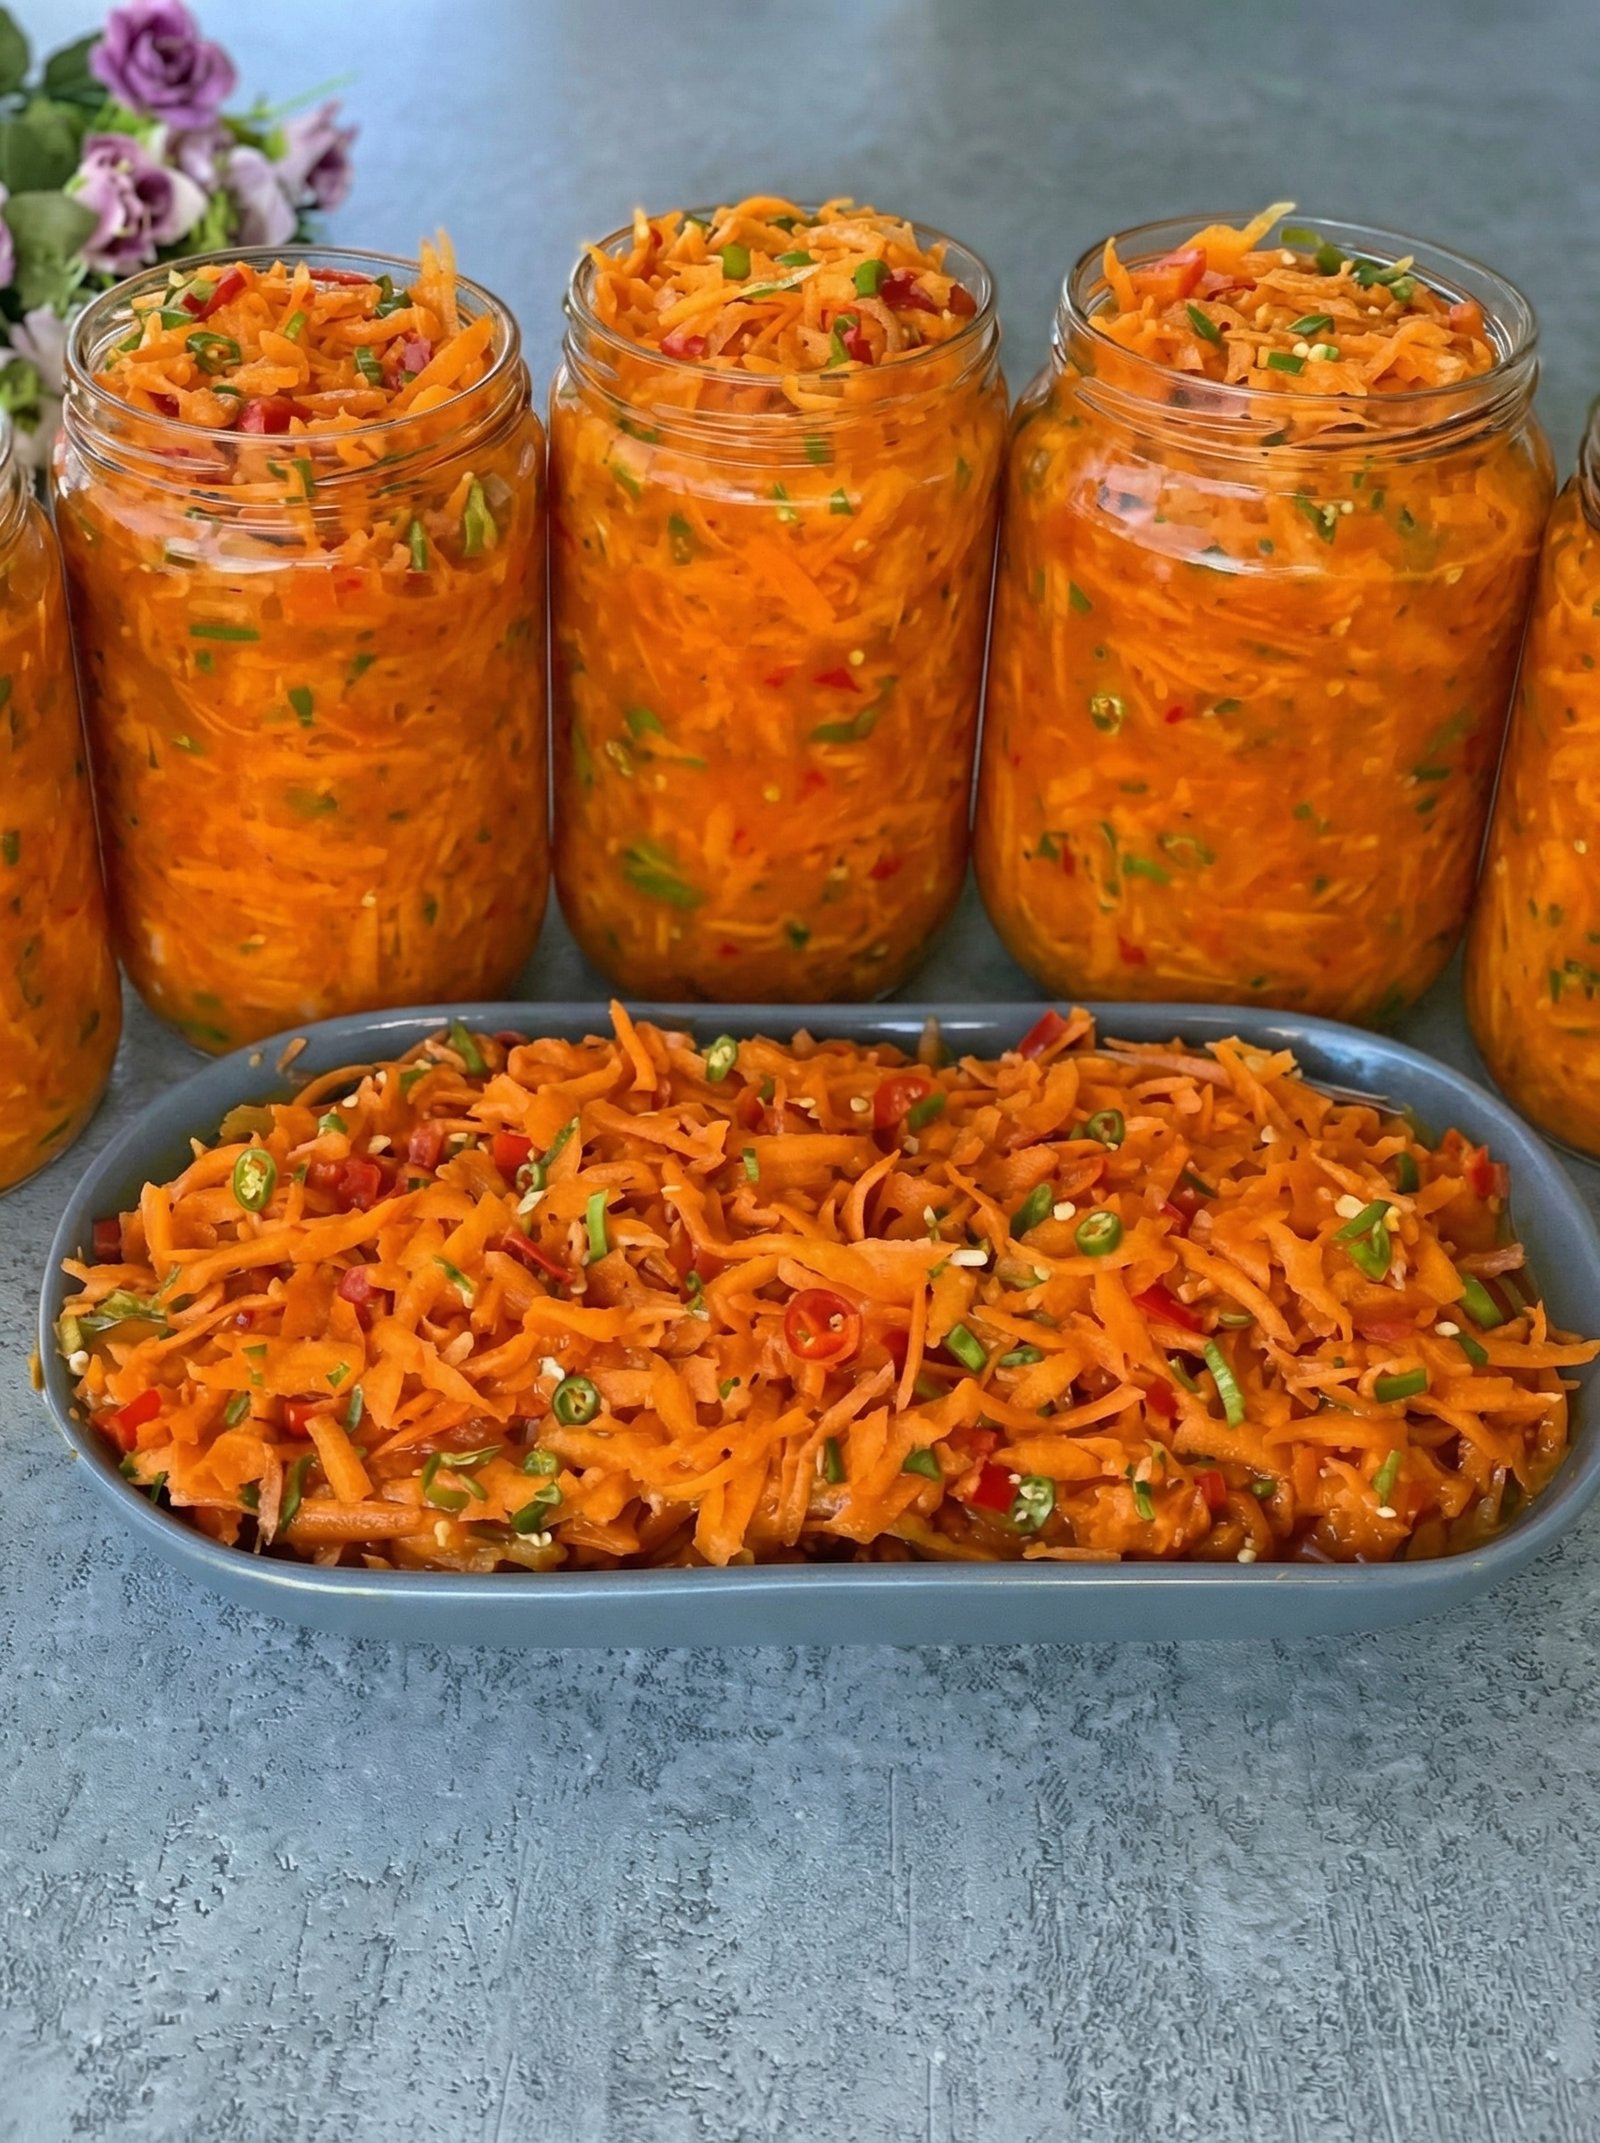
Korean-Style Carrot Salad (Morkovcha)

Korean-Style Carrot Salad (Morkovcha)

This dish is a savory, tangy, and slightly spicy staple of Koryo-saram cuisine. It is naturally gluten-free and packed with nutrients.

  • Prep time: 20 minutes

  • Chilling time: 2–12 hours (essential for flavor)

  • Servings: 4–6

  • Calories: ~115 kcal per serving


Ingredients

Ingredient Amount Notes
Carrots 1 lb (500g) Firm, large carrots work best
Sugar 1 tbsp Balances the acidity
Salt 1 tsp For sweating the carrots
Vinegar (9%) 2 tbsp White distilled or Apple Cider
Vegetable Oil 1/4 cup Neutral oil (Sunflower or Grapeseed)
Garlic 3–4 cloves Minced or pressed
Coriander 1 tsp Ground (the “secret” ingredient)
Red Chili Flakes 1/2 to 1 tsp Adjust to your heat preference
Black Pepper 1/2 tsp Freshly ground
Onion 1/2 medium Used to flavor the oil (optional)

Detailed Instructions

  1. The Shred:

    Peel the carrots. To achieve the traditional texture, use a julienne peeler or a specific Korean carrot grater to create long, thin, spaghetti-like strands. Avoid a standard box grater, as it can make the carrots too soft.

  2. The Sweat:

    Place the shredded carrots in a large glass or stainless steel bowl. Sprinkle with the salt and sugar. Using your hands, massage the carrots for 1–2 minutes until they soften slightly and begin to release moisture. Let them sit for 10 minutes. If you prefer a very crunchy salad, drain any excess liquid that has pooled at the bottom.

  3. The Seasoning:

    Clear a small space in the center of the carrots. Place the minced garlic, ground coriander, black pepper, and red chili flakes in a concentrated pile. Do not stir them in yet.

  4. The Sizzle:

    In a small skillet or saucepan, heat the vegetable oil over medium-high heat until it is shimmering and just about to smoke.

    • Optional Pro-Tip: Sauté the chopped onion in the oil until golden brown, then remove and discard the onion pieces. This infuses the oil with a deeper savory aroma.

  5. The Bloom:

    Carefully pour the hot oil directly onto the pile of spices and garlic. You should hear a loud sizzle. This “blooms” the spices, intensifying their flavor and mellowing the sharp bite of the raw garlic.

  6. The Marinate:

    Pour the vinegar over the mixture. Use tongs (or wear gloves) to toss everything thoroughly until the carrots are evenly coated in the spiced oil and vinegar.

  7. The Wait:

    Transfer the salad to airtight jars or cover the bowl tightly. Refrigerate for at least 2 hours. For the best results, let it marinate overnight to allow the carrots to fully absorb the flavors.


Tips for Success

  • Oil Temperature: The oil must be hot enough to sizzle the spices but not so hot that it burns the garlic. If it doesn’t sizzle when it hits the coriander, the flavor won’t be as deep.

  • Customizing Heat: If you prefer a milder version, replace the red chili flakes with sweet paprika. This maintains the beautiful orange color without the spice.

  • Storage: This salad is a “Meal Prep King”—it stays fresh, crunchy, and delicious in the refrigerator for 5 to 7 days.


Nutritional Benefits

  • Vitamin A: One serving provides roughly 300% of your daily value, which is excellent for eye health.

  • Bioavailability: Carrots contain Beta-carotene, which is fat-soluble. The vegetable oil in this recipe significantly increases your body’s ability to absorb these nutrients.

  • Gut Health: The combination of vinegar and raw garlic can act as a mild digestive aid.

Savory Boiled Red Onion Broth

Savory Boiled Red Onion Broth 🧅✨

This simple, nutrient-dense broth is often enjoyed for its mild, earthy flavor and warm comfort. Using red onions provides a beautiful hue and a subtle sweetness that makes it a perfect light base or a soothing warm drink.


🛒 Ingredients

  • Red Onions: 2 large (peeled and sliced into thick rings) 🧅

  • Garlic: 3–4 cloves (smashed) 🧄

  • Water: 6 cups 💧

  • Fresh Herbs: A handful of fresh parsley or cilantro 🌿

  • Seasoning: A pinch of salt and black pepper to taste 🧂


👩‍🍳 Instructions

  1. Prep the Veggies ➡️ Peel the red onions and slice them into thick, even rings. Smash the garlic cloves to release their natural oils. 🧅🧄

  2. Combine ➡️ Place the onion rings and smashed garlic into a large pot. Pour in the 6 cups of water. 🥘

  3. Boil and Simmer ➡️ Bring the water to a boil over medium-high heat. Once boiling, reduce the heat to low and let it simmer gently for about 20 to 30 minutes. The water should take on a deep, beautiful purple or pink tint. 🌡️➡️🧪

  4. Add Herbs ➡️ During the last 5 minutes of simmering, add the fresh parsley or cilantro to infuse the broth with a bright, herbal note. 🌿

  5. Strain (Optional) ➡️ If you prefer a clear broth, strain the liquid through a fine-mesh sieve. If you enjoy the softened onions, you can leave them in the bowl! 🥄

  6. Season and Serve ➡️ Add a small pinch of salt and pepper. Ladle the warm broth into mugs or bowls and enjoy while hot. ☕✨


❓ Q&A Section

Q: Can I add other vegetables to this broth? A: ➡️ Absolutely! Adding a few slices of fresh ginger or a stalk of celery can add even more depth and a refreshing aromatic quality to the liquid. 🫚🌱

Q: Is it okay to eat the onions after boiling? A: ➡️ Yes! After simmering, the red onions become very soft and mild. They can be eaten as part of the broth or saved to add to a salad or omelet later. 🧅🍳

Q: How do I store leftovers? A: ➡️ Allow the broth to cool completely, then pour it into a glass jar or airtight container. It will stay fresh in the refrigerator for up to 4 days. ❄️🏺

Q: Why use red onions specifically? A: ➡️ Red onions contain specific antioxidants called anthocyanins (which give them their color). When boiled, these are released into the water, making it a very colorful and flavorful base. 🧪✨


💡 Tips for Success

  • Low and Slow: Don’t rush the simmer! A gentle heat ensures the onions release their sweetness without becoming bitter. 🕯️

  • Freshness Matters: Use firm, heavy onions for the best flavor profile in your broth. 🧅✅

Buttery Soft Flaky Parathas

Buttery Soft Flaky Parathas 🥞✨

These layered flatbreads are a staple for a reason! They are incredibly soft, golden-brown, and feature delicate, buttery layers that peel apart beautifully. They pair perfectly with a hearty curry, a side of yogurt, or even just a hot cup of tea. ☕


🛒 Ingredients

  • Flour: 2 cups all-purpose flour (or a mix of whole wheat and all-purpose) 🌾

  • Salt: ½ tsp 🧂

  • Warm Water: ¾ cup (adjust as needed for a soft dough) 💧

  • Oil/Ghee: 2 tbsp for the dough + extra for layering and frying 🧈

  • Dry Flour: For dusting ☁️


👩‍🍳 Instructions

  1. Make the Dough ➡️ In a large mixing bowl, combine the flour and salt. Add 2 tablespoons of oil or ghee. Gradually pour in the warm water, mixing until a soft dough forms. 🥣

  2. Knead and Rest ➡️ Knead the dough on a lightly floured surface for about 5 minutes until smooth and elastic. Cover with a damp cloth and let it rest for at least 20 to 30 minutes. This is essential for soft layers! ⏳

  3. Divide and Roll ➡️ Divide the rested dough into 6 equal-sized balls. Roll one ball out into a thin circle on a floured surface. 🫓

  4. Create the Layers ➡️ Spread a thin layer of ghee or oil over the surface of the rolled dough. Sprinkle a tiny bit of dry flour on top. Fold the dough like a paper fan (pleating) or roll it up like a cigar and then coil it into a spiral (like a snail shell). 🐌✨

  5. Final Roll ➡️ Flatten the coiled ball gently with your palm and roll it out again into a circle (about 6-7 inches wide). Be gentle so you don’t press out all the layers! ➡️🫓

  6. Cook to Golden ➡️ Heat a tawa or flat skillet over medium-high heat. Place the paratha on the hot pan. Cook for 30 seconds, then flip. 🍳

  7. Add Fat and Sear ➡️ Spread a teaspoon of ghee or oil on the cooked side and flip again. Press down gently with a spatula to help it puff up and become crispy. Repeat on the other side until both sides have beautiful golden-brown spots. 🔥

  8. Serve ➡️ Stack them up and serve hot while they are at their flakiest! 😍


❓ Q&A Section

Q: Why are my parathas coming out hard instead of soft? A: ➡️ This usually happens if the dough is too dry or if you cook them on low heat for too long, which dries out the moisture. Use warm water for the dough and cook on medium-high heat quickly! 🌡️🔥

Q: Can I make these ahead of time? A: ➡️ Yes! You can roll them out and place parchment paper between them, then store them in the fridge for 24 hours or freeze them. Cook them directly from the fridge or freezer. ❄️🗓️

Q: How do I get those distinct “peelable” layers? A: ➡️ The secret is the “fat + flour” dusting in step 4. The thin layer of flour keeps the ghee from soaking completely into the dough, creating a physical barrier that forms the layers during cooking. 🧈🌾

Q: What is the best way to keep them soft after cooking? A: ➡️ Place the hot parathas in an insulated container or wrap them in a clean kitchen towel immediately after they come off the pan. The steam will keep them soft. 🧤✨


💡 Tips for Success

  • The Rest is Best: Never skip the 30-minute rest period. It relaxes the gluten, making the dough much easier to roll out thin without it snapping back. 🧘‍♂️

  • Ghee vs Oil: While oil works, ghee (clarified butter) provides a much richer flavor and a crispier texture. 🧈✅

Vanilla Chia Seed Pudding

Vanilla Chia Seed Pudding 🥣✨

This simple pudding is a nutritional powerhouse. Chia seeds are famous for their ability to absorb liquid and expand, creating a gel-like texture that is incredibly satisfying. They are a fantastic source of fiber and omega-3 fatty acids! 🌿🫀


🛒 Ingredients

  • Chia Seeds: 3 tbsp (Black or white seeds) 🫘

  • Milk of Choice: 1 cup (Almond, coconut, oat, or dairy) 🥛

  • Vanilla Extract: ½ tsp 🥥

  • Sweetener: 1-2 tsp honey, maple syrup, or a sugar-free alternative (optional) 🍯

  • Toppings: Fresh berries, sliced almonds, or a dash of cinnamon (optional) 🍓🥜


👩‍🍳 Instructions

  1. Combine Ingredients ➡️ In a glass jar or a small bowl, add the chia seeds, milk, vanilla extract, and sweetener. 🥣

  2. Stir Thoroughly ➡️ Mix everything together with a spoon or whisk. Make sure there are no clumps of seeds sticking to the bottom or sides of the container. 🥄

  3. The First Rest ➡️ Let the mixture sit at room temperature for about 5 to 10 minutes. ⏳

  4. Stir Again ➡️ Give it one more good stir to break up any remaining clumps. This step is the secret to a perfectly smooth pudding! ✨

  5. Refrigerate ➡️ Cover the jar and place it in the fridge for at least 2 hours, or ideally overnight. The seeds will soak up the liquid and thicken into a pudding consistency. ❄️

  6. Serve ➡️ Give it a final stir before eating. Top with your favorite fruits or nuts and enjoy! 😋🍓


❓ Q&A Section

Q: My pudding is too thin. How do I fix it? A: ➡️ Simply add another teaspoon of chia seeds, stir well, and let it sit for another 30 minutes. The seeds will continue to absorb the liquid and thicken the mixture. 🫘✅

Q: Can I use hot milk? A: ➡️ Yes! If you prefer a warm “porridge” style, you can use warm milk. However, the traditional pudding texture is best achieved with cold milk in the refrigerator. 🌡️🥛

Q: How long can I store this? A: ➡️ Chia pudding stays fresh in an airtight container in the fridge for up to 5 days. It’s perfect for meal prepping your breakfasts for the week! 🗓️🛍️

Q: Do I have to use vanilla? A: ➡️ Not at all! You can swap vanilla for cocoa powder for a chocolate version, or add a pinch of cardamom and saffron for a unique, aromatic flavor. 🍫🌿


💡 Tips for Success

  • The Double-Stir: Stirring twice (once at the start and once after 10 minutes) prevents the seeds from settling in a block at the bottom. 🔄

  • Variety: Try using coconut milk for a much richer, creamier dessert-like texture! 🥥🥛

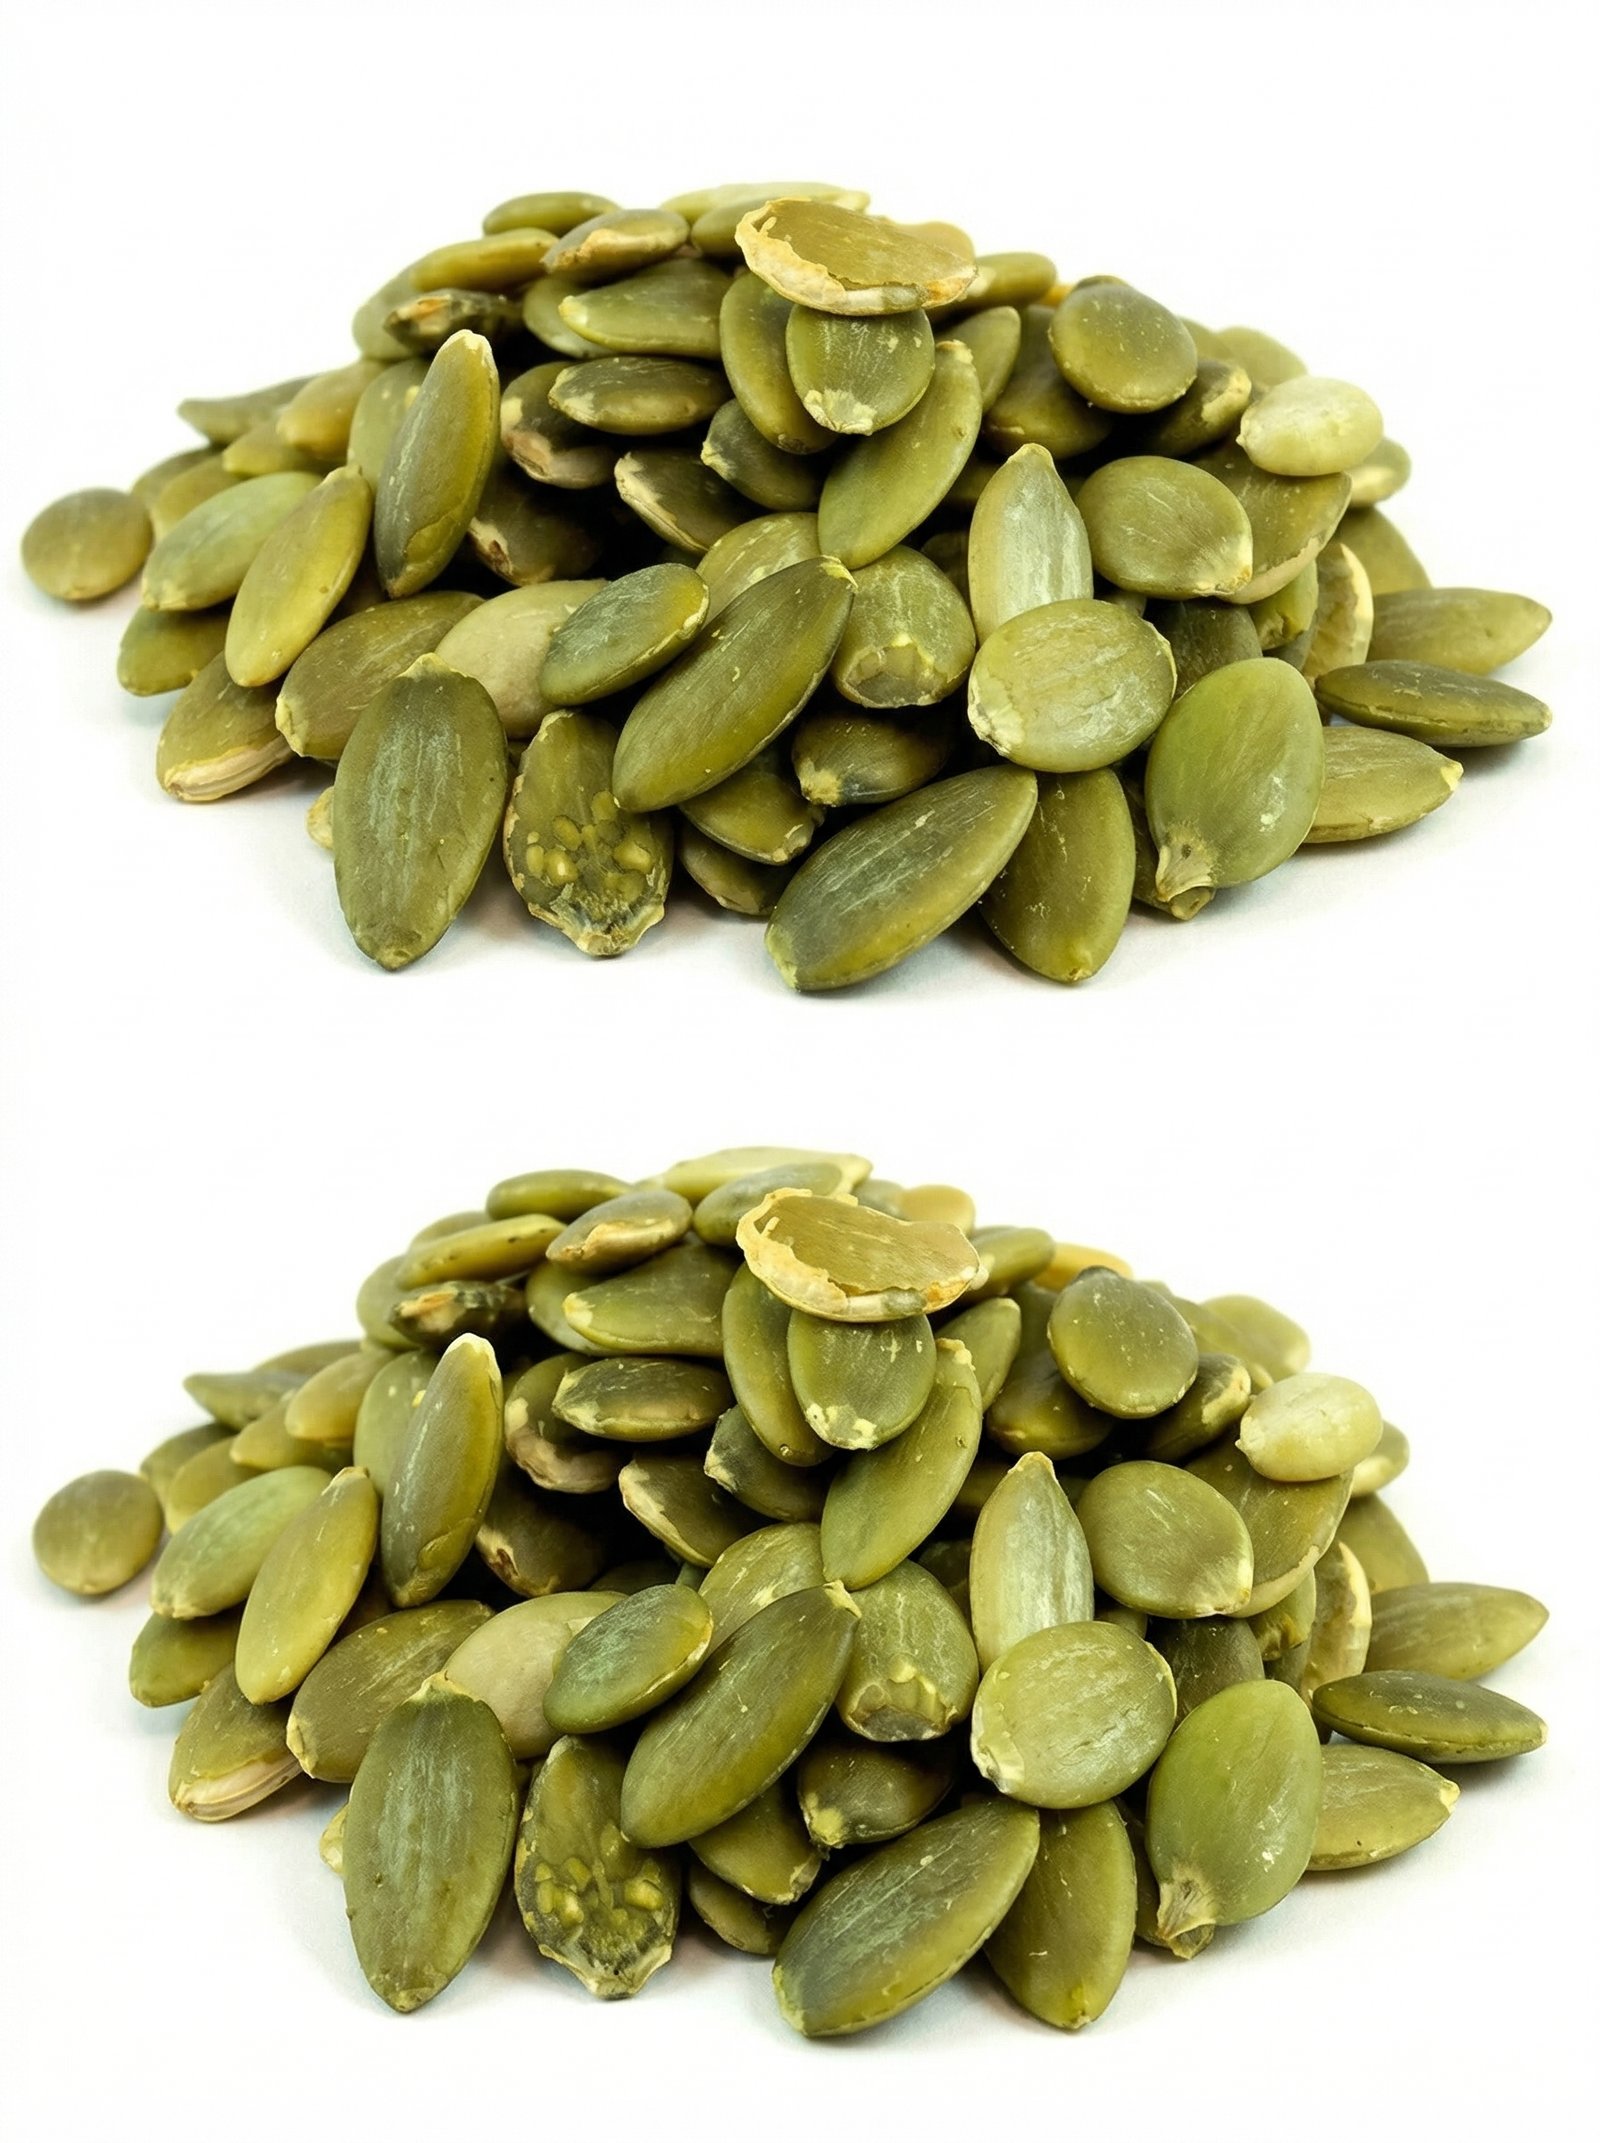
Pumpkin Seeds benefits for Your Body:

Pumpkin Seeds benefits for Your Body:

Even a Handful of Pumpkin Seeds Can Start an Irreversible Reaction in Your Body. Despite their small size, pumpkin seeds are incredibly beneficial to your health. These nutrient-dense seeds include vital vitamins, minerals, and antioxidants that can positively impact your body with just a handful. Here’s how eating pumpkin seeds might cause your body to go through a “irreversible” reaction and why you should think about include them in your regular diet.

1. Promotes Heart Health

  • Magnesium is abundant in pumpkin seeds and is necessary for heart function. A few can help lower the risk of heart disease, enhance circulation, and control blood pressure.

2. Encourages Appropriate Blood Sugar Levels

  • As a wonderful snack for diabetics or anyone trying to avoid blood sugar spikes, pumpkin seeds have been demonstrated to help manage blood sugar. Their low glycemic index contributes to blood sugar regulation by stabilizing insulin levels.

3. Concealed Antioxidants

  • Antioxidants like vitamin E and carotenoids, which are abundant in pumpkin seeds, help shield your cells from harm caused by free radicals. This increase in antioxidants promotes general health and may delay the aging process.

4. Enhances the Quality of Sleep

  • Pumpkin seeds are a great source of tryptophan, an amino acid that your body uses to produce melatonin and serotonin. Having a handful of pumpkin seeds for dinner may help you sleep better and longer.

5. Encourages Health of the Prostate

  • Pumpkin seeds are especially good for guys since they help with prostate health. Zinc, which is present in the seeds, helps to keep the prostate healthy and may lower the chance of prostate-related problems.
See also  Coffee and Ginger Mix

6. Boosts Adaptability

  • Pumpkin seeds are rich in antioxidants and zinc, which naturally strengthen your immune system. Consistent intake can support your body’s defense against infections and illnesses, promoting year-round health.

7. Promotes Better Digestion

  • A fantastic source of fiber that supports gut health and facilitates digestion are pumpkin seeds. By keeping your digestive tract functioning properly, a handful of seeds can lower your chance of constipation and other digestive problems.

8. Combats Irritation

  • Pumpkin seeds are a great option for lowering inflammation in the body because of their anti-inflammatory qualities. Frequent consumption can support general joint health and aid in the management of diseases like arthritis.

9. Lifts the Spirit and Eases Stress

  • Pumpkin seeds include magnesium, which is good for your heart and helps control your mood. This mineral has been demonstrated to improve mental health by lowering stress, anxiety, and even depressive symptoms.

10. Encourages Bone Health

  • Pumpkin seeds contribute to the maintenance of strong bones because of their high magnesium concentration. Together with calcium, magnesium increases bone density and lowers the risk of osteoporosis and fractures.

In conclusion, a tiny seed can have a big impact.

  • A small quantity of pumpkin seeds can initiate a series of advantageous effects on your health. Pumpkin seeds are a nutritional powerhouse that can improve blood sugar regulation, digestion, sleep quality, and heart health. Take advantage of the “irreversible” wonderful benefits they bring about by include them in your diet now!

Crispy Potato Cakes with Dill Cream

Crispy Potato Cakes with Dill Cream 🥔🌿

These golden, pan-fried potato cakes are a perfect blend of a soft, fluffy interior and a satisfyingly crispy crust. The addition of fresh scallions and lemon zest gives them a bright, modern flavor that pairs beautifully with the cool dill cream.


⏱️ Prep & Cook Time

  • Prep Time: 25 minutes 🔪

  • Cook Time: 30 minutes 🍳

  • Total Time: 55 minutes ⏳

  • Servings: 8–10 cakes (Serves 4) 🍽️


🛒 Ingredients

The Potato Cakes:

  • Potatoes: 2 lbs (900g) Russet or Yukon Gold 🥔

  • Scallions: 4 (finely sliced) 🧅

  • All-Purpose Flour: ½ cup 🌾

  • Egg: 1 (beaten) 🥚

  • Lemon Zest: 1 tsp 🍋

  • Salt & Pepper: 1 tsp salt, ½ tsp black pepper 🧂

  • Cayenne Pepper: A pinch (optional for a tiny kick) 🌶️

  • Cooking Fat: 4–6 tbsp oil or ghee (for frying) 🧈

The Topping:

  • Cream Base: ½ cup crème fraîche or sour cream 🥛

  • Fresh Dill: 2 tbsp (chopped) 🌿

  • Lemon Juice: 1 tbsp 🍋

  • Protein: 4 oz smoked salmon (optional) 🐟

  • Garnish: Flaky salt and extra dill ✨


👩‍🍳 Instructions

  1. Boil the Potatoes ➡️ Peel and cut the potatoes into chunks. Boil in salted water for 12–15 minutes until soft. Pro Tip: Drain well and let them sit in the hot pot for 1–2 minutes to steam off any excess moisture. 💧

  2. Mash & Mix ➡️ Mash the potatoes until smooth. Add the scallions, flour, egg, lemon zest, salt, pepper, and cayenne. Mix gently until just combined. 🥣

  3. Shape the Cakes ➡️ With lightly floured hands, shape the mixture into 8–10 patties (about ¾-inch thick). ✋

    • Optional: Chill the patties in the fridge for 15–30 minutes to help them hold their shape better during frying. ❄️

  4. Fry to Perfection ➡️ Heat oil or ghee in a pan over medium heat. Fry the cakes for 4–5 minutes per side until they are deep golden and crispy. Work in batches to avoid overcrowding the pan. 🍳

  5. Prepare the Topping ➡️ While the cakes fry, whisk together the crème fraîche (or sour cream), chopped dill, and lemon juice. 🥣

  6. Assemble & Serve ➡️ Place 1–2 warm cakes on a plate. Top with a generous dollop of dill cream and a piece of smoked salmon if using. Finish with a sprinkle of flaky salt. 😍


❓ Q&A Section

Q: Why did my potato cakes fall apart in the pan? A: ➡️ This usually happens if the potatoes were too wet. Make sure to drain them thoroughly and let them “dry” after boiling. Chilling the shaped patties before frying also acts as a “glue” to keep them together. 🧊

Q: Can I make these in an air fryer? A: ➡️ Yes! Lightly spray the patties with oil and air fry at 200°C (400°F) for about 15–20 minutes, flipping halfway through, until golden. 💨

Q: Can I use leftover mashed potatoes? A: ➡️ Absolutely! Just be mindful that leftover mash often contains milk or butter, so you might need to add a little extra flour to ensure the dough isn’t too sticky to handle. 🥔

Q: What else can I add to the potato mixture? A: ➡️ Feel free to fold in ½ cup of shredded cheddar or parmesan cheese for a savory, melty center! 🧀


💡 Quick Tips

  • Don’t Overmix: Mixing too much can make the potatoes gummy. Keep it light! ☁️

  • High Heat is Key: Ensure the oil is shimmering before adding the cakes so they sear instead of soaking up grease. 🔥

Refreshing Lemon & Ginger Tonic

Refreshing Lemon & Ginger Tonic 🍋🫚☕

This tonic is a powerhouse of natural wellness! It is completely sugar-free (if omitting honey), flourless, and packed with antioxidants. Whether you need a morning boost or a soothing evening drink, this simple recipe is a perfect addition to your daily routine.


🛒 Ingredients (Serves 2 Cups)

  • 2 cups Water (Filtered) 💧

  • 1 inch Fresh Ginger Root (Peeled and sliced or grated) 🫚

  • 1 Whole Lemon (Half sliced into rounds, half juiced) 🍋

  • 1 tbsp Raw Honey (Optional/to taste) 🍯

  • Pinch of Cayenne Pepper (Optional, for a metabolic boost) 🌶️


👨‍🍳 Step-by-Step Instructions

  1. Prepare the Ginger 🔪 ➡️

    • Peel the fresh ginger root. Slice it into thin rounds for a mild tea, or grate it if you prefer an intense, spicy flavor.

  2. Boil the Water 🌡️ ➡️

    • Bring 2 cups of filtered water to a gentle boil in a small pot or kettle.

  3. Infuse the Ginger 🕒 ➡️

    • Add the ginger to the hot water.

    • For a mild tonic: Remove from heat and let it steep for 5 minutes.

    • For a stronger tonic: Let the ginger simmer in the water for 3 to 5 minutes before turning off the heat.

  4. Add the Lemon 🍋 ➡️

    • Stir in the fresh lemon juice and drop the lemon slices directly into the pot. The lemon adds bright acidity and a boost of vitamin C.

  5. Sweeten and Season ✨ ➡️

    • Allow the liquid to cool slightly. Once it is warm (not boiling), stir in the raw honey and a pinch of cayenne pepper if you enjoy a little heat.

  6. Serve 🍽️ ➡️

    • Pour into a mug to enjoy warm, or pour over ice for a chilled, refreshing version. 🧊 Drink one cup in the morning and one in the evening! 😊✨


❓ Q & A (Common Inquiries)

Q: Can I use ground ginger instead of fresh ginger root? A: Yes! If fresh is unavailable, use 1/4 to 1/2 teaspoon of ground ginger for 2 cups of water. However, fresh ginger provides a more vibrant flavor and higher levels of gingerol for digestion. 🫚✅

Q: Why should I wait for the water to cool before adding honey? A: Boiling water can neutralize the beneficial enzymes and antioxidants found in raw honey. Letting it cool to a warm temperature preserves these natural properties. 🍯🌡️

Q: Is it okay to leave the lemon peels in the drink? A: Absolutely. The peel contains healthy lemon oils. Just ensure you wash the lemon thoroughly before slicing to remove any wax or residue. 🍋🚿

Q: Can I make a large batch to keep in the fridge? A: Yes! You can triple or quadruple the recipe and store it in a glass jar in the refrigerator for up to 3 days. It is a delicious, healthy replacement for sugary sodas. 🍱🧊

Q: What are the benefits of adding cayenne pepper? A: Cayenne contains capsaicin, which can help support a healthy metabolism and adds a warming sensation that complements the spice of the ginger. 🌶️📈


💡 Quick Tips

  • Freshness Hack: Store your fresh ginger in the freezer; it stays fresh longer and is much easier to grate when frozen! 🧊🫚

  • Morning Ritual: Drinking this on an empty stomach in the morning is a great way to “wake up” your digestive system. ☀️🧘‍♀️

Homemade Lung Revival Herbal Tea Blend

Homemade Lung Revival Herbal Tea Blend 🌿🫁☕

This herbal infusion is designed to support respiratory wellness using natural, soothing ingredients. It is a traditional wellness tonic that is caffeine-free, flourless, and sugar-free, making it a gentle addition to your daily routine.


🛒 Ingredients (Dry Blend)

  • 2 parts Mullein Leaf: Known for its soothing effect on the respiratory tract. 🍃

  • 1 part Peppermint Leaf: Helps open up airways and provides a refreshing taste. 🌱

  • 1 part Ginger Root (dried or fresh): Supports a healthy inflammatory response. 🫚

  • ½ part Licorice Root: Adds a natural sweetness and coats the throat. 🍬

  • ½ part Thyme: A traditional herb used for chest comfort. 🌿

  • Optional: A slice of fresh lemon or a teaspoon of raw honey (after brewing). 🍋🍯


👨‍🍳 Step-by-Step Instructions

  1. Prepare the Herb Blend 🥣 ➡️

    • In a large clean jar (like the one in the photo), mix all your dried herbs together.

    • Shake the jar well so the smaller pieces of ginger and licorice are evenly distributed.

  2. Boil the Water 🌡️ ➡️

    • Bring fresh, filtered water to a boil.

    • Tip: Let the water sit for 1 minute after boiling so it doesn’t “scorch” the delicate leaves.

  3. Measure and Steep 🥄 ➡️

    • Add 1 to 2 teaspoons of the herbal blend into a tea infuser or directly into a mug.

    • Pour 8 oz (1 cup) of hot water over the herbs. ➡️

    • Cover the mug with a small plate to keep the beneficial essential oils from escaping in the steam.

  4. The Waiting Game ⏳ ➡️

    • Let the tea steep for 10 to 15 minutes. Herbal teas require a longer steeping time than green or black tea to release their full properties.

  5. Strain and Sip ☕ ➡️

    • Remove the infuser or strain the tea into a fresh cup. ➡️

    • Add a squeeze of lemon if desired. Enjoy it warm for the best results! ✨


❓ Q & A (Common Inquiries)

Q: How often can I drink this tea? A: Most people enjoy 1 to 2 cups a day. However, it is always a good idea to listen to your body and consult with a healthcare professional if you are taking specific medications. 🍵✅

Q: Can I use fresh herbs instead of dried? A: Yes! If using fresh herbs, triple the amount (use 3 teaspoons instead of 1) because dried herbs are more concentrated. 🌿➡️🌿

Q: Is this safe for children? A: While these herbs are generally mild, it is best to check with a pediatrician first, especially for ingredients like licorice root. 👶🏥


💡 Quick Tips

  • Deep Breathing: While sipping your tea, try taking slow, deep breaths. The warm steam from the cup also helps to moisturize the nasal passages and throat. 💨🧘‍♀️

  • Storage: Keep your jar in a cool, dark place (like a pantry) to keep the herbs potent for up to 6 months. 📦🌑

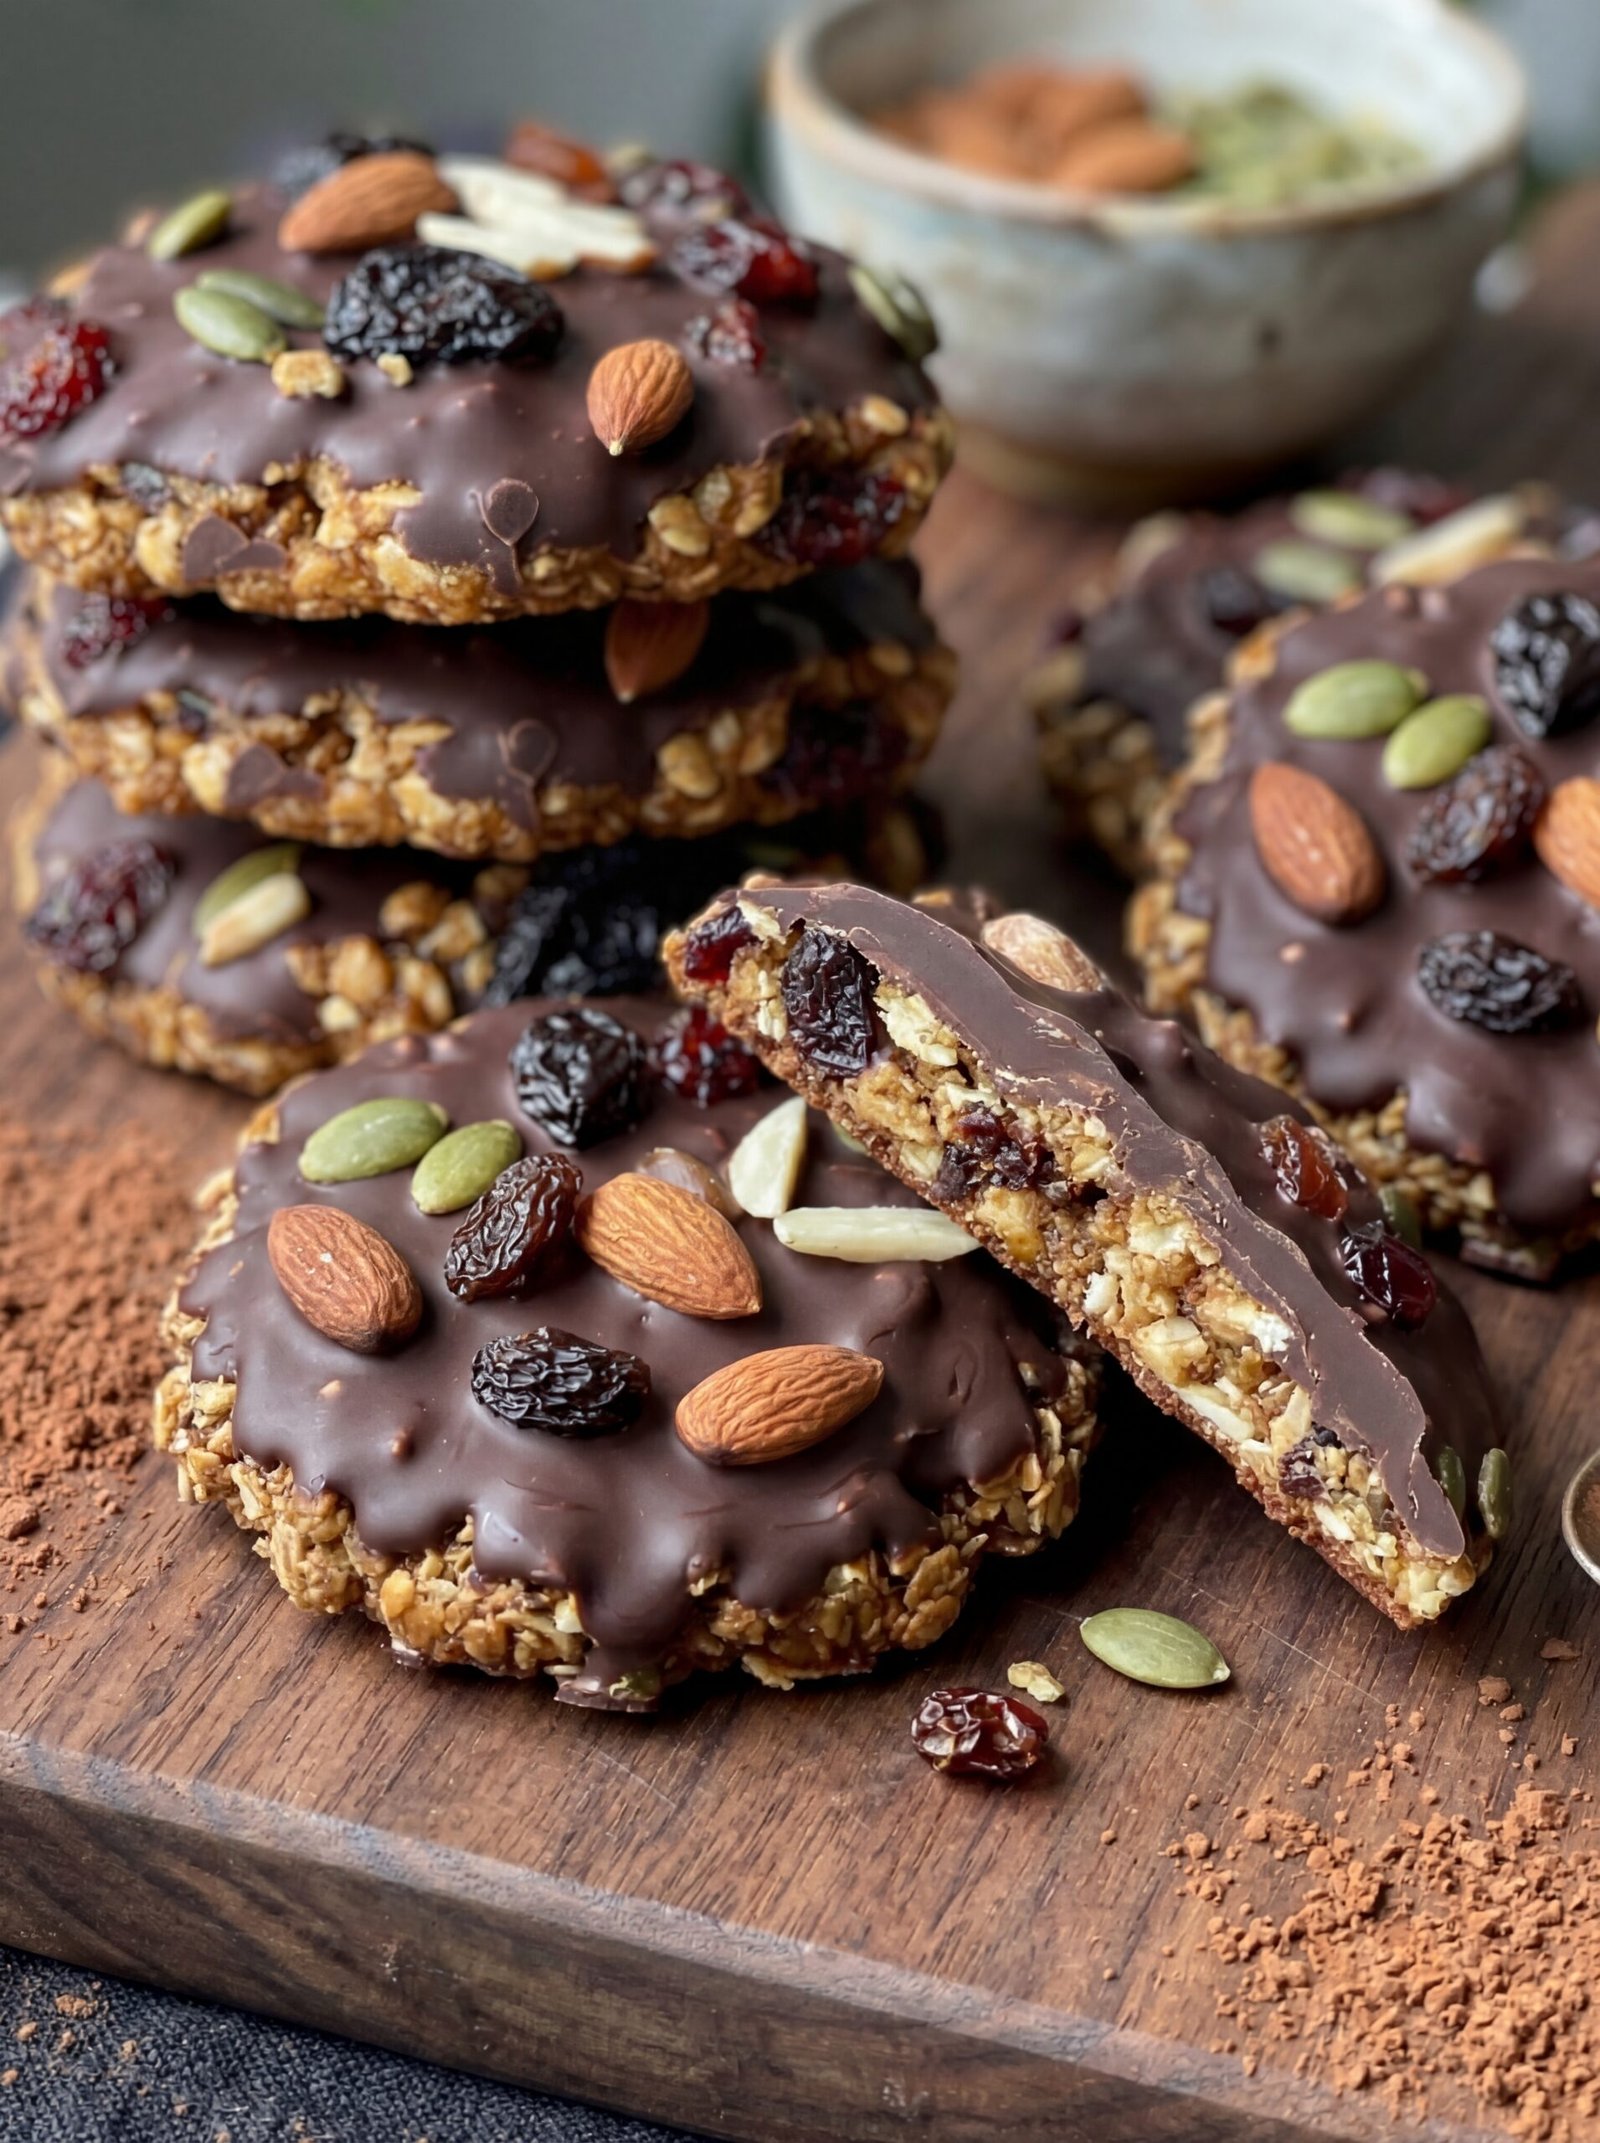
Chocolate-Dipped Oat & Nut Power Cookies.

Chocolate-Dipped Oat & Nut Power Cookies.


🍪 Ingredients

The Cookie Base:

  • 2 cups Rolled oats (slightly pulsed in a blender for a better bind) 🌾

  • ½ cup Almond flour or finely ground nuts

  • 1 tsp Cinnamon powder

  • ½ cup Natural almond butter or peanut butter (no added sugar) 🥜

  • ⅓ cup Honey or maple syrup 🍯

  • 1 tsp Vanilla extract

  • ¼ cup Raisins or dried cranberries 🍇

The Topping & Crunch:

  • 100g Dark chocolate (70% cocoa or higher for a rich flavor) 🍫

  • 1 tbsp Coconut oil (helps the chocolate melt smoothly)

  • Handful of Whole almonds, pumpkin seeds (pepitas), and raisins for decoration 🥜🎃


👨‍🍳 Step-by-Step Instructions

1. Mix the Base 🥣 ➡️

  • In a large bowl, combine the oats, almond flour, cinnamon, and dried fruit.

  • Add the nut butter, honey, and vanilla. Mix until a thick, sticky dough forms. If it feels too dry, add a teaspoon of water or more honey.

2. Shape the Cookies 🍪 ➡️

  • Line a tray with parchment paper.

  • Take a golf-ball-sized portion of dough, roll it into a ball, and press it down firmly to create a flat, round cookie shape.

  • Place the tray in the fridge for 30 minutes to firm up.

3. Melt the Chocolate 🍫 ➡️

  • Use a double boiler or a microwave (30-second intervals) to melt the dark chocolate with the coconut oil until glossy and smooth.

4. Dip and Decorate ✨ ➡️

  • Dip the top of each chilled cookie into the melted chocolate. ➡️

  • While the chocolate is still wet, carefully press whole almonds, pumpkin seeds, and raisins onto the top as shown in the picture. ➡️

5. Final Chill ❄️ ➡️

  • Place the cookies back in the fridge for another 20 minutes until the chocolate shell is completely set. Enjoy your treat! ➡️ 😋


❓ Q & A (Common Inquiries)

Q: Do I need to bake these? A: This is a “no-bake” version which keeps the nuts and oats very crunchy! However, if you prefer a toasted flavor, you can bake the oat base at 180°C for 10 minutes before adding the chocolate. 🌡️

Q: Can I make these nut-free? A: Yes! Swap the almond butter for sunflower seed butter and replace the whole almonds on top with extra pumpkin seeds or sunflower seeds. 🌻

Q: How should I store these? A: Because of the chocolate coating, these stay best in an airtight container in the fridge. They will stay fresh and crunchy for up to 7 days. 🍱


💡 Quick Tips

  • Firm Press: When shaping the cookies, press them down tightly so they don’t crumble when you dip them in chocolate. ➡️ 👊

  • Darker is Better: Using dark chocolate with a high cocoa percentage keeps the sugar content low and the antioxidant levels high! 🍫✅

Mediterranean Red Onion & Black Bean Skillet

Mediterranean Red Onion & Black Bean Skillet

A Fiber-Rich, Plant-Based Savory Dish

🛒 Ingredients (Serves 4)

  • 1 large red onion, thinly sliced 🧅

  • 2 medium sweet potatoes, diced small 🍠

  • 1 cup cooked black beans (rinsed and drained) 🫘

  • 1 red bell pepper, diced 🫑

  • ½ cup corn kernels (optional) 🌽

  • 2 cloves garlic, minced 🧄

  • 2 tablespoons olive oil 🫒

  • 1 teaspoon ground cumin

  • ½ teaspoon smoked paprika

  • ½ teaspoon oregano

  • Salt & pepper to taste 🧂

  • 1 tablespoon lemon juice 🍋

  • Fresh parsley or cilantro for garnish 🌿

  • Optional: ½ avocado, diced 🥑


👨‍🍳 Step-by-Step Instructions

  1. Sauté the Onion ➡️

    • Heat the olive oil in a large skillet over medium heat.

    • Add the sliced red onion and cook for 5–7 minutes.

    • Tip: Stir frequently until they are softened and have a light golden caramelization.

  2. Cook the Sweet Potatoes ➡️

    • Add the diced sweet potatoes to the pan.

    • Cover with a lid and cook for 8–10 minutes.

    • Stir occasionally until the potatoes are fork-tender but not mushy.

  3. Incorporate Beans & Spices ➡️

    • Stir in the minced garlic, black beans, diced bell pepper, corn, cumin, paprika, and oregano.

    • Cook for another 5 minutes to allow the flavors to meld and the peppers to soften.

  4. The Finishing Touch ➡️

    • Drizzle with lemon juice and season with salt and pepper to your preference.

    • Remove from heat and garnish with fresh herbs and avocado.

    • Serve warm! 🍽️


❓ Q & A (Common Inquiries)

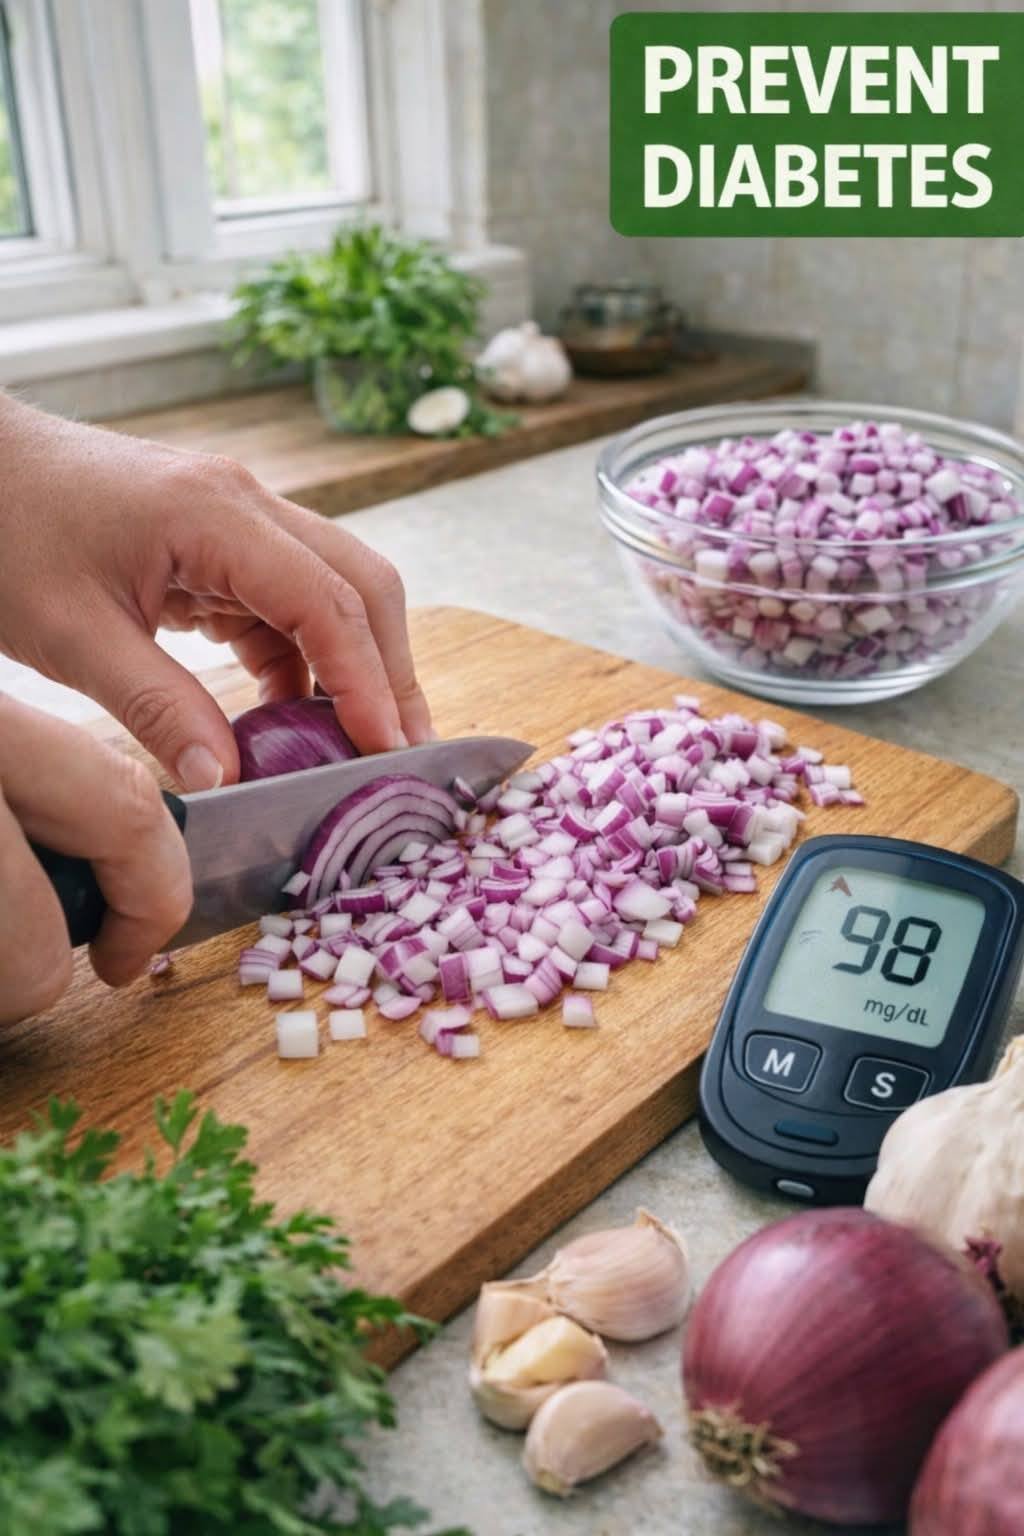
Q: Can this cure chronic blood sugar conditions? A: No. While healthy eating is vital, there is currently no cure for Type 1 diabetes, and Type 2 requires comprehensive management. This dish is a supportive part of a balanced diet, not a replacement for medical care.

Q: Do red onions specifically lower glucose? A: Some studies suggest onions contain antioxidants like quercetin that may have mild effects, but they are a culinary ingredient, not a substitute for prescribed medication. 💊

Q: How can I make this even lower in carbohydrates? A: You can swap the sweet potatoes and corn for non-starchy vegetables like zucchini, spinach, or cauliflower florets. This keeps the volume high while reducing the carb count. 🥗

Q: What is the best way to serve this? A: To further slow down glucose absorption, pair this skillet with a lean protein like grilled chicken, tofu, or a dollop of Greek yogurt. 🍗


📊 Estimated Nutritional Info (Per Serving)

  • Calories: 280–320 kcal

  • Carbohydrates: 40–45g

  • Fiber: 9–11g (High Fiber!)

  • Protein: 8–10g

  • Fat: 10–14g

  • Glycemic Impact: Moderate (Balanced by healthy fats and high fiber content)


💡 Notes & Tips

  • Thin Slicing: Slicing the onions thinly helps them caramelize faster, bringing out a natural sweetness without needing any added sugar. 🔪

  • Portion Control: Even healthy carbs like beans and sweet potatoes should be enjoyed in moderate portions—aim for about 1 to 1¼ cups per serving. 📏

  • Stay Consistent: Everyone’s body responds differently to ingredients, so it is always a good idea to monitor your personal levels after trying new recipes. 📈

🍍 Why It’s Great for Your Skin

🍍 Why It’s Great for Your Skin

  • Cucumber: Made up of about 95% water, cucumbers are the ultimate hydrator. They also contain silica, a trace mineral that helps maintain skin elasticity and strength, and antioxidants that help soothe inflammation.

  • Pineapple: Packed with Vitamin C, which is essential for collagen production (the protein that keeps your skin firm). It also contains an enzyme called bromelain, known for its anti-inflammatory properties that can help reduce redness and swelling.

  • Mint: Besides adding a cool, refreshing flavor, mint has slight antibacterial properties and aids in digestion. A healthy gut often translates to a clearer complexion!


🥒 How to Make Your Own Skin-Hydrating Juice

Ingredients:

  • 1 cup fresh pineapple chunks

  • 1/2 large cucumber (peeled if you prefer, but keeping the skin adds extra nutrients)

  • A small handful of fresh mint leaves

  • 1/2 cup water or coconut water (for an extra electrolyte boost)

  • Ice cubes

Instructions:

  1. Prep: Chop the pineapple and cucumber into manageable pieces for your blender or juicer.

  2. Blend/Juice: * If using a juicer: Run the pineapple, cucumber, and mint leaves through the juicer.

    • If using a blender: Add the pineapple, cucumber, mint, and water/coconut water to the blender. Blend until completely smooth. You can strain it through a fine-mesh sieve if you prefer a pulp-free juice, or drink it as a smoothie to keep the healthy fiber.

  3. Serve: Pour the juice into a glass over ice.

  4. Garnish: Top with a sprig of fresh mint, a few thin cucumber slices, and a piece of pineapple on the rim, just like in the picture!

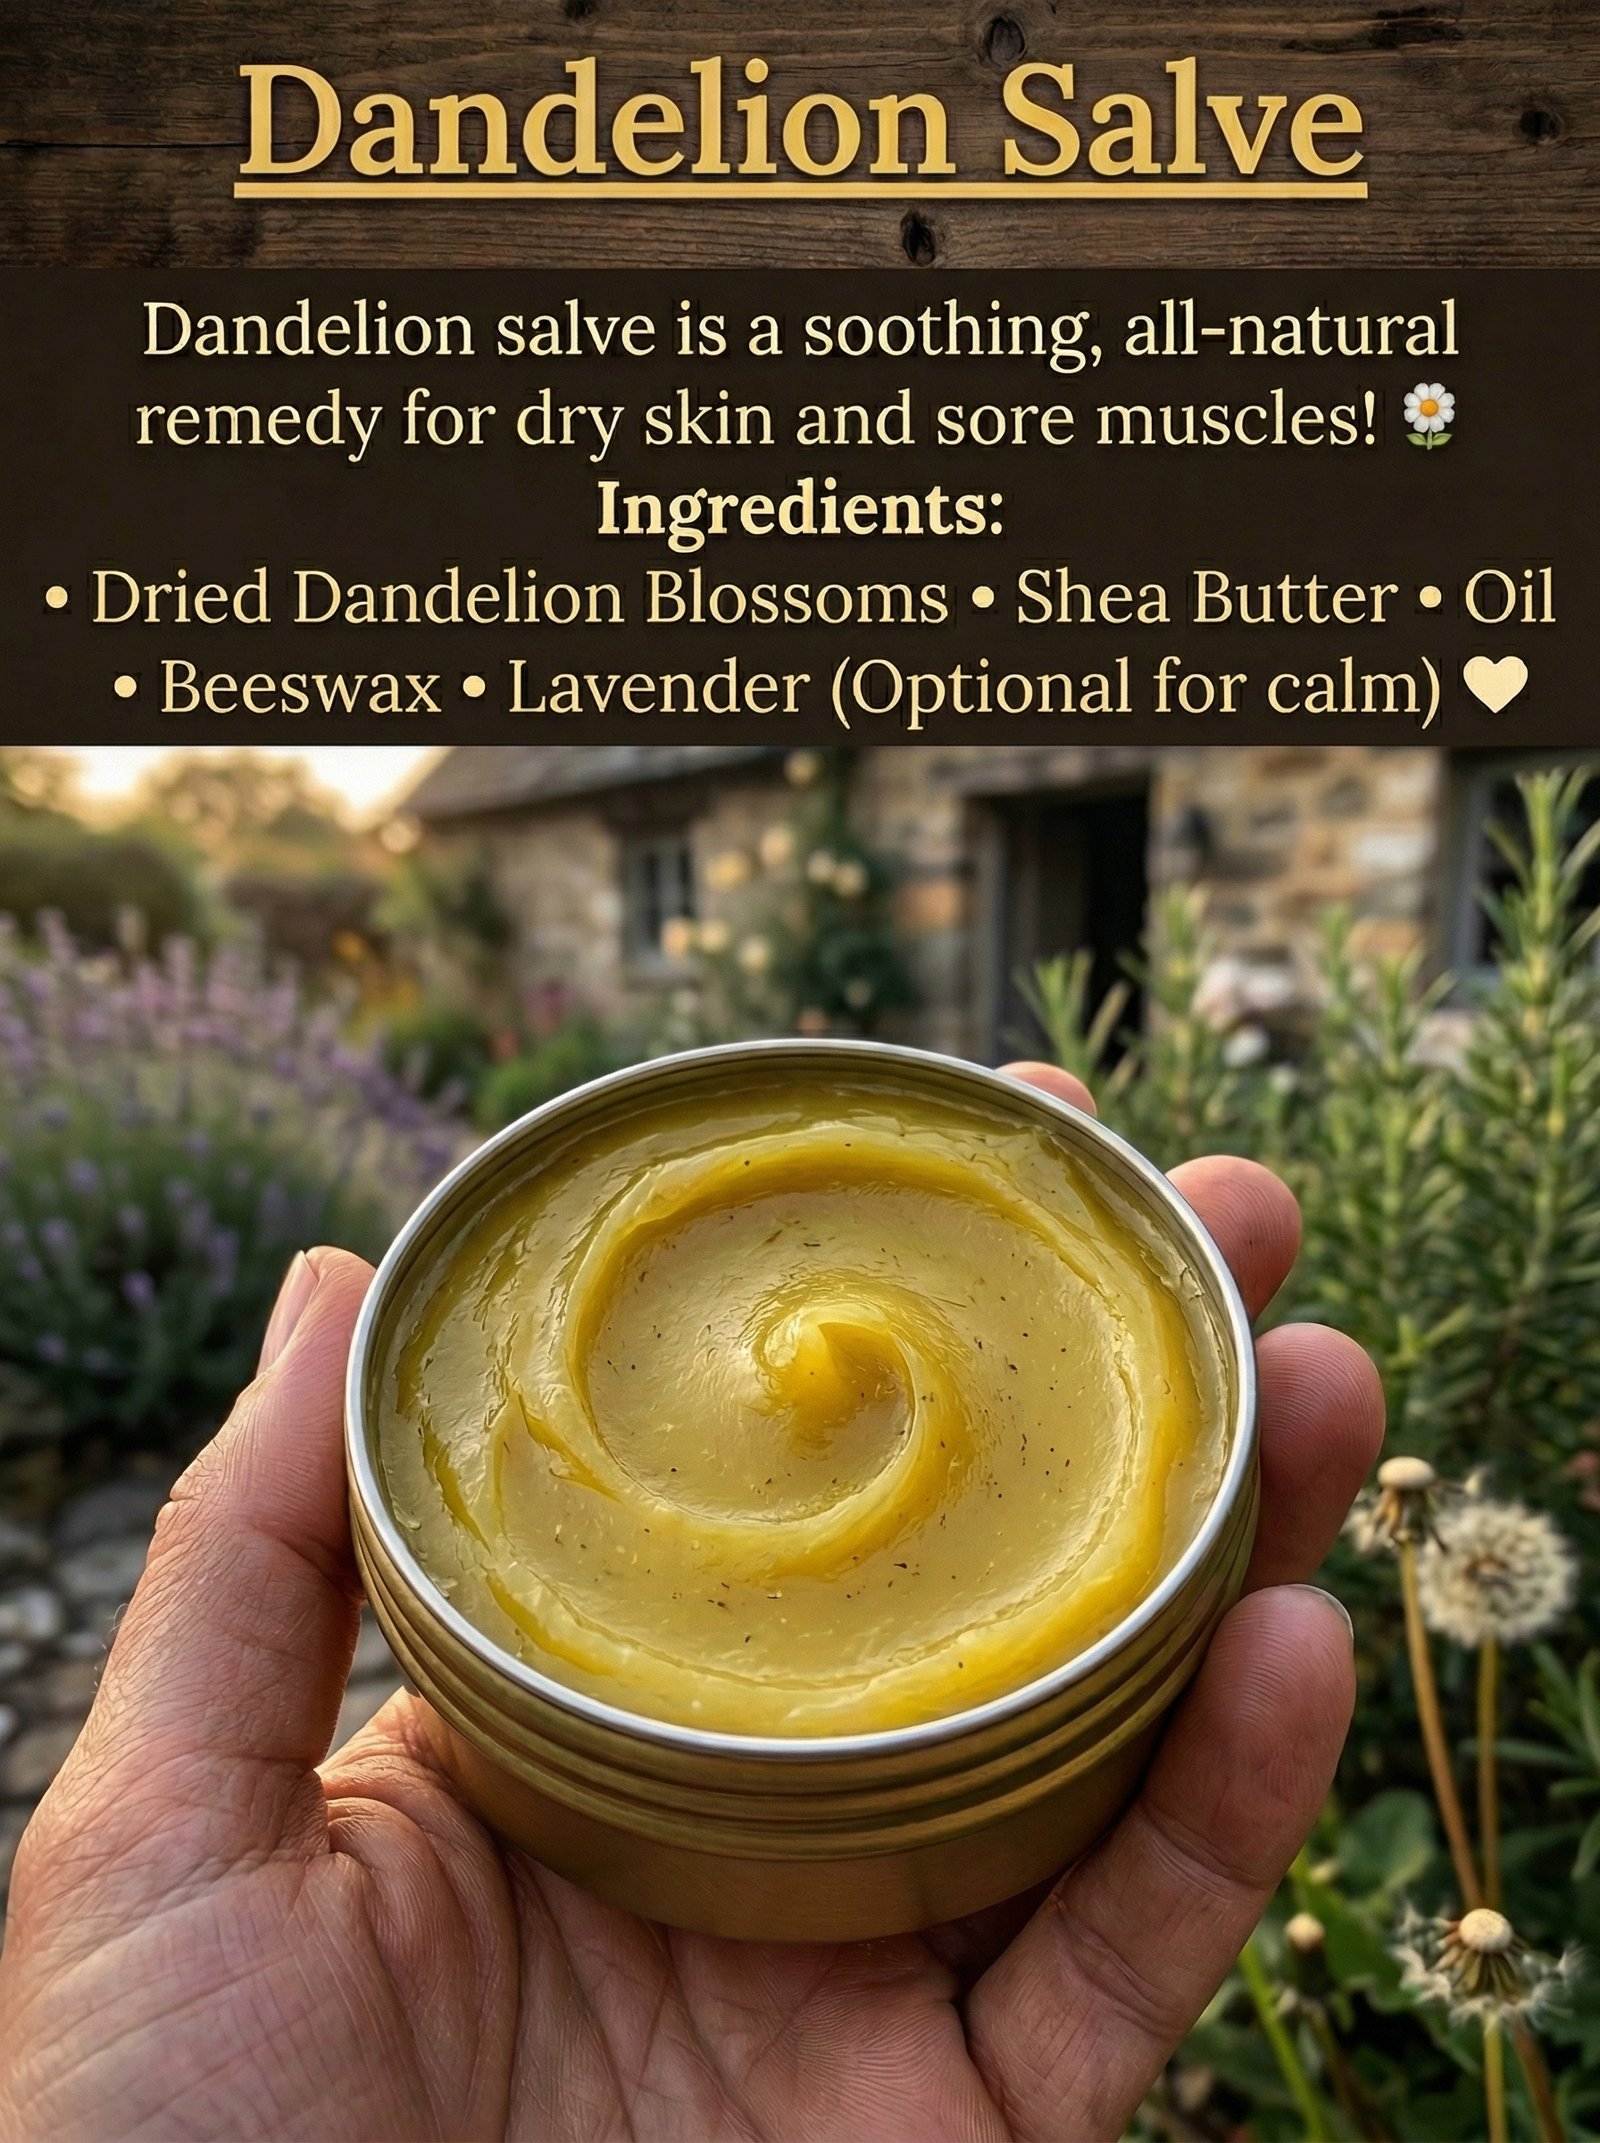
Soothing Dandelion Salve

Soothing Dandelion Salve

Ingredients

  • Dried Dandelion Blossoms: The core medicinal herb.

  • Carrier Oil: Such as olive, almond, or jojoba oil.

  • Shea Butter: For deep moisturization and a creamy texture.

  • Beeswax: To provide structure and create a protective barrier on the skin.

  • Lavender (Optional): Added for a calming scent and additional skin-soothing properties.


Instructions

Step 1: Infuse the Oil

Place your dried dandelion blossoms into a clean glass jar and cover them completely with your chosen carrier oil. You can use the “solar method” by letting it sit in a sunny window for 2–4 weeks, or the “quick method” by heating the jar in a water bath (double boiler) on very low heat for 3–4 hours.

Step 2: Strain the Herbs

Once the oil has taken on the properties of the dandelions, strain the mixture through a cheesecloth or fine-mesh sieve into a clean bowl. Squeeze the cloth well to get every drop of infused oil.

Step 3: Melt the Base

In a double boiler over medium-low heat, combine your infused dandelion oil with the shea butter and beeswax. A common ratio is 1 cup of infused oil to 1 ounce of beeswax and 1/4 cup of shea butter, depending on how firm you want the final salve.

Step 4: Add Aromatics

Once the beeswax and shea butter have completely melted into the oil, remove the mixture from the heat. If you are using lavender, stir in a few drops of lavender essential oil or dried lavender buds at this stage.

Step 5: Pour and Set

Carefully pour the liquid mixture into clean metal tins or glass jars. Let the salve sit undisturbed at room temperature until it has completely cooled and solidified.


Questions & Answers

Q: Why do the dandelion blossoms need to be dried first? A: Using fresh flowers can introduce moisture into your salve, which can lead to mold growth. Drying the blossoms ensures your salve has a long, stable shelf life.

Q: Is this salve safe for sensitive skin? A: Dandelion and shea butter are generally very gentle; however, it is always recommended to perform a small patch test on a small area of skin before applying it more broadly.

Q: How long does the salve last? A: If stored in a cool, dark place, a dandelion salve typically remains effective for 6 to 12 months.

Q: Can I use this on my face? A: While it is excellent for dry patches, shea butter and beeswax can be heavy. If you have oily or acne-prone skin, it is best used on the body, hands, and feet rather than the face.

Daily Cinnamon Wellness Practice

Daily Cinnamon Wellness Practice

This simple ritual focuses on the natural properties of cinnamon to support cardiovascular health and metabolic balance. Using the sublingual method (placing it under the tongue) allows for quick absorption of the spice’s beneficial compounds.


Ingredients

  • 1 tsp ground Ceylon cinnamon

  • Optional: A small amount of water or honey to help with palatability


Instructions

  1. Measure: Take exactly one teaspoon of high-quality ground cinnamon.

  2. Position: Place the cinnamon directly under your tongue.

  3. Hold: Keep the cinnamon in place for approximately 30 seconds.

  4. Absorb: Allow the nutrients to begin absorbing before swallowing or rinsing with a small sip of water.

  5. Frequency: This can be practiced daily as part of a consistent wellness routine.


Benefits

  • Blood Sugar Regulation: Cinnamon may improve insulin sensitivity, aiding in more stable blood sugar management.

  • Heart & Circulation: Rich in antioxidants, it helps protect heart tissues and may improve overall blood flow.

  • Anti-Inflammatory: The natural properties of the spice help reduce internal inflammation, which supports long-term health.


Questions & Answers

Q: Why is “Ceylon” cinnamon specifically recommended?

  • A: Ceylon cinnamon is preferred because it contains significantly lower levels of coumarin compared to the more common Cassia variety. High doses of coumarin can be taxing on the liver, making Ceylon the safer choice for daily use.

Q: What if I find the dry powder too difficult to hold under my tongue?

  • A: If the dry texture is uncomfortable, you can mix the teaspoon of cinnamon with a tiny drop of honey to create a paste, or simply stir it into your morning coffee, oatmeal, or a smoothie to still receive the nutritional benefits.

Q: Can I do this if I am on blood pressure medication?

  • A: While cinnamon may help naturally reduce blood pressure due to its anti-inflammatory effects, it is essential to consult with your healthcare professional before starting this routine to ensure it does not interfere with your specific medications.


Notes for Best Results

  • Consistency is Key: For optimal metabolic and heart benefits, aim for regular daily use rather than occasional intake.

  • Synergy Tip: For an added boost, you can combine your daily cinnamon with a pinch of turmeric to increase the anti-inflammatory impact.

    Daily Cinnamon Wellness Practice

    This simple ritual focuses on the natural properties of cinnamon to support cardiovascular health and metabolic balance. Using the sublingual method (placing it under the tongue) allows for quick absorption of the spice’s beneficial compounds.


    Ingredients

    • 1 tsp ground Ceylon cinnamon

    • Optional: A small amount of water or honey to help with palatability


    Instructions

    1. Measure: Take exactly one teaspoon of high-quality ground cinnamon.

    2. Position: Place the cinnamon directly under your tongue.

    3. Hold: Keep the cinnamon in place for approximately 30 seconds.

    4. Absorb: Allow the nutrients to begin absorbing before swallowing or rinsing with a small sip of water.

    5. Frequency: This can be practiced daily as part of a consistent wellness routine.


    Benefits

    • Blood Sugar Regulation: Cinnamon may improve insulin sensitivity, aiding in more stable blood sugar management.

    • Heart & Circulation: Rich in antioxidants, it helps protect heart tissues and may improve overall blood flow.

    • Anti-Inflammatory: The natural properties of the spice help reduce internal inflammation, which supports long-term health.


    Questions & Answers

    Q: Why is “Ceylon” cinnamon specifically recommended?

    • A: Ceylon cinnamon is preferred because it contains significantly lower levels of coumarin compared to the more common Cassia variety. High doses of coumarin can be taxing on the liver, making Ceylon the safer choice for daily use.

    Q: What if I find the dry powder too difficult to hold under my tongue?

    • A: If the dry texture is uncomfortable, you can mix the teaspoon of cinnamon with a tiny drop of honey to create a paste, or simply stir it into your morning coffee, oatmeal, or a smoothie to still receive the nutritional benefits.

    Q: Can I do this if I am on blood pressure medication?

    • A: While cinnamon may help naturally reduce blood pressure due to its anti-inflammatory effects, it is essential to consult with your healthcare professional before starting this routine to ensure it does not interfere with your specific medications.


    Notes for Best Results

    • Consistency is Key: For optimal metabolic and heart benefits, aim for regular daily use rather than occasional intake.

    • Synergy Tip: For an added boost, you can combine your daily cinnamon with a pinch of turmeric to increase the anti-inflammatory impact.

Golden Coconut Crust Cake

Golden Coconut Crust Cake

This vibrant, crusty coconut cake is the perfect solution for a healthy, satisfying dessert. It is completely free of flour and sugar, relying on the natural sweetness and texture of coconut.


Ingredients

  • 2 cups unsweetened shredded coconut

  • 4 large eggs

  • 1 cup full-fat coconut milk (canned)

  • 1/2 cup granulated monk fruit or erythritol (or your preferred sugar-free sweetener)

  • 1/4 cup melted coconut oil

  • 1 tsp vanilla extract

  • 1/2 tsp baking powder

  • A pinch of salt


Instructions

  1. Preparation: Preheat your oven to 180°C (350°F). Lightly grease a glass baking dish with coconut oil.

  2. Whisk Wet Ingredients: In a large mixing bowl, beat the eggs until they are light and fluffy. Stir in the coconut milk, melted coconut oil, vanilla extract, and your sugar-free sweetener until well combined.

  3. Combine Dry Ingredients: Add the shredded coconut, baking powder, and salt to the wet mixture. Fold everything together gently until the coconut has fully absorbed the liquid.

  4. Transfer: Pour the batter into your prepared baking dish. Use a spatula to smooth the surface for an even bake.

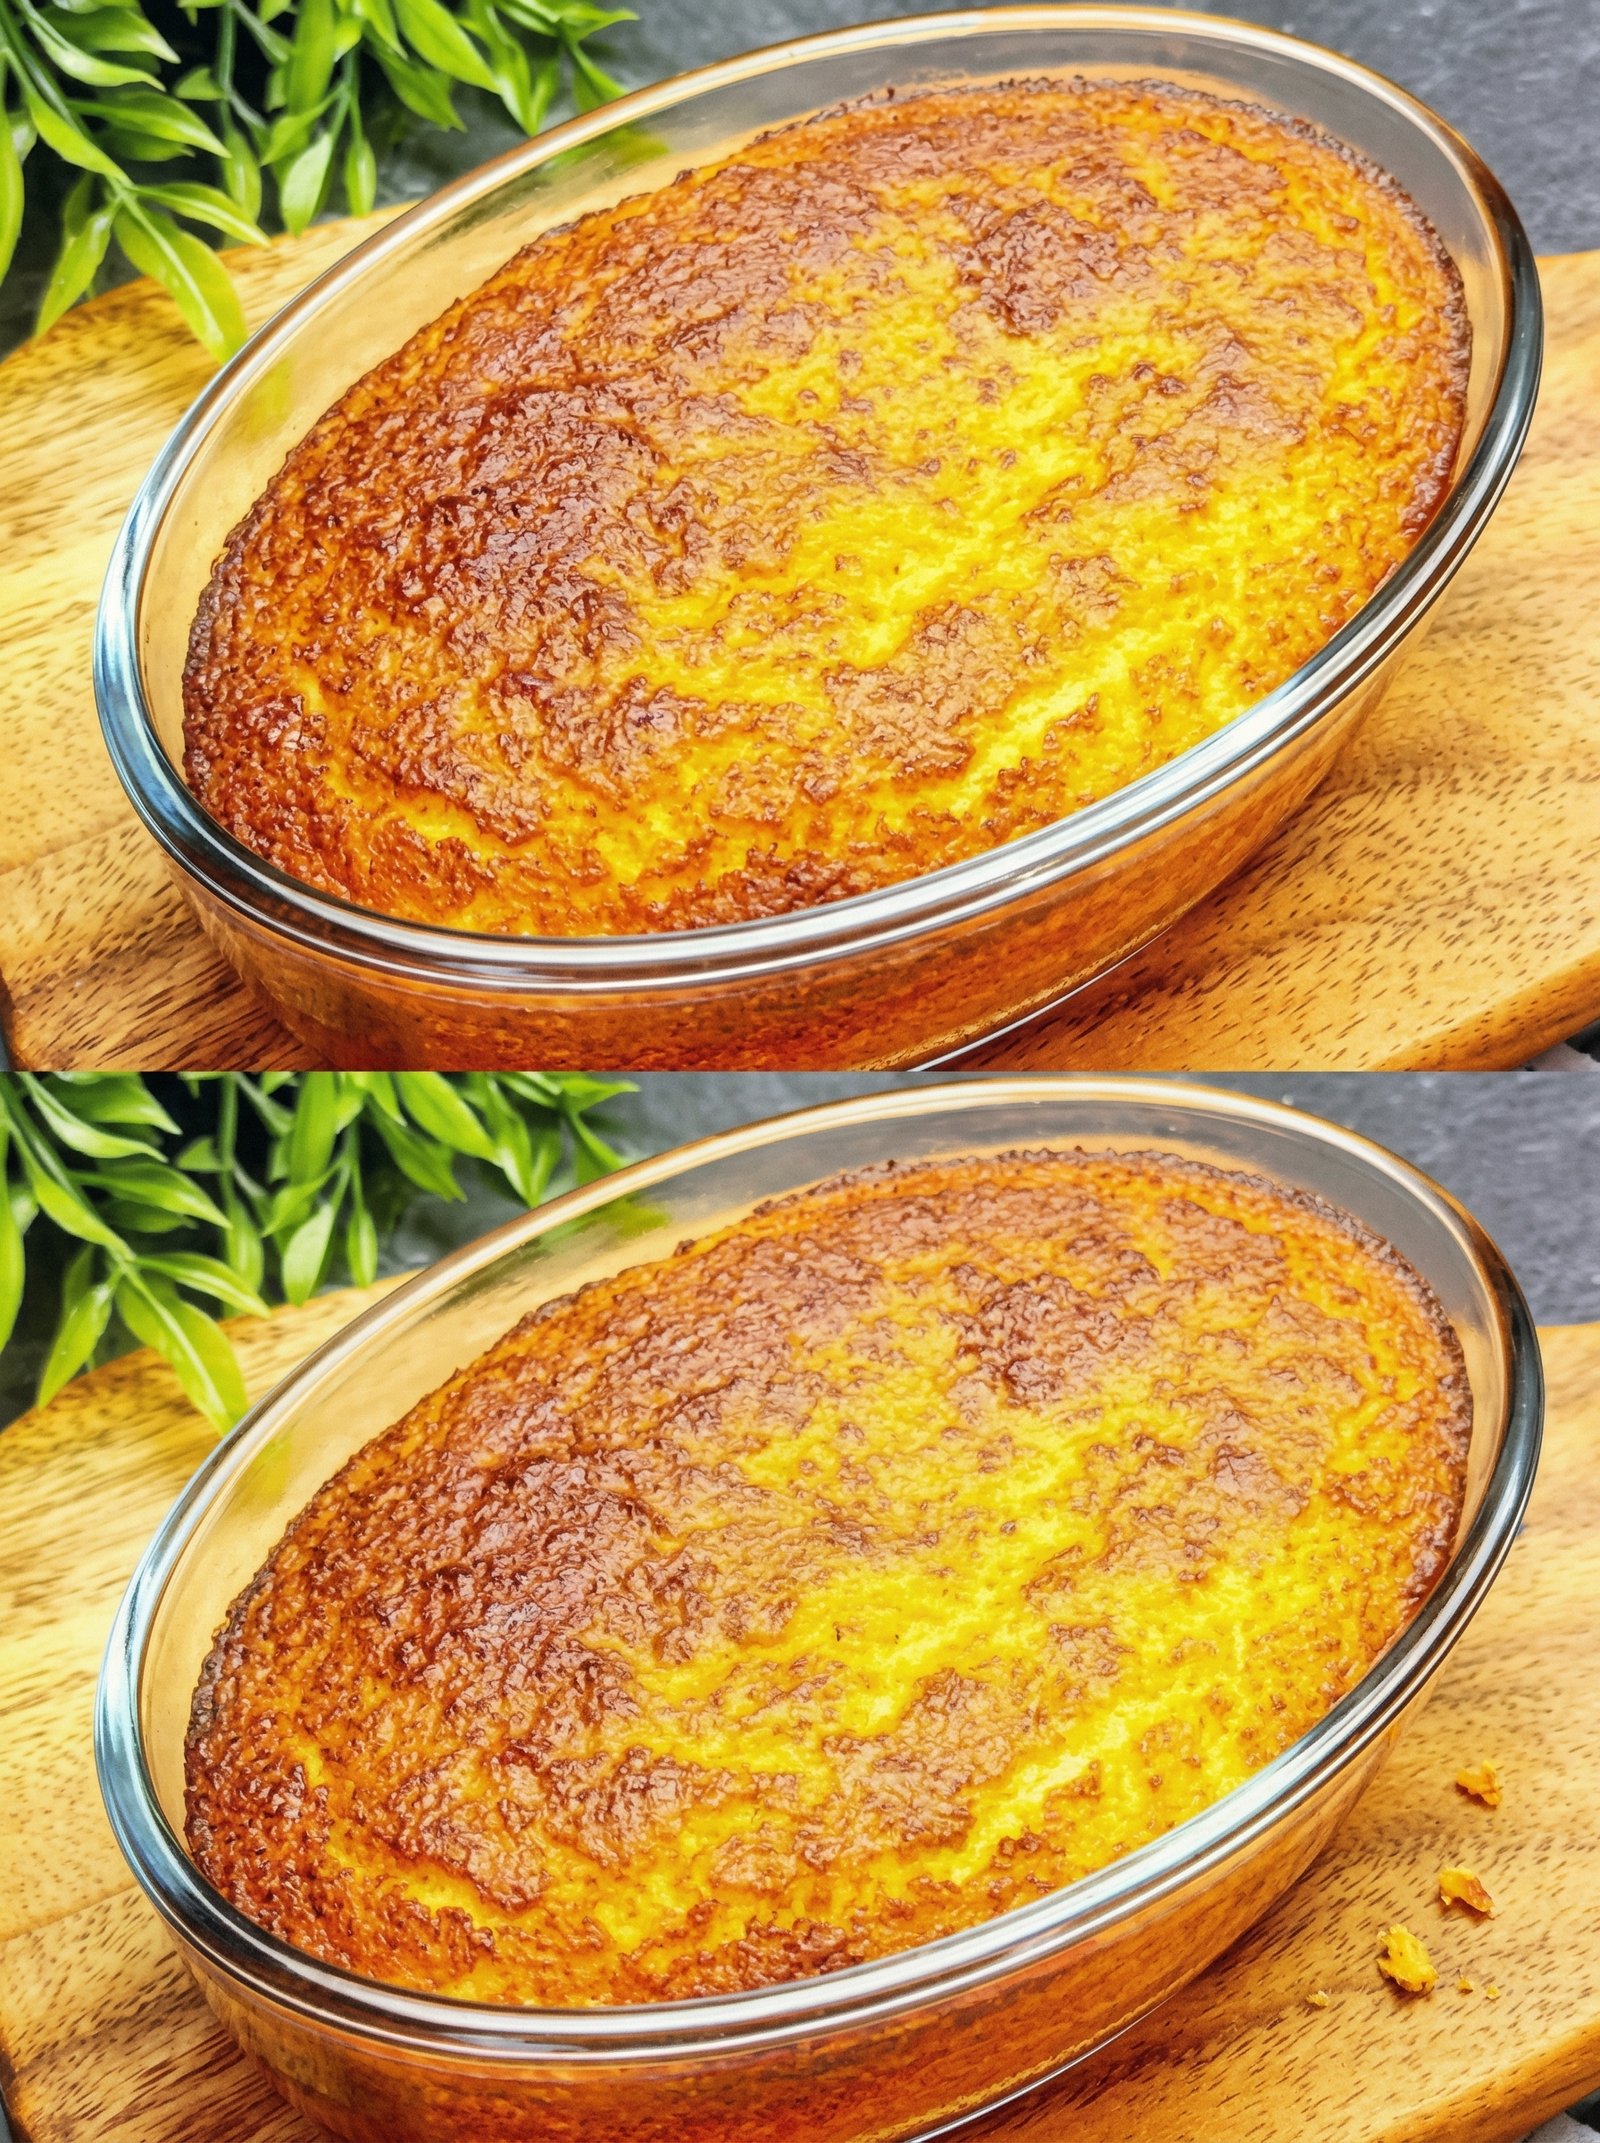
  5. Bake: Place the dish in the center of the oven and bake for 35 to 40 minutes. The top should develop a deep, toasted golden-brown color as seen in the image.

  6. Check for Doneness: Insert a toothpick into the center; it should come out clean or with just a few dry crumbs.

  7. Cooling: Allow the cake to cool in the dish for at least 20 minutes. This step is crucial as it allows the coconut structure to set, making it easier to slice.


Questions & Answers

Q: Can I use coconut flour instead of shredded coconut?

  • A: It is not recommended. Coconut flour is significantly more absorbent than shredded coconut and would make the cake very dry. This recipe specifically uses shredded coconut to provide the necessary structure without flour.

Q: Why does the top look so dark?

  • A: Shredded coconut contains natural oils that toast quickly under high heat. This creates a caramelized, “crunchy” crust that adds a wonderful depth of flavor to the dessert.

Q: How should I store this cake?

  • A: Due to the moisture from the coconut milk and eggs, it is best stored in an airtight container in the refrigerator for up to 5 days. It can be served chilled or slightly warmed.

Q: Is this recipe suitable for weight management programs?

  • A: Yes. By using unsweetened coconut and a sugar-free sweetener, this becomes a very low-impact dessert option for those tracking their intake or following a specific program.

Homemade Aloe Vera Hair Growth Oil

Homemade Aloe Vera Hair Growth Oil

  • Prep time: 10 minutes

  • Infusion time: 15 minutes

  • Shelf life: 2–3 weeks

Ingredients

  • 2 to 3 Fresh Aloe Vera Leaves: Provides vitamins A, C, E, and B12.

  • 1 Cup Carrier Oil: Coconut oil is excellent for deep penetration, while Olive oil is great for scalp moisture.

  • 1 Tablespoon Castor Oil (Optional): Highly recommended for those focusing specifically on thickening and hair loss control.


Step-by-Step Instructions

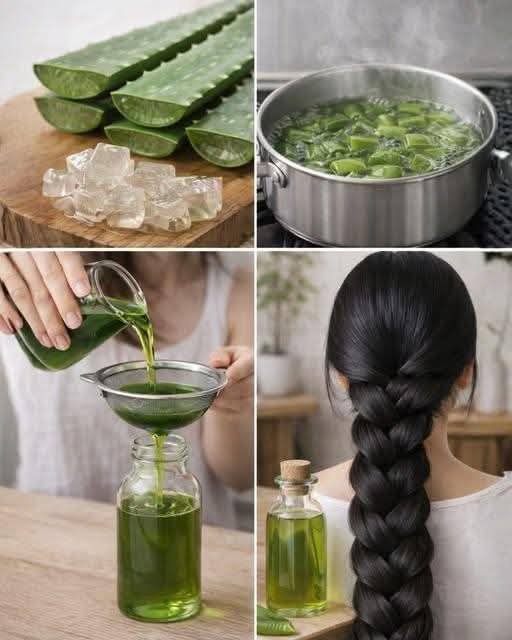
  1. Extract the Gel: Wash the leaves thoroughly to remove any dirt. Trim the spiked edges, then slice the leaf open lengthwise. Use a spoon to scoop out the clear inner gel.

    Note: Be careful to avoid the yellow sap (latex) near the skin, as it can be an irritant for some people.

  2. Prepare the Gel: Cut the clear gel into small, uniform cubes. This increased surface area allows the oil to extract the nutrients more efficiently during the heating process.

  3. Combine and Heat: Place your carrier oil (Coconut or Olive) in a heavy-bottomed pan over low heat. Add the aloe cubes immediately. It is vital to keep the heat low to prevent frying the gel, which can destroy the delicate enzymes.

  4. The Infusion Process: Simmer the mixture for 10 to 15 minutes, stirring occasionally. You are looking for the gel to turn translucent or slightly brown and for the oil to take on a very faint greenish tint.

  5. Cool and Strain: Remove the pan from the heat and let it sit until it reaches room temperature. Use a fine mesh sieve or a piece of cheesecloth to strain the oil into a clean, dry glass jar. Discard the spent aloe bits.

  6. Final Fortification: If you are using Castor oil, stir it into the cooled, strained mixture now. Close the lid tightly and store it in a cool, dark place.


Questions & Answers

Q: Can I use store-bought Aloe Vera gel instead of fresh leaves? A: It is best to use fresh leaves. Store-bought gels often contain thickeners, preservatives, and alcohols that do not react well to heat and may not blend properly with the oil.

Q: Why did my oil turn cloudy? A: Cloudiness usually happens if there is still water content from the aloe in the oil. To prevent this, ensure the aloe gel is patted dry before adding it to the oil and ensure you simmer it long enough for the moisture to evaporate.

Q: How often should I apply this for noticeable results? A: Consistency is key with natural remedies. Aim for 2 to 3 times a week. Most people begin to notice a difference in hair texture within a month, while growth changes usually take 8–12 weeks of regular use.

Q: Is this safe for color-treated hair? A: Yes, this natural oil is generally safe for color-treated hair. In fact, the proteolytic enzymes in aloe can help repair the chemical damage often associated with hair dye.

Q: Can I leave this in my hair all day? A: While you can, it is quite a heavy treatment. Leaving it on for 1 to 2 hours provides ample time for the scalp to absorb the nutrients. If you have very dry hair, an overnight treatment is fine, but be sure to protect your pillowcase!

Creamy Garlic & Herb Scalloped Potatoes

🥔 Creamy Garlic & Herb Scalloped Potatoes

Ingredients

  • Potatoes: 2.5 lbs (about 6-7 medium) Yukon Gold or Russet, peeled and sliced into 1/8-inch rounds.

  • Aromatics: 4 cloves garlic (minced), 1 small shallot (finely diced).

  • The Sauce: 2 cups heavy cream, 1/2 cup whole milk, 2 tbsp butter.

  • Herbs & Seasoning: 1 tbsp fresh thyme (chopped), 1 tsp salt, 1/2 tsp black pepper, 1/4 tsp nutmeg.

  • Cheese (Optional): 1.5 cups shredded Gruyère or sharp Cheddar.


Step-By-Step Instructions

  1. Prep the Oven & Pan ➔ Preheat your oven to 375°F (190°C). Lightly grease a 9×13 inch baking dish with butter or cooking spray.

  2. Slice the Potatoes ➔ Peel your potatoes and slice them into uniform rounds.

    Pro Tip: Using a mandoline slicer ensures they all cook at the same rate!

  3. Prepare the Herb Cream ➔ In a medium saucepan over medium heat, melt the butter. Add the shallots and garlic, sautéing for 2 minutes until fragrant. Stir in the heavy cream, milk, thyme, salt, pepper, and nutmeg. Bring to a gentle simmer (do not boil), then remove from heat.

  4. Layer the Dish ➔ Arrange half of the potato slices in the prepared baking dish, overlapping them slightly.

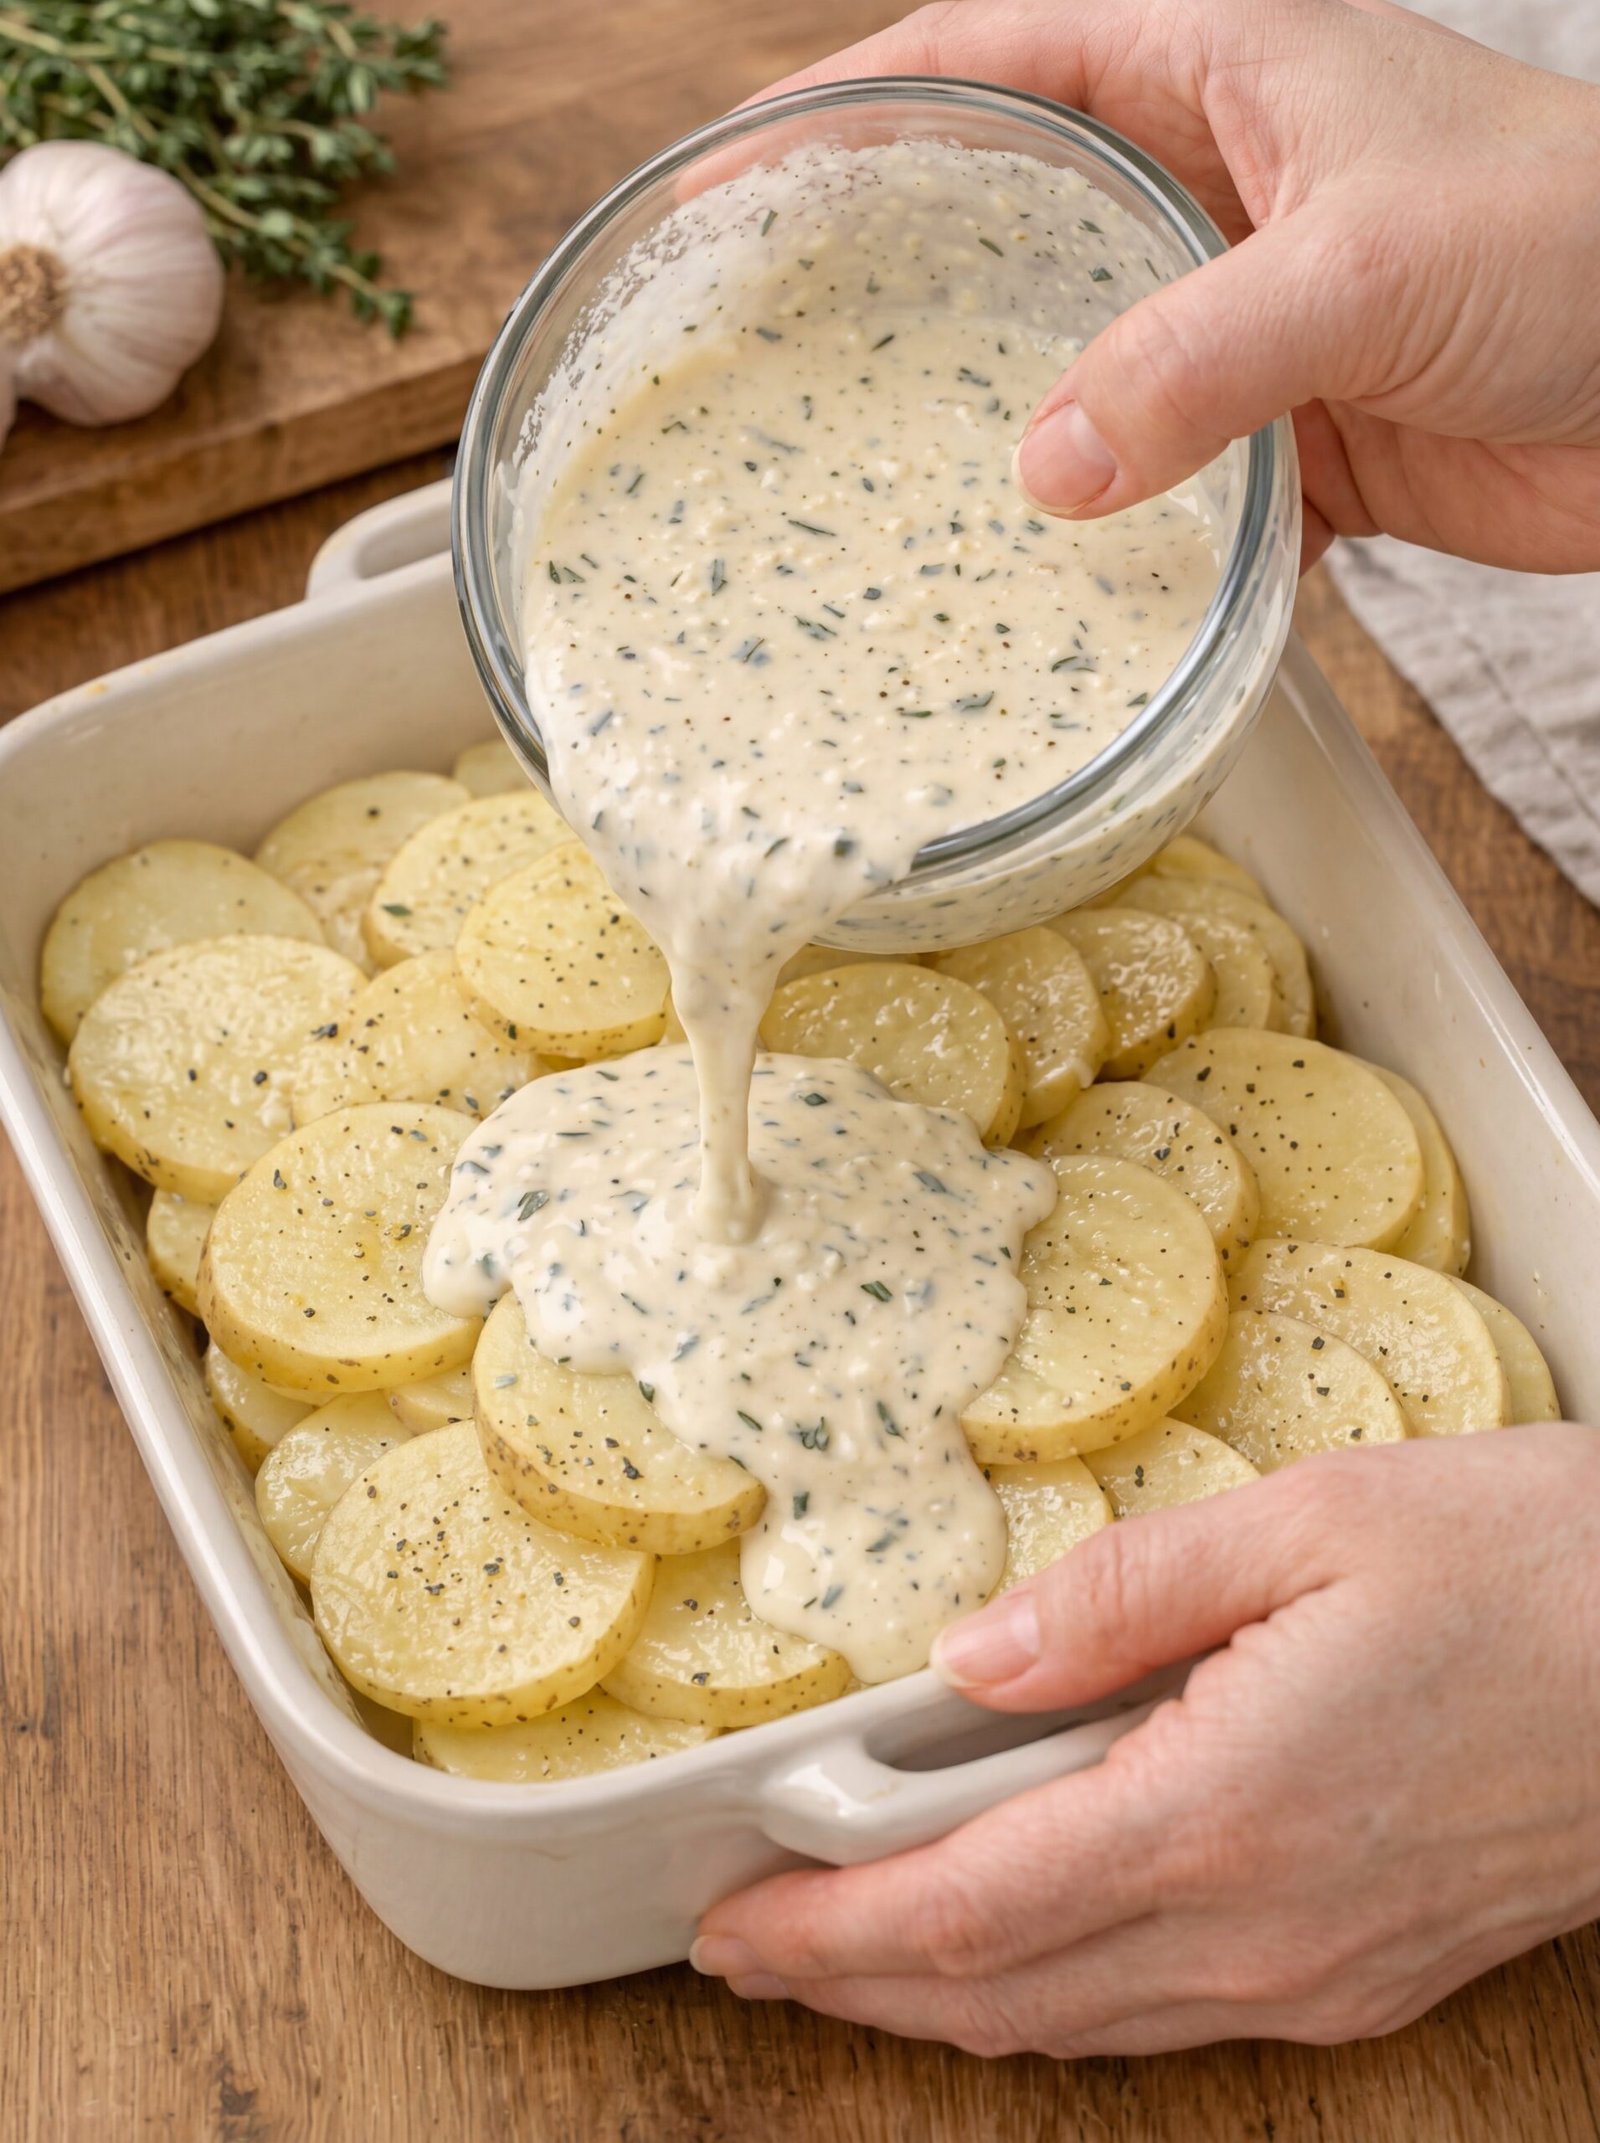
  5. Pour the Sauce ➔ Pour half of the warm cream mixture over the first layer. If using cheese, sprinkle half of it now. Repeat with the remaining potatoes and the rest of the sauce.

  6. The First Bake ➔ Cover the dish tightly with aluminum foil. Bake for 45 minutes.

  7. The Final Crisp ➔ Remove the foil. Sprinkle the remaining cheese on top. Bake uncovered for another 20–30 minutes until the potatoes are tender when pierced with a fork and the top is golden brown and bubbly.

  8. Rest ➔ Let the dish sit for 10 minutes before serving. This allows the sauce to thicken up so it isn’t runny! 🕒


❓ Common Questions (Q&A)

Q: Can I use milk instead of heavy cream? A: You can, but the sauce will be thinner and less stable. If using milk, whisk 2 tablespoons of flour into the butter and garlic first to create a “roux” to help it thicken. 🥛

Q: Why are my potatoes still hard after baking? A: Usually, this means the slices were too thick or the dish wasn’t covered tightly enough. Ensure the foil creates a good seal to steam the potatoes. 🥘

Q: Can I make this ahead of time? A: Yes! You can bake it fully, let it cool, and refrigerate. Reheat it covered in the oven at 350°F until warmed through. ❄️

Pumpkin & Roasted Seed Heart-Healthy Bowl

Pumpkin & Roasted Seed Heart-Healthy Bowl

Description

A nutrient-dense dish combining roasted pumpkin and crunchy pumpkin seeds. It’s rich in fiber, healthy fats, vitamins, and minerals that can support overall health—especially heart health and blood sugar balance when part of a balanced diet.

 Ingredients (Serves 2–3)

  • 2 cups fresh pumpkin (cubed)
  • ½ cup pumpkin seeds (raw, shelled)
  • 1 tbsp olive oil
  • 1 clove garlic (minced)
  • ½ tsp turmeric
  • ½ tsp cinnamon
  • Salt & black pepper to taste
  • 1 tbsp lemon juice
  • Optional: chopped parsley or spinach

 Instructions

  1. Roast the pumpkin
    • Preheat oven to 400°F (200°C).
    • Toss pumpkin cubes with olive oil, garlic, turmeric, salt, and pepper.
    • Roast for 25–30 minutes until tender.
  2. Toast the seeds
    • In a dry pan, toast pumpkin seeds for 3–5 minutes until lightly golden.
  3. Combine
    • Mix roasted pumpkin with seeds.
    • Add lemon juice and cinnamon.
    • Garnish with greens if desired.
  4. Serve warm as a side or light main dish.

 Notes & Tips

  • Pumpkin seeds are rich in magnesium and healthy fats.
  • Add chickpeas or grilled chicken for extra protein.
  • For better blood sugar control, pair with protein or healthy fat.
  • Avoid over-salting if managing blood pressure.

 Servings

  • Makes 2–3 servings

 Approximate Nutritional Info (per serving)

  • Calories: ~180–220
  • Fiber: 5–7g
  • Protein: 6–8g
  • Healthy fats: 8–10g
  • Rich in: Vitamin A, magnesium, zinc

 Potential Benefits (Evidence-Based)

  • Blood sugar support: Fiber helps slow glucose absorption
  • Heart health: Healthy fats + antioxidants support cardiovascular function
  • Cholesterol: Seeds may help improve lipid profiles slightly
  • Anemia support: Contains iron—but not enough alone to treat anemia

⚠️ Important: This is not a cure for conditions like diabetes, high cholesterol, or anemia.

 Reality Check

Claims like “cleaning arteries” are misleading. No single food can reverse plaque buildup. A healthy diet, exercise, and medical care are key.

 Q&A

Q1: Can this recipe cure diabetes or high cholesterol?
No. It can support a healthy diet but cannot replace medical treatment.

Q2: Are pumpkin seeds good for the heart?
Yes, they contain magnesium and healthy fats that support heart health.

Q3: Is pumpkin good for blood sugar?
Yes, in moderation. It has fiber but also natural carbs—portion control matters.

Q4: Can it treat anemia?
It provides some iron, but not enough alone. Iron-rich foods and medical advice are important.

Q5: Can I eat this daily?
Yes, in reasonable portions as part of a balanced diet.

Simple Celery Hydration Juice

 Description

A fresh, light vegetable juice that supports hydration, digestion, and provides antioxidants and minerals. Best used as a morning hydration drink, not a detox cure.

 Ingredients (1 serving)

  • 6–8 fresh celery stalks (organic if possible)

  • ½ cup water (optional, if blending)

  • Optional add-ins (gentle, not detox):

    • ½ cucumber

    • Small squeeze of lemon (for taste, not “cleansing”)

 Instructions

  1. Wash celery thoroughly.

  2. Juicer method: Juice celery directly.
    Blender method: Blend with water, then strain.

  3. Drink immediately for best taste and nutrient retention.

 How to Use It (this matters)

  • Drink on an empty stomach if it feels good to you

  • 1 small glass (200–250 ml) is enough

  • Not more than 3–4 times per week

  • Stop if you experience bloating, dizziness, or diarrhea

Servings

  • 1 serving per recipe

 Approximate Nutritional Info (per serving)

  • Calories: ~40

  • Water: ~95%

  • Fiber: Low (most removed during juicing)

  • Potassium: Moderate

  • Vitamin K: High

  • Antioxidants: Present (flavonoids)

 Real Benefits (no exaggeration)

✔ Supports hydration
✔ May help reduce bloating (for some people)
✔ Provides antioxidants that support general skin health
✔ Low-calorie, sugar-light vegetable option

❌ Does NOT detox organs
❌ Does NOT cure disease
❌ Does NOT replace medical treatment

 Who Should Be Careful

  • Kidney disease (high potassium risk)

  • Low blood pressure

  • On diuretics

  • History of kidney stones (celery contains oxalates)

If that’s you → talk to a doctor first

 Q & A

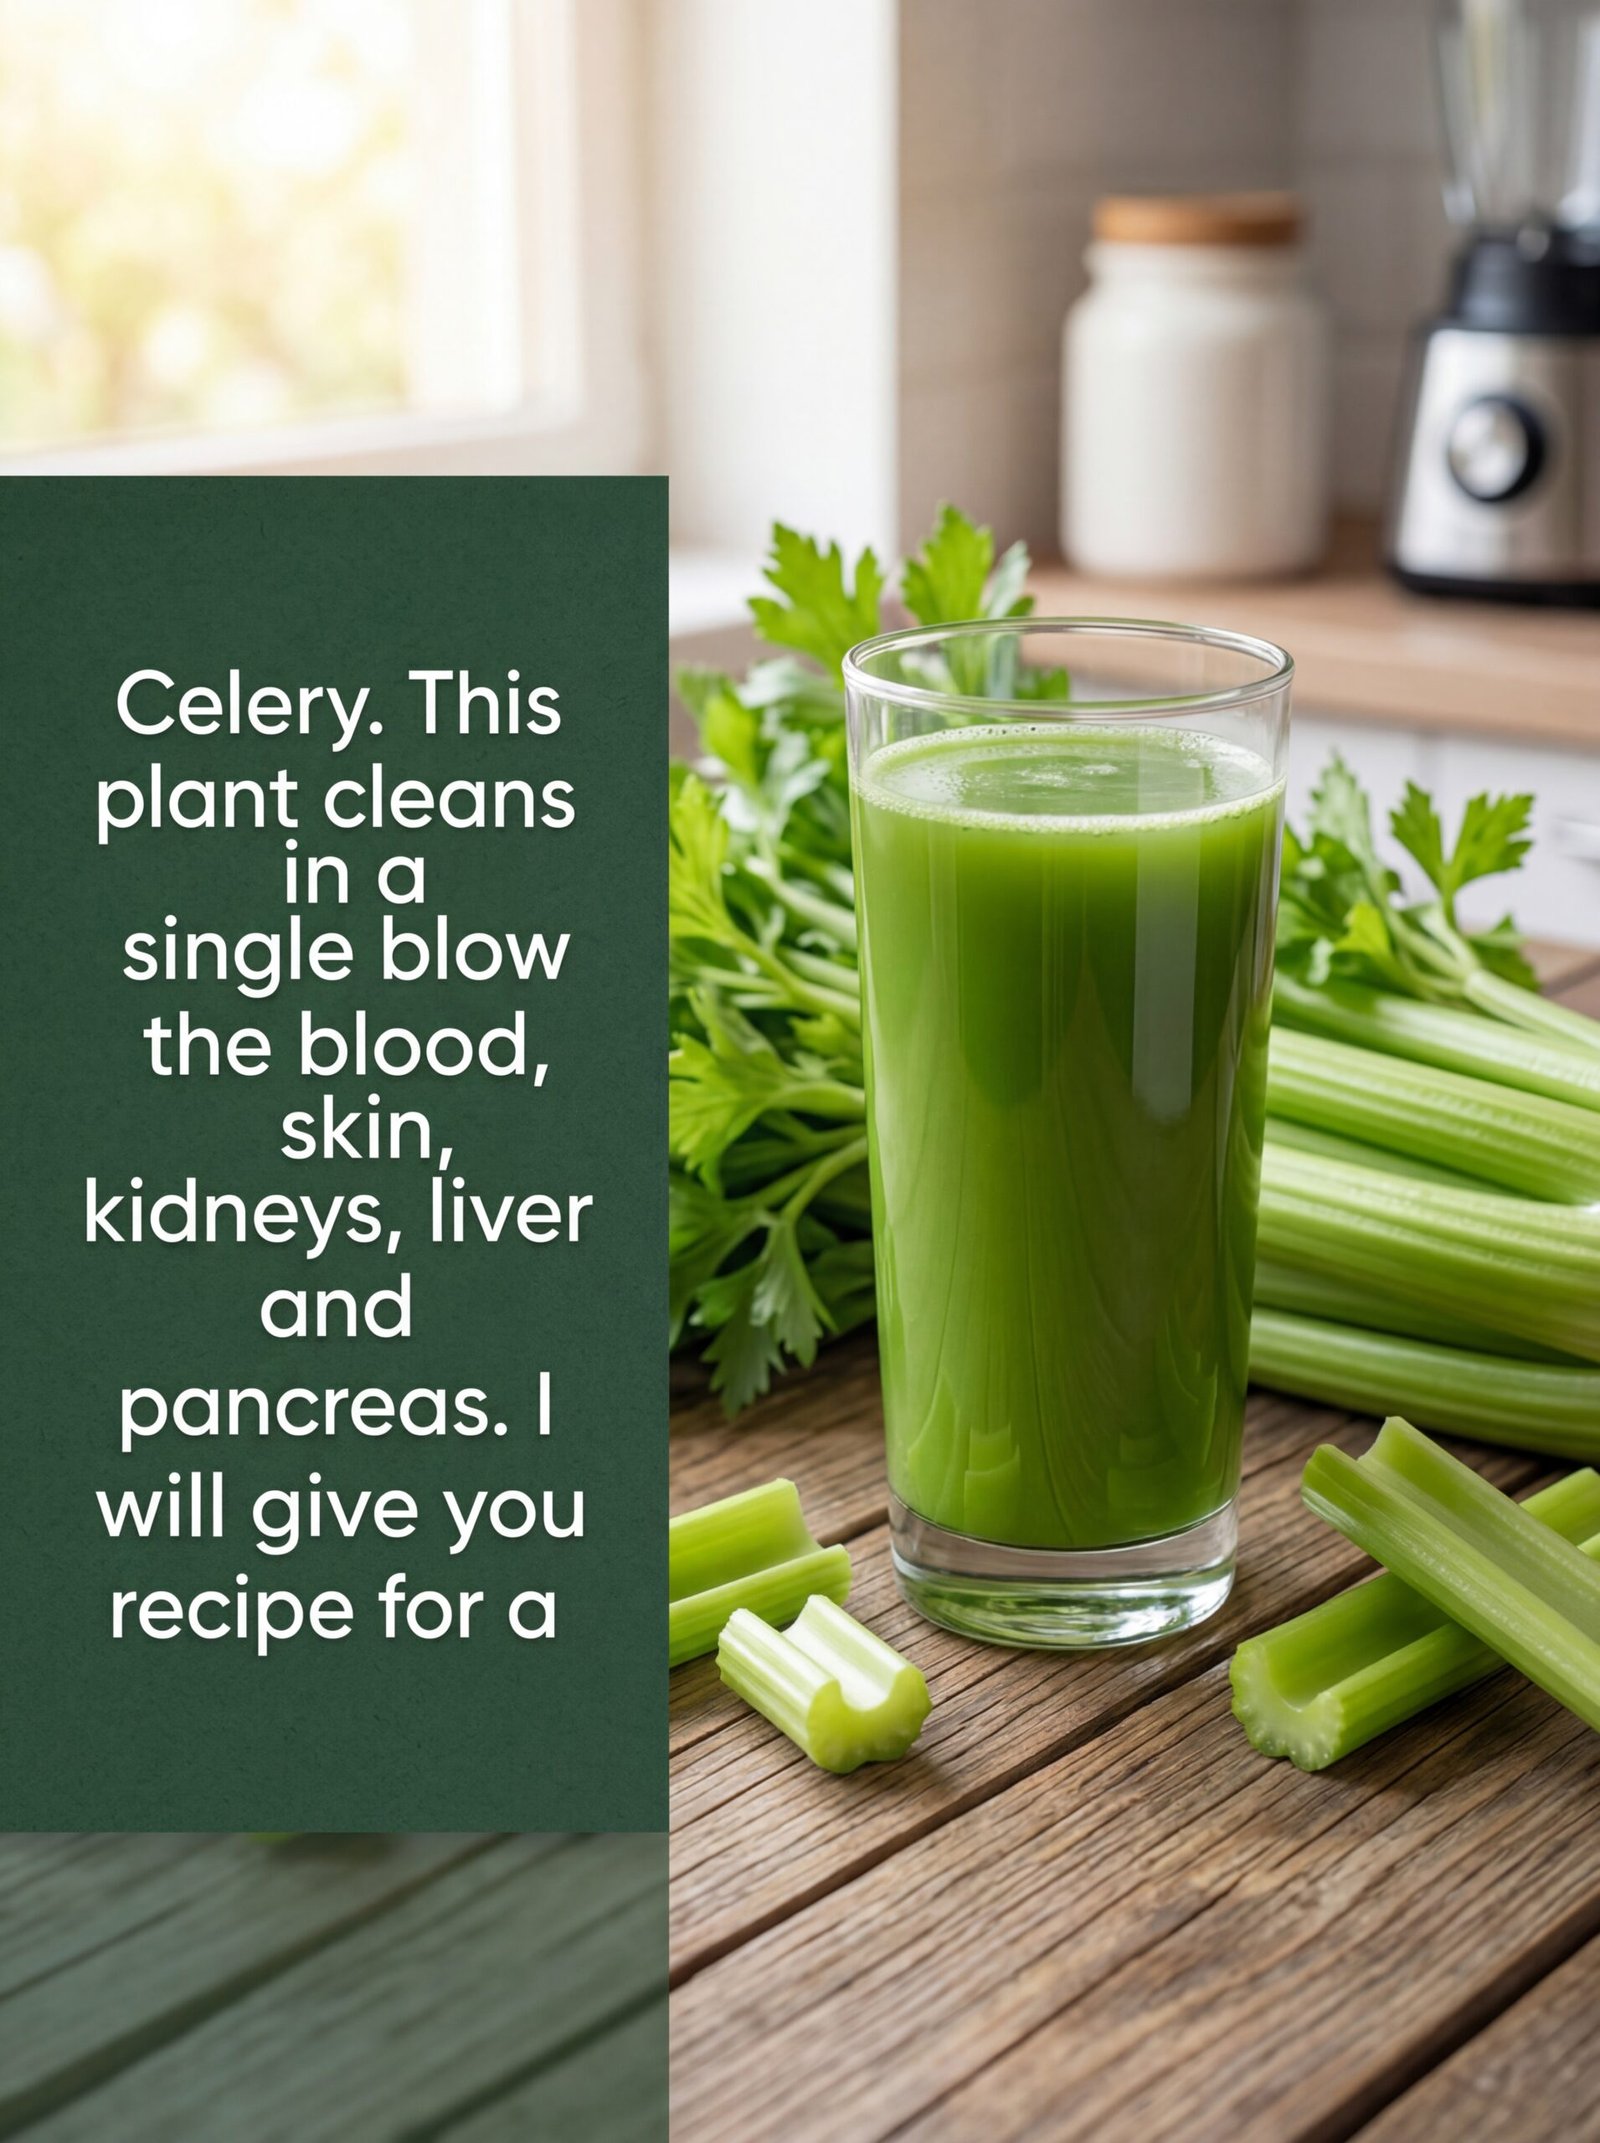
Q: Does celery juice clean the blood?
A: No. Your liver and kidneys already do that job 24/7.

Q: Can it improve skin?
A: Indirectly — hydration + nutrients may help over time, not instantly.

Q: Is it better than eating celery?
A: Eating whole celery is better for digestion because of the fiber.

Q: Can I drink it daily?
A: Not necessary and not ideal for everyone

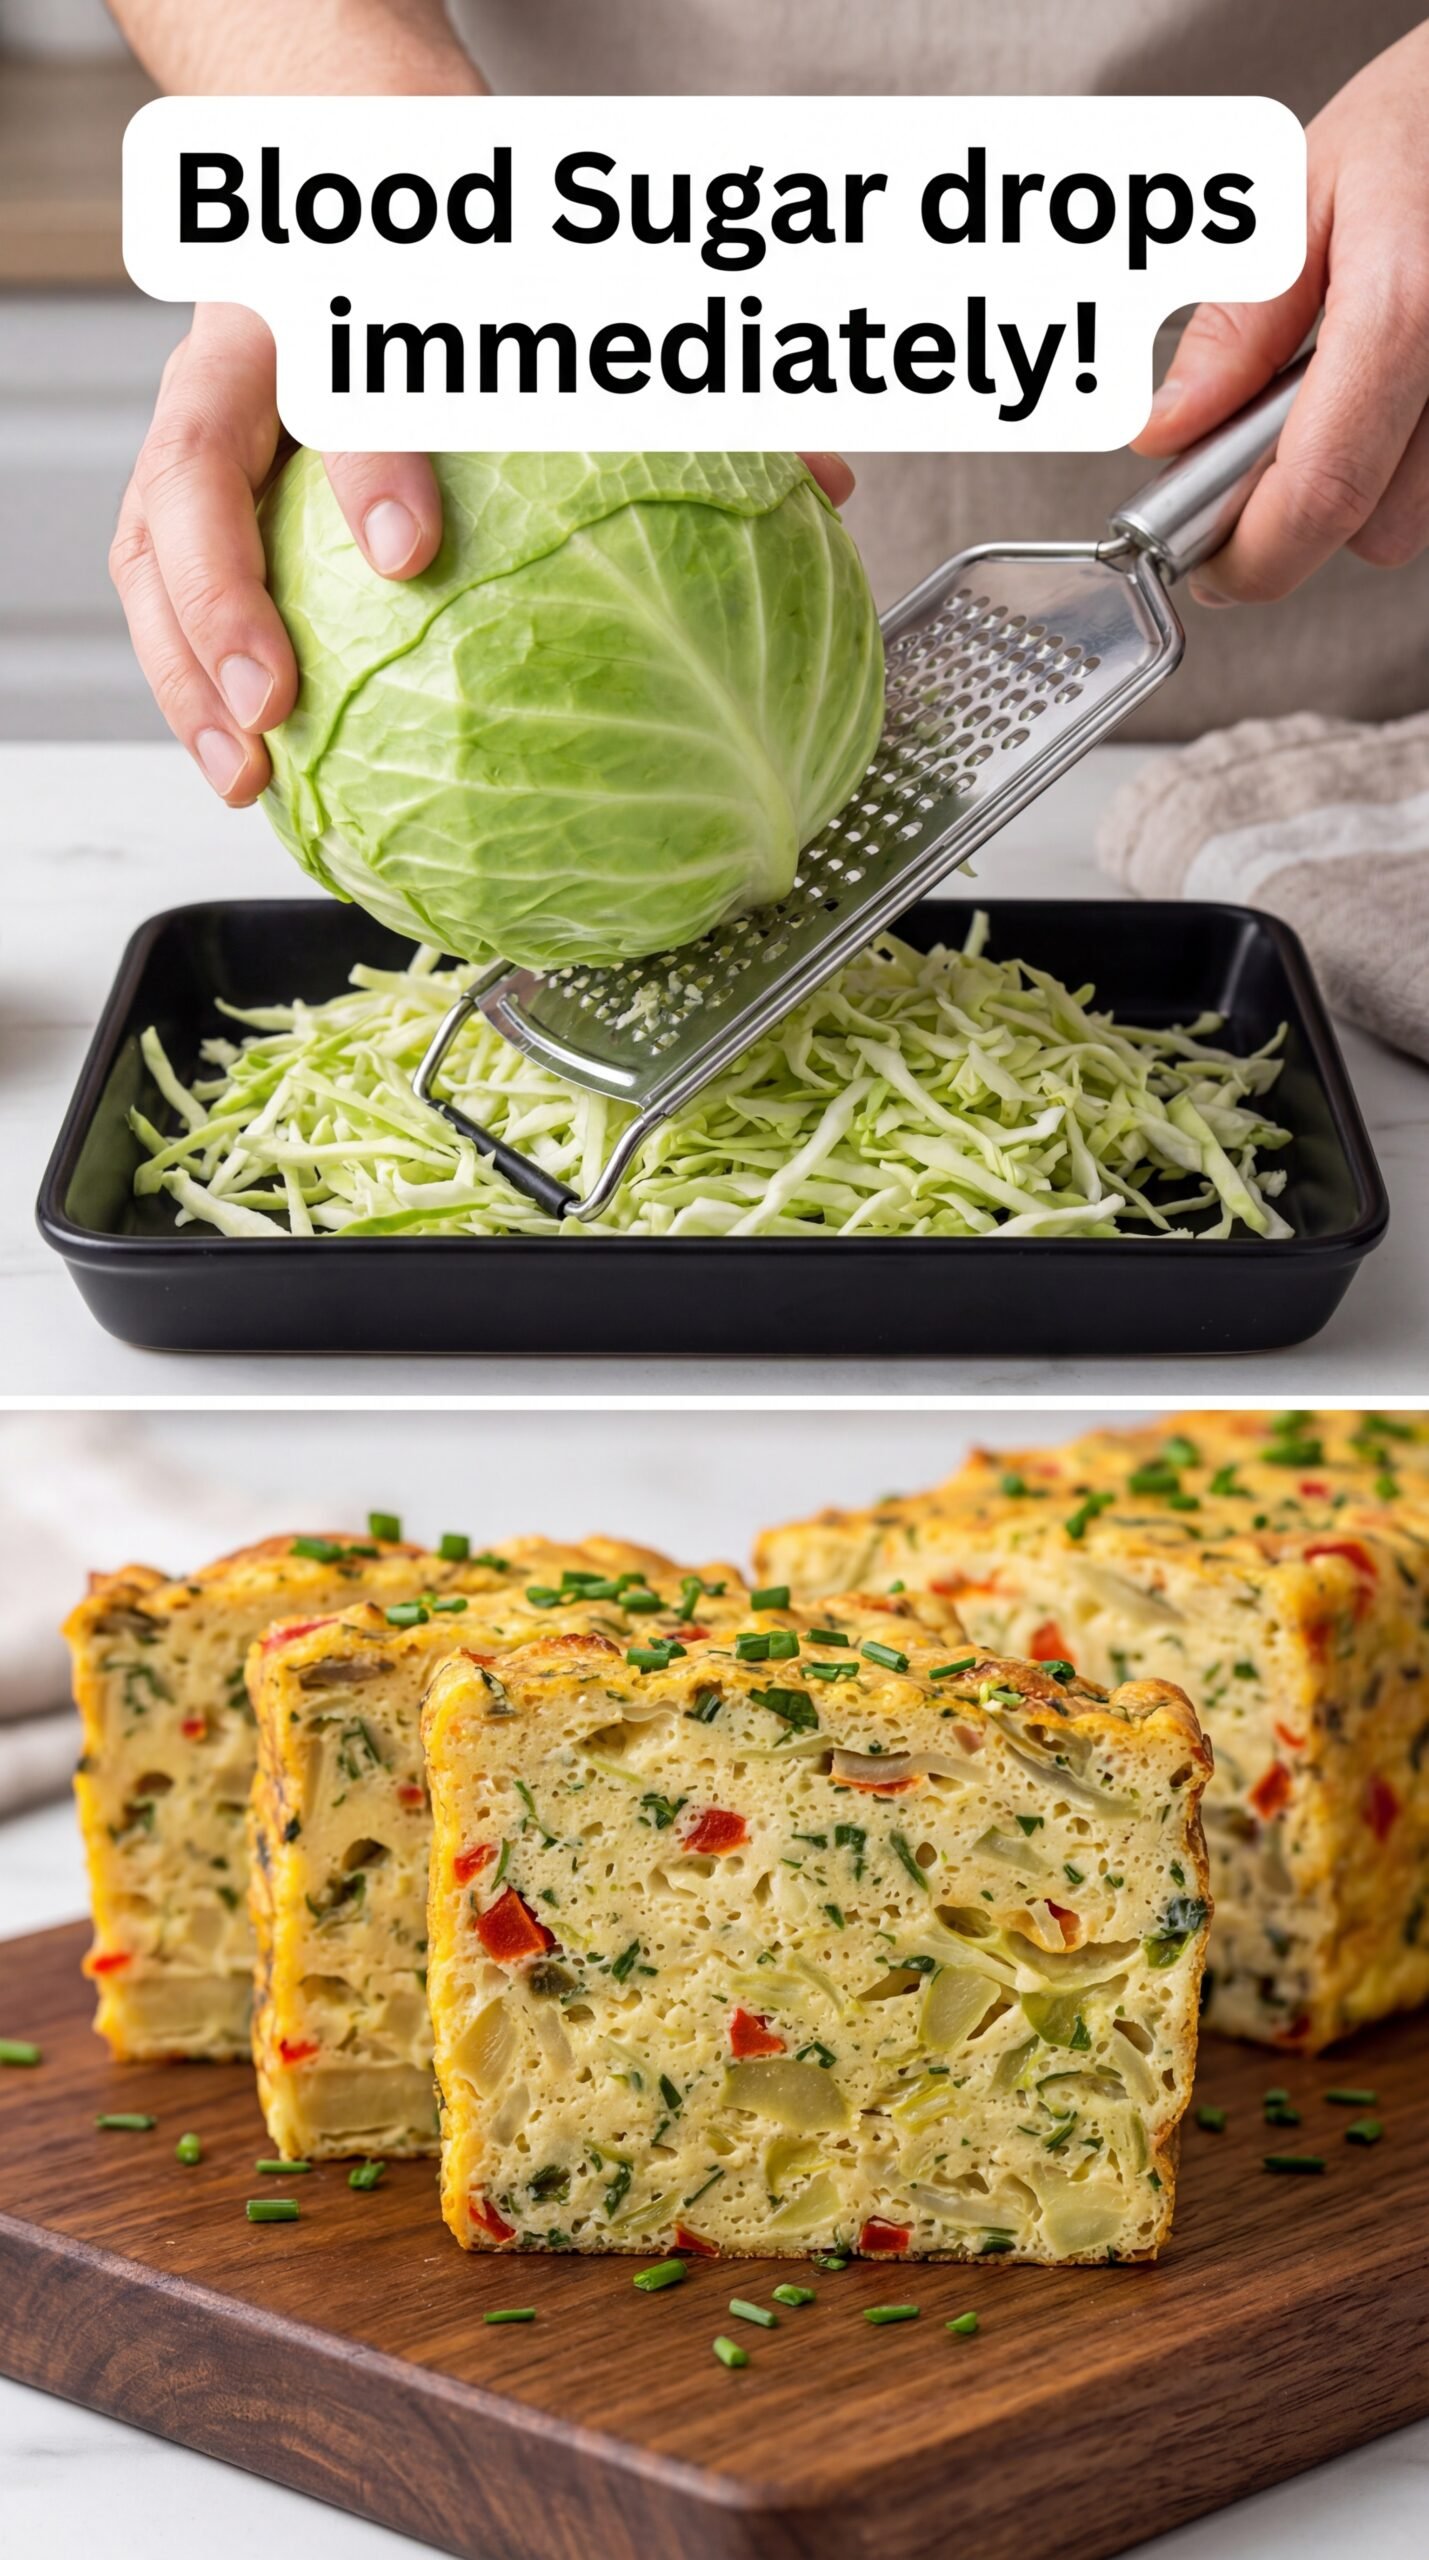
Cabbage & Veggie Savory Bake (Blood-Sugar Friendly)

Cabbage & Veggie Savory Bake (Blood-Sugar Friendly)

Description

This savory cabbage bake is a nutritious, budget-friendly dish made with shredded cabbage, onions, garlic, eggs, and herbs. It’s high in fiber, low in refined carbohydrates, and packed with vegetables—making it a smart choice for people looking to support stable blood sugar levels.
Perfect for breakfast, lunch, or a light dinner.

⚠️ Note: This recipe supports healthy blood sugar management, but it does not replace medical treatment or cause “instant” glucose drops.

 Ingredients

  • 400 g cabbage, finely shredded

  • 1 large onion, finely chopped

  • 3 cloves garlic, minced

  • 4 large eggs

  • ½ cup milk or unsweetened plant milk

  • ½ cup grated cheese (optional – mozzarella, cheddar, or feta)

  • 2 tablespoons olive oil

  • 2 tablespoons fresh parsley or green onions, chopped

  • ½ teaspoon salt

  • ½ teaspoon black pepper

  • ½ teaspoon paprika

  • Optional add-ins: grated carrot, zucchini, bell pepper, or herbs

 Instructions

  1. Prepare the vegetables
    Heat olive oil in a pan. Sauté onion until soft (3–4 minutes). Add garlic and cook 30 seconds.

  2. Soften the cabbage
    Add shredded cabbage to the pan. Cook 5–7 minutes until slightly wilted. Let cool slightly.

  3. Mix the batter
    In a bowl, whisk eggs, milk, salt, pepper, paprika, and herbs.

  4. Combine
    Add cooked cabbage mixture and cheese (if using). Mix well.

  5. Bake
    Pour into a greased baking dish.
    Bake at 180°C (350°F) for 35–40 minutes, until golden and set.

  6. Cool & serve
    Rest 10 minutes before slicing.

 Notes

  • For lower carbs, skip cheese and milk or use almond milk

  • For extra protein, add cottage cheese or Greek yogurt

  • Can be baked in muffin tins for meal prep

Tips for Best Results

  • Squeeze excess moisture from cabbage if very juicy

  • Don’t overbake—keeps it moist and tender

  • Pairs well with yogurt sauce or avocado

Servings

4–6 servings

 Approximate Nutritional Information (per serving, 1/6 recipe)

  • Calories: ~150–180

  • Protein: 8–10 g

  • Carbohydrates: 8–10 g

  • Fiber: 3–4 g

  • Fat: 9–11 g

  • Glycemic Load: Low

(Values vary depending on cheese and milk used)

 Health Benefits

  • Cabbage: High fiber → slows glucose absorption

  • Eggs: Stabilize blood sugar with protein & fats

  • Low refined carbs: No flour or sugar

  • Gut-friendly: Supports digestion and insulin sensitivity

✔ Suitable for:

  • Prediabetes

  • Type 2 diabetes (portion-controlled)

  • Low-carb & Mediterranean diets

 Q & A

Q: Does this instantly lower blood sugar?
A: No food works instantly. This dish helps prevent spikes and supports steady levels.

Q: Can I eat this for breakfast?
A: Yes! It’s excellent for breakfast because protein + fiber help prevent morning glucose spikes.

Q: Can I make it dairy-free?
A: Absolutely—use plant milk and skip cheese.

Q: How long does it keep?
A: 3–4 days refrigerated; freezes well up to 2 months.

Turmeric & Lemon Tea Recipe


Turmeric & Lemon Tea Recipe

Ingredients:

• 1 Cup of Warm Water

• 1 Tablespoon of Turmeric Powder

• 1 Fresh Lemon

Step-by-Step Instructions:

1. Prepare the Warm Water: Start by warming a cup of water. It should be warm, but not boiling, to ensure it’s comfortable to drink.

2. Add Turmeric: Add one tablespoon of turmeric powder to the warm water.

3. Squeeze in Fresh Lemon: Squeeze the juice of one entire fresh lemon into the mixture.

4. Stir Thoroughly: Use a spoon to stir the mixture well until the turmeric is fully incorporated and the lemon juice is evenly distributed.

5. Enjoy: Drink this mixture every morning for seven days to feel more energized and lighter.

The Vitamin-Rich Night Glow Balm

The Vitamin-Rich Night Glow Balm

This luxurious nighttime treatment combines the deeply moisturizing properties of Coconut Oil with the antioxidant power of Vitamin E and the natural brightening potential of Citrus.

Ingredients

  • 1/2 cup Organic Cold-Pressed Coconut Oil: Acts as a deeply hydrating base.

  • 1 tbsp Extra Virgin Olive Oil: Adds Vitamins A and E to support skin repair.

  • 3 Vitamin E Capsules (400 IU): Helps protect the skin from oxidative stress.

  • 5 drops Lemon Essential Oil: Used for its natural brightening properties.

  • Optional: 1 tsp Beeswax pellets (use this if you prefer a firmer, traditional “balm” texture).


Step-by-Step Instructions

  1. Sanitize Your Workspace Ensure your mixing bowl and final storage jar are completely clean and dry. Since this recipe is oil-based and contains no water, keeping it bacteria-free will significantly extend its shelf life.

  2. Melt the Base Place the coconut oil (and beeswax, if using) in a heat-safe glass bowl. Use a double-boiler method by placing the bowl over a pot of simmering water. Gently melt until it is a clear liquid. Avoid high heat to preserve the delicate nutrients in the oils.

  3. Cool Slightly Remove the bowl from the heat. Let it sit for about 5 minutes until the oil is warm to the touch but no longer hot.

  4. Incorporate Vitamins Carefully puncture the Vitamin E capsules with a clean pin and squeeze the oil into the mixture. Stir in the olive oil.

  5. Add the Brightening Agent Add 5 drops of lemon essential oil. Stir thoroughly with a glass or silicone spatula to ensure the oils are fully blended.

  6. Set the Texture Pour the liquid into a dark glass jar (this protects the oils from light degradation). Place the jar in the refrigerator for 30–45 minutes until it solidifies into a creamy consistency.

  7. Final Whip (Optional) For a “fluffy” or “mousse” texture, remove the balm from the fridge once it is semi-solid. Whip it with a clean hand mixer for 2 minutes before returning it to the jar.


Application Guide

  • Night Use Only: Because citrus essential oils can cause photosensitivity (making skin more sensitive to the sun), only apply this balm as part of your evening routine.

  • Apply to Damp Skin: For the best absorption, massage a pea-sized amount onto skin that is still slightly damp from washing. This helps the balm lock in maximum moisture.