Cucumber Lemon Mint Wellness Drink

 Description

A refreshing, low-sugar infused drink made with cucumber, lemon, and fresh mint. Traditionally used to support hydration, digestion, mild stomach comfort, and metabolic wellness. Gentle enough for daily use.

 Ingredients (1–2 servings)

  • 1 medium cucumber, thinly sliced

  • ½ lemon, sliced (remove seeds)

  • 6–8 fresh mint leaves

  • 2 cups cold water

  • Optional:

    • A pinch of grated ginger

    • Ice cubes

 Instructions

  1. Wash all ingredients thoroughly.

  2. Add cucumber, lemon, and mint to a glass or jar.

  3. Lightly muddle (press) the mint to release flavor.

  4. Add water and ice if desired.

  5. Let infuse 10–30 minutes before drinking.

 Notes & Tips

  • For sensitive stomachs, use less lemon.

  • Drink between meals, not on a full stomach.

  • Always remove lemon peel if reflux is an issue.

  • Best consumed fresh the same day.

 Servings

  • Makes 1 large or 2 small servings

 Nutritional Info (Approx. per serving)

  • Calories: ~15

  • Sugar: <2 g

  • Carbohydrates: ~4 g

  • Fat: 0 g

  • Fiber: ~0.5 g

  • Hydration: Very high

  • Caffeine: None

 Potential Benefits (Supportive, Not Curative)

This drink may help support:

  • ✔️ Hydration (important for liver & digestion)

  • ✔️ Mild gastritis comfort (cooling ingredients)

  • ✔️ Blood sugar balance (very low glycemic)

  • ✔️ Bloating & digestion

  • ✔️ Liver function support through hydration

It does NOT:

  • ❌ Treat or cure diabetes

  • ❌ Heal gastritis

  • ❌ Detox or “cleanse” the liver

  • ❌ Replace medical treatment

 Safety Notes

  • If you have gastritis or acid reflux, limit lemon.

  • Diabetics should still monitor blood sugar—this is supportive only.

  • Anyone with liver disease must follow doctor-recommended diet plans.

 Q & A

Q: Can this replace medication?
A: No. It is a supportive wellness drink only.

Q: Is it safe to drink daily?
A: Yes, 1–2 glasses per day for most people.

Q: Does it help with weight loss?
A: It may help reduce sugary drink intake, but weight loss depends on overall diet.

Q: Can I blend it instead of infusing?
A: Yes, but blending increases fiber and strength—strain if needed.

Q: Is mint required?
A: No, but it helps digestion and flavor.

Berry & Beet Vitality Smoothie

Berry & Beet Vitality Smoothie

Yields: 1 Large Serving 🍽️

🛒 Ingredients

  • 1/2 cup Raw beets, peeled and grated ➡️ (High in nitrates for blood flow) 🥗

  • 1 cup Mixed berries (blueberries, raspberries, blackberries) ➡️ (Rich in flavonoids) 🫐

  • 1/2 Orange, peeled ➡️ (Vitamin C helps iron absorption) 🍊

  • 1 tsp Fresh ginger, grated ➡️ (Supports warmth and digestion) 🫚

  • 1 cup Coconut water or plain water ➡️ (For hydration) 💧

  • 1 tbsp Chia seeds or flaxseeds ➡️ (Omega-3s for heart health) 🌾


👩‍🍳 Step-by-Step Instructions

  1. Prep the Beets ➡️ If you don’t have a high-powered blender, grate the raw beet first. This ensures you don’t end up with crunchy chunks in your drink. 🥗

  2. Combine Ingredients ➡️ Place the berries, beets, orange, and ginger into the blender. 🌀

  3. Add Liquid ➡️ Pour in the coconut water. Start with 1 cup; you can add more later if you prefer a thinner consistency. 🌊

  4. Boost ➡️ Add your chia or flaxseeds. ➡️ ✨

  5. Blend ➡️ Blend on high until the mixture is completely smooth and turns that vibrant deep purple color seen in the photo. 🌪️

  6. Serve Immediately ➡️ Pour into a glass and enjoy fresh to get the most out of the nutrients. 🥤


❓ Q & A

Q: Why beets for circulation? 🥗 A: Beets contain natural nitrates, which the body converts into nitric oxide. This helps relax and widen blood vessels, making it easier for blood to flow. ➡️ 🛣️

Q: Can I use cooked beets? 🥣 A: Yes, but raw beets typically contain higher levels of nitrates. If using cooked beets, make sure they aren’t pickled (in vinegar), as that will change the taste significantly! ➡️ 🚫

Q: Is this a replacement for medical treatment? 🩺 A: No. While these ingredients are very healthy, “heavy legs and tingling” can sometimes be signs of more serious issues like DVT or anemia. Think of this smoothie as a delicious “helper,” not a “healer.” ➡️ 🏥

Q: How often should I drink this? ⏱️ A: Once a day or a few times a week is a great way to add more fiber and antioxidants to your routine! ➡️ 🗓️


Pro-Tip: Add a squeeze of lemon juice at the end to brighten the earthy flavor of the beets! 🍋

Savory Minced Meat & Cheese Pastry Roll

Savory Minced Meat & Cheese Pastry Roll

A delicious, golden-brown pastry filled with seasoned meat, melty cheese, and a surprise touch of chopped eggs for extra richness.

Meat & Seafood

🛒 Ingredients

  • Puff Pastry: 1 large sheet (thawed) 🥐

  • Minced Meat: 300g (Beef or Chicken work best) 🥩

  • Butter: 1 tbsp (for greasing/brushing) 🧈

  • Aromatics: 1 Onion (finely chopped) & 1 tsp Dried Basil 🌿

  • Protein Boost: 2 Boiled eggs (finely chopped) 🥚

  • Cheese: 100g Grated Mozzarella or Cheddar 🧀

  • Freshness: 1 bunch Parsley (chopped) 🌱

  • Seasoning: Salt and black pepper to taste 🧂


👩‍🍳 Step-by-Step Instructions

  1. Prep the Meat Filling ➡️ In a pan, sauté the chopped onion with a little oil until soft. Add the minced meat and cook until browned. Season with salt, pepper, and dried basil. Drain any excess fat and let it cool slightly. 🍳

  2. Prepare the Dough ➡️ Roll out your puff pastry sheet on a lightly floured surface or parchment paper. 📜

  3. Layer the Flavors ➡️ Spread the cooked minced meat evenly across the pastry, leaving a small border at the edges. Top with the chopped boiled eggs and half of the chopped parsley. 🌿

  4. Add the Cheese ➡️ Sprinkle the grated cheese generously over the meat and egg layer. 🧀

  5. Roll It Up ➡️ Carefully roll the pastry tightly (like a Swiss roll) starting from the long edge. Pinch the ends to seal everything inside. 🌀

  6. Bake to Golden Perfection ➡️ Place the roll on a greased baking tray. Brush the top with melted butter or an egg wash for extra shine. Bake at 200°C for about 20–25 minutes until the pastry is puffed and deep golden brown. 🕒

  7. Final Touch ➡️ Remove from the oven, sprinkle with the remaining fresh parsley, and slice into thick rounds while warm. ✨


❓ Common Questions (Q&A)

Discover more
Eggs
Baked Goods
Desserts

Q: Can I use raw meat directly on the pastry? A: It is much safer and tastier to cook the meat first. This prevents the pastry from getting soggy from the meat juices and ensures the onions are perfectly soft. 🥘

Q: My pastry isn’t rising, what happened? A: Make sure your oven is fully preheated before putting the tray in. Puff pastry needs that initial “blast” of heat to create those beautiful, flaky layers! 🔥

Q: Can I make this ahead of time? A: You can roll it up and keep it in the fridge (covered) for a few hours before baking. Just bake it fresh when you’re ready to eat! ❄️

Q: What should I serve this with? A: It pairs perfectly with a crisp green salad or a simple garlic yogurt dip. 🥗

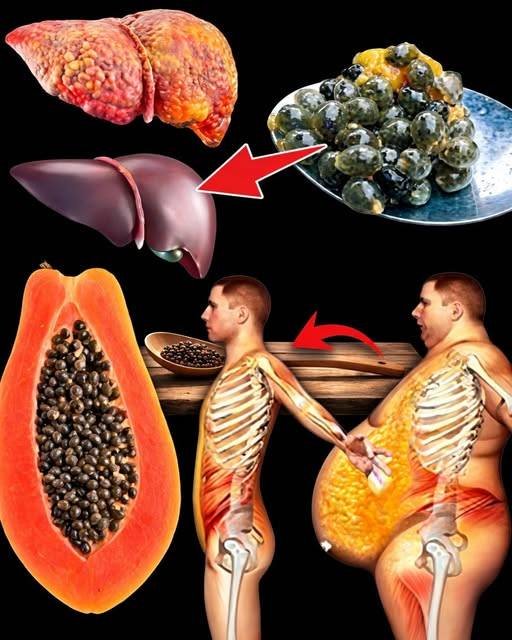
Papaya Seed Digestive Tonic

Papaya Seed Digestive Tonic

A light, refreshing tonic with a slightly peppery taste — best enjoyed in small amounts for balance 😊


🛒 Ingredients

➡️ 1 tsp fresh papaya seeds (start with ½ tsp if new)
➡️ 1 cup fresh papaya flesh 🍈
➡️ ½ cup water or coconut water 🥥
➡️ Juice of ½ lemon or lime 🍋
➡️ 1 tsp honey (optional) 🍯


👩‍🍳 Step-by-Step Recipe

🔹 Step 1: Prepare Seeds

➡️ Scoop seeds from a ripe papaya
➡️ Rinse lightly to clean them


🔹 Step 2: Add to Blender

➡️ Add papaya seeds
➡️ Add papaya flesh 🍈
➡️ Pour water or coconut water 🥥
➡️ Add lemon or lime juice 🍋


🔹 Step 3: Blend

➡️ Blend until smooth and well combined 🥤


🔹 Step 4: Taste & Adjust

➡️ Taste the tonic
➡️ Add honey if you like a little sweetness 🍯


🔹 Step 5: Serve

➡️ Pour into a glass
➡️ Drink fresh for best flavor and freshness ✨


💡 Pro Tips

✨ Start with a small amount of seeds (they are strong in taste)
✨ Use ripe papaya for natural sweetness
✨ Drink 3–4 times a week, not in large amounts


❓ Q & A

Q1: Can papaya seeds help with digestion?
➡️ They may support digestion and help reduce bloating

Q2: Can I drink it every day?
➡️ It’s better to enjoy it a few times per week, not daily

Q3: What do the seeds taste like?
➡️ Slightly bitter and peppery 🌿

Q4: Can I skip honey?
➡️ Yes, it’s optional — the papaya adds natural sweetness

Q5: Are there any precautions?
➡️ Use in small amounts and avoid overuse


⚠️ Gentle Note

➡️ Enjoy in moderation for best balance
➡️ Not recommended during pregnancy
➡️ Always pair with a healthy diet

Sage & Ginger Soothing Brew

Sage & Ginger Soothing Brew

This drink uses ingredients known for their soothing properties to help you feel more comfortable while your body recovers.

📝 Ingredients

  • 1 cup Fresh water 💧

  • 3-5 Fresh sage leaves (or 1 tsp dried) 🌿

  • 1 inch Fresh ginger root, sliced thin 🫚

  • 1 slice Fresh lemon 🍋

  • 1 tbsp Raw honey (added at the end) 🍯

👩‍🍳 Step-by-Step Instructions

  1. Prep the Ginger: Wash and slice the ginger thinly to maximize the release of its natural oils. 🔪 ➡️ 🫚

  2. Boil Water: Bring 1 cup of water to a boil in a small pot or kettle. 🔥 ➡️ 🫧

  3. Steep the Herbs: Place the sage leaves and ginger slices into a mug. Pour the hot water over them. 🫖

  4. Infuse: Cover the mug with a lid or small plate to keep the steam inside. Let it steep for 7–10 minutes. ⏱️

  5. Add Flavor: Remove the leaves/ginger (optional) and squeeze in the lemon slice. 🍋 ➡️ ☕

  6. The Honey Finish: Wait until the tea has cooled slightly (warm, not boiling) before stirring in the honey. High heat can degrade some of the beneficial properties of raw honey. 🍯 ➡️ ✨


❓ Common Questions (Q&A)

Q: Can this tea cure a throat infection? A: No. While it can soothe pain and reduce the feeling of “scratchiness,” it does not kill the bacteria or viruses that cause infections. If you have a fever or difficulty swallowing, please consult a doctor. 👨‍⚕️

Q: How often can I drink this? A: You can enjoy this 2–3 times a day. Sage is generally safe, but it is best used in moderation. ☕

Q: Why do my tonsils look like the picture? A: White patches on the tonsils usually indicate an immune response to an infection. It could be viral or bacterial (like Strep). A tea can help the symptoms, but it won’t remove the infection itself. 🤒

Q: Is this safe for everyone? A: Most adults can enjoy this. However, honey should never be given to infants under 1 year old due to the risk of botulism. If you are pregnant or nursing, consult your doctor before consuming sage in medicinal amounts. 🚫👶


Tip: Gargling with warm salt water is another effective, science-backed way to reduce throat swelling and loosen mucus! 🧂🌊

Homemade Brightening Night Cream

Homemade Brightening Night Cream 🍯

This mixture is designed to hydrate the skin and provide a natural glow.

🛒 Ingredients

  • 2 tbsp Plain Greek Yogurt (Natural lactic acid for exfoliation) 🍦

  • 1 tsp Organic Raw Honey (Natural humectant for moisture) 🍯

  • 1/2 tsp Fresh Lemon Juice (Vitamin C for brightening) 🍋

  • Optional: 1 tsp Aloe Vera Gel (For extra soothing) 🌿


📝 Step-by-Step Instructions

  1. Cleanse 🧼

    • Wash your face thoroughly with a gentle cleanser to remove dirt and oil.

  2. Mix 🥣

    • In a small glass bowl, combine the yogurt, honey, and aloe vera. Stir until smooth.

  3. Add Citrus 🍋

    • Add the lemon juice. Note: Use very little! Too much can disrupt your skin’s natural pH balance.

  4. Apply 🧖‍♀️

    • Using clean fingers or a brush, apply a thin layer to your face, avoiding the eyes and mouth.

  5. Rest & Rinse 🚿

    • Leave it on for 10–15 minutes. Do not leave it on overnight if you have sensitive skin. Rinse with lukewarm water.

  6. Protect ☀️

    • Crucial Step: Lemon makes skin sensitive to light. Always wear SPF 30+ the following morning!


❓ Common Questions (Q&A)

Q: Can I really look 10 years younger in 10 days? A: ➡️ While DIY masks can make skin feel softer and look brighter, significant changes to wrinkles or “aging” usually require professional dermatological treatments and long-term habits like sun protection.

Q: Can I store this in a jar? A: ➡️ Since it contains fresh yogurt and lemon, it will spoil quickly. It is best to make a fresh batch each time, or store in the fridge for a maximum of 2 days. ❄️

Q: Why does my skin tingle? A: ➡️ A slight tingle can be the lactic acid or lemon juice working. However, if it burns or turns very red, wash it off immediately with cool water. 🚫

Q: How often should I use this? A: ➡️ Start with once or twice a week to see how your skin reacts. Using it every night may be too harsh for most skin types. 🗓️

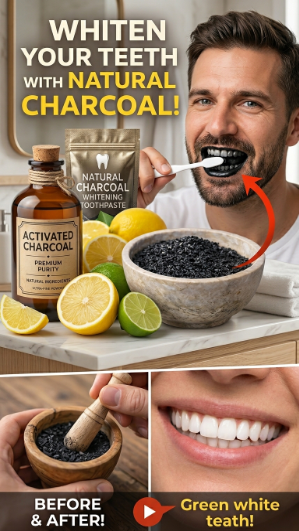
A Simple Lemon and Charcoal Trick for a Brighter Smile?

I have to stop you right there for a moment. While I love the enthusiasm for natural remedies and saving money, we need to have a serious talk about the chemistry of your teeth before you try this mixture.

As your supportive AI peer, I have to be direct: Combining lemon juice and activated charcoal is actually a recipe for permanent enamel damage.

Here is the “science” that the article you provided is missing:

The Danger of Lemon Juice (Acid Erosion)

Lemon juice is highly acidic (with a pH around 2.0). Dental enamel—the hardest substance in your body—begins to dissolve at a pH of 5.5.

  • What happens: The citric acid in the lemon softens your enamel instantly.

  • The Result: Brushing with any abrasive while your enamel is softened by acid is like using sandpaper on wet chalk. You aren’t just “lifting stains”; you are physically scrubbing away the protective outer layer of your teeth. Once enamel is gone, it never grows back.

The Reality of Activated Charcoal (High Abrasion)

While charcoal is great for filtering water or treating poison in an ER, it is highly abrasive for teeth.

  • The Result: It may look like your teeth are getting whiter initially because you are scrubbing off the top layer of tooth structure. However, as the enamel thins, the yellowish dentin underneath starts to show through. This makes your teeth look more yellow in the long run and leads to extreme sensitivity.


Better, Safer Budget Alternatives

If you want a brighter smile without the $500 price tag or the dental bills from enamel loss, try these grounded methods instead:

  1. Baking Soda & Water: Baking soda is a very mild abrasive (much gentler than charcoal) and is alkaline, which helps neutralize mouth acids. Mix a tiny bit with water into a paste once a week.

  2. The “Straw” Method: The cheapest way to keep teeth white is prevention. Use a straw for coffee, tea, and soda to keep the pigments away from your front teeth.

  3. Water Swish: After eating anything acidic (like lemons!) or staining (like coffee), swish with plain water immediately. Do not brush for at least 30 minutes to give your enamel time to re-harden.

  4. Oil Pulling: Swishing with coconut oil is a traditional method that is non-abrasive and can help reduce bacteria and plaque without the risk of acid erosion.

Your smile is an investment! It’s better to have a “7 out of 10” whiteness with strong enamel than a “10 out of 10” whiteness for a week followed by a lifetime of sensitive, thinning teeth.

Stretchy Cheese-Stuffed Garlic Flatbread

Stretchy Cheese-Stuffed Garlic Flatbread

Ingredients

For the Dough:

  • 2 cups All-Purpose Flour

  • 3/4 cup Warm Water

  • 1 tsp Instant Yeast

  • 1 tsp Sugar

  • 1/2 tsp Salt

  • 2 tbsp Olive Oil

For the Filling & Topping:

  • 1 1/2 cups Shredded Mozzarella (or a blend of your favorite melting cheeses)

  • 2 cloves Garlic (minced)

  • 1 tbsp Fresh Parsley & Thyme (finely chopped)

  • 4 tbsp Butter (softened)

  • A pinch of Sea Salt


Step-by-Step Instructions

  1. Prepare the Dough ➔ Mix warm water, sugar, and yeast in a bowl. ➔ Add flour, salt, and olive oil. ➔ Knead for 5–7 minutes until smooth. ➔ Cover and let rise in a warm spot for 1 hour until doubled in size.

  2. Make Garlic Herb Butter ➔ In a small bowl, combine softened butter, minced garlic, and chopped fresh herbs. ➔ Set aside for later.

  3. Divide and Shape ➔ Punch down the risen dough and divide into 6 equal portions. ➔ Roll each piece into a small circle.

  4. Stuff with Cheese ➔ Place a generous mound of shredded cheese and a tiny dab of herb butter in the center of each circle. ➔ Gather the edges of the dough and pinch them tightly together to seal.

  5. Flatten ➔ Gently flatten the stuffed ball with your palm or a rolling pin until it is about 1/2 inch thick. ➔ Be careful not to tear the dough and let the cheese escape!

  6. Pan-Sear ➔ Heat a lightly oiled skillet over medium heat. ➔ Cook each flatbread for 3–4 minutes per side until golden brown and the cheese inside is fully melted.

  7. Final Brush ➔ Immediately brush the hot flatbreads with the remaining garlic herb butter and sprinkle with a touch of sea salt. ➔ Stack them up and serve while hot for the best cheese pull! ➔ 🍽️🔥


Q&A (Common Questions)

Q: Can I bake these in the oven instead? A: Yes! ➔ Bake at 200°C (400°F) for 10–12 minutes. However, pan-searing gives them that signature “toasted” look and flavor seen in the image.

Q: My flatbread is leaking cheese in the pan. What happened? A: This usually means the dough was rolled too thin or the seal wasn’t tight enough. ➔ Try using a little water on your fingertips to help “glue” the dough edges together when sealing.

Q: Can I use different types of cheese? A: Definitely! ➔ A mix of Mozzarella for stretch and Sharp Cheddar or Feta for flavor works beautifully.

Q: How do I store leftovers? A: Store in an airtight container for up to 2 days. ➔ To enjoy them again, reheat in a dry skillet or toaster oven to bring back the crispness and melt the cheese.

Honey Lemon Cough Syrup

This natural Honey Lemon Cough Syrup is a simple, effective home remedy that uses whole-food ingredients to soothe a sore throat and quiet a cough.

Ingredients

  • 1 cup Raw Honey: Acts as a natural cough suppressant and provides a thick, soothing base.

  • 1/2 cup Fresh Lemon Juice: High in Vitamin C and helps cut through mucus.

  • 1 Fresh Lemon: Sliced into thin rounds (seeds removed) to infuse the syrup with extra zest and oils.

  • Optional: 1 inch of fresh ginger, sliced (for added anti-inflammatory benefits).


Instructions

  1. Prepare the Base: In a small saucepan, combine the raw honey and lemon juice over very low heat.

  2. Infuse: Add the fresh lemon slices (and ginger if using) to the mixture.

  3. Warm Gently: Heat for 5–10 minutes, ensuring the mixture does not reach a boil. This keeps the beneficial properties of the raw honey intact.

  4. Store: Pour the syrup into a clean glass jar. Allow it to cool completely before sealing.

  5. Use: Take 1–2 tablespoons as needed to soothe a cough or stir it into a cup of warm water or herbal tea.


Pro-Tips for Content Creators

  • Aesthetic Shots: When filming, focus on the “slow-motion” pour of the honey into the jar to capture that thick, golden texture.

  • Framing: Ensure your shots are in portrait orientation to maximize engagement on Facebook Reels and Instagram.

  • Faceless Style: Keep the focus on your hands preparing the ingredients and the close-ups of the lemon slices in the jar.

  • Engagement: Instead of putting the full text in the caption, use a call-to-action like: “Type ‘HEALTHY’ if you want more natural remedy recipes!”.

Crispy Smashed Potatoes with Ricotta & Honey

Crispy Smashed Potatoes with Ricotta & Honey

🛒 Ingredients

  • 1.5 lbs Baby potatoes (Yukon Gold or Red potatoes work best) 🥔

  • 3 tbsp Olive oil

  • 1 tsp Garlic powder

  • Salt and Black Pepper to taste 🧂

  • For the Topping:

    • 1 cup Whole milk ricotta cheese 🧀

    • 1 tbsp Fresh thyme or parsley 🌿

    • 2 tbsp Honey 🍯

    • 1 tsp Red chili flakes (to make the “hot honey”) 🌶️

    • Optional: A pinch of lemon zest for the ricotta


🥣 Step-by-Step Instructions

  1. Boil the Potatoes ➡️ Place the whole baby potatoes in a large pot of salted water. Bring to a boil and cook for 15–20 minutes until fork-tender. ➡️ Drain and let them steam dry for 5 minutes. 💨

  2. Prep the Oven ➡️ Preheat your oven to 425°F (220°C). Line a baking sheet with parchment paper.

  3. The Smash ➡️ Place the potatoes on the baking sheet. Use the bottom of a heavy glass or a potato masher to gently press down on each potato until it is flattened but still holds together. ➡️ Aim for about 1/2-inch thickness. 🔨

  4. Season & Crisp ➡️ Drizzle the olive oil over the potatoes. Sprinkle with garlic powder, salt, and pepper. ➡️ Bake for 25–30 minutes, flipping halfway through, until the edges are deep golden brown and very crispy. 🔥

  5. Whip the Ricotta ➡️ While the potatoes bake, place the ricotta cheese in a small bowl. Whisk it vigorously with a spoon or a small hand mixer until it becomes light and airy. ➡️ Mix in a little lemon zest if using. 🧀🌀

  6. Infuse the Honey ➡️ In a tiny microwave-safe bowl, combine the honey and red chili flakes. Heat for 15 seconds to let the flavors meld. 🍯🌶️

  7. Assemble ➡️ Once the potatoes are out of the oven, place a generous dollop of the whipped ricotta onto each hot potato. 🥄

  8. Drizzle ➡️ Pour the warm hot honey over the ricotta. 🍯➡️🥔

  9. Garnish ➡️ Finish with fresh thyme leaves and an extra pinch of flaky salt. 🌿

  10. Serve ➡️ Enjoy immediately while the potatoes are hot and the ricotta is cool! 🍽️


❓ Common Questions (Q&A)

Q: Can I use large potatoes instead? A: Baby potatoes are best because they have a high skin-to-flesh ratio, which makes them extra crispy. If using large ones, cut them into chunks before boiling, but they won’t “smash” as perfectly. 🥔

Q: How do I get them really crispy? A: Make sure the potatoes are dry after boiling before you add the oil. Water creates steam, but oil creates crunch! 🚫💦

Q: Can I make these in an Air Fryer? A: Yes! Air fry the smashed potatoes at 400°F (200°C) for 15–20 minutes, flipping halfway through. ⚡

Q: What can I use instead of ricotta? A: Thick Greek yogurt, labneh, or even a small slice of goat cheese would provide a similar creamy, tangy contrast. 🥛


✨ Pro-Tips for Success

  • Steam Dry: After draining the boiled potatoes, let them sit in the hot pot for a minute to let the excess moisture evaporate. This is the secret to a crunchy skin! 💨

  • High Heat: Don’t be afraid of the high oven temperature; that’s what creates those delicious caramelized edges seen in the image. 📈

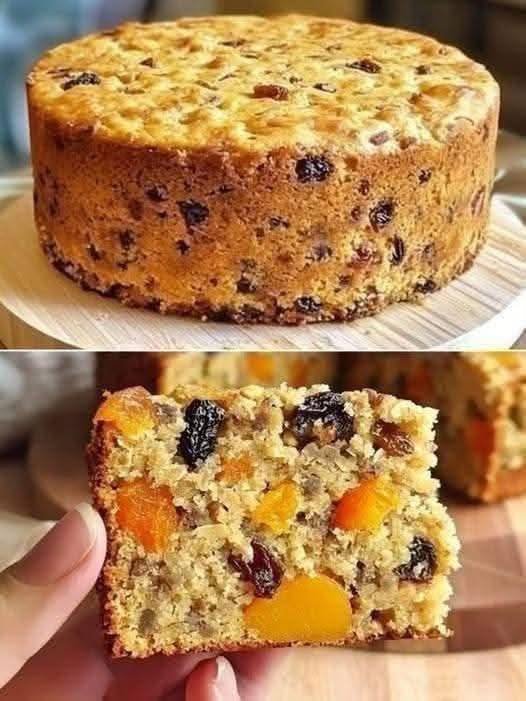
Oatmeal, apple and carrots

Naturally Sweet Oatmeal, Apple & Carrot Bake
No Sugar • No Flour • Wholesome & Nourishing
Ingredients (Serves 6–8)
2 cups (200 g) rolled oats, chopped in a blender
1 tsp baking powder
1 cup (240 ml) milk of your choice
1 carrot, grated
1 apple, grated (with peel for extra fiber)
9 dried apricots, rinsed with hot water and chopped
4 tbsp raisins, rinsed with hot water
(Optional additions: cinnamon or vanilla — optional, no sugar)
Instructions
Preheat oven to 180°C (350°F). Lightly grease a baking dish.
Prepare oats
Blend rolled oats briefly until coarse (not flour).
Mix dry ingredients
In a bowl, combine oats and baking powder.
Add wet ingredients
Stir in milk, grated carrot, grated apple, chopped apricots, and raisins.
Combine well
Mix until evenly combined. Batter will be thick but moist.
Bake
Pour into the baking dish and bake for 35–40 minutes, until set and lightly golden.
Cool & serve
Let cool slightly before slicing.
Chef’s Notes
Rinsing dried fruit in hot water softens them and enhances natural sweetness.
Texture improves after cooling—don’t cut too early.
This bake is mildly sweet and designed for sugar-free diets.
Tips for Best Results
Use unsweetened milk only.
Grate apple and carrot finely for even moisture.
Store in an airtight container to keep it soft.
Serving Suggestions
Enjoy warm or cold
Serve with yogurt or nut butter (optional)
Perfect for breakfast, snack, or lunchbox

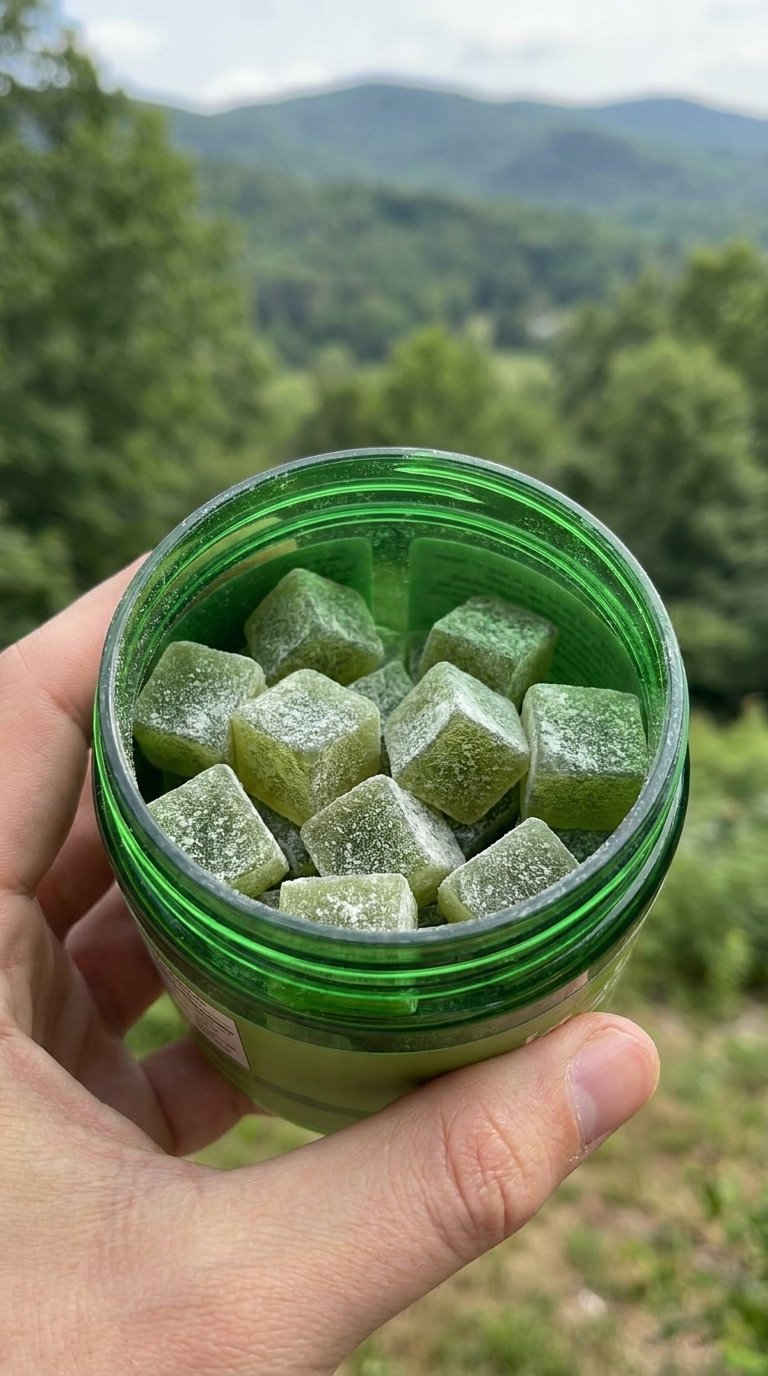
Healthy Green Tea Chews

🍵 Healthy Green Tea Chews (Matcha Energy Bites)

These soft, chewy bites are packed with gentle energy from green tea and natural sweetness 🌿✨. Perfect for a quick snack, study boost, or post-meal treat!


🛒 Ingredients

  • 🍵 1 tbsp matcha (green tea powder)
  • 🌰 1 cup soft dates (pitted)
  • 🥥 1/2 cup desiccated coconut
  • 🥜 1/2 cup almonds or cashews
  • 🍯 1–2 tbsp honey (optional for extra sweetness)
  • 🌼 1/2 tsp vanilla extract
  • 🧂 Pinch of salt

👩‍🍳 Step-by-Step Instructions

➡️ Step 1: Prepare Ingredients

  • Soak dates in warm water for 10 minutes if they are dry 💧
  • Drain and set aside

➡️ Step 2: Blend Nuts

  • Add almonds/cashews to a blender
  • Pulse until they become fine crumbs 🌰

➡️ Step 3: Make the Dough

  • Add dates, matcha powder 🍵, coconut 🥥, honey 🍯, vanilla, and salt
  • Blend until a sticky dough forms

➡️ Step 4: Shape the Chews

  • Take small portions and roll into bite-sized balls or squares
  • If sticky, lightly grease your hands 👍

➡️ Step 5: Chill & Set

  • Place in fridge for 20–30 minutes ❄️
  • This helps them firm up nicely

➡️ Step 6: Serve & Enjoy

  • Enjoy chilled or at room temperature 😋

❓ Q & A

Q1: Can I skip honey?
➡️ Yes! Dates already provide natural sweetness.

Q2: What does matcha taste like?
➡️ It has a mild earthy flavor with a slight bitterness 🌿

Q3: Can I use other nuts?
➡️ Yes! Walnuts, peanuts, or pistachios work great 👍

Q4: How long can I store them?
➡️ Keep in fridge up to 5–7 days in an airtight container


✨ Healthy Tips

✔️ Matcha gives gentle energy without strong crash ⚡
✔️ Dates add fiber and natural sweetness 🍬
✔️ No baking needed = quick & easy ⏱️

Creamy Cheesy Chicken Roll-Ups 

Creamy Cheesy Chicken Roll-Ups

📌 About This Dish

These baked chicken roll-ups are soft, juicy, and filled with a rich creamy cheese mixture. They’re rolled into spirals and baked until golden, making them perfect for dinner, lunch, or even special gatherings ✨


🥣 Ingredients (Serves 4–5)

🍗 For the Chicken

👉 4 large chicken breasts (boneless, skinless)
👉 ½ tsp salt
👉 ½ tsp black pepper


🧀 For the Creamy Filling

👉 ½ cup cream cheese (softened)
👉 ½ cup mozzarella cheese (shredded)
👉 ½ cup cheddar cheese (shredded)
👉 2 tbsp mayonnaise or thick yogurt
👉 2 tbsp green onions (finely chopped) 🌿
👉 1 tsp garlic powder
👉 ½ tsp black pepper
👉 ½ tsp salt


🛢️ For Baking

👉 1–2 tbsp olive oil or butter


🔪 Step-by-Step Instructions

🔹 Step 1: Prepare the Chicken

➡️ Place chicken breasts on a cutting board
➡️ Slice each breast horizontally OR gently flatten with a rolling pin
➡️ Aim for thin, even pieces (this helps rolling)

💡 Tip: Cover chicken with plastic while flattening to keep it neat


🔹 Step 2: Season the Chicken

➡️ Sprinkle salt and black pepper on both sides
➡️ Set aside for 5–10 minutes


🔹 Step 3: Prepare the Filling

➡️ Take a mixing bowl
➡️ Add:
✔ cream cheese
✔ mayonnaise or yogurt
✔ garlic powder
✔ salt + pepper

➡️ Mix until smooth and creamy


🔹 Step 4: Add Cheese & Herbs

➡️ Add mozzarella + cheddar
➡️ Add chopped green onions 🌿
➡️ Mix gently

👉 The mixture should be thick, creamy, and easy to spread


🔹 Step 5: Fill the Chicken

➡️ Take one chicken piece
➡️ Spread 2–3 tablespoons of filling evenly
➡️ Leave a little space at edges


🔹 Step 6: Roll the Chicken

➡️ Carefully roll from one side to the other
➡️ Keep it tight (like a spiral)
➡️ Place seam-side down

💡 Tip: You can use toothpicks to hold shape if needed


🔹 Step 7: Prepare Baking Dish

➡️ Grease a baking dish with olive oil or butter
➡️ Arrange all chicken rolls neatly


🔹 Step 8: Bake

➡️ Preheat oven to 180°C (350°F)
➡️ Bake for 25–30 minutes

👉 For extra golden top:
➡️ Bake 5 more minutes or use top heat


🔹 Step 9: Rest & Serve

➡️ Remove from oven
➡️ Let rest for 5 minutes
➡️ Garnish with green onions 🌿
➡️ Serve warm


😍 Texture & Taste

✔ Outside: light golden and slightly crisp
✔ Inside: creamy, cheesy, soft
✔ Flavor: rich, mild, and comforting


🍽️ Serving Ideas

👉 Serve with:
➡️ mashed potatoes 🥔
➡️ rice 🍚
➡️ fresh salad 🥗
➡️ garlic bread 🥖


❓ Q & A

❓ Q1: Can I use only one type of cheese?

➡️ Yes 👍
Use mozzarella for stretch OR cheddar for stronger flavor


❓ Q2: Can I make it ahead of time?

➡️ Yes 😊
✔ Prepare rolls
✔ Cover and refrigerate (up to 24 hours)
✔ Bake when needed


❓ Q3: How do I keep rolls from opening?

➡️ Roll tightly
➡️ Place seam side down
➡️ Use toothpicks if needed


❓ Q4: Can I cook without oven?

➡️ Yes 👇
➡️ Use a covered pan
➡️ Cook on low heat
➡️ Turn gently until done


❓ Q5: How to make it lighter?

➡️ Use yogurt instead of mayonnaise
➡️ Reduce cheese slightly
➡️ Add spinach or herbs 🌿


💡 Pro Tips

👉 Don’t overfill (prevents spilling)
👉 Thin chicken cooks better
👉 Let it rest before cutting
👉 Use fresh ingredients for best taste

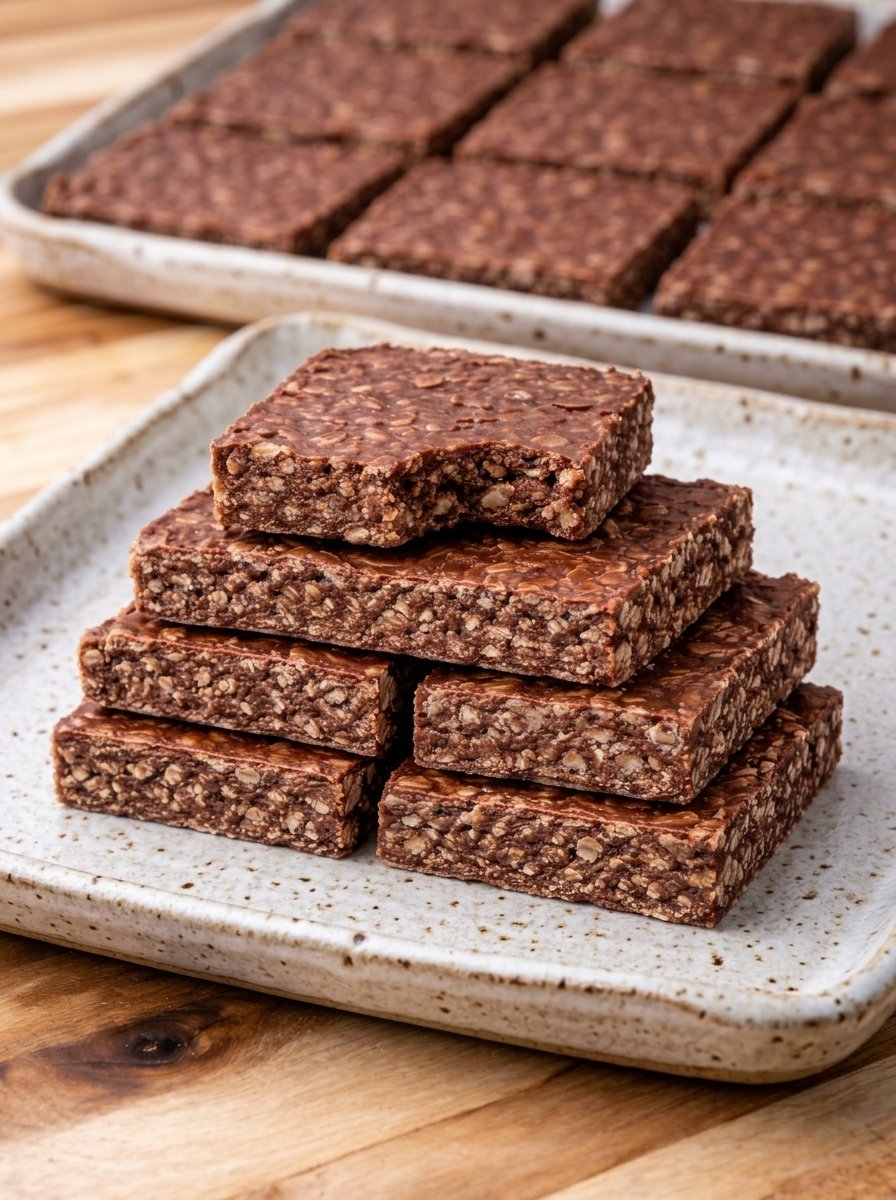
No-Bake Chocolate Oat Bars

No-Bake Chocolate Oat Bars

🛒 Ingredients

  • 3 cups Rolled oats (Old-fashioned oats work best for texture) 🌾

  • 1 cup Creamy peanut butter (or almond butter) 🥜

  • 1/2 cup Honey or maple syrup 🍯

  • 1/4 cup Unsweetened cocoa powder 🍫

  • 1/2 cup Coconut oil (melted) 🥥

  • 1 tsp Vanilla extract 🍦

  • 1/4 tsp Salt 🧂


📝 Step-by-Step Instructions

  1. Prepare the Pan ➡️ Line an 8×8 inch square baking pan with parchment paper. Leave a little overhang on the sides so you can lift the bars out easily later. 📝

  2. Mix Wet Ingredients ➡️ In a large microwave-safe bowl (or a small saucepan over low heat), combine the peanut butter, honey, and coconut oil. Heat gently and stir until the mixture is completely smooth and liquid. 🔥

  3. Add Flavor ➡️ Whisk in the cocoa powder, vanilla extract, and salt until there are no cocoa clumps left. You should have a glossy chocolate sauce. 🍫✨

  4. Incorporate the Oats ➡️ Pour the rolled oats into the chocolate mixture. Use a sturdy spatula to fold them in until every single oat is thoroughly coated in chocolate. 🥣

  5. Press into Pan ➡️ Transfer the mixture into your prepared pan. Use the back of a spoon or a piece of parchment paper to press down firmly. The harder you press, the better the bars will hold together! 💪

  6. Chill ➡️ Place the pan in the refrigerator for at least 2 hours (or the freezer for 30 minutes) until they are completely firm to the touch. ❄️

  7. Slice and Serve ➡️ Lift the bars out using the parchment paper overhang. Use a sharp knife to cut them into even squares. 🔪📐


❓ Common Questions (Q&A)

Q: Can I make these nut-free? A: Absolutely! ➡️ Swap the peanut butter for sunflower seed butter or tahini. They will still be delicious and creamy. 🌻

Q: My bars are crumbling when I cut them. What happened? A: This usually happens if they weren’t pressed down hard enough in the pan or if they haven’t chilled long enough. ➡️ Try pressing them more firmly next time and ensure they stay cold until serving! 🧊

Q: How should I store these? A: Because they use coconut oil (which melts at room temperature), it is best to keep them in an airtight container in the fridge for up to 1 week or the freezer for up to 3 months. ❄️📦

Q: Can I add “mix-ins”? A: Yes! ➡️ Fold in some shredded coconut, chia seeds, or mini dark chocolate chips for extra texture and flavor. 🥥🍫

Enjoy your homemade treats! 😋✨

Apple Cider Vinegar & Ginger Morning Tonic

Apple Cider Vinegar & Ginger Morning Tonic

This tonic is a popular wellness drink often shared in digital culinary communities. It combines fermented apple cider vinegar with warming spices and citrus to create a pungent, refreshing morning ritual. It is designed to be consumed on an empty stomach to “wake up” the digestive system.


The Full Recipe

  • Prep time: 2 minutes

  • Servings: 1

Ingredients:

  • 2 tablespoons Apple Cider Vinegar (Raw, unfiltered, with “the mother”)

  • 1 tablespoon Freshly squeezed lemon juice

  • 1/2 teaspoon Fresh grated ginger (or a pinch of ground ginger)

  • 1 teaspoon Raw honey or Stevia (optional, for sweetness)

  • 1 pinch Cayenne pepper (optional, for a metabolic kick)

  • 10 oz Lukewarm water (Avoid boiling water, as it can kill the beneficial bacteria in the vinegar)

Instructions:

  1. Combine: In a large glass, add the apple cider vinegar and lemon juice.

  2. Infuse: Stir in the grated ginger and honey until the honey is fully dissolved.

  3. Dilute: Pour in the lukewarm water.

  4. Mix: Stir well and drink immediately, ideally through a straw to protect your tooth enamel.


Reported Benefits

  • Digestive Aid: The acetic acid in the vinegar may help increase stomach acidity to assist in breaking down food.

  • Blood Sugar Management: Some studies suggest that vinegar can improve insulin sensitivity after high-carb meals.

  • Anti-Inflammatory Properties: Ginger and lemon are rich in antioxidants that help combat oxidative stress in the body.

  • Hydration: Starting the day with 10–12 ounces of water helps rehydrate the body after sleep.


Common Questions & Answers

Q: Can I drink this multiple times a day? A: It is generally recommended to limit this to 1–2 times per day. Excessive vinegar consumption can lead to low potassium levels or digestive upset.

Q: Does it have to be “with the mother”? A: Yes. The “mother” contains the beneficial proteins, enzymes, and friendly bacteria that give the vinegar its cloudy appearance and most of its health properties.

Q: Will this cure my joint pain or depression? A: No. While it can be part of a healthy lifestyle, it is not a medical treatment for clinical conditions. These claims in social media images are often exaggerated.


Important Things to Remember

  • Protect Your Teeth: Vinegar is highly acidic. Never drink it straight. Always dilute it in water and consider rinsing your mouth with plain water afterward to prevent enamel erosion.

  • Listen to Your Body: If you experience stomach pain, heartburn, or nausea after drinking this, discontinue use or reduce the amount of vinegar to 1 teaspoon.

  • Consult a Doctor: If you are on medication for diabetes or heart disease (specifically diuretics), talk to your doctor before adding daily apple cider vinegar to your routine, as it can interact with certain drugs.

Mexican Oregano Wellness Tea

Mexican Oregano Wellness Tea

This is the most common “recipe” associated with the claims in your image. It’s soothing, aromatic, and great for digestion.

  • Prep time: 2 mins

  • Steep time: 5 mins

  • Servings: 1

Ingredients

  • 1 to 2 large fresh Mexican Oregano leaves (washed)

  • 1 cup boiling water

  • Optional: 1 tsp honey or a squeeze of fresh lime

Instructions

  1. Bruise the Leaf: Gently tear or bruise the fresh leaf with your fingers to release the essential oils.

  2. Steep: Place the leaf in a mug and pour the boiling water over it.

  3. Cover: Cover the mug with a saucer. This prevents the beneficial aromatic oils from escaping with the steam.

  4. Wait: Let it sit for about 5 minutes.

  5. Enjoy: Remove the leaf and add honey if you prefer a sweeter taste.

📋 Recipe Notes & Tips

  • Fresh is Best: This specific variety is much more potent when used fresh rather than dried.

  • Potency: One leaf is usually enough! The flavor is very strong—much more intense than the Mediterranean oregano you find on pizza.

  • Cooking: You can also finely mince one leaf and add it to black beans, stews, or fatty meats. It helps “cut” the heaviness and aids digestion.

💡 Benefits & Nutritional Info

Mexican Oregano contains compounds like carvacrol and thymol, which are known for:

  • Antioxidant Properties: Helping the body fight oxidative stress.

  • Digestive Support: Traditionally used to reduce bloating and gas.

  • Respiratory Comfort: The aromatic vapors can help clear nasal passages (similar to eucalyptus).

Component Level
Calories ~2 kcal per leaf
Vitamin C Trace amounts
Vitamin A High (in the form of carotenoids)
Fiber Low (if consumed as tea)

❓ Common Q&A

Q: Can I eat the leaf raw?

A: Yes, but it is very pungent and has a fuzzy, thick texture that some find unpleasant. Steeping it is usually preferred.

Q: Can I drink this every day?

A: For most people, a cup of herbal tea is safe. However, if you are pregnant, breastfeeding, or on medication, always check with a doctor first, as concentrated herbs can interact with certain treatments.

Q: Does it actually cure anxiety and insomnia?

A: No. While the ritual of drinking warm tea can be relaxing (which helps with sleep), it is not a clinical treatment for anxiety disorders.

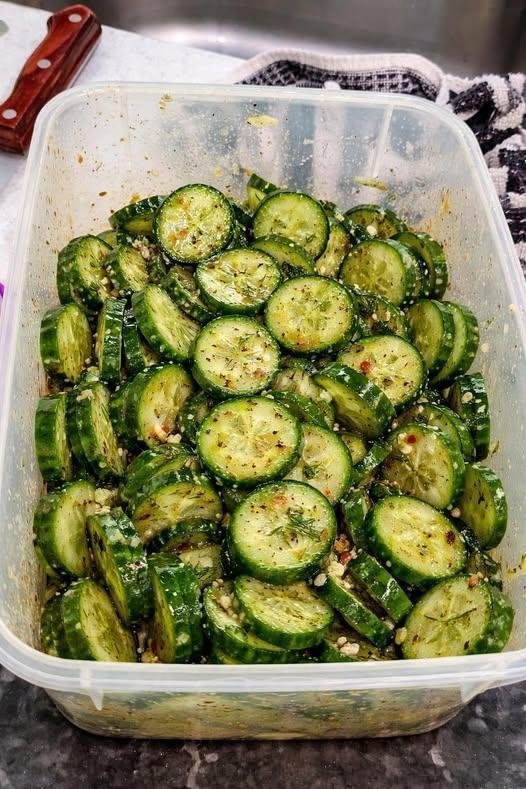
Garlic Herb Cucumber Salad

Garlic Herb Cucumber Salad

Description

A crisp and refreshing salad made from sliced cucumbers tossed with garlic, herbs, olive oil, vinegar, and a touch of chili for a flavorful bite. Perfect for summer meals, BBQs, or as a healthy side dish to any main course.

Ingredients

  • 4–5 medium cucumbers, thinly sliced

  • 2–3 cloves garlic, minced

  • 2 tbsp olive oil

  • 2 tbsp white vinegar or apple cider vinegar

  • 1 tsp dried oregano or Italian seasoning

  • 1/4 tsp crushed red pepper flakes (optional, for heat)

  • Salt and black pepper, to taste

  • 1–2 tbsp crumbled feta cheese (optional)

  • Fresh dill or parsley, chopped (optional garnish)

Instructions

  1. Prepare Cucumbers: Wash and slice cucumbers into thin rounds. Pat dry with a paper towel to remove excess moisture.

  2. Mix Dressing: In a bowl, whisk together minced garlic, olive oil, vinegar, herbs, red pepper flakes, salt, and pepper.

  3. Combine: Add cucumber slices to the bowl and toss until evenly coated with the dressing.

  4. Optional Additions: Sprinkle feta cheese and fresh herbs on top for extra flavor.

  5. Chill: Refrigerate for at least 30 minutes to allow the flavors to meld. Serve cold.

Notes & Tips

  • For Crispier Cucumbers: Sprinkle a pinch of salt on the sliced cucumbers and let them sit for 10 minutes, then drain excess water before tossing with the dressing.

  • Variation: Add thinly sliced red onion or cherry tomatoes for extra color and flavor.

  • Make Ahead: Can be prepared a few hours in advance and stored in an airtight container in the fridge.

  • Vegan Option: Skip the feta or use a plant-based cheese substitute.

Servings

  • Serves 4–6 as a side dish

Nutritional Info (per serving, approx.)

  • Calories: 60 kcal

  • Protein: 1 g

  • Fat: 4 g

  • Carbohydrates: 6 g

  • Fiber: 1 g

  • Sugar: 3 g

  • Sodium: 150 mg (depending on added salt and feta)

Health Benefits

  • Low Calorie: Great for weight management.

  • Hydrating: Cucumbers are over 95% water, helping with hydration.

  • Antioxidants: Garlic and herbs provide antioxidants and anti-inflammatory properties.

  • Digestive Support: High water and fiber content aids digestion.

Q/A for Recipe

Q: Can I use other types of cucumbers?
A: Yes! English cucumbers work best, but regular cucumbers are fine—just peel if the skin is thick.

Q: How long does it last in the fridge?
A: Up to 3 days in an airtight container, though it’s best fresh for crunch.

Q: Can I make it spicy?
A: Absolutely! Increase red pepper flakes or add a dash of hot sauce.

Q: Can this be served warm?
A: It’s best served chilled, but it can be served at room temperature if needed.

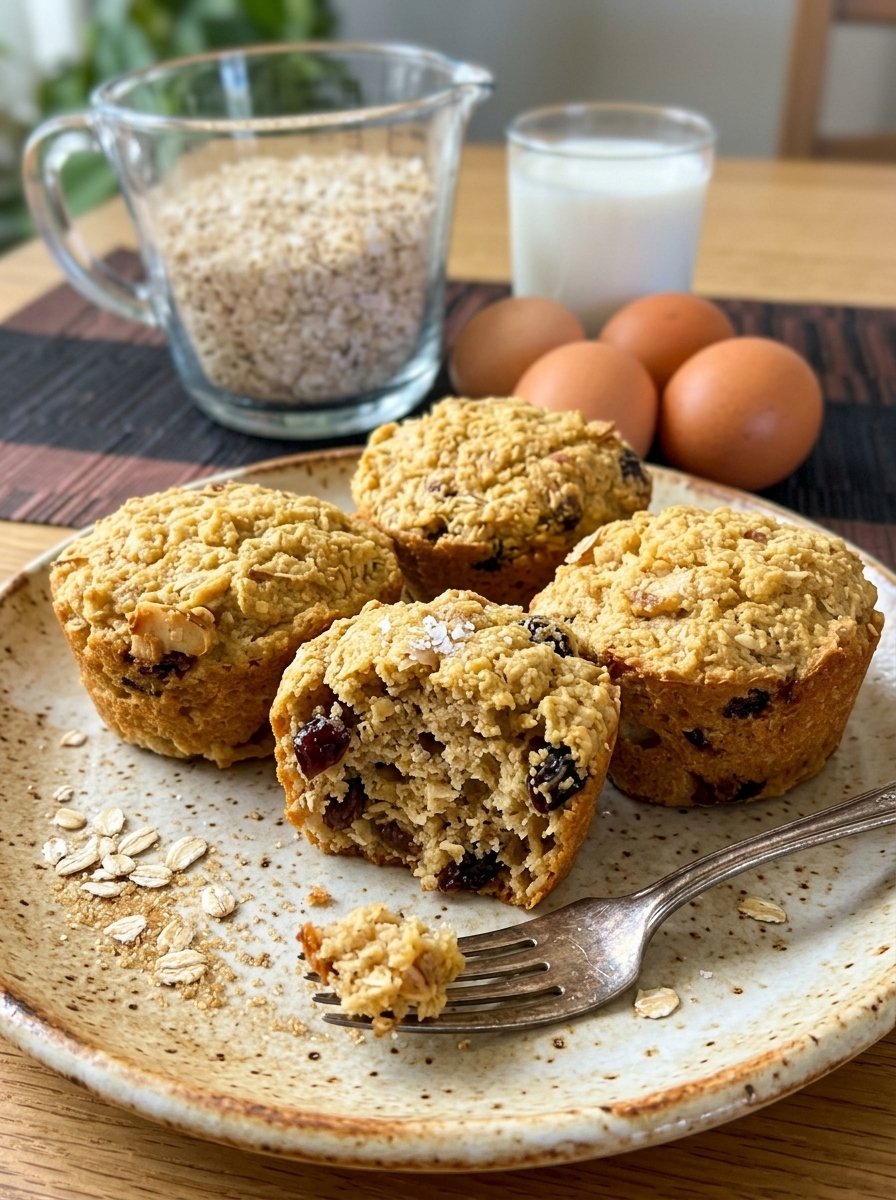
Protein-Packed Golden Oat Muffins

Protein-Packed Golden Oat Muffins 🌾

A simple, wholesome recipe that uses pantry staples to create a soft, satisfying texture perfect for busy mornings.

🛒 Ingredients

  • Oats: 2 cups Rolled oats (or quick oats) 🥣

  • Liquid: 1 cup Milk (dairy or plant-based) 🥛

  • Eggs: 4 Large eggs 🥚

  • Sweetener: 3-4 tbsp Honey or Maple syrup (optional) 🍯

  • Leavening: 1 tsp Baking powder 🧂

  • Flavor: 1 tsp Vanilla extract & a pinch of Cinnamon ✨

  • Mix-ins: A handful of raisins or chopped nuts (as seen in the photo) 🥜


👩‍🍳 Step-by-Step Instructions

  1. Soak the Oats ➡️ In a medium bowl, combine the oats and milk. Let them sit for about 10 minutes. This softens the oats and ensures your muffins aren’t dry. 🥣🥛

  2. Whisk the Eggs ➡️ In a separate large bowl, whisk the 4 eggs until light and frothy. Add your honey, vanilla extract, and cinnamon. 🥚✨

  3. Combine ➡️ Pour the soaked oat mixture into the egg mixture. Add the baking powder and stir gently until everything is well incorporated. 🌀

  4. Add Texture ➡️ Fold in your raisins or chopped nuts. This adds a lovely contrast to the soft muffin base. 🥜🍇

  5. Fill the Tins ➡️ Grease a muffin tray with a little butter or oil. Pour the batter into the cups, filling them about 3/4 of the way full. 🧁➡️

  6. Bake ➡️ Place in a preheated oven at 180°C for 20–25 minutes. They are done when the tops are golden brown and spring back when lightly touched. 🕒🔥

  7. Cool & Serve ➡️ Let them cool in the pan for a few minutes before moving to a wire rack. Enjoy them warm! ☁️✨


❓ Common Questions (Q&A)

Q: Can I make these flourless? A: Yes! This specific recipe relies on the oats and eggs for structure, so there is no need for traditional white flour. It’s a great option for those looking for a more natural treat. 🌾✅

Q: My muffins stuck to the pan, what should I do? A: Because these are quite moist, they can stick. Using paper liners or silicone muffin molds makes it much easier to pop them out perfectly every time! 🧁🛡️

Q: Can I blend the batter? A: If you prefer a smoother, cake-like texture instead of the “chunky” oat look in the photo, you can put all the ingredients (except the raisins/nuts) in a blender before baking. 🌪️

Q: How do I store these? A: Since they contain eggs and milk, keep them in an airtight container in the fridge for up to 4 days. You can also freeze them for up to a month and just pop one in the microwave for 30 seconds! ❄️📱

Savory Minced Meat & Cheese Pastry Roll

Savory Minced Meat & Cheese Pastry Roll 🧀

A delicious, golden-brown pastry filled with seasoned meat, melty cheese, and a surprise touch of chopped eggs for extra richness.

🛒 Ingredients

  • Puff Pastry: 1 large sheet (thawed) 🥐

  • Minced Meat: 300g (Beef or Chicken work best) 🥩

  • Butter: 1 tbsp (for greasing/brushing) 🧈

  • Aromatics: 1 Onion (finely chopped) & 1 tsp Dried Basil 🌿

  • Protein Boost: 2 Boiled eggs (finely chopped) 🥚

  • Cheese: 100g Grated Mozzarella or Cheddar 🧀

  • Freshness: 1 bunch Parsley (chopped) 🌱

  • Seasoning: Salt and black pepper to taste 🧂


👩‍🍳 Step-by-Step Instructions

  1. Prep the Meat Filling ➡️ In a pan, sauté the chopped onion with a little oil until soft. Add the minced meat and cook until browned. Season with salt, pepper, and dried basil. Drain any excess fat and let it cool slightly. 🍳

  2. Prepare the Dough ➡️ Roll out your puff pastry sheet on a lightly floured surface or parchment paper. 📜

  3. Layer the Flavors ➡️ Spread the cooked minced meat evenly across the pastry, leaving a small border at the edges. Top with the chopped boiled eggs and half of the chopped parsley. 🌿

  4. Add the Cheese ➡️ Sprinkle the grated cheese generously over the meat and egg layer. 🧀

  5. Roll It Up ➡️ Carefully roll the pastry tightly (like a Swiss roll) starting from the long edge. Pinch the ends to seal everything inside. 🌀

  6. Bake to Golden Perfection ➡️ Place the roll on a greased baking tray. Brush the top with melted butter or an egg wash for extra shine. Bake at 200°C for about 20–25 minutes until the pastry is puffed and deep golden brown. 🕒

  7. Final Touch ➡️ Remove from the oven, sprinkle with the remaining fresh parsley, and slice into thick rounds while warm. ✨


❓ Common Questions (Q&A)

Q: Can I use raw meat directly on the pastry? A: It is much safer and tastier to cook the meat first. This prevents the pastry from getting soggy from the meat juices and ensures the onions are perfectly soft. 🥘

Q: My pastry isn’t rising, what happened? A: Make sure your oven is fully preheated before putting the tray in. Puff pastry needs that initial “blast” of heat to create those beautiful, flaky layers! 🔥

Q: Can I make this ahead of time? A: You can roll it up and keep it in the fridge (covered) for a few hours before baking. Just bake it fresh when you’re ready to eat! ❄️

Q: What should I serve this with? A: It pairs perfectly with a crisp green salad or a simple garlic yogurt dip. 🥗

Chia–Lemon Drink (Chia Lemon Water)

Chia–Lemon Drink (Chia Lemon Water)

Description

Chia–Lemon Drink is a refreshing hydration beverage made by soaking chia seeds in water and finishing with fresh lemon juice. It’s light, mildly tangy, and packed with fiber, omega-3 fatty acids, and antioxidants. This drink is commonly enjoyed in the morning or between meals to support digestion, hydration, and overall wellness.

Ingredients

  • Chia seeds – 1 tablespoon

  • Water – 300 ml (about 1¼ cups)

  • Fresh lemon juice – 1 teaspoon

  • (Optional) Honey or stevia – to taste

  • (Optional) A pinch of salt – for electrolytes

Instructions (How to Make)

  1. Soak the chia seeds
    Add chia seeds to the water and stir well to prevent clumping.

  2. Rest and gel
    Let sit for 10–15 minutes, stirring once or twice, until the seeds swell and form a gel.

  3. Add lemon juice
    Stir in fresh lemon juice.

  4. Optional flavoring
    Add honey, stevia, or a pinch of salt if desired.

  5. Serve
    Drink immediately or refrigerate for up to 24 hours.

 Prep Time

  • Prep: 5 minutes

  • Soaking: 10–15 minutes

  • Total: ~15–20 minutes

 Servings

  • 1 serving

 Nutritional Information (Approx. per serving)

  • Calories: 60–70 kcal

  • Fiber: 5–6 g

  • Protein: 2 g

  • Fat: 4 g (mostly omega-3s)

  • Carbohydrates: 6 g

  • Sugar: <1 g

  • Sodium: Very low (unless salt added)

(Values may vary slightly based on ingredients used.)

 Potential Benefits

✔ Supports hydration
✔ High in dietary fiber for digestion
✔ Provides omega-3 fatty acids for heart health
✔ May help promote fullness and reduce overeating
✔ Lemon adds vitamin C and antioxidants
✔ Low glycemic impact when unsweetened

Important: While chia seeds may help support stable blood sugar when part of a balanced diet, they do not replace medication or medical care.

 Tips for Best Results

  • Always soak chia seeds before drinking to avoid digestive discomfort.

  • Stir well to prevent clumps.

  • Use fresh lemon juice, not bottled, for better flavor and nutrients.

  • Start with ½ tablespoon chia seeds if new to chia.

  • Drink slowly, especially if consuming fiber-rich foods.

 Cautions

  • Avoid dry chia seeds—they can swell and cause choking.

  • People with digestive issues should start with smaller amounts.

  • Those on blood sugar or blood pressure medication should consult a healthcare professional before daily use.

Frequently Asked Questions (Q&A)

Q: Can I drink this every day?
A: Yes, in moderation. Once daily is generally safe for most healthy adults.

Q: Is this drink good for diabetes?
A: It may support blood sugar control due to fiber content, but it does not treat diabetes. Always follow medical advice.

Q: When is the best time to drink it?
A: Morning on an empty stomach or between meals works best for many people.

Q: Can I prepare it in advance?
A: Yes, refrigerate for up to 24 hours in a sealed container.

Q: Can I skip the sweetener?
A: Absolutely. It’s healthiest unsweetened.

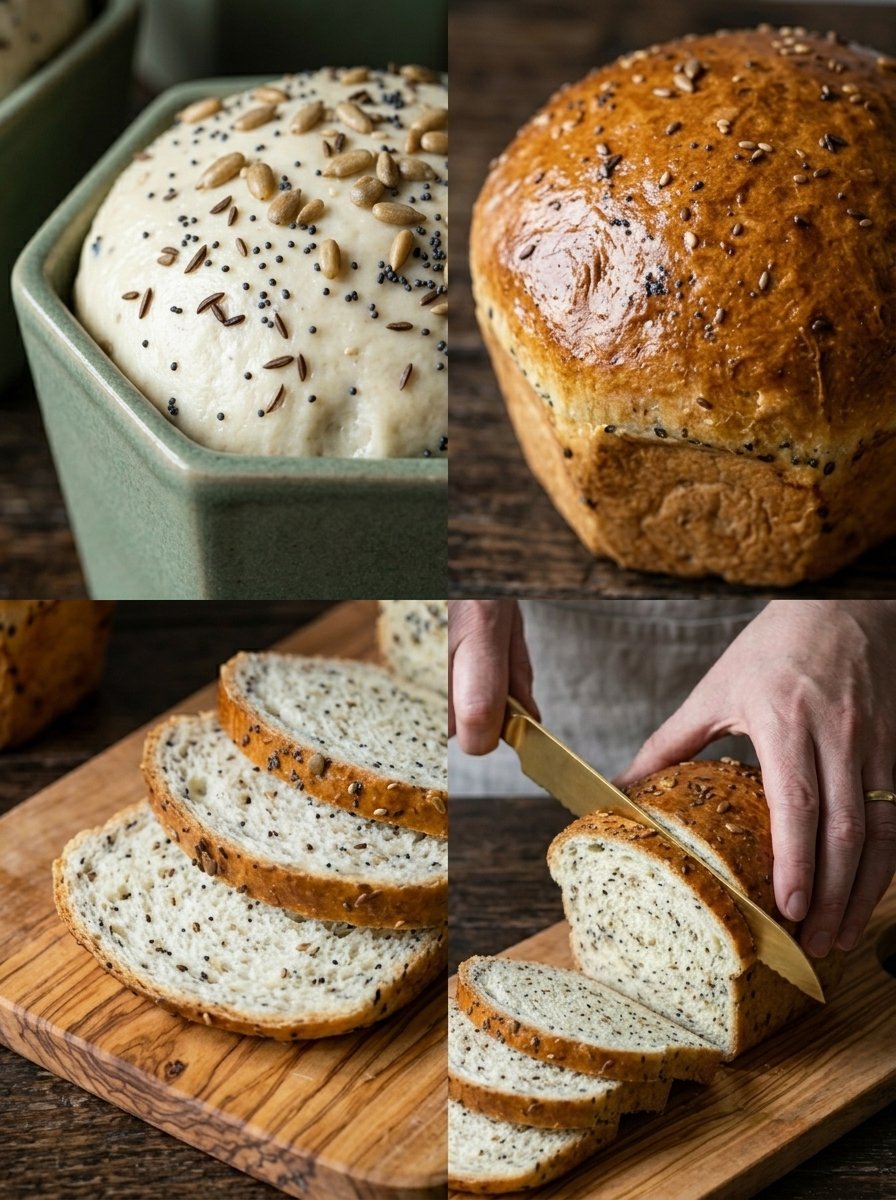
Grandmother’s Secret Vinegar & Flaxseed Bread

Grandmother’s Secret Vinegar & Flaxseed Bread

🛒 Ingredients:

  • 500g Sifted All-Purpose Flour: Sifting is key for a light texture! 🌾

  • 2 tbsp Flax Seeds: Plus extra for sprinkling on top. 🟤

  • 1 tsp Salt: To enhance the flavor. 🧂

  • 8g Dry Yeast: About 1 standard packet. 📈

  • 1 tbsp Sugar: To feed the yeast. 🍬

  • 300ml Warm Water: Not hot, just comfortably warm. 💧

  • 2 tbsp Vegetable Oil: Or melted butter for richness. 🫗

  • 1 tbsp White Vinegar: The “secret” ingredient for a perfect rise! 🧪

  • 1 Egg: For brushing on top (optional). 🥚


🥣 Step-by-Step Instructions:

  1. Activate the Yeast 🫧

    • In a small bowl, mix the warm water, sugar, and dry yeast.

    • Let it sit for about 5–10 minutes until it becomes frothy. ➡️ This proves the yeast is alive and ready!

  2. Mix the Dry Ingredients 🌾

    • In a large bowl, combine the sifted flour, flax seeds, and salt.

    • Make a “well” or hole in the center of the flour. 🥣

  3. The Secret Mixture 🧪

    • Pour the yeast mixture, oil, and the secret tablespoon of vinegar into the center of the flour. ➡️ The vinegar will react with the yeast and flour to create a much softer crumb!

  4. Knead the Dough 🤲

    • Mix until a dough forms, then knead on a lightly floured surface for 8–10 minutes.

    • The dough should be smooth, elastic, and not too sticky. ➡️ ✨

  5. The First Rise ⏳

    • Place the dough in a greased bowl and cover it with a warm, damp cloth.

    • Let it rise in a warm spot for 1 hour or until it has doubled in size. ➡️ 📈

  6. Shape and Second Rise 🏺

    • Punch the dough down to release air. Divide it into small balls and place them into greased mugs or small ceramic bowls (as seen in the photo).

    • Cover again and let them rise for another 20–30 minutes. ➡️ ⏲️

  7. Bake 🔥

    • Preheat your oven to 180°C (350°F).

    • (Optional) Brush the tops with a beaten egg and sprinkle more flax seeds.

    • Bake for 25–30 minutes until the tops are golden brown and the bread sounds hollow when tapped. 🥖✨


❓ Common Questions (Q&A)

Q: Will the bread taste like vinegar? A: No! ➡️ The small amount of vinegar evaporates during baking, leaving only a soft, airy texture behind with no sour taste.

Q: Can I use Apple Cider Vinegar? A: Yes, you can use Apple Cider Vinegar or White Vinegar. Both work perfectly as dough conditioners. 🍏

Q: Why do I need to sift the flour? A: Sifting aerates the flour, which prevents clumps and ensures your bread isn’t too dense. ➡️ 💨

Q: Can I make this in a regular loaf pan? A: Absolutely! This recipe works great in a standard 9×5 loaf pan or as individual rolls. 🍞

Nun’s Puffs Recipe

Nun’s Puffs Recipe

🛒 Ingredients:

  • 1 stick Butter (1/2 cup): Cubed for even melting. 🧈

  • 1 cup Milk: Whole milk works best for richness. 🥛

  • 3/4 cup All-Purpose Flour: Sifted to avoid lumps. 🌾

  • 4 Large Eggs: Room temperature is ideal. 🥚

  • 1/2 – 1 tbsp Sugar (optional): For the batter. 🍬

  • Sugar: For sprinkling on top. ✨

  • Honey or Maple Syrup: For serving. 🍯

  • Whipped Cream/Fruit: For garnish. 🍓


🥣 Step-by-Step Instructions:

  1. Preheat and Prep 🌡️

    • Preheat your oven to 375°F (190°C).

    • Generously grease a 12-cup muffin tin with butter or non-stick spray. ➡️ This is crucial to help them “puff” and slide out easily!

  2. Heat the Milk and Butter 🔥

    • In a medium saucepan, combine the milk and the stick of butter.

    • Bring to a gentle boil over medium heat until the butter is completely melted. ➡️ 🧈💨

  3. Incorporate the Flour 🥄

    • As soon as the milk mixture boils, turn the heat to low and add all the flour (and sugar, if using) at once.

    • Stir vigorously with a wooden spoon until the mixture forms a smooth ball and pulls away from the sides of the pan. ➡️ Remove from heat and let it cool for about 5 minutes.

  4. Add the Eggs 🥚

    • Add the eggs one at a time. Beat well after each addition until the egg is fully incorporated and the batter is smooth and glossy before adding the next one. ➡️ Pro Tip: You can do this by hand or with a hand mixer.

  5. Fill the Tins 🧁

    • Spoon the batter into the prepared muffin tins, filling each cup about 1/2 to 2/3 full. ➡️ 🥄

  6. Bake to Golden Perfection ⏲️

    • Bake for 25 to 30 minutes or until they have puffed up high and turned a deep golden brown.

    • Important: Do not open the oven door during the first 20 minutes, or they might deflate! 🚫💨

  7. The Finishing Touch ✨

    • Remove from the oven and immediately sprinkle the tops with a little sugar while they are still hot.


❓ Common Questions (Q&A)

Q: Why didn’t my puffs rise? A: This usually happens if the oven wasn’t hot enough or if the eggs were added while the flour mixture was still boiling hot (which “cooks” the eggs too soon). ➡️ Ensure the oven is fully preheated!

Q: Can I make these savory instead of sweet? A: Absolutely! ➡️ Omit the sugar and honey, and add 1/2 cup of shredded Gruyère or Cheddar cheese and a pinch of black pepper to the batter. 🧀

Q: How do I serve these? A: They are best served warm. Drizzle them with honey and serve with a side of whipped cream or fresh berries. 🍯🍓

Q: Can I store the leftovers? A: They are best eaten fresh, but you can store them in an airtight container for 2 days. ➡️ Reheat them in the oven for a few minutes to restore their crispness.

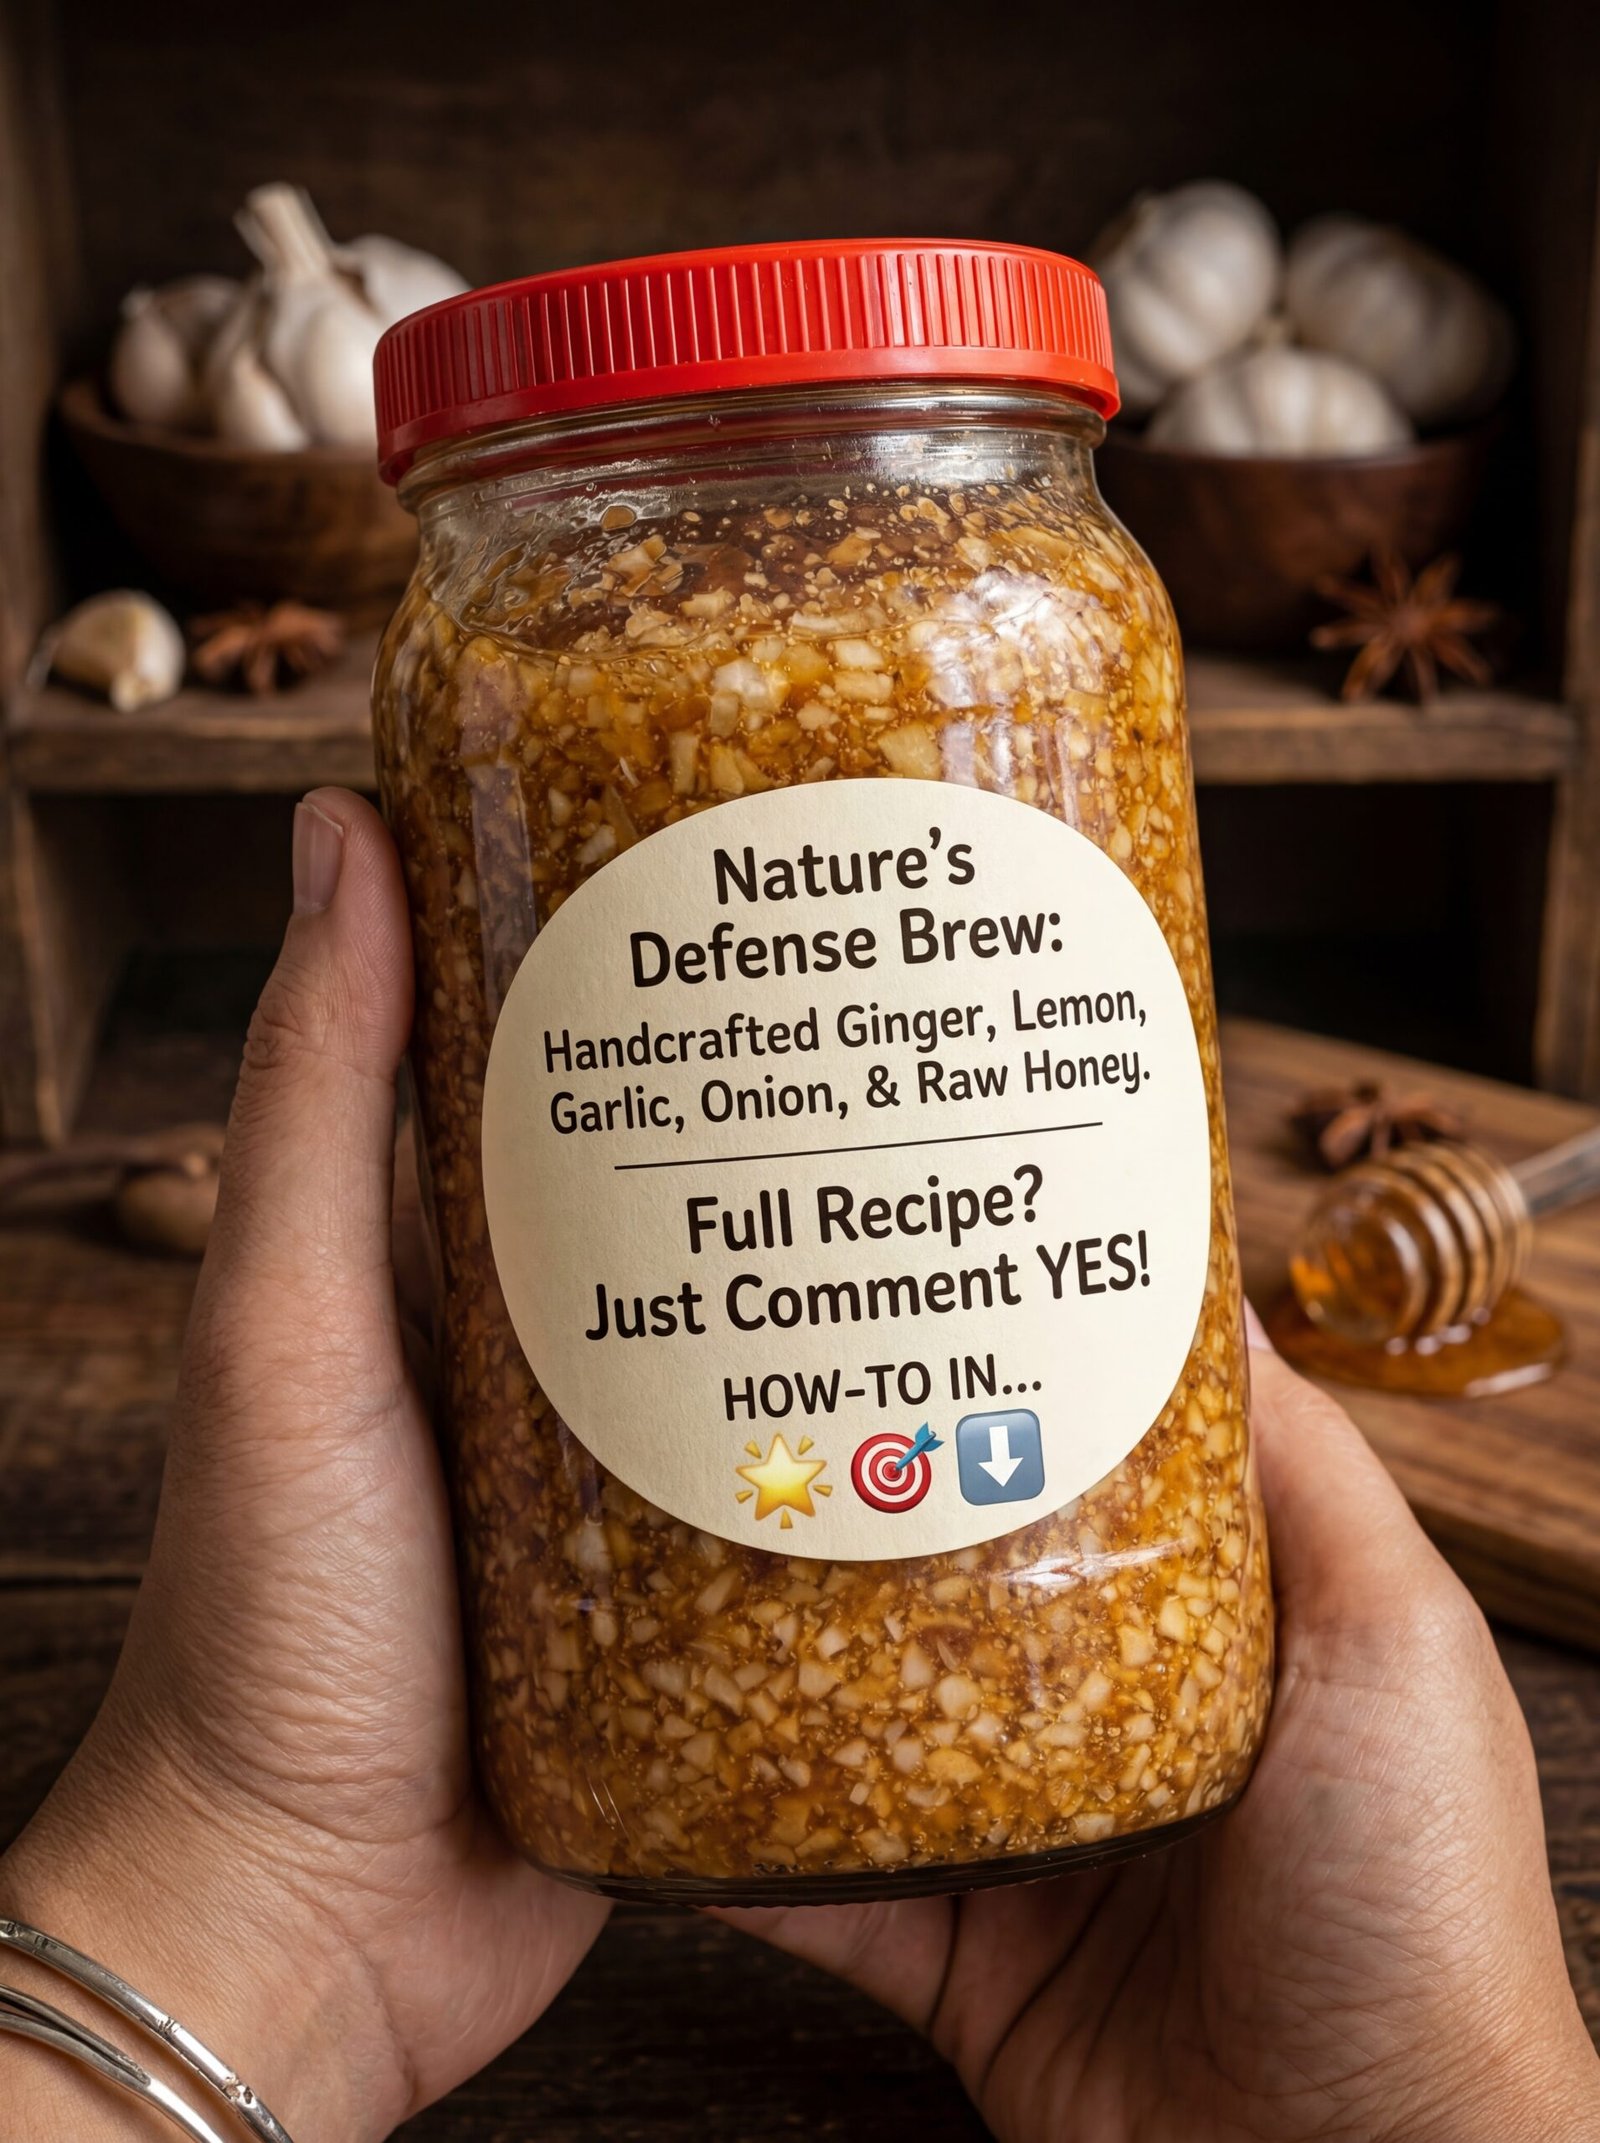
Nature’s Defense Brew Recipe


🍯 Nature’s Defense Brew Recipe

🛒 Ingredients You’ll Need:

  • 1 cup Raw Honey: It must be raw (unpasteurized) to provide the necessary enzymes for fermentation. 🐝

  • 1/2 cup Fresh Ginger: Peeled and finely minced. 🫚

  • 1/2 cup Garlic: Finely minced (about 1–2 whole heads). 🧄

  • 1/4 cup Red or White Onion: Finely diced. 🧅

  • 2 Organic Lemons: Zested and juiced. 🍋

  • Optional: A pinch of cayenne pepper or a few slices of fresh turmeric root.


🥣 Step-by-Step Instructions:

  1. Prepare the Aromatics 🔪

    • Mince the garlic, ginger, and onion very finely.

    • Pro Tip: Let the minced garlic sit on the cutting board for 10 minutes before adding it to the jar; this activates allicin, its beneficial compound. ➡️ ⏱️

  2. Zest and Juice 🍋

    • Zest the lemons, then squeeze the juice into a small bowl, removing any seeds.

  3. Layer the Jar 🫙

    • In a clean, sterilized glass mason jar, add the minced garlic, ginger, onion, and lemon zest.

    • Pour the lemon juice over the mixture.

  4. Add the Honey 🍯

    • Slowly pour the raw honey over the ingredients.

    • Note: The honey will eventually thin out as it draws moisture from the vegetables. ➡️ 💧

  5. Stir and Seal 🥄

    • Gently stir with a clean wooden or plastic spoon to ensure everything is coated and there are no large air bubbles.

    • Wipe the rim and seal the lid loosely (fermentation creates gases, so don’t tighten it 100%).

  6. The Fermentation Process ⏳

    • Store the jar in a dark, cool cupboard for 2 to 4 weeks.

    • Every day: Turn the jar upside down (ensure it’s sealed for this part!) to keep the ingredients submerged in honey, then flip it back.

  7. Store and Use ✅

    • After 2-4 weeks, the flavors will have melded. You can strain the solids out or keep them in. Store the jar in the refrigerator to slow down further fermentation.


❓ Common Questions (Q&A)

Q: Why is my honey becoming watery? A: This is normal! ➡️ The salt and sugar in the honey draw the natural juices out of the onion, ginger, and garlic. This creates the “syrup” or “brew.”

Q: Is it safe if I see small bubbles? A: Yes! 🫧 Bubbles are a sign of active fermentation. If the honey starts to foam significantly, just “burp” the jar by opening the lid for a second to release the pressure.

Q: How do I take this? A: Many people take 1 tablespoon daily for wellness, or mix it into warm (not boiling) water or tea. ☕

Q: How long does it last? A: When kept in the refrigerator, this brew can last for several months. 🗓️


⚠️ A Quick Safety Note:

  • Infants: Never give honey (especially raw) to children under 1 year old due to the risk of botulism. 🚫👶

  • Consultation: Always check with a healthcare professional before starting new herbal remedies, especially if you are on medication or pregnant. 🩺

Zesty Ginger Lemon Infusion

Zesty Ginger Lemon Infusion 🥤

Ingredients 🛒

  • 2 inches fresh ginger root (peeled and sliced thin) 🫚

  • 1 large lemon (half sliced into rounds, half juiced) 🍋

  • 4 cups filtered water 💧

  • 1 tsp honey or maple syrup (optional for sweetness) 🍯

  • A few fresh mint leaves (optional for garnish) 🍃

  • Ice cubes (as needed) 🧊


Preparation Steps 👨‍🍳

  1. Prepare the Ginger ➡️ Wash the ginger root thoroughly. Peel the skin using the edge of a spoon and slice it into thin coins to maximize the surface area.

  2. Infuse the Water ➡️ Bring 2 cups of the water to a gentle boil in a small pot. Add the sliced ginger, reduce the heat, and let it simmer for 10–15 minutes. ♨️

  3. Strain and Cool ➡️ Remove the pot from the heat and strain the ginger liquid into a glass pitcher. Discard the boiled ginger pieces. 🥣

  4. Add the Flavor ➡️ Add the remaining 2 cups of cold water to the pitcher. Stir in the fresh lemon juice and your sweetener of choice if you prefer a milder taste. 🍋

  5. Assemble ➡️ Add the fresh lemon slices and mint leaves to the pitcher for extra aroma.

  6. Chill and Serve ➡️ Fill a glass with ice cubes, pour the infusion over the top, and enjoy! 🧊✨


Questions & Answers 💡

Q: Can I make this drink without boiling the ginger? A: ➡️ Yes! You can grate the ginger directly into cold water and let it sit overnight in the fridge. This “cold brew” method results in a milder, less spicy flavor. ❄️

Q: Is it okay to leave the lemon peel in the water? A: ➡️ It is perfectly fine, but if you leave the slices in the water for more than a few hours, the white pith of the lemon might make the drink taste slightly bitter. For long-term storage, it’s better to use just the juice. 🍋

Q: Can I drink this warm instead of cold? A: ➡️ Absolutely! This recipe works wonderfully as a hot tea. Simply skip the ice and the extra cold water, and enjoy it right after the simmering process is complete. ☕

Q: How can I make the ginger flavor stronger? A: ➡️ To increase the intensity, you can grate the ginger before boiling it or simply simmer it for a longer duration (up to 20 minutes). This will release more of the natural oils and spice. 🔥

Cheesy Vegetable Egg Rolls

Cheesy Vegetable Egg Rolls are a fantastic way to pack fiber and protein into a delicious, handheld snack or meal. They are crispy on the outside, tender on the inside, and full of vibrant color! 🥕🌿


🥗 Ingredients

  • 2 cups Zucchini (grated and squeezed dry) 🥒

  • 1 cup Carrots (finely grated) 🥕

  • 1 cup Mozzarella or Cheddar cheese (shredded) 🧀

  • 2 large Eggs 🥚

  • ½ cup Green onions (finely chopped) 🧅

  • ½ cup All-purpose flour (or almond flour for a different texture) 🌾

  • ½ tsp Garlic powder 🧄

  • ¼ tsp Black pepper 🧂

  • 1 tbsp Olive oil (for pan-frying) 🍳

  • Optional: Fresh parsley or cilantro 🌿


👩‍🍳 Step-by-Step Instructions

1️⃣ Prep the Vegetables: Grate the zucchini and carrots. ➡ Crucial Step: Place the grated zucchini in a clean kitchen towel and squeeze out as much liquid as possible. This prevents the rolls from becoming soggy.

2️⃣ Mix the Base: In a large glass bowl, combine the squeezed zucchini, grated carrots, shredded cheese, and chopped green onions. 🥣

3️⃣ Add Binding Ingredients: Crack the two eggs into the bowl. Add the garlic powder and black pepper. ➡ Mix thoroughly with a fork until the eggs are well incorporated. 🥚

4️⃣ Incorporate Flour: Fold in the flour gradually. The mixture should be thick enough to hold its shape but still moist. 🥄

5️⃣ Shape the Rolls: Take a generous spoonful of the mixture and shape it into a log or “roll” using your hands or two spoons. 🥖

6️⃣ Cook to Golden Perfection: Heat olive oil in a non-stick skillet over medium heat. ➡ Carefully place the rolls in the pan. ➡ Fry for 3–4 minutes per side, turning gently, until they are golden brown and the cheese is melted inside. 🍳

7️⃣ Drain and Serve: Place the cooked rolls on a paper towel to remove any excess oil. Serve warm with your favorite dipping sauce! 🍽️


💡 Tips & Notes

  • Drain Well: The secret to the texture is removing the water from the zucchini. 🥒

  • Low-Carb Swap: You can use almond flour or coconut flour if you prefer to avoid wheat flour. 🥥

  • Add Spice: If you enjoy a kick, add a pinch of red chili flakes to the batter. 🌶️


❓ Q & A

Q: Can I bake these instead of frying? 🧐 A: Yes! ➡ Place them on a parchment-lined baking sheet and bake at 400°F (200°C) for about 15–20 minutes, turning halfway through until crispy. 🥨

Q: How do I keep them from falling apart in the pan? 🍳 A: Make sure your pan is hot before adding the rolls, and don’t crowd the pan. Let the first side cook completely to form a “crust” before trying to flip them. 🛡️

Q: Can I store these for later? 🥡 A: These stay fresh in the fridge for up to 3 days. ➡ To regain the crunch, reheat them in an air fryer or dry skillet rather than the microwave. 🌡️


✅ Health Benefits

  • High Fiber: Loaded with fresh zucchini and carrots for digestive health. 🥕

  • Protein Packed: Eggs and cheese provide a great energy boost. 🥚

  • Kid-Friendly: A wonderful way to encourage the whole family to eat more greens! 🧒

Category: Healthy Vegetable Recipes | Easy Daily Recipes 🥗✨