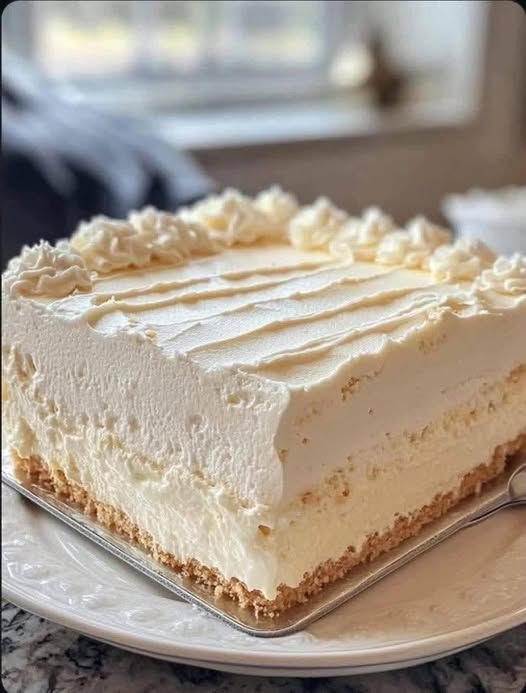
Creamy Vanilla Cream Slice Dessert

Creamy Vanilla Cream Slice Dessert

Prep Time: 20 minutes
Chill Time: 4 hours (or overnight)
Serves: 8–10 slices

A smooth, rich dessert with a biscuit base, creamy vanilla filling, and a soft whipped topping.


Ingredients

For the Base

  • 200 g (about 2 cups) crushed plain biscuits or graham crackers

  • 100 g (½ cup) melted butter

For the Cream Filling

  • 2 cups milk

  • ½ cup sugar

  • ¼ cup cornstarch

  • 2 egg yolks

  • 1 tablespoon butter

  • 1 teaspoon vanilla extract

For the Whipped Layer

  • 1½ cups heavy whipping cream

  • 3 tablespoons powdered sugar

  • ½ teaspoon vanilla extract


Instructions

1. Prepare the Base

In a bowl, mix the crushed biscuits with melted butter until evenly combined.
Press the mixture firmly into the bottom of a rectangular dish lined with parchment paper.
Refrigerate while preparing the filling.


2. Make the Cream Filling

In a saucepan, whisk together:

  • Milk

  • Sugar

  • Cornstarch

  • Egg yolks

Place over medium heat and stir constantly until thickened and smooth (about 5–7 minutes).
Remove from heat and stir in:

  • Butter

  • Vanilla extract

Let the mixture cool slightly, then pour over the biscuit base.
Spread evenly and refrigerate for at least 1 hour until set.


3. Prepare the Whipped Layer

In a chilled bowl, beat the heavy cream with powdered sugar and vanilla until soft peaks form.


4. Assemble

Spread the whipped cream evenly over the set cream layer.
Use a spatula to smooth the top or create decorative lines.


5. Chill

Refrigerate for 3 more hours or until fully firm and easy to slice.


6. Serve

Lift out using the parchment paper and cut into neat squares or slices.
Serve cold.


Helpful Tips

  • Neater slices: Dip your knife in hot water and wipe between cuts.

  • Flavor variation: Add lemon zest or a little almond extract to the cream filling.

  • Topping idea: Sprinkle shredded coconut or white chocolate curls on top.

  • Storage: Keep covered in the refrigerator for up to 3 days.

Crispy Chicken and Potato Patties

Crispy Chicken and Potato Patties

Prep Time: 20 minutes
Cook Time: 15 minutes
Yield: 10–12 patties

Golden, crispy patties made with seasoned chicken and mashed potatoes. These can be pan-fried and served as a main dish, snack, or sandwich filling.


Ingredients

  • 1 lb (450 g) ground chicken (or very finely minced chicken breast)

  • 2 large potatoes, peeled, boiled, and mashed

  • 1 small onion, finely grated or minced

  • 1 large egg

  • ½ cup breadcrumbs, plus extra for coating

  • 2 cloves garlic, minced

  • 1 tablespoon fresh parsley, finely chopped

  • 1 teaspoon salt

  • ½ teaspoon black pepper

  • ½ teaspoon paprika

  • Oil, for shallow frying (vegetable or olive oil)


Instructions

1. Prepare the Base

Place the ground chicken and mashed potatoes in a large mixing bowl.
Make sure the potatoes have cooled slightly before adding the egg.


2. Add the Aromatics

Add to the bowl:

  • Onion

  • Garlic

  • Parsley

  • Egg

  • Breadcrumbs

Mix gently until combined.


3. Season the Mixture

Add salt, black pepper, and paprika.
Mix thoroughly using your hands or a spoon until the mixture is uniform and holds together.


4. Shape the Patties

Scoop about ¼ cup of the mixture.
Roll into a ball, then flatten into a patty about ½ inch (1–1.5 cm) thick.
Repeat with the remaining mixture.


5. Coat the Patties

Place extra breadcrumbs in a shallow dish.
Lightly coat each patty in breadcrumbs on both sides.


6. Fry

Heat oil in a large skillet over medium heat.
Place patties in the pan without overcrowding.
Cook for 5–7 minutes per side, turning carefully, until golden brown and fully cooked through.


7. Drain and Serve

Transfer cooked patties to a plate lined with paper towels to remove excess oil.
Sprinkle with extra chopped parsley if desired.


Helpful Tips

  • Even cooking: Keep patties similar in size and thickness.

  • Extra flavor: Add a pinch of chili powder or dried herbs to the mixture.

  • Make ahead: Patties can be shaped and refrigerated (uncooked) for up to 24 hours before frying.

  • Serving ideas: Serve with a dipping sauce, in a sandwich bun, or with a side of vegetables or salad.

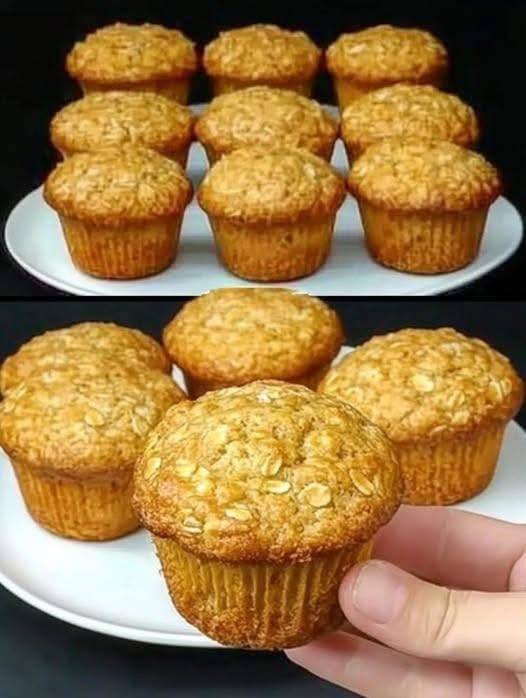
Apple & Oat Muffins

Apple & Oat Muffins

Prep Time: 5 minutes
Bake Time: 20–25 minutes
Yield: 10–12 muffins

Soft, lightly sweet muffins made with oats, apples, and nuts. These are easy to mix in one bowl and bake quickly.


Ingredients

  • 1 cup rolled oats

  • ⅔ cup (150 ml) warm milk (dairy or unsweetened plant-based)

  • 2 apples, grated or finely chopped

  • 2 eggs

  • 2 tablespoons butter or margarine, melted

  • ½ cup walnuts or almonds, chopped

  • ½ teaspoon vanilla extract

  • 1 teaspoon ground cinnamon (optional but recommended)

  • Vegetable oil, for greasing the muffin tin

  • Optional: a small pinch of salt


Instructions

1. Soften the Oats

Place the rolled oats in a large mixing bowl.
Pour in the warm milk and stir.
Let the mixture rest for 5–10 minutes so the oats absorb the liquid and soften.


2. Preheat the Oven

Preheat your oven to 350°F (180°C).
Lightly grease a muffin tin with vegetable oil or line with paper liners.


3. Prepare the Apples

Peel if desired, then grate or finely chop the apples.
Grated apples blend smoothly into the batter, while chopped apples give more texture.


4. Mix the Wet Ingredients

To the soaked oats, add:

  • Eggs

  • Melted butter or margarine

  • Vanilla extract

Whisk until everything is well combined.


5. Add the Solid Ingredients

Fold in:

  • Apples

  • Chopped nuts

  • Cinnamon (if using)

  • Pinch of salt (optional)

Stir gently until evenly mixed.


6. Fill the Muffin Tin

Divide the batter evenly among the muffin cups.
These muffins do not rise much, so you can fill each cup almost to the top.


7. Bake

Bake for 20–25 minutes, or until:

  • The tops feel firm

  • A toothpick inserted in the center comes out clean


8. Cool

Let the muffins cool in the pan for 5 minutes, then transfer to a wire rack to cool completely.


Helpful Tips

  • Extra flavor: Add raisins or chopped dates if you want more sweetness.

  • Texture: For softer muffins, grate the apples; for chunkier muffins, finely chop them.

  • Storage: Keep in an airtight container in the refrigerator for up to 3 days or freeze for longer storage.

  • Serving idea: Warm slightly and serve with butter or nut spread if desired.

Creamy Chicken & Broccoli Bake (4 Ingredients)

Creamy Chicken & Broccoli Bake (4 Ingredients)

Prep Time: 10 minutes
Cook Time: 20–25 minutes
Serves: 4

This easy baked dish combines tender chicken, broccoli, and a creamy cheese sauce for a comforting meal made with simple ingredients.


Ingredients

Main Ingredients

  • 1 lb (450 g) boneless, skinless chicken breast, cut into bite-sized pieces

  • 2 cups broccoli florets, fresh or thawed and patted dry if frozen

  • 1 cup plain Greek yogurt

  • 1½ cups shredded low-moisture mozzarella cheese, divided

Optional Seasonings (Not counted as main ingredients)

  • 1 teaspoon garlic powder

  • Salt, to taste

  • Black pepper, to taste

  • Fresh parsley or chives, chopped (for garnish)


Instructions

1. Preheat the Oven

Preheat your oven to 400°F (200°C).
Lightly grease a medium baking dish with a small amount of oil or cooking spray.


2. Season the Chicken and Broccoli

In a large mixing bowl, add the chicken pieces and broccoli florets.
Sprinkle with salt, pepper, and garlic powder.
Toss well so everything is evenly seasoned.


3. Make the Creamy Mixture

Add the Greek yogurt and ¾ cup of the shredded mozzarella to the bowl.
Stir until the chicken and broccoli are fully coated in the creamy mixture.


4. Bake

Transfer the mixture to the prepared baking dish and spread it out evenly.
Bake for 15–18 minutes, or until:

  • The chicken is fully cooked

  • The broccoli is tender

  • The internal temperature of the chicken reaches 165°F (74°C)


5. Add Cheese Topping

Remove the dish from the oven.
Sprinkle the remaining ¾ cup mozzarella evenly over the top.
Switch the oven to broil and return the dish to the oven for 2–3 minutes, until the cheese is melted, bubbly, and lightly golden.


6. Rest and Serve

Let the bake rest for 5 minutes before serving.
This helps the sauce thicken slightly and makes serving easier.
Garnish with fresh parsley or chives if desired.


Helpful Tips

  • Texture tip: Pat broccoli dry if using frozen so the sauce stays thick and creamy.

  • Flavor boost: Add onion powder, paprika, or Italian seasoning for extra flavor.

  • Make it a meal: Serve with roasted potatoes, rice, or crusty bread if desired.

  • Storage: Store leftovers in an airtight container in the refrigerator for up to 3 days.
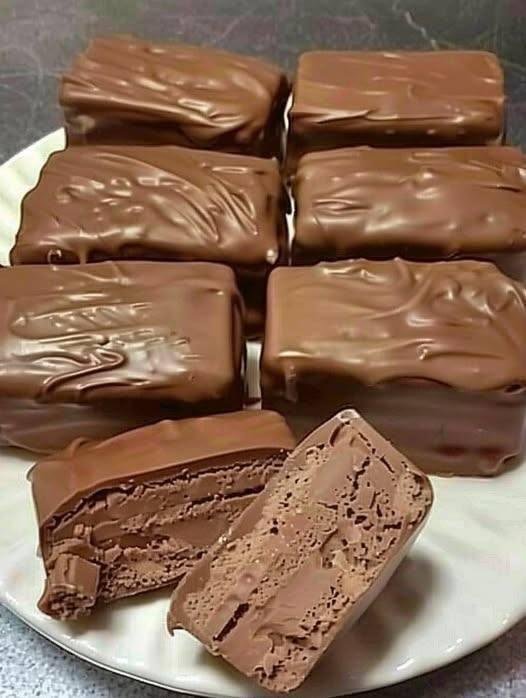
Homemade Whipped Chocolate Bars

Homemade Whipped Chocolate Bars

Prep Time: 15 minutes
Freeze Time: 2 hours
Yield: 8 bars

These creamy, airy chocolate bars have a soft whipped center and a smooth chocolate coating. They are easy to prepare and perfect for storing in the freezer for a quick dessert.


Ingredients

For the Filling

  • 1 cup thick Greek yogurt

  • ½ cup whipped topping, thawed

  • 2 tablespoons unsweetened cocoa powder

  • 2 to 3 tablespoons granulated sweetener (such as monk fruit or stevia, adjust to taste)

  • Optional: 1 scoop chocolate protein powder (for extra body and flavor)

  • Optional: ½ teaspoon vanilla extract

For the Chocolate Coating

  • ½ cup chocolate chips

  • 1 teaspoon coconut oil


Instructions

1. Prepare the Filling Base

In a medium mixing bowl, add the Greek yogurt, cocoa powder, sweetener, and vanilla extract (if using).
Whisk well until the mixture is completely smooth and free of lumps. Scrape down the sides of the bowl to ensure everything is evenly combined.


2. Make the Mixture Light and Fluffy

Add the whipped topping to the bowl.
Using a spatula, gently fold it into the chocolate yogurt mixture.
If using protein powder, fold it in at this stage.
Mix slowly and gently to keep the mixture airy and light.


3. Shape and Freeze

Line a small rectangular dish or loaf pan with parchment paper, leaving extra paper hanging over the sides for easy lifting.
Spread the mixture evenly into the pan, smoothing the top with a spatula.
Aim for about 1 inch thickness.

Place in the freezer for at least 2 hours, or until fully firm.


4. Slice into Bars

Once solid, lift the frozen slab out using the parchment paper.
Place it on a cutting board and slice into 8 equal bars.
Return the bars to the freezer while you prepare the chocolate coating.


5. Melt the Chocolate Coating

In a microwave-safe bowl, combine the chocolate chips and coconut oil.
Microwave in 30-second intervals, stirring between each round, until fully melted and smooth.


6. Coat the Bars

Working one at a time, dip each frozen bar into the melted chocolate using a fork.
Allow excess chocolate to drip off before placing the bar back onto parchment paper.
The chocolate will harden quickly because the bars are frozen.


7. Store

Once all bars are coated, place them in an airtight container and store in the freezer.


Helpful Tips

  • Flavor balance: If the filling tastes slightly tangy, vanilla extract helps round out the flavor.

  • Work fast: If the bars soften while dipping, return them to the freezer for 10 minutes before continuing.

  • Serving: Let each bar sit at room temperature for 3–5 minutes before eating for the best whipped texture.

  • Optional texture boost: Add a tablespoon of powdered peanut butter or almond butter powder to the filling for a richer taste.

Flat Tummy Detox Water

Flat Tummy Detox Water

Prep time: 10 mins | Infusion time: 2–4 hours | Yields: Approx. 6 cups

Ingredients

  • 6 cups: Water

  • 1: Cucumber, sliced

  • ½: Lemon, sliced

  • ½: Lime, juiced

  • 1 tbsp: Fresh ginger, sliced or grated

  • Handful: Fresh mint leaves


Instructions

  1. Prepare the Ingredients: Wash the cucumber, lemon, and mint thoroughly to remove any residue. Slice the cucumber and lemon into thin rounds.

  2. Prep the Ginger: Peel a small knob of fresh ginger and slice it thinly or grate it to release more of its natural oils.

  3. Combine: Place the cucumber slices, lemon slices, ginger, and mint leaves into a large pitcher or carafe.

  4. Add Liquids: Pour in the juice of half a lime, followed by the 6 cups of water.

  5. Infuse: Stir gently and place the pitcher in the refrigerator. For the best flavor, let it sit for at least 2 to 4 hours, or even overnight, to allow the ingredients to fully infuse the water.

  6. Serve: Pour into glasses (with ice if desired) and enjoy throughout the day to stay hydrated.


Why These Ingredients?

  • Cucumber: Provides a refreshing flavor and acts as a natural hydrator.

  • Lemon & Lime: Add a boost of Vitamin C and a bright, citrusy acidity.

  • Ginger: Known for its ability to soothe the digestive system and reduce minor inflammation.

  • Mint: Adds a cooling sensation and can help ease occasional digestive discomfort.