Garlic Cheese Fingers

Garlic Cheese Fingers

Prep Time: 10 minutes
Cook Time: 10–12 minutes
Serves: 4–6

Crispy flatbread or pizza crust topped with garlic butter and melted cheese, sliced into easy-to-share fingers.


Ingredients

  • 1 prepared pizza crust or flatbread (thin works best)

  • 1 tablespoon butter, melted

  • 1 tablespoon olive oil

  • 2 cloves garlic, finely minced

  • 1 cup shredded mozzarella cheese

  • ¼ cup grated Parmesan cheese

  • ½ teaspoon dried oregano or Italian seasoning

  • ¼ teaspoon black pepper

  • Optional:

    • Chopped fresh parsley

    • Red pepper flakes

    • Light sour cream or yogurt for dipping


Instructions

1. Preheat Oven

Preheat oven to 400°F (200°C).
Line a baking tray with parchment paper or lightly grease it.


2. Prepare Garlic Butter

In a small bowl, mix:

  • Melted butter

  • Olive oil

  • Minced garlic

  • Black pepper

  • Oregano or Italian seasoning

Stir until well combined.


3. Prepare the Crust

Place pizza crust or flatbread on the baking tray.
Brush the entire surface evenly with the garlic butter mixture.


4. Add Cheese

Sprinkle mozzarella evenly over the crust.
Top with Parmesan cheese.


5. Bake

Bake for 10–12 minutes, or until:

  • Cheese is fully melted

  • Edges are lightly golden

  • Bottom is crisp

For extra browning, broil for the last 1–2 minutes while watching closely.


6. Slice and Serve

Remove from oven and let rest for 2 minutes.
Slice into strips or triangles.
Garnish with chopped parsley if desired.


Optional Light Version (Lower-Calorie Method)

  • Use whole wheat or low-carb flatbread

  • Use part-skim mozzarella

  • Reduce butter to ½ tablespoon

  • Increase garlic and herbs for flavor without extra fat


Storage & Reheating

  • Storage: Refrigerate leftovers up to 2 days

  • Reheat: Oven or air fryer at 350°F (175°C) for 4–5 minutes

  • Avoid microwave for best texture


Serving Ideas

Serve with:

  • Marinara sauce

  • Light garlic yogurt dip

  • Tomato soup

  • Fresh salad

Salmon Stuffed with Spinach & Parmesan

Salmon Stuffed with Spinach & Parmesan

Prep Time: 15 minutes
Cook Time: 12–15 minutes
Serves: 4

Tender salmon fillets filled with a creamy spinach and Parmesan mixture, then baked until flaky and golden.


Ingredients

  • 4 salmon fillets (about 6 oz / 170 g each, skin removed if preferred)

  • 1 tablespoon olive oil

  • 1 teaspoon smoked paprika

  • ½ teaspoon garlic powder

  • ½ teaspoon onion powder

  • 1 cup fresh spinach, finely chopped

  • ¼ cup grated Parmesan cheese

  • Optional:

    • Salt, to taste

    • Black pepper, to taste

    • 1 tablespoon cream cheese or ricotta (for a creamier filling)

    • Lemon wedges, for serving


Instructions

1. Preheat and Prepare

Preheat oven to 375°F (190°C).
Lightly grease a baking dish with olive oil or line with parchment paper.


2. Prepare the Salmon

Using a sharp knife, cut a pocket lengthwise into the side of each salmon fillet (do not cut all the way through).
Place fillets on a plate and brush lightly with olive oil.

Season both sides with:

  • Smoked paprika

  • Garlic powder

  • Onion powder

  • Salt and pepper (if using)


3. Make the Filling

In a bowl, combine:

  • Chopped spinach

  • Parmesan cheese

  • Optional cream cheese or ricotta

Mix until evenly blended.


4. Stuff the Salmon

Spoon the spinach mixture into each salmon pocket.
Press gently so the filling stays inside.


5. Bake

Place stuffed fillets in the prepared baking dish.
Bake uncovered for 12–15 minutes, or until:

  • Salmon flakes easily with a fork

  • Internal temperature reaches 145°F (63°C)

For a lightly browned top, broil for the last 1–2 minutes.


6. Rest and Serve

Let the salmon rest for 2–3 minutes before serving.
Serve with lemon wedges if desired.


Helpful Tips

  • Even cooking: Choose fillets of similar thickness.

  • Extra flavor: Add a pinch of nutmeg or dried basil to the filling.

  • Side ideas: Serve with roasted potatoes, rice, or steamed vegetables.

  • Storage: Refrigerate leftovers in a sealed container for up to 2 days.

  • Reheating: Warm gently in the oven at 300°F (150°C) to avoid drying out.

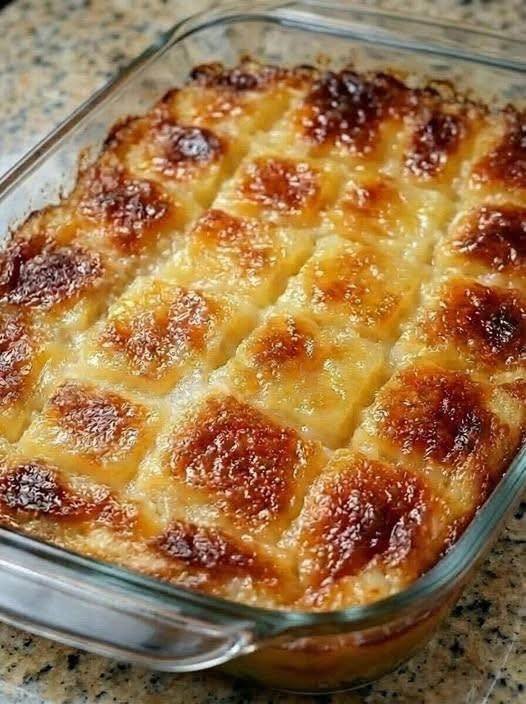
Cheesy Baked Potato Casserole (Steakhouse-Style)

Cheesy Baked Potato Casserole (Steakhouse-Style)

Prep Time: 20 minutes
Bake Time: 45–55 minutes
Serves: 6–8

A rich, baked potato dish layered with cream, cheese, and seasonings, baked until golden and bubbling.


Ingredients

  • 3 pounds (about 6 medium) potatoes, peeled and thinly sliced

  • 2 cups heavy cream

  • 1 cup whole milk

  • 3 tablespoons butter

  • 3 cloves garlic, minced

  • 1 teaspoon salt

  • ½ teaspoon black pepper

  • ½ teaspoon paprika

  • 1 teaspoon onion powder

  • 2 cups shredded cheddar cheese

  • 1 cup shredded mozzarella or Monterey Jack cheese

  • ½ cup grated Parmesan cheese

  • Fresh parsley, chopped (optional, for garnish)


Instructions

1. Preheat and Prepare

Preheat oven to 375°F (190°C).
Butter or lightly grease a 9×13-inch baking dish.


2. Cook the Cream Base

In a saucepan over medium heat, melt the butter.
Add garlic and cook for 30 seconds until fragrant.
Pour in cream and milk.
Stir in salt, pepper, paprika, and onion powder.
Heat until warm but not boiling. Remove from heat.


3. Layer the Potatoes

Arrange half of the sliced potatoes evenly in the baking dish.
Pour half of the cream mixture over them.
Sprinkle with:

  • 1 cup cheddar

  • ½ cup mozzarella

  • ¼ cup Parmesan

Repeat with remaining potatoes, cream, and cheeses.


4. Bake Covered

Cover the dish tightly with foil.
Bake for 35 minutes.


5. Bake Uncovered

Remove foil and bake for another 15–20 minutes, until:

  • The top is golden brown

  • The potatoes are tender when pierced with a fork

  • The sauce is bubbling around the edges


6. Rest and Serve

Let rest for 10 minutes before slicing.
Garnish with parsley if desired.


Helpful Tips

  • Even cooking: Slice potatoes evenly (⅛-inch thick is ideal).

  • Extra flavor: Add a pinch of thyme or rosemary to the cream mixture.

  • Texture option: Top with breadcrumbs for a crisp finish.

  • Storage: Refrigerate leftovers up to 3 days.

  • Reheating: Warm in oven at 325°F (165°C) until heated through.

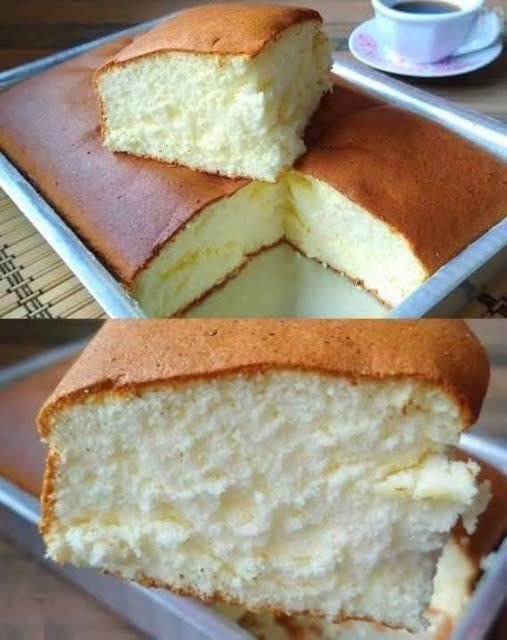
Cloud Milk Cake (3 Ingredients)

Cloud Milk Cake (3 Ingredients)

Prep Time: 15 minutes
Bake Time: 30–35 minutes
Serves: 6–8 slices

A light, airy cake made with eggs, milk, and sweetener, with a soft texture similar to a soufflé-style sponge.


Ingredients

  • 5 large eggs, separated

  • 1 cup (240 ml) milk

  • ½ cup granulated sweetener (such as monk fruit or erythritol, adjust to taste)

Optional:

  • 1 teaspoon vanilla extract

  • Pinch of cream of tartar (for stabilizing egg whites)


Instructions

1. Prepare the Pan and Oven

Preheat your oven to 325°F (160°C).
Line the bottom of an 8-inch round or square baking pan with parchment paper.
Do not grease the sides of the pan so the batter can rise evenly.


2. Mix the Yolk Batter

Place the egg yolks in a medium bowl.
Add the milk and ¼ cup of the sweetener.
Whisk until smooth and slightly pale in color.
Stir in vanilla extract if using.


3. Whip the Egg Whites

In a clean, dry bowl, beat the egg whites with a mixer on medium-high speed.
Once foamy, gradually add the remaining ¼ cup sweetener.
Beat until stiff peaks form.
If using cream of tartar, add it at the foamy stage.


4. Combine the Mixtures

Add a small portion of the whipped egg whites to the yolk mixture and stir gently to loosen it.
Then gently fold the remaining egg whites into the batter using a spatula.
Fold slowly and carefully to keep the mixture airy.


5. Bake in a Water Bath

Pour the batter into the prepared pan.
Place the pan inside a larger baking dish and pour hot water into the outer dish until it reaches about 1 inch up the sides of the cake pan.

Bake for 30–35 minutes, or until:

  • The top is lightly golden

  • The cake feels springy when gently touched


6. Cool Gradually

Turn off the oven and crack the door open.
Let the cake sit inside for 10 minutes.
Remove and allow to cool completely in the pan before slicing.


Helpful Tips

  • Clean bowl: Any grease or water can prevent egg whites from whipping properly.

  • Gentle folding: Use a light hand to keep the batter fluffy.

  • Flavor ideas: Add lemon zest or almond extract for variation.

  • Serving: Serve plain or with fruit, cream, or a light glaze.

  • Storage: Keep covered in the refrigerator for up to 2 days.

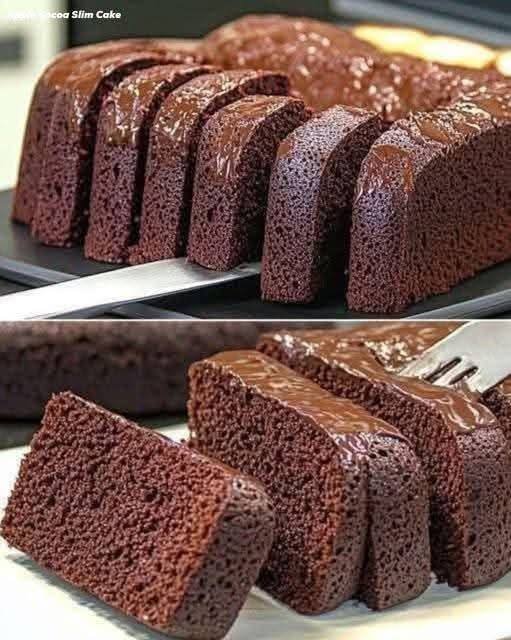
Flourless Apple & Cocoa Cake

Flourless Apple & Cocoa Cake

Prep Time: 10 minutes
Bake Time: 35–40 minutes
Serves: 8 slices

A soft, dense chocolate-style cake made from blended apples, eggs, and cocoa powder.


Ingredients

  • 4 medium apples (such as Gala, Fuji, or Red Delicious), peeled and cored

  • 4 large eggs

  • 5 tablespoons unsweetened cocoa powder

  • 1 teaspoon baking powder

  • Olive oil, for greasing the pan

  • Optional: Pinch of salt


Instructions

1. Prepare the Apples

Peel and core the apples.
Cut them into small chunks so they blend easily.


2. Blend the Base

Place the apple pieces and eggs into a blender or food processor.
Blend until completely smooth and liquid, with no visible apple pieces.


3. Add Dry Ingredients

Add the cocoa powder, baking powder, and salt (if using).
Blend again until the mixture is fully combined and evenly colored.


4. Prepare the Pan and Oven

Preheat your oven to 350°F (180°C).
Lightly grease a silicone mold or line a loaf pan with parchment paper and brush with olive oil.


5. Bake

Pour the batter into the prepared pan.
Bake for 35–40 minutes, or until a toothpick inserted into the center comes out clean.


6. Cool and Set

Let the cake cool in the pan for 20 minutes.
Transfer to the refrigerator and chill for 1 hour before slicing.
This helps the cake firm up and develop its dense texture.


7. Serve

Slice and serve as is, or with an optional topping of melted dark chocolate drizzled over the top.


Helpful Tips

  • Smoother texture: Blend the apples very well to avoid chunks in the batter.

  • Flavor option: Add ½ teaspoon vanilla extract or cinnamon for extra aroma.

  • Pan choice: Silicone or parchment-lined pans release more easily.

  • Storage: Store covered in the refrigerator for up to 3 days.

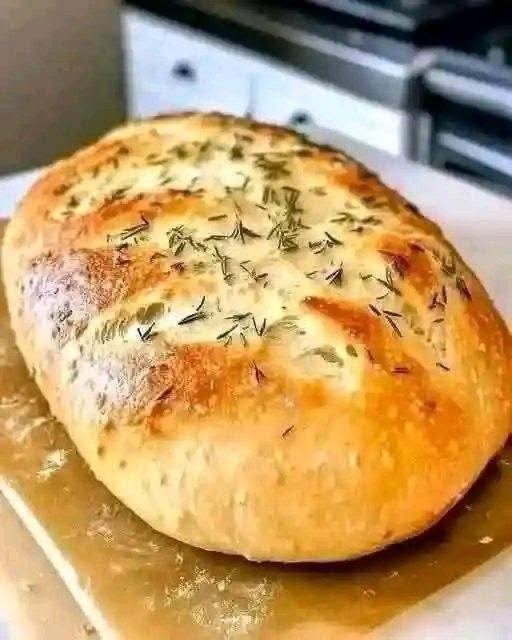
Simple No-Knead Herb Bread

Simple No-Knead Herb Bread

Prep Time: 10 minutes
Rise Time: 1½–2 hours
Bake Time: 35–40 minutes
Yields: 1 round loaf

A soft, airy bread with a lightly crisp crust and herb topping, made without kneading.


Ingredients

  • 3 cups all-purpose flour

  • 1 teaspoon salt

  • 1 tablespoon sugar

  • 1 tablespoon instant yeast

  • 1½ cups warm water (about 110°F / 43°C)

  • 1 tablespoon olive oil (for brushing)

  • 1–2 teaspoons dried herbs (rosemary, thyme, or mixed herbs)

Optional topping:

  • Coarse salt or extra herbs


Instructions

1. Mix the Dough

In a large bowl, combine:

  • Flour

  • Salt

  • Sugar

  • Yeast

Pour in the warm water and stir with a spoon until a sticky, shaggy dough forms.
Do not knead.


2. First Rise

Cover the bowl with a towel or plastic wrap.
Let rise in a warm place for 1½ to 2 hours, or until doubled in size and bubbly.


3. Shape

Line a baking tray with parchment paper.
Turn the dough out onto the tray and gently shape it into a round loaf using a spatula or lightly oiled hands.


4. Second Rest

Cover loosely and let rest for 20 minutes while the oven heats.


5. Preheat Oven

Preheat to 375°F (190°C).


6. Add Topping

Brush the loaf lightly with olive oil.
Sprinkle dried herbs evenly over the top.
Optional: add a light pinch of coarse salt.


7. Bake

Bake for 35–40 minutes, or until:

  • The top is deep golden

  • The loaf sounds hollow when tapped on the bottom


8. Cool

Transfer to a rack and cool for 15–20 minutes before slicing.


Helpful Tips

  • Crispier crust: Place a small oven-safe dish of hot water on the lower rack while baking.

  • Flavor ideas: Add garlic powder or grated cheese to the dough.

  • Storage: Wrap and store at room temperature for 2 days or freeze for longer storage.

  • Serving: Great with soups, butter, olive oil, or as sandwich bread.