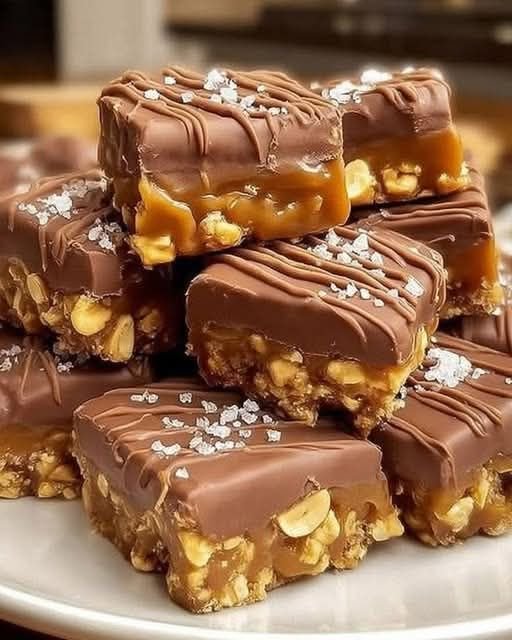
Chocolate Caramel Peanut Bars


Chocolate Caramel Peanut Bars

Ingredients

Peanut Base

  • 2 cups roasted peanuts (unsalted or lightly salted)

  • ½ cup crushed digestive biscuits or graham crackers

  • ¼ cup melted butter

Caramel Layer

  • 1 cup granulated sugar

  • 6 tbsp butter, room temperature

  • ½ cup heavy cream, room temperature

  • ½ tsp salt

  • 1 tsp vanilla extract

Chocolate Topping

  • 1 ½ cups milk chocolate or semi-sweet chocolate chips

  • 2 tbsp creamy peanut butter (optional, for a softer chocolate layer)

  • Flaky sea salt for sprinkling


Instructions

1. Prepare the Base

  • Line an 8×8 inch square baking pan with parchment paper, leaving a slight overhang on the sides for easy removal.

  • In a medium bowl, combine the roasted peanuts, crushed biscuits, and melted butter.

  • Stir until the crumbs are moistened and the peanuts are evenly coated.

  • Press the mixture firmly into the bottom of your prepared pan. Place it in the freezer to set while you make the caramel.

2. Make the Caramel

  • Place the granulated sugar in a heavy-bottomed saucepan over medium heat.

  • Whisk constantly as the sugar melts. It will clump first, then turn into a thick, amber-colored liquid. Watch closely so it doesn’t burn.

  • Once the sugar is completely melted, carefully add the butter. The mixture will bubble rapidly; keep whisking until the butter is fully incorporated.

  • Slowly pour in the heavy cream. Let the mixture boil for about 1 minute.

  • Remove from heat and stir in the salt and vanilla extract.

  • Let the caramel cool for about 5–10 minutes, then pour it evenly over the peanut base. Return the pan to the refrigerator for at least 30 minutes.

3. Add the Chocolate Layer

  • In a microwave-safe bowl, melt the chocolate chips (and peanut butter, if using) in 30-second intervals, stirring in between until smooth.

  • Pour the melted chocolate over the set caramel layer. Spread it to the edges with a spatula.

  • Optional: Drizzle a little extra melted chocolate on top in a zig-zag pattern for that professional look seen in your photo.

  • Immediately sprinkle with flaky sea salt.

4. Set and Serve

  • Refrigerate for at least 2 hours, or until the chocolate and caramel are completely firm.

  • Lift the bars out of the pan using the parchment paper overhang.

  • Using a sharp knife dipped in hot water (and wiped dry), slice into squares.

Zero-Carb Pizza, All the pizza flavor you crave—without a single gram of carbs.

Zero-Carb Pizza, All the pizza flavor you crave—without a single gram of carbs.

Do you miss pizza, but follow a strict zero-carb diet or a Carnivore eating plan? Giving up bread and crusts might feel like giving up on a classic comfort food forever. We know that feeling of intense craving when your friends order a  pie! Fortunately, we have the perfect zero-carb solution that delivers all the savory satisfaction you need while keeping your carb count exactly at zero.

Groceries

This recipe, affectionately known as a “Meatza,” uses a perfectly seasoned, protein-packed ground  meat crust instead of flour-based dough. It’s not just a substitution—it’s an incredibly delicious, high-protein meal that’s naturally gluten-free and completely free of vegetable oils and sugars. It’s the ultimate Keto-friendly recipe for when the craving hits hard.

Get ready to revolutionize your meal plan. This zero-carb pizza is easy, filling, and the absolute best way to enjoy a pizza night while staying 100% committed to your low-carb lifestyle.

Look at the Recipe

  • Sensory Appeal: A robust, savory crust that holds up perfectly, topped with a thick layer of melted, bubbling mozzarella and salty, smoky  pepperoni.
  • Flavor Highlight: The rich, umami flavor of the beef crust provides a satisfying foundation, enhanced by the fatty, savory punch of the zero-carb toppings.
  • Key Keto Benefit: It contains 0g net carbs and is extremely high in bioavailable protein and healthy fats, making it a perfect fat-loss meal that keeps you satiated for hours.

Ingredients Needed

For the Zero-Carb Crust

  • 1.5 lbs Lean Ground Beef (85/15 is ideal for flavor, but 93/7 also works)
  • 1 Large Egg
  • 1 tsp Salt
  • ½ tsp Black Pepper
  • ½ tsp Garlic Powder (Optional: Omit for strictest Carnivore)

For the Zero-Carb Toppings

  • ½ cup Low-Sugar/Zero-Carb Pizza Sauce (Read labels for 0g sugar/carb, or use a thin layer of cream cheese for Carnivore)
  • 1 cup Shredded Full-Fat Mozzarella Cheese (Whole Milk preferred)
  • 10-12 slices Uncured Turkey Pepperoni or Standard Pepperoni (Check for no added sugar/dextrose)
  • 1 tbsp Dried Oregano (Optional: Omit for strictest Carnivore)

How to Make Our Zero-Carb Pizza

  1. Prep the Crust: Preheat your oven to 400°F (200°C). Line a baking sheet with parchment paper. In a large bowl, combine the ground beef, egg, salt, pepper, and garlic powder (if using). Mix thoroughly using your hands until just combined—do not overmix.
  2. Shape the Dough: Press the meat mixture evenly onto the prepared baking sheet into a 10×12-inch rectangular crust shape, about $\frac{1}{2}$ inch thick. Create a slight lip around the edge to form a crust barrier.
  3. Pre-Bake: Bake the crust for 15 minutes. This allows the crust to set and the fat to render.
  4. Drain the Fat: Carefully remove the baking sheet from the oven. Gently blot or carefully pour off any excess rendered fat from the baking sheet.
  5. Load the Toppings: Spread a thin layer of your zero-carb sauce or cream cheese over the pre-baked crust. Top evenly with the shredded mozzarella, followed by the pepperoni slices and oregano (if using).
  6. Final Bake: Return the pizza to the oven and bake for another 8-10 minutes, or until the cheese is completely melted and bubbly, and the pepperoni edges are crispy.
  7. Rest and Slice: Let the pizza rest for 5 minutes before slicing into 4 generous squares.

Storage & Serving Suggestions

Discover more
cheese
Cheese
Cream

This “meatza” holds up surprisingly well and is fantastic for meal prep.

  • Storing: Allow any leftovers to cool completely. Store slices in an airtight container in the refrigerator for up to 3 days.
  • Reheating: Reheat slices in an air fryer or a toaster oven at 350°F (175°C) for 5-7 minutes. This is crucial for crisping up the meat crust again. Microwaving may result in a rubbery texture.
  • Freezing: You can freeze individual cooked slices wrapped tightly in foil for up to 1 month. Thaw overnight in the refrigerator before reheating as instructed above.
  • Serving Pairings: Since the pizza is already a complete meal (protein and fat), serve it alongside a simple zero-carb beverage like sparkling water or a cup of rich, fatty bone broth for maximum nourishment.

Cheesy Herb Bread Bake (10-Minute Prep)

Cheesy Herb Bread Bake (10-Minute Prep)

Description

This ultra-comforting Cheesy Herb Bread Bake is crisp and golden on the outside, soft and melty inside, and bursting with garlic,  herbs, and  cheese. It comes together in just 10 minutes of prep, bakes beautifully in a loaf pan, and disappears fast at parties. Perfect as a side dish, appetizer, or cozy dinner companion.

Ingredients

  • 1 loaf crusty bread or French bread (about 12–14 oz), cubed or sliced

  • 2 cups shredded mozzarella cheese

  • 1 cup shredded cheddar or Gruyère

  • 3 large eggs

  • 1 cup whole  milk or half-and-half

  • 3 tbsp melted butter

  • 2 cloves garlic, finely minced

  • 1 tbsp fresh dill or parsley, chopped (plus more for topping)

  • 1 tsp dried thyme or Italian seasoning

  • ½ tsp salt

  • ½ tsp black pepper

Instructions

  1. Preheat oven to 375°F (190°C). Grease a loaf pan.

  2. Layer bread evenly in the pan.

  3. In a bowl, whisk eggs, milk, butter, garlic, salt, pepper, and herbs.

  4. Pour mixture evenly over bread.

  5. Sprinkle cheeses generously on top.

  6. Bake uncovered for 30–35 minutes until bubbly and deeply golden.

  7. Rest 5 minutes, garnish with herbs, and serve warm.

Tips & Notes

  • Use day-old bread for best texture.

  • Swap dill for chives or rosemary if preferred.

  • For extra richness, add ¼ cup sour cream to the egg mixture.

  • Want a crispier top? Broil for the last 2 minutes.

 Servings

6–8 servings

Nutritional Information (per serving, approx.)

  • Calories: 290

  • Protein: 14g

  • Fat: 18g

  • Carbohydrates: 18g

  • Calcium: 25% DV

 Benefits

  • High in protein & calcium

  • Comforting yet simple ingredients

  • Crowd-pleasing and kid-friendly

  • Great way to use leftover bread

 Recipe Q & A

Q: Can I make this ahead of time?
Yes! Assemble, cover, and refrigerate up to 12 hours. Bake fresh.

Q: Can I freeze it?
Absolutely. Freeze after baking, reheat covered at 350°F.

Discover more
bread
Cake
Milk

Q: Can I add extras?
Yes—crispy bacon, caramelized onions, or sautéed mushrooms are excellent additions.

Q: What should I serve it with?
Soups, salads, roasted chicken, or as a standalone appetizer.

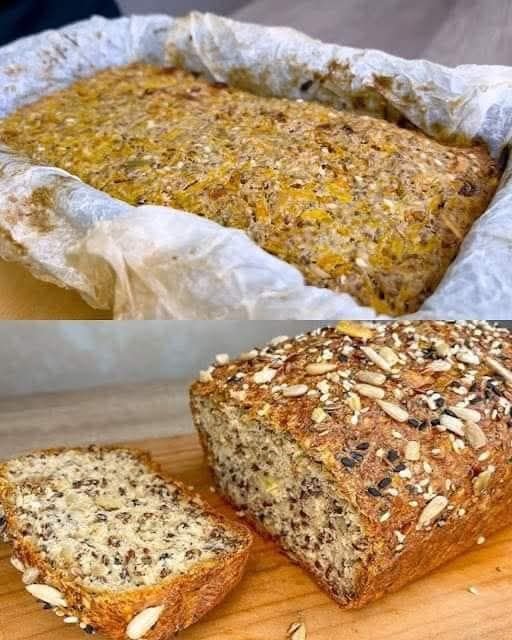
Quick Oatmeal Breakfast Bread with Pumpkin & Nuts

Quick Oatmeal Breakfast Bread with Pumpkin & Nuts

Soft • Nourishing • Naturally Flavorful

Preparation Time

  • Prep: 15 minutes

  • Bake: 40–45 minutes

  • Servings: 1 medium loaf (8–10 slices)


Ingredients

  • 1 cup oatmeal (rolled oats or quick oats)

  • 1 glass warm water (200–250 ml)

  • ½ pumpkin (about 400 g), peeled and grated or finely chopped

  • 1 tablespoon sweetener (optional, to taste)

  • 1 teaspoon cinnamon (optional)

  • A pinch of salt

  • 3 tablespoons vegetable oil (optional, for extra softness)

  • 1 tablespoon sesame seeds

  • 5–6 dried apricots, rinsed and soaked in hot water, then finely chopped

  • 1 tablespoon chia seeds

  • 1–2 tablespoons finely chopped nuts (walnuts, almonds, or pecans)

  • 2 tablespoons mixed nuts, seeds, and dried fruits (for topping or inside)

  • 1 teaspoon baking powder

  • Parchment paper for lining the pan


Step-by-Step Instructions

1. Prepare the Oats

Place the oatmeal in a mixing bowl.
Pour the warm water over the oats, stir well, and let them soak for 10 minutes until soft and slightly thick.


2. Prepare the Pumpkin

Grate or finely chop the pumpkin.
If it contains excess moisture, gently squeeze it with your hands to remove extra liquid.


3. Combine the Base

Add the pumpkin to the soaked oats.
Mix in:

  • Sweetener (if using)

  • Cinnamon (if using)

  • Salt

  • Vegetable oil (optional)

Stir until evenly combined.


4. Add Fruits, Nuts & Seeds

Fold in:

  • Chopped dried apricots

  • Chia seeds

  • Chopped nuts

  • Mixed nuts, seeds, and dried fruits

Mix gently so everything is evenly distributed.


5. Add the Leavening

Sprinkle in the baking powder and stir just until combined.
Do not overmix.


6. Prepare for Baking

Preheat oven to 180°C (350°F).
Line a loaf pan with parchment paper.

Pour the batter into the pan and smooth the top.
Sprinkle sesame seeds evenly over the surface.


7. Bake

Bake for 40–45 minutes, or until:

  • The top is golden

  • A toothpick inserted in the center comes out clean


8. Cool & Serve

Remove from oven and allow the bread to cool in the pan for 10–15 minutes.
Lift out using the parchment paper and cool completely before slicing.


Serving Suggestions

  • Enjoy warm with yogurt, honey, or nut  butter

  • Perfect for breakfast, snack time, or lunchbox slices

  • Stores well in the refrigerator for up to 4 days

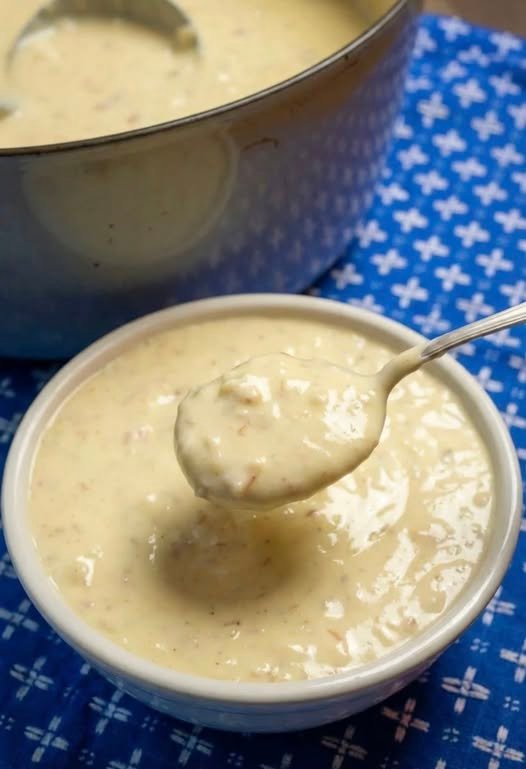
Canadian Cheese Soup

Canadian Cheese Soup

Prep Time: 15 minutes
Cook Time: 25 minutes
Yield: 4–6 servings

A creamy soup made with vegetables, milk, broth, and sharp cheddar cheese.


Ingredients

  • 3 tablespoons unsalted butter

  • 1 medium onion, finely diced

  • 2 carrots, finely diced

  • 2 celery stalks, finely diced

  • 3 tablespoons all-purpose flour

  • 4 cups chicken broth (or vegetable broth)

  • 2 cups whole milk or half-and-half

  • 2½ cups sharp cheddar cheese, freshly shredded

  • ½ teaspoon salt, or to taste

  • ½ teaspoon black pepper, or to taste

  • ¼ teaspoon paprika or dry mustard (optional)


Equipment

  • Large soup pot

  • Wooden spoon or whisk

  • Measuring cups


Instructions

1. Cook the Vegetables

Melt butter in a large pot over medium heat.
Add onion, carrots, and celery.
Cook for 6–8 minutes, stirring occasionally, until vegetables are soft.


2. Make the Roux

Sprinkle flour over the vegetables.
Stir well and cook for 1–2 minutes to remove raw flour taste.


3. Add Broth

Slowly pour in the broth while stirring constantly.
Bring to a gentle simmer.
Cook for 5 minutes until slightly thickened.


4. Add Milk

Lower heat to medium-low.
Stir in the milk or half-and-half.
Heat gently without boiling.


5. Add Cheese

Add shredded cheddar a small handful at a time.
Stir continuously until completely melted and smooth.
Do not allow soup to boil.


6. Season

Add salt, black pepper, and optional paprika or dry mustard.
Taste and adjust seasoning.


7. Serve

Ladle into bowls and serve warm.


Storage

  • Refrigerate in a sealed container for up to 3 days

  • Reheat gently over low heat, stirring frequently

  • Add milk or broth if soup becomes too thick

Freezing is not recommended due to texture changes after thawing.


Optional Variations

  • Broccoli Cheddar: Add 1 cup finely chopped broccoli

  • Bacon Cheddar: Stir in cooked chopped bacon

  • Spicy: Add cayenne or chopped jalapeño

  • Smoked: Use smoked cheddar

  • Thicker Soup: Add 1 additional tablespoon flour

  • Gluten-Free: Use gluten-free flour or cornstarch


Serving Suggestions

  • Crusty bread

  • Garlic toast

  • Green salad

  • Grilled cheese sandwich

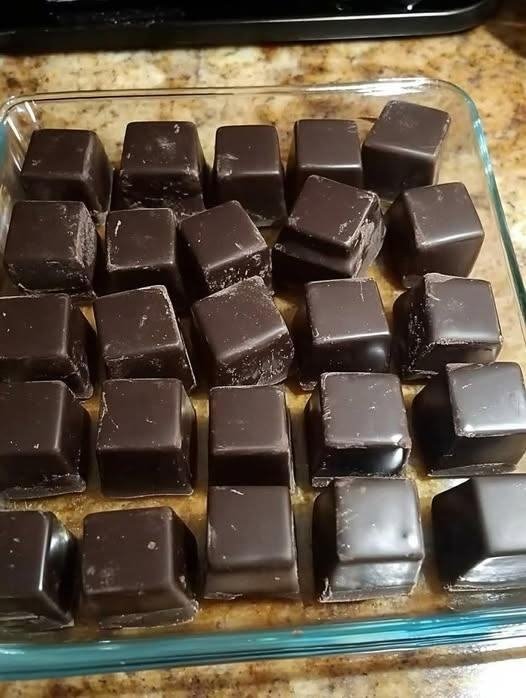
Homemade Dark Chocolate Bites

Homemade Dark Chocolate Bites

Prep Time: 10 minutes
Chill Time: 1–2 hours
Yield: About 24 small bites

These simple chocolate bites are made with cocoa powder and coconut oil for a firm, rich texture and deep chocolate flavor.


Ingredients

  • 1 cup unsweetened cocoa powder (Dutch-processed gives a smoother taste)

  • 1 cup coconut oil, melted

  • 1 tablespoon ground coffee or instant coffee powder (optional, for flavor depth)

  • 2 to 4 tablespoons powdered sweetener (stevia, erythritol, or preferred sweetener)

  • Pinch of sea salt (optional)

Optional mix-ins:

  • Chopped nuts

  • Unsweetened coconut flakes

  • Orange zest

  • Peppermint extract

  • Vanilla extract


Equipment

  • Silicone chocolate molds or

  • Parchment-lined square dish

  • Mixing bowl

  • Whisk

  • Spoon or small spatula


Instructions

1. Prepare the Molds

Place silicone molds on a tray or line a small glass dish with parchment paper. Set aside.


2. Melt the Coconut Oil

If not already melted, gently melt the coconut oil using a double boiler or microwave in short intervals. Let it cool slightly but remain liquid.


3. Mix the Liquid Ingredients

In a medium bowl, whisk together:

  • Melted coconut oil

  • Sweetener

  • Coffee powder (if using)

  • Salt

Stir until the sweetener is mostly dissolved.


4. Add Cocoa Powder

Sift the cocoa powder into the bowl to avoid lumps.
Whisk slowly until the mixture becomes smooth and glossy with no dry spots.


5. Adjust Flavor

Taste a small amount.
Add more sweetener if needed, 1 teaspoon at a time.
If desired, mix in vanilla, citrus zest, or other flavorings.


6. Pour into Molds

Carefully pour or spoon the chocolate mixture into molds or the lined dish.
Tap gently on the counter to remove air bubbles.


7. Chill

Place in refrigerator for 1–2 hours, or freezer for 30 minutes, until fully firm.


8. Unmold and Store

Remove chocolate from molds or cut into bite-size pieces.
Store in an airtight container in the refrigerator.


Storage

  • Keep refrigerated due to coconut oil’s low melting point

  • Best used within 7 days

  • Will soften at room temperature


Texture & Flavor Notes

  • Firm when chilled

  • Smooth and rich

  • Slight coffee note if used

  • Sweetness can be fully customized