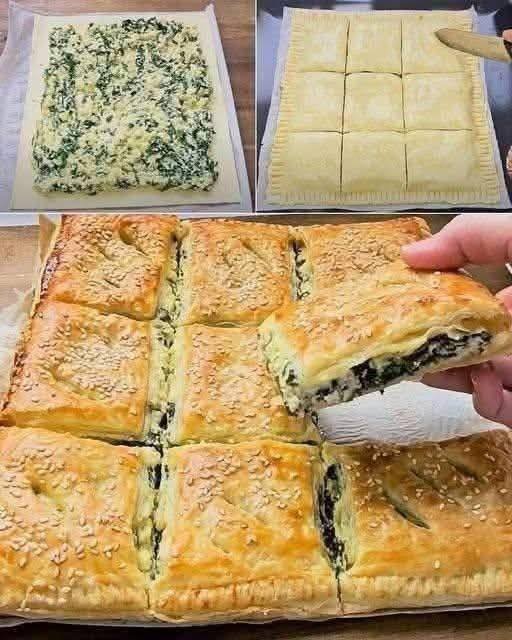
Spinach and Cheese Puff Pastry Squares

Spinach and Cheese Puff Pastry Squares

Flaky, Savory, and Potluck-Perfect

Ingredients

  • 2 sheets Puff Pastry: Thawed according to package instructions.

  • 1 ½ cups Spinach: Chopped and cooked. Crucial Step: Squeeze out every drop of excess water to prevent a soggy crust.

  • 1 cup Ricotta Cheese: For a creamy, mild flavor (or substitute Feta for a saltier, tangy kick).

  • 1/2 cup Shredded Mozzarella or Parmesan: To help bind the filling and add a golden crust.

  • 1 Large Egg: Beaten (to be used for the filling and as an egg wash).

  • 1 clove Garlic: Minced.

  • Salt & Pepper: To taste.

  • Optional: A pinch of nutmeg (pairs beautifully with spinach and ricotta).

Instructions

  1. Prep the Oven: Preheat your oven to 400°F (200°C). Line a large baking sheet with parchment paper.

  2. Make the Filling: In a medium bowl, combine the squeezed-dry spinach, ricotta (or feta), half of the beaten egg, minced garlic, mozzarella/parmesan, salt, and pepper. Mix until well combined.

  3. Prepare the Pastry: Lay one sheet of puff pastry onto your baking sheet.

  4. Assemble: Spread the spinach and cheese mixture evenly over the pastry sheet, leaving a 1-inch border around the edges.

  5. The “Lid”: Place the second sheet of puff pastry on top. Use a fork to crimp the edges together tightly, sealing the filling inside.

  6. The Egg Wash: Brush the remaining half of the beaten egg over the top of the pastry. This is what gives it that professional, deep golden shine.

  7. Score and Vent: Use a sharp knife to lightly score the top into squares (don’t cut all the way through) and poke a few small holes to let steam escape.

  8. Bake: Bake for 20–25 minutes until the pastry is puffed up and a beautiful golden brown.

  9. Serve: Let it rest for 5 minutes, then cut along your score lines into squares.


Why this is a “Potluck Winner”:

  • Handheld Ease: No forks or plates are strictly necessary, making it perfect for mingling.

  • Vegetable-Forward: It’s a great way to sneak a significant amount of greens into a savory snack.

  • The “Crunch” Factor: The contrast between the flaky outer shell and the creamy center is what makes people keep asking for it!
5-Minute “Melt-in-Your-Mouth” Cupcake

5-Minute “Melt-in-Your-Mouth” Cupcake

Quick, Simple, and Perfectly Portioned

Ingredients

  • 4 tbsp All-Purpose Flour: (Or almond flour for a lower-carb version).

  • 2 tbsp Sugar-Free Sweetener: (Like Monk Fruit or Erythritol).

  • 1 tbsp Unsweetened Cocoa Powder: For a chocolate version (or omit for vanilla).

  • 1/4 tsp Baking Powder: For that essential lift.

  • 3 tbsp Milk: (Dairy or almond milk both work great).

  • 1 tbsp Melted Butter or Coconut Oil: Adds the “melt-in-your-mouth” richness.

  • 1/4 tsp Vanilla Extract: To enhance the sweetness.

Instructions

  1. Mix Dry Ingredients: In a standard microwave-safe mug, whisk together the flour, sweetener, cocoa powder, and baking powder using a small fork. Ensure there are no lumps.

  2. Add Wet Ingredients: Pour in the milk, melted butter (or oil), and vanilla extract.

  3. Stir until Smooth: Mix everything together until the batter is smooth and glossy. Be sure to scrape the bottom of the mug to incorporate all the flour.

  4. Microwave: Place the mug in the center of the microwave. Cook on high for 90 seconds to 2 minutes.

    • Note: Every microwave is different. Start with 90 seconds; if the top still looks “wet,” add 15-second increments until it is firm.

  5. Rest and Enjoy: Let the cupcake sit for 2 minutes before eating. This is the “magic” step where the steam finishes cooking the center and the texture becomes soft and fluffy.


Why this works for your “No-Sweet” streak:

  • Portion Control: Since it only makes one, you don’t have to worry about a whole tray of leftovers calling your name.

  • Customizable: You can drop a few of your fresh raspberries (from your cheesecake fluff) into the center before microwaving for a fruity surprise.

  • Speed: It satisfies the “need something now” feeling in under 5 minutes, preventing you from reaching for processed snacks.

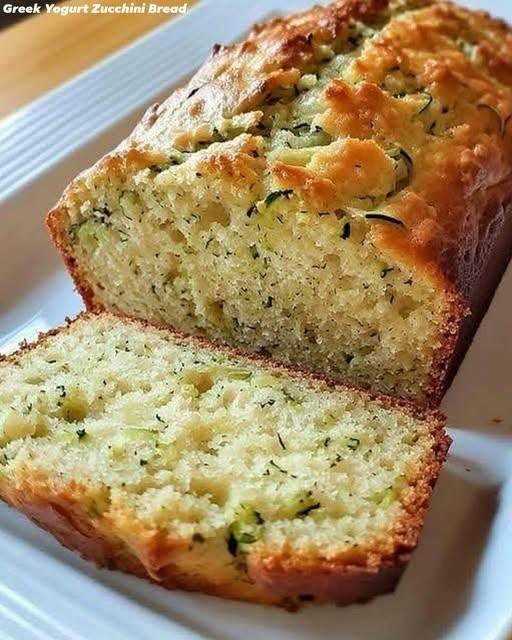
Moist Greek Yogurt Zucchini Bread

Moist Greek Yogurt Zucchini Bread

Wholesome, High-Protein, and Naturally Sweetened

Ingredients

  • 1 1/2 cups Grated Zucchini: Approximately 2 medium zucchinis. (Pro-tip: Squeeze out the excess moisture with a paper towel after grating for the best texture).

  • 2 Large Eggs: Room temperature.

  • 1/2 cup Plain Greek Yogurt: Provides moisture and a protein boost.

  • 1/3 cup Honey or Maple Syrup: A natural way to add sweetness.

  • 1/4 cup Melted Coconut Oil: Or vegetable oil if preferred.

  • 1 tsp Vanilla Extract: For a warm, baked aroma.

  • 1 1/2 cups Whole Wheat Flour: Or all-purpose flour for a lighter crumb.

  • 1 tsp Baking Powder & 1/2 tsp Baking Soda: For the perfect rise.

  • Spices: 1/2 tsp Ground Cinnamon and 1/4 tsp Ground Nutmeg.

  • 1/4 tsp Salt: To balance the flavors.

  • Optional: 1/2 cup chopped walnuts or sugar-free chocolate chips for added texture.

Instructions

  1. Preparation: Preheat your oven to 350°F (175°C). Grease a 9×5-inch loaf pan or line it with parchment paper for easy removal.

  2. Mix the Wet Ingredients: In a large bowl, whisk together the eggs, Greek yogurt, honey (or syrup), oil, and vanilla extract until smooth.

  3. Incorporate Zucchini: Stir the grated (and squeezed) zucchini into the wet mixture until evenly distributed.

  4. Combine Dry Ingredients: In a separate medium bowl, whisk together the flour, baking powder, baking soda, cinnamon, nutmeg, and salt.

  5. The Gentle Mix: Gradually add the dry ingredients into the wet ingredients. Fold them in gently with a spatula just until combined—do not overmix, as this can make the bread tough. Fold in your walnuts or chocolate chips now if using.

  6. Bake: Pour the batter into the prepared loaf pan. Bake for 45–55 minutes.

  7. The Toothpick Test: Insert a toothpick into the center; if it comes out clean or with just a few moist crumbs, it’s done.

  8. Cooling: Let the bread cool in the pan for 10 minutes, then transfer to a wire rack to cool completely before slicing.


Why this fits your lifestyle:

  • Moisture without Heavy Fats: The Greek yogurt replaces a large portion of the oil/butter usually found in quick breads, making it lighter but still incredibly soft.

  • Fiber-Rich: Using whole wheat flour and zucchini adds fiber, which helps maintain steady energy levels and keeps you full.

  • No Refined Sugars: By using honey or maple syrup, you’re avoiding the “crash” associated with processed white sugar.

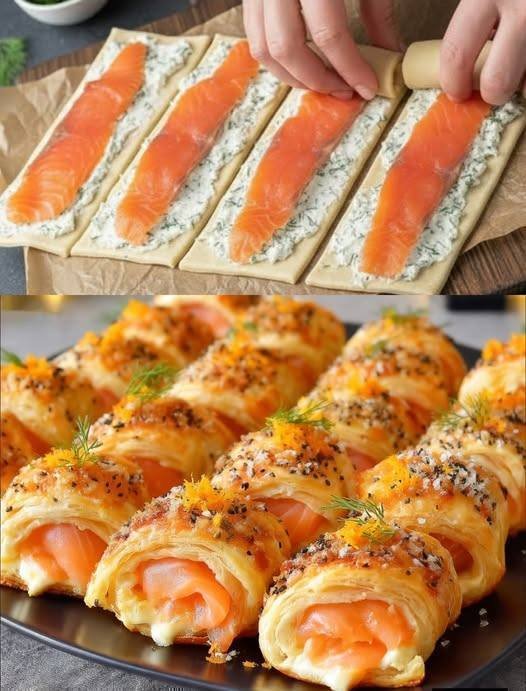
Elegant Salmon & Cream Cheese Puff Pastry Rolls

Elegant Salmon & Cream Cheese Puff Pastry Rolls

Crispy, Savory, and Refreshing

Ingredients

  • 1 package Puff Pastry Sheets: Thawed according to package instructions.

  • 200g Smoked Salmon: Sliced into thin, even strips.

  • 4 oz Cream Cheese: Softened at room temperature for easy spreading.

  • 2 tbsp Fresh Dill: Chopped finely (or 1 tsp dried dill).

  • Optional: 1 egg (beaten for an egg wash) and a squeeze of fresh lemon juice.

Instructions

  1. Prepare Your Workspace: Preheat your oven to 400°F (200°C). Line a large baking sheet with parchment paper to prevent sticking.

  2. Season the Base: In a small bowl, mix the softened cream cheese with the chopped dill. If you like a bit of brightness, add a small squeeze of lemon juice here.

  3. Roll and Spread: On a lightly floured surface, gently roll out the puff pastry sheet. Spread the cream cheese and dill mixture evenly over the entire surface, leaving a small half-inch border at the edges.

  4. Layer the Salmon: Place the smoked salmon strips evenly across the cream cheese layer.

  5. The Roll-Up: Starting from one long side, roll the pastry tightly into a log shape. Use a sharp knife to slice the log into rounds about 1 inch thick.

  6. The Final Touch: Place the rolls on the prepared baking sheet. For a professional golden shine, lightly brush the tops of the pastry with the beaten egg wash.

  7. Bake: Place in the oven for 15–18 minutes, or until the pastry has puffed up significantly and turned a beautiful golden brown.

  8. Serve: Let them rest for 5 minutes before serving. These are excellent warm or at room temperature.


Why this works for your goals:

  • Nutrient Dense: The smoked salmon provides essential fatty acids that support your energy levels during your “no-sweet” journey.

  • Satiety: The combination of protein and healthy fats helps you stay full longer, supporting the progress you’ve seen with your 15 kg loss.

20-Minute Sugar-Free Cloud Bread

20-Minute Sugar-Free Cloud Bread

Diabetic-Friendly, Gluten-Free, and Low-Calorie

Ingredients

  • 3 Large Eggs: Separated (whites in one bowl, yolks in another).

  • 3 tbsp Cream Cheese: Softened (you can use the same brand from your Cloud Cake).

  • 1/4 tsp Cream of Tartar: This is the secret to making it fluffy and stable.

  • 1/2 tsp Garlic Powder: For a savory bread flavor (optional).

  • 1/4 tsp Salt: To enhance the flavor.

  • 1 tbsp Powdered Monk Fruit: Only if you want a slightly sweeter “dessert bread” style.

  • 1/2 tsp Dried Oregano or Rosemary: For an herbal finish.

Instructions

  1. Preheat and Prep: Preheat your oven to 300°F (150°C). Line a baking sheet with parchment paper.

  2. Mix the Yolks: In a medium bowl, whisk the egg yolks with the softened cream cheese and salt until the mixture is completely smooth with no lumps.

  3. Whip the Whites: In a separate clean, dry bowl, add the egg whites and the cream of tartar. Using a hand mixer, beat on high speed until “stiff peaks” form (the whites should stay put even if you tilt the bowl).

  4. The Gentle Fold: Very slowly, fold the egg yolk mixture into the egg whites using a spatula. Do this gently so you don’t deflate the air bubbles you just created.

  5. Shape: Scoop the mixture onto the baking sheet into 6–8 rounds (about 1 inch thick). Sprinkle the top with your dried herbs or garlic powder.

  6. Bake: Bake for 15–20 minutes. The tops should be golden brown.

  7. Cool: Let them cool on the pan for at least 5 minutes. They will settle into a bread-like consistency as they cool.


Why this fits your routine:

  • No Calories/Low Carb: By removing the flour and sugar, you are avoiding the “spikes” that can interrupt your progress.

  • Speed: Because there is no yeast, you don’t have to wait hours for the dough to rise.

  • Versatility: You can use two pieces to make a sandwich or eat one plain as a light dessert.

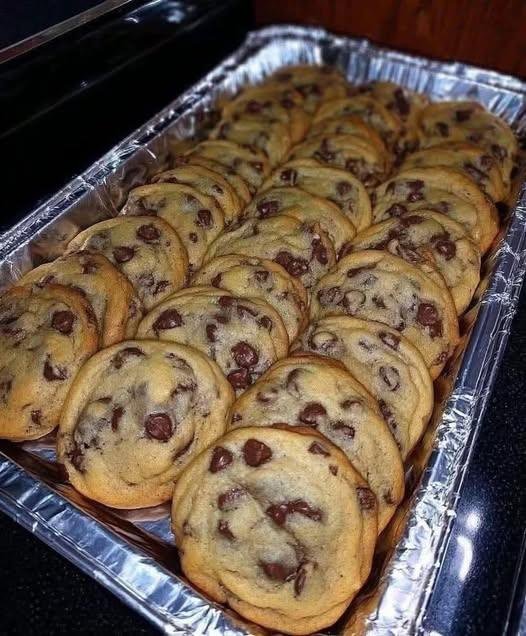
3-Ingredient Chocolate Chip Cookies

3-Ingredient Chocolate Chip Cookies

A simple homemade cookie using basic ingredients.

⏱ Prep Time: 5 minutes

🔥 Bake Time: 12–15 minutes

🍽 Makes: 18–20 cookies


📝 Ingredients

  • 2 ripe bananas

  • 1½ cups rolled oats (or oat flour)

  • ½ cup chocolate chips


👩‍🍳 Instructions

  1. Preheat oven to 180°C (350°F). Line a baking tray with parchment paper.

  2. In a bowl, mash the bananas until smooth.

  3. Stir in oats until fully combined.

  4. Fold in chocolate chips.

  5. Scoop spoonfuls of dough onto the tray and gently flatten each cookie.

  6. Bake for 12–15 minutes, or until set and lightly golden.

  7. Let cool for 5 minutes before serving.


🌟 Optional Add-Ins

  • Chopped nuts

  • Cinnamon

  • Vanilla extract

  • Raisins


🧊 Storage

  • Store in an airtight container for up to 3 days

  • Refrigerate up to 5 days

  • Freeze up to 1 month