Garlic & Ginger Wellness Tonic

Garlic & Ginger Wellness Tonic

Yields: Approx. 2 cups | Prep time: 15 mins | Cook time: 20 mins

Ingredients

  • 1 cup Fresh lemon juice (about 4–6 lemons)

  • 1 cup Garlic juice (freshly blended and strained)

  • 1 cup Ginger juice (freshly blended and strained)

  • 1 cup Raw Apple Cider Vinegar (with “the mother”)

  • 1 cup Raw honey (optional, to balance the strong flavors)


Step-by-Step Instructions

1. Prepare the Juices

Peel the garlic and ginger. Blend them separately with a small amount of water if necessary, then strain through a fine-mesh cloth or sieve to extract exactly one cup of clear juice for each.

2. Simmer the Mixture

In a non-reactive saucepan (stainless steel or ceramic), combine the lemon juice, garlic juice, ginger juice, and apple cider vinegar. Bring to a very gentle simmer over low heat.

3. Reduce the Liquid

Allow the mixture to simmer uncovered for about 20–30 minutes, or until the liquid has reduced by roughly one-quarter. This concentrates the ingredients.

4. Cool and Sweeten

Remove the pot from the heat and let it cool completely to room temperature. Once cooled, stir in the raw honey.

Note: Adding honey while the liquid is hot can destroy its natural enzymes, so wait until it is cool.

5. Storage

Pour the mixture into a clean glass bottle or jar. Store it in the refrigerator.


How to Use It

The common suggestion for this type of tonic is to take 1 to 2 tablespoons in the morning on an empty stomach. You can take it straight or stir it into a glass of warm water.

Important Precautions

  • Consult your doctor: Ingredients like garlic and ginger can act as natural blood thinners. If you are on medication for blood pressure or cholesterol, please speak with a medical professional before adding this to your routine.

  • Acidity: The high acid content can be hard on tooth enamel and sensitive stomachs; diluting it with water is highly recommended.

Nighttime Ginger & Lemon Wellness Tonic

Nighttime Ginger & Lemon Wellness Tonic

Yields: 1 serving | Prep time: 5 mins | Steep time: 5–10 mins

Ingredients

  • 1 cup Water

  • 1 inch Fresh ginger root, sliced or grated

  • ½ Fresh lemon, juiced

  • ½ tsp Ground cinnamon (or 1 cinnamon stick)

  • 1 tsp Raw honey (optional, for sweetness)

  • A pinch of Cayenne pepper (optional, for a metabolic boost)


Step-by-Step Instructions

1. Prepare the Ginger

Peel the fresh ginger using the edge of a spoon and slice it thinly. Grating the ginger will result in a stronger, spicier flavor as more of its natural juices are released.

2. Boil the Water

In a small saucepan or kettle, bring 1 cup of water to a rolling boil.

3. Infuse the Spices

Once boiling, add the ginger slices and the cinnamon (powder or stick) to the water. Turn the heat down to low and let it simmer for about 5 minutes. If you are using cayenne pepper, add the pinch now.

4. Steep

Remove the pot from the heat. Cover it with a lid and let the mixture steep for another 5 minutes. This allows the ginger and cinnamon to fully infuse the water with their beneficial compounds.

5. Add Lemon and Honey

Strain the tea into a mug to remove the ginger pieces and cinnamon stick. Stir in the fresh lemon juice and honey.

Pro Tip: Add the lemon juice after the water has cooled slightly; high heat can diminish some of the Vitamin C content in the lemon.

6. Enjoy

Drink this warm about 30–60 minutes before you head to bed.


Why These Ingredients?

  • Ginger: Known for its ability to soothe the digestive system and reduce inflammation.

  • Lemon: High in Vitamin C and antioxidants; it helps support the body’s natural detoxification processes.

  • Cinnamon: Often used to help stabilize blood sugar levels, which can reduce late-night cravings.

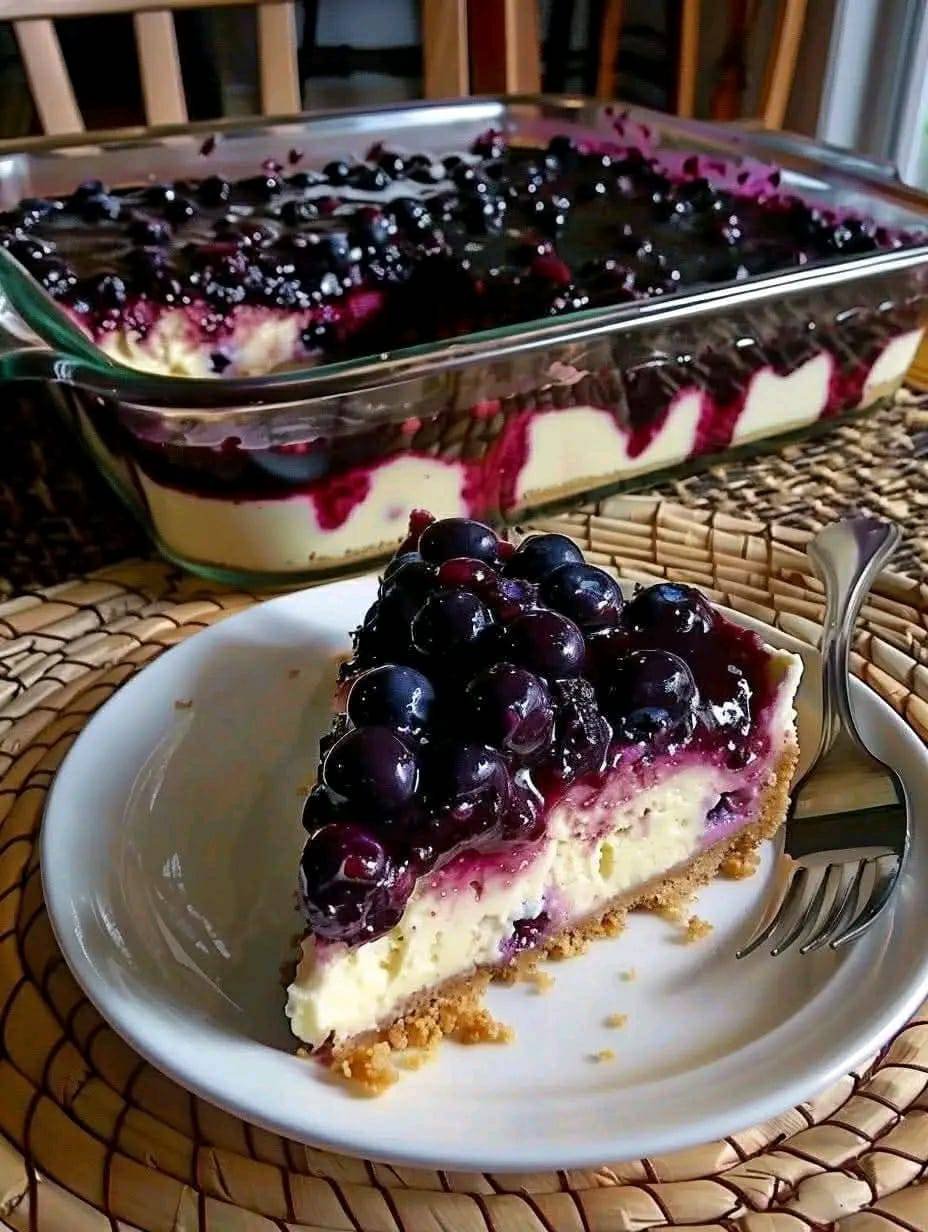
Blueberry Delight Cheesecake Bars

Blueberry Delight Cheesecake Bars

Yields: 12–15 bars | Prep time: 20 mins | Chill time: 4 hours (or overnight)

Ingredients

The Graham Cracker Crust:

  • 2 cups Graham cracker crumbs (about 12-14 full sheets)

  • 1/3 cup Granulated sugar

  • 1/2 cup (1 stick) Unsalted butter, melted

The Creamy Filling:

  • 2 blocks (16 oz total) Cream cheese, softened to room temperature

  • 1 cup Powdered sugar

  • 1 tsp Vanilla extract

  • 1 container (8 oz) Whipped topping (like Cool Whip), thawed

The Blueberry Topping:

  • 2 cans (21 oz each) Blueberry pie filling

  • 1 tbsp Lemon juice (optional, to brighten the flavor)

  • Fresh blueberries for garnish (optional)


Step-by-Step Instructions

1. Prepare the Crust

In a medium bowl, combine the graham cracker crumbs, granulated sugar, and melted butter. Stir until the mixture looks like wet sand. Press the mixture firmly and evenly into the bottom of a 9×13-inch baking dish.

Pro Tip: Freeze the crust for 15 minutes while you make the filling to help it set without baking.

2. Beat the Cream Cheese

In a large mixing bowl, beat the softened cream cheese until it is completely smooth and free of lumps. Add the powdered sugar and vanilla extract, beating until fluffy.

3. Fold in the Whipped Topping

Using a spatula, gently fold the whipped topping into the cream cheese mixture. Work slowly to keep the filling light and airy.

4. Layer the Filling

Spread the cream cheese mixture evenly over the chilled graham cracker crust. Use an offset spatula or the back of a spoon to smooth out the top to the edges.

5. Add the Blueberry Layer

In a small bowl, stir the blueberry pie filling with the lemon juice (if using). Gently spoon the blueberry filling over the cream cheese layer. Spread it carefully so you don’t disturb the white layer underneath.

6. Chill and Set

Cover the dish with plastic wrap and refrigerate for at least 4 hours, though overnight is best. This allows the layers to firm up so you can cut clean, beautiful squares.

7. Serve

Cut into squares and serve cold. If you want to elevate the look, add a few fresh blueberries or a sprig of mint on top of each slice just before serving.


Variations

  • Cherry Version: Swap the blueberry filling for cherry pie filling for a “Cherry Delight.”

  • Lemon Twist: Add a tablespoon of lemon zest to the cream cheese filling for a citrusy kick.

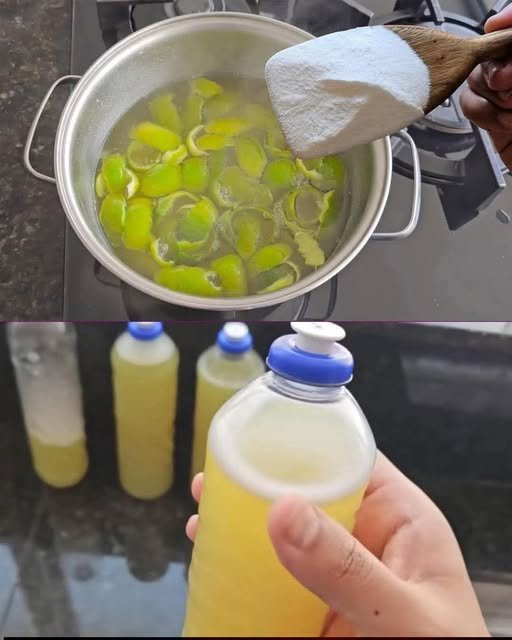
DIY Natural Lemon & Salt Cleaning Concentrate

DIY Natural Lemon & Salt Cleaning Concentrate

Yields: Approx. 3-4 bottles | Prep time: 10 mins | Cook time: 15 mins

Ingredients & Supplies

  • Peels from 5–8 lemons (you can also use lime, orange, or grapefruit)

  • 2 tbsp Salt

  • 1 liter Water

  • 1 cup White vinegar (added after boiling)

  • Optional: 1 tbsp Baking soda (add slowly to avoid overflowing)

  • Tools: Large pot, strainer, funnel, and empty spray bottles or squeeze bottles.


Step-by-Step Instructions

1. Prepare the Peels

Collect your leftover lemon peels. If they have a lot of fruit pulp left, that’s fine, as the citric acid in the juice helps the cleaning power. Chop them into smaller pieces to allow more surface area to touch the water.

2. The Boiling Process

Place the lemon peels in a large pot and add 1 liter of water. Bring the mixture to a boil. Once boiling, turn the heat down to medium-low and let it simmer for about 15 minutes. The water should turn a cloudy yellow color.

3. Add the Salt

While the mixture is simmering, stir in the 2 tablespoons of salt. The salt acts as a natural preservative for the cleaner and helps break down organic stains when you eventually use it.

4. Cool and Strain

Turn off the heat and let the liquid cool completely. Once cool, use a fine-mesh strainer to remove the lemon peels, pouring the infused liquid into a clean bowl or jug.

5. The “Booster” Ingredients

Add 1 cup of white vinegar to the lemon water. Vinegar is excellent for cutting through limescale and streaks.

Note: If you choose to add baking soda for extra scrubbing power, add it very slowly, as it will fizz significantly when it hits the vinegar.

6. Bottle and Store

Using a funnel, pour your concentrate into spray bottles or recycled dish soap bottles.


How to Use It

  • For Countertops: Spray directly and wipe with a microfiber cloth.

  • For Greasy Pans: Squirt a small amount into the pan with hot water and let it sit for 5 minutes before scrubbing.

  • For Glass: Dilute the mixture with an equal part of water for a streak-free shine.

Soft Turkish Milk Bread (Bazlama)

Soft Turkish Milk Bread (Bazlama)

Yields: 6–8 flatbreads | Prep time: 1.5 hours (including rising) | Cook time: 15 mins

Ingredients

For the Dough:

  • 500g (approx. 4 cups) All-purpose flour

  • 160ml (2/3 cup) Warm milk

  • 160ml (2/3 cup) Warm water

  • 1 packet (7g or 2 ¼ tsp) Active dry yeast or instant yeast

  • 1 tbsp Sugar (to help the yeast activate)

  • 1 tsp Salt

  • 2 tbsp Olive oil or melted butter

For the Topping (Garlic Butter):

  • 3 tbsp Butter, melted

  • 1 clove Garlic, minced

  • 1 tbsp Fresh parsley, finely chopped

  • Optional: A pinch of red pepper flakes (as seen in the image)


Step-by-Step Instructions

1. Activate the Yeast

In a large bowl, combine the warm milk, warm water, sugar, and yeast. Stir gently and let it sit for about 5–10 minutes until it becomes frothy.

Note: Ensure the liquids are warm (about 105°F/40°C), not hot, so you don’t deactivate the yeast.

2. Mix the Dough

Add the olive oil and salt to the yeast mixture. Gradually add the flour, one cup at a time, mixing with a wooden spoon or a dough hook until a shaggy dough forms.

3. Knead

Turn the dough onto a lightly floured surface. Knead by hand for about 8–10 minutes (or 5 minutes in a stand mixer) until the dough is smooth, elastic, and slightly tacky but not sticking to your hands.

4. First Rise

Lightly grease a bowl with oil. Place the dough inside, cover it with a damp cloth or plastic wrap, and let it rise in a warm, draft-free spot for 1 hour, or until it has doubled in size.

5. Shape the Bread

Gently punch down the risen dough to release the air. Divide it into 6 to 8 equal pieces. Roll each piece into a smooth ball. On a floured surface, use a rolling pin to flatten each ball into a circle about ½ inch (1 cm) thick.

6. Second Rise

Cover the flattened circles with a clean kitchen towel and let them rest for 15–20 minutes. This rest is crucial for getting that “balloon” puff in the pan.

7. Cook in the Pan

  • Heat a non-stick skillet or cast-iron pan over medium heat (do not use oil in the pan).

  • Place one dough circle in the hot pan. Cook for about 1–2 minutes until small bubbles form on the surface.

  • Flip the bread. It should begin to puff up significantly. Cook for another 1–2 minutes until both sides have golden-brown toasted spots.

8. Garnish and Serve

While the bread is still hot, brush the top with the garlic butter mixture and sprinkle with fresh parsley and red pepper flakes. Stack them on top of each other to keep them soft and warm.


Pro Tip for Success

If your bread isn’t puffing up, your heat might be too low, or the dough might have been rolled too thin. Aim for a medium-high heat to create the steam needed for the “pocket” to form.

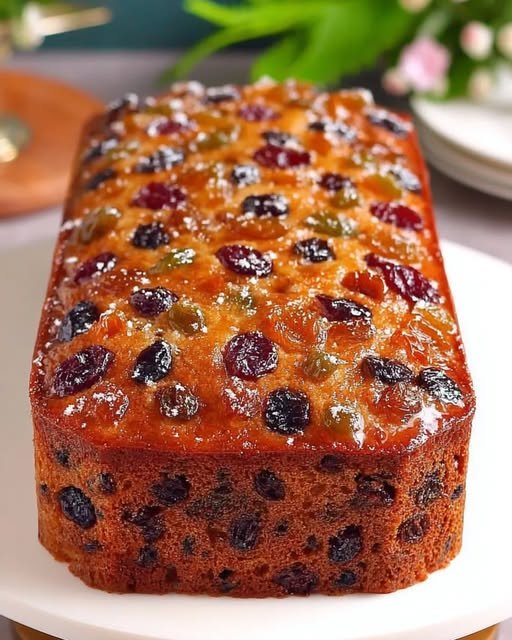
Eggless Buttermilk Fruit Cake

Eggless Buttermilk Fruit Cake

Prep time: 15 mins | Bake time: 50-60 mins | Servings: 1 loaf

Ingredients

Dry Base:

  • 1 1/2 cups (200g) all-purpose flour

  • 1 tsp (4 g) baking soda

  • 1/2 tsp (2 g) salt

Spices:

  • 1/2 tsp freshly grated nutmeg

  • 3/4 tsp ground cinnamon

  • 1/4 tsp ground ginger

  • 1/4 tsp ground cloves

Wet Ingredients:

  • 1 cup (240 ml) buttermilk (room temperature)

  • 1/2 cup (113g) unsalted butter (melted and cooled)

  • 3/4 cup (150g) light brown sugar (firmly packed)

  • 1/2 tsp (2 g) pure vanilla extract

The Fruit Mix:

  • 2 cups (300g) mixed dried and candied fruits (raisins, currants, dates, figs, cranberries, cherries, apricots, mixed peel, etc.)


Instructions

  1. Preparation: Preheat your oven to 350°F (180°C). Grease and flour a 9x5x3 inch loaf pan.

  2. Combine Dry Ingredients: In a large bowl, whisk the flour, salt, baking soda, and all spices. Add the fruit mix to the bowl and toss well until all the fruit pieces are coated in flour to prevent them from sinking.

  3. Mix Wet Ingredients: In a separate bowl, whisk together the buttermilk, melted butter, vanilla, and brown sugar.

  4. Create the Batter: Pour the buttermilk mixture into the dry ingredients and stir with a spatula until just combined and moistened.

  5. Bake: Pour the batter into the prepared pan and smooth the top. Bake for 50–60 minutes until the loaf is golden brown and a toothpick comes out clean.

  6. Cool: Let the cake cool in the pan for 10 minutes before transferring to a wire rack to cool completely.


Recipe Collection Roundup

  • Seafood: Crispy Joe’s Crab Shack Crab Cakes

  • Savory: Cheesy Air Fryer Hasselback Potatoes

  • Dessert: Rich Chocolate Cake with Glossy Glaze