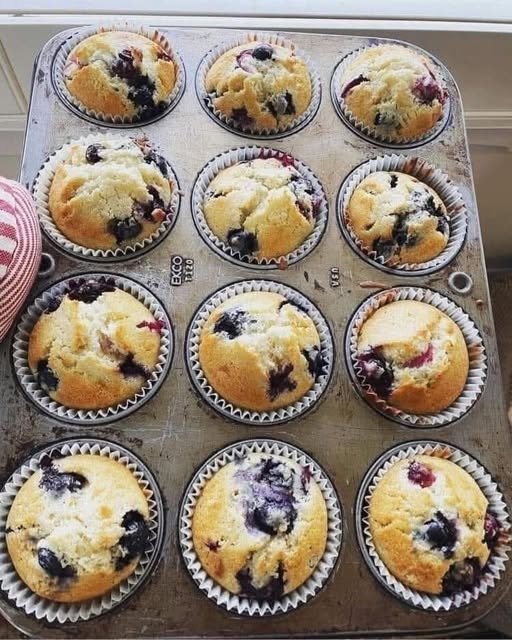
Classic Bakery-Style Blueberry Muffins

Classic Bakery-Style Blueberry Muffins


Ingredients

The Dry Mix:

  • 1 ½ cups All-purpose flour

  • ¾ cup Granulated sugar

  • 2 tsp Baking powder

  • ½ tsp Salt

The Wet Mix:

  • 1/3 cup Vegetable oil (or melted butter for extra flavor)

  • 1 Large egg

  • 1/3 cup Milk (Whole milk or buttermilk works best)

  • 1 tsp Vanilla extract

The Star Ingredient:

  • 1 cup Fresh blueberries (if using frozen, do not thaw them first to prevent the batter from turning purple)


Instructions

  1. Preheat and Prep: Preheat your oven to 400°F (200°C). Line a 12-cup muffin tin with paper liners, just like the ones in your photo.

  2. Mix Dry Ingredients: In a large bowl, whisk together the flour, sugar, baking powder, and salt.

  3. Mix Wet Ingredients: In a separate measuring cup or small bowl, whisk the oil, egg, milk, and vanilla until well combined.

  4. Combine: Pour the wet ingredients into the dry ingredients. Fold gently with a spatula just until combined. Do not overmix; the batter should be thick and slightly lumpy.

  5. Fold in Berries: Gently fold in the blueberries.

  6. Fill the Tin: Divide the batter evenly among the 12 muffin cups. They should be about 3/4 full.

  7. Bake: Bake for 20 to 25 minutes, or until a toothpick inserted into the center comes out clean and the tops are golden brown.

  8. Cool: Let them cool in the pan for about 5 minutes before transferring them to a wire rack.


Tips for Success

  • Toss the Berries: To prevent the blueberries from sinking to the bottom, toss them in a teaspoon of flour before adding them to the batter.

  • High Heat: Starting the oven at 400°F helps create that “domed” top seen in your image by giving the leavening agents a quick boost.

Lemon, Ginger & Turmeric Wellness Drink

Lemon, Ginger & Turmeric Wellness Drink

A warm, refreshing drink that supports digestion and daily wellness

Ingredients

  • 1 fresh lemon

  • 1 small piece of fresh ginger root (about 1 inch)

  • ½ teaspoon turmeric powder or 1 teaspoon freshly grated turmeric

  • 2 cups water

  • Optional: 1 teaspoon honey (for mild sweetness)


Instructions

Step 1: Prepare the Ingredients

Wash the lemon, ginger, and turmeric (if using fresh turmeric).
Slice the lemon into thin rounds.
Peel and grate the ginger (and turmeric, if using fresh).


Step 2: Simmer the Drink

Pour the water into a saucepan and bring it to a gentle boil.
Add the lemon slices, grated ginger, and turmeric.
Lower the heat and let it simmer for 10 minutes so the flavors blend well.


Step 3: Strain and Serve

Remove from heat and strain into a cup.
Add honey if desired and stir gently.

Drink warm in the morning or between meals.


Helpful Tips

✔ Drink once daily for best results

✔ Always use fresh lemon for better flavor
✔ Do not drink on an empty stomach if you have acid sensitivity
✔ Combine with balanced meals and light activity for overall wellness


Important Note

This drink supports digestion and hydration. It does not replace healthy eating or movement, and it works best as part of a healthy lifestyle.

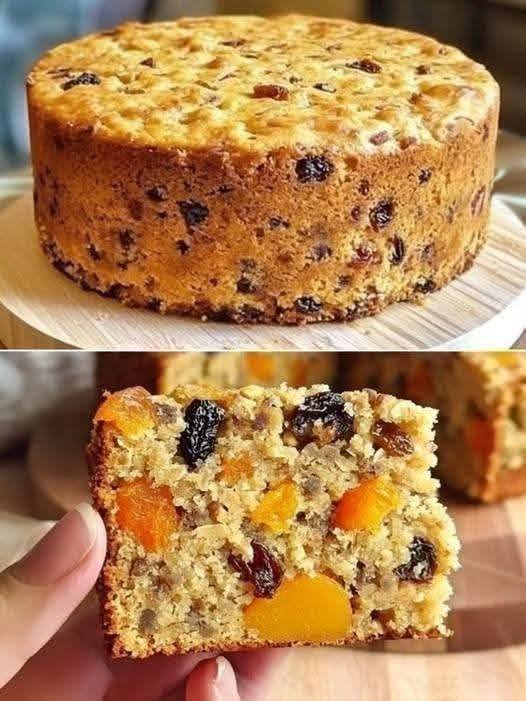
Oatmeal, Apple & Carrot Breakfast Cake

Oatmeal, Apple & Carrot Breakfast Cake

Sugar-Free | Flourless | High-Fiber

Ingredients

  • 2 cups (200g) Rolled Oats: Processed in a blender until they reach a coarse flour consistency.

  • 1 tsp Baking Powder: For a bit of lift.

  • 1 cup (240ml) Milk: Use your choice of dairy or unsweetened plant-based milk (almond or oat works great).

  • 1 Medium Carrot: Finely grated.

  • 1 Medium Apple: Finely grated or finely chopped (adds moisture and natural sweetness).

  • 9 Dried Apricots: Rinsed with hot water and chopped into bite-sized pieces.

  • 4 tbsp Raisins: Rinsed with hot water.

  • Optional: 1 tsp Cinnamon or Vanilla extract for extra aroma.


Step-by-Step Instructions

1. Prepare the Oven and Pan

Preheat your oven to 180°C (350°F). Line a small round cake tin (about 6 or 7 inches) with parchment paper or lightly grease it with a tiny bit of coconut oil to ensure the cake doesn’t stick.

2. Process the Oats

Place your 2 cups of rolled oats into a blender or food processor. Pulse until the oats look like a coarse flour. Don’t worry if it’s not perfectly fine; a little texture is nice in this recipe. Transfer the oat flour to a large mixing bowl and stir in the baking powder.

3. Hydrate the Oats

Pour the milk into the bowl with the oat mixture. Stir well and let it sit for about 5 to 10 minutes. This allows the oats to soak up the liquid, which ensures your cake stays moist and doesn’t crumble.

4. Prepare the Fruit and Veg

While the oats are soaking, grate your carrot and apple. If the apple is very juicy, you can lightly squeeze out some excess liquid so the cake isn’t too mushy. Chop your rinsed apricots.

5. Mix Everything Together

Add the grated carrot, grated apple, chopped apricots, and raisins to the oat mixture. Stir until everything is evenly distributed. The batter should be thick and chunky.

6. Bake

Pour the batter into your prepared tin and smooth the top with a spoon. Bake for 35 to 45 minutes. The cake is done when the top feels firm to the touch and a toothpick inserted into the center comes out clean.

7. Cool and Serve

Allow the cake to cool in the tin for at least 15 minutes before removing it. This is important because flourless cakes need time to “set” as they cool. Slice and enjoy!


Tips for Success

  • Storage: Because this cake is very moist and contains fresh fruit/veg, store any leftovers in an airtight container in the refrigerator for up to 4 days.

  • Flavor Boost: If you like, you can add half a cup of crushed walnuts for a nice crunch that pairs perfectly with the apricots.

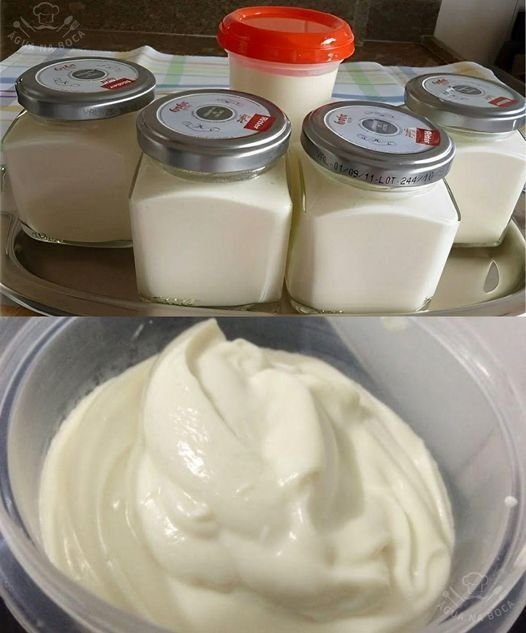
Homemade Creamy Cream Cheese

Homemade Creamy Cream Cheese

Yields: Approx. 1.5 cups | Prep time: 10 mins | Set time: 6–12 hours

Ingredients

  • 1 liter (approx. 4 cups) Whole milk (fresh or pasteurized, but avoid “Ultra-Pasteurized” or UHT as it may not curdle properly)

  • 3–4 tbsp White vinegar or fresh lemon juice

Optional (for flavor and texture):

  • ½ tsp Salt (to taste)

  • 1 tbsp Softened butter or heavy cream (for extra creaminess)


Step-by-Step Instructions

1. Heat the Milk

Pour the whole milk into a large, heavy-bottomed pot. Place it over medium heat and bring it to a gentle simmer. Stir occasionally to prevent the milk from scorching on the bottom. Do not let it reach a rolling boil; you want to see small bubbles around the edges.

2. Curdle the Milk

Once the milk is simmering, reduce the heat to low. Add the vinegar (or lemon juice) one tablespoon at a time, stirring gently after each addition. You will notice the milk beginning to separate into white curds and a yellowish liquid (the whey).

3. Let it Rest

Turn off the heat. Let the pot sit undisturbed for about 5–10 minutes. This allows the curdling process to finish completely and the curds to become firm.

4. Strain the Curds

Place a fine-mesh strainer over a deep bowl and line it with a clean cheesecloth or a thin kitchen towel. Carefully pour the contents of the pot into the strainer. Let it drain for about 15 minutes.

Pro Tip: Save the leftover whey! It’s highly nutritious and can be used in smoothies or as a liquid replacement in bread recipes.

5. Blend for Creaminess

Transfer the warm curds into a food processor or high-speed blender. Add a pinch of salt. Blend on high for 2–3 minutes until the mixture is completely smooth and glossy. If it seems too dry or crumbly, add 1 tablespoon of the reserved whey or a little heavy cream until it reaches your desired consistency.

6. Chill and Set

Transfer the cream cheese into glass jars or an airtight container. Place it in the refrigerator for at least 6 hours, though overnight is best. It will thicken and develop its classic “spreadable” texture as it cools.


Storage

  • Keep the cream cheese refrigerated in an airtight container.

  • Because it contains no preservatives, it is best enjoyed within 5–7 days.

Variations

  • Garlic & Herb: Fold in minced garlic and fresh chives after blending.

  • Honey Walnut: Stir in a drizzle of honey and crushed walnuts for a sweet spread.

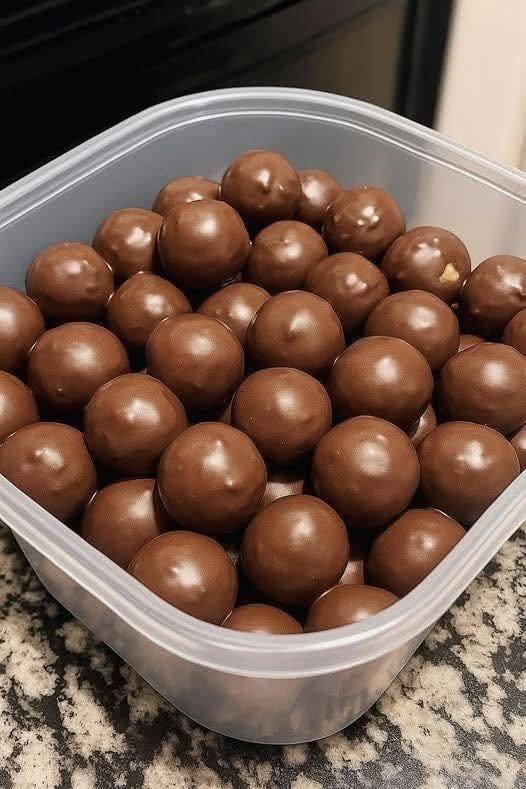
No-Bake High-Protein Chocolate Peanut Butter Balls — Easy, Sweet, and Satisfying

No-Bake High-Protein Chocolate Peanut Butter Balls — Easy, Sweet, and Satisfying

  • Servings: 12 balls
  • Total Time: 15 minutes
  • Difficulty: Very Easy
  • Calories per Ball: ~120 kcal
  • Macros (Per Ball): 6g Protein / 5g Net Carbs / 8g Fat / 2g Fiber

Introduction

Butter Balls are the perfect solution. Creamy peanut butter, rich cocoa, and protein powder come together in bite-sized treats that satisfy your sweet tooth and fuel your body.

Perfect for Keto, Slimming , Weight Watchers, High-Protein, and Mediterranean-inspired diets, these chocolate peanut butter balls are low-carb, nutrient-dense, and incredibly easy to make. Whether it’s a post-workout snack, a grab-and-go treat, or a healthy dessert, these balls deliver flavor, protein, and convenience in every bite.


Look at the Recipe

  • Texture & Visual: Smooth, chocolatey, and slightly firm with a soft peanut butter center.
  • Flavor Highlight: Nutty, rich, and naturally sweet — chocolate and peanut butter in perfect harmony.
  • Diet Benefit: High in protein, low in refined sugar, and made with wholesome ingredients.

Ingredients Needed

  • ½ cup natural peanut butter (or almond butter for variation/Keto)
  • ¼ cup protein powder (chocolate or vanilla)
  • 2 tbsp unsweetened cocoa powder
  • 2–3 tbsp sweetener of choice (erythritol, monk fruit, or honey for Mediterranean version)
  • 1 tsp vanilla extract
  • Optional: pinch of salt, chopped nuts, or sugar-free chocolate chips for topping

How to Make Our No-Bake High Protein Chocolate Peanut Butter Balls

  1. Mix the ingredients:
    In a medium bowl, combine peanut butter, protein powder, cocoa powder, sweetener, and vanilla. Stir until a thick, sticky dough forms.
  2. Shape the balls:
    Using your hands or a small cookie scoop, roll the mixture into 12 equal-sized balls.
  3. Optional toppings:
    Roll balls in cocoa powder, crushed nuts, or sprinkle with sugar-free chocolate chips for extra flavor and texture.
  4. Chill to set:
    Place the balls on a parchment-lined tray and refrigerate for at least 15 minutes to firm up.
  5. Serve & enjoy:
    Store in an airtight container in the fridge and grab one whenever you need a quick protein boost.

Storage & Serving Suggestions

  • Store: Refrigerate for up to 1 week.
  • Freeze: Freeze for up to 2 months; thaw in fridge for 10–15 minutes before eating.
  • Serving Ideas:
    • Pair with a protein shake for a post-workout combo.
    • Pack in lunchboxes for a portable snack.
    • Serve alongside fresh berries or Greek yogurt for a mini dessert platter.

Tips & FAQs

1. Can I make these Slimming -friendly?
Yes — use low-calorie peanut butter and a syn-free sweetener. Each ball is roughly 1–2 syns, depending on ingredients.

2. How many Weight Watchers points per ball?
Approximately 2–3 WW points, depending on sweetener and nut butter choice.

3. Can I make them Keto-friendly?
Use natural almond or peanut butter and a low-carb sweetener like erythritol.

4. Can I make these nut-free?
Yes — substitute peanut butter with sunflower seed butter or soy nut butter.

5. Can I add extra protein?
Absolutely — increase protein powder or fold in collagen peptides for an extra boost.

Soft and Fluffy Naan Bread

Soft and Fluffy Naan Bread

Yields: 6 Naan | Prep time: 1 hour 20 mins | Cook time: 10–15 mins

Ingredients

  • 3 cups (375g) All-purpose flour

  • 1 tsp Instant yeast

  • 1 tsp Sugar

  • 1 tsp Salt

  • ¾ cup (180ml) Warm water

  • ¼ cup (60ml) Greek yogurt

  • 2 tbsp Olive oil or melted butter

Optional For Topping:

  • 2 cloves Garlic, minced

  • 2 tbsp Fresh cilantro, chopped

  • Extra melted butter for brushing


Step-by-Step Instructions

1. Mix the Dough

In a large mixing bowl, combine the flour, instant yeast, sugar, and salt. Add the warm water, Greek yogurt, and olive oil (or melted butter). Stir the ingredients together until a sticky dough begins to form.

2. Knead

Transfer the dough onto a surface that has been lightly dusted with flour. Knead the dough by hand for 8 to 10 minutes. You are looking for the texture to become smooth, elastic, and no longer overly sticky.

3. The First Rise

Lightly grease a clean bowl with oil and place the dough inside. Cover the bowl with a damp cloth or plastic wrap to keep the moisture in. Leave it in a warm, draft-free spot for approximately 1 hour, or until the dough has doubled in size.

4. Shape the Portions

Gently punch down the risen dough to release the air. Divide the dough into 6 equal portions. Roll each piece into a ball, then use a rolling pin (or your hands) to flatten them into ovals or rounds about ¼ inch thick.

5. Cook the Naan

  • Heat a cast-iron skillet or heavy-bottomed pan over medium-high heat.

  • Lightly brush the pan with oil or butter.

  • Lay one piece of dough into the hot skillet. Cook for 1 to 2 minutes until you see bubbles forming on the top and the bottom is golden brown.

  • Flip the naan and cook the other side for an additional 1 to 2 minutes.

6. Garnish and Serve

If you are making garlic naan, mix your minced garlic into some melted butter and brush it over the bread the moment it comes out of the pan. Sprinkle with fresh cilantro and serve while warm.


Storage and Reheating

  • Fridge: Keep in an airtight container for up to 3 days.

  • Freezer: Store in a freezer-safe bag for up to 2 months.

  • Reheating: To restore the soft texture, warm the naan briefly in a skillet or oven before serving.