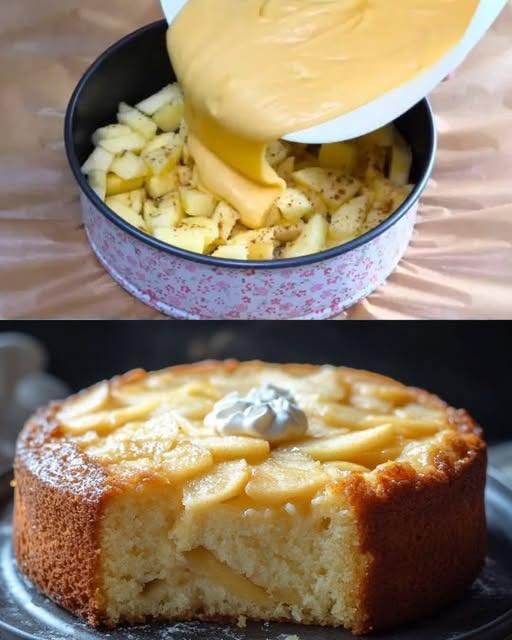
Apple Cinnamon Cake (Soft & Moist)

Apple Cinnamon Cake (Soft & Moist)

🧺 Ingredients

For the Apple Layer:

  • 3 medium apples (peeled, cored, diced or thinly sliced)

  • 1–2 tbsp sugar

  • 1 tsp cinnamon

  • 1 tsp lemon juice (prevents browning)

For the Cake Batter:

  • 3 eggs (room temperature)

  • 75 g sugar (about ⅓ cup)

  • 8 g vanilla sugar (or 1 tsp vanilla extract)

  • 150 g all-purpose flour (1¼ cups)

  • 10 g baking powder (2 tsp)

  • 100 g melted butter (½ cup)


👩‍🍳 Step-by-Step Instructions

✅ Step 1: Prepare the Apples

  1. Peel and cut apples into small cubes or thin slices.

  2. Put them in a bowl.

  3. Add:

    • Sugar

    • Cinnamon

    • Lemon juice

  4. Mix gently and set aside.


✅ Step 2: Prepare the Cake Batter

  1. In a mixing bowl, add eggs + sugar + vanilla sugar.

  2. Beat with a whisk or mixer for 2–3 minutes until light and fluffy.

  3. Add melted butter and mix well.

  4. In another bowl, combine:

    • Flour

    • Baking powder

  5. Gradually add dry ingredients into wet mixture.

  6. Mix gently until smooth (do NOT overmix).


✅ Step 3: Assemble the Cake

  1. Line a round cake pan (20–22 cm) with parchment paper or grease it.

  2. Spread the prepared apples evenly in the bottom of the pan.

  3. Pour the cake batter over the apples.

  4. Smooth the top with a spatula.


✅ Step 4: Bake

  1. Preheat oven to 170°C (340°F).

  2. Bake for 35–40 minutes until:

    • Top is golden

    • Toothpick comes out clean


✅ Step 5: Cool & Serve

  1. Let cake cool for 10 minutes.

  2. Turn upside down onto a plate (apple layer on top).

  3. Optional topping:

    • Powdered sugar

    • Whipped cream

    • Honey drizzle


🍰 Result:

✔ Soft
✔ Moist
✔ Sweet apple cinnamon flavor
✔ Perfect for tea or dessert

Baked Chicken Alfredo Calzones

Baked Chicken Alfredo Calzones

Yields: 4 Calzones | Prep time: 20 mins | Bake time: 15–20 mins

Ingredients

The Dough & Filling:

  • 1 lb (450g) Pizza dough (store-bought or homemade), at room temperature

  • 1 cup Cooked chicken breast, shredded or diced

  • 1 ½ cups Shredded mozzarella cheese (divided)

  • ¼ cup Parmesan cheese, grated

  • ½ cup Thick Alfredo sauce (plus extra for dipping)

  • 1 cup Fresh baby spinach, chopped (optional)

  • 2 cloves Garlic, minced

The Topping:

  • 2 tbsp Butter, melted

  • ½ tsp Garlic powder

  • 1 tsp Fresh parsley, chopped (for garnish)


Step-by-Step Instructions

1. Preheat and Prep

Preheat your oven to 400°F (200°C). Line a large baking sheet with parchment paper or a silicone baking mat. If you have a pizza stone, place it in the oven while it preheats.

2. Mix the Filling

In a medium mixing bowl, combine the shredded chicken, Alfredo sauce, minced garlic, Parmesan cheese, and chopped spinach. Stir in ½ cup of the mozzarella.

Pro Tip: Make sure your Alfredo sauce is thick; if it’s too watery, the dough might become soggy.

3. Portion the Dough

Divide your pizza dough into 4 equal pieces. On a lightly floured surface, roll each piece into a circle roughly 6–7 inches in diameter.

4. Assemble the Calzones

  • Place about ¼ of the chicken mixture onto one half of each dough circle, leaving a 1-inch border around the edge.

  • Top the mixture with another generous sprinkle of the remaining mozzarella cheese.

  • Fold the empty half of the dough over the filling to create a half-moon shape.

5. Seal the Edges

Tightly pinch the edges together. You can use your fingers to “roll and tuck” the edge or simply press down firmly with the tines of a fork to crimp them shut. This prevents the cheese from leaking out.

6. Add the Topping

Mix the melted butter and garlic powder. Brush the tops of the calzones generously with the garlic butter. Using a sharp knife, cut 2 small slits on the top of each calzone to allow steam to escape.

7. Bake

Place the calzones on the prepared baking sheet. Bake for 15 to 20 minutes, or until the crust is a deep golden brown and the cheese inside is bubbling.

8. Garnish and Serve

Remove from the oven and immediately brush with any remaining garlic butter. Sprinkle with fresh parsley and extra Parmesan. Let them rest for 5 minutes before serving (the filling will be very hot!).


Serving Suggestion

Serve these with a side of warm Alfredo sauce or a simple marinara for dipping.

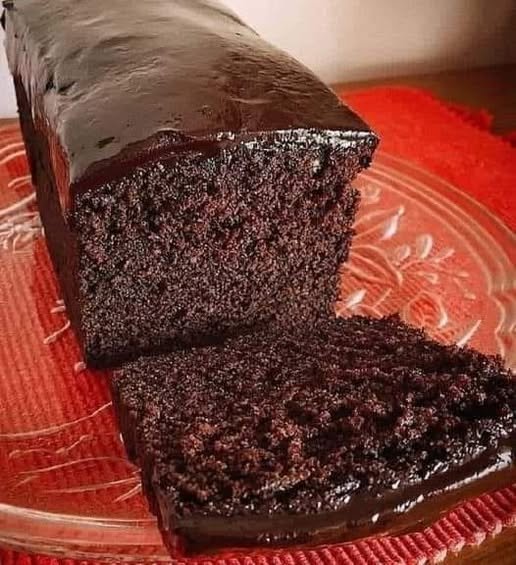
Dreamy Cream Cheese Chocolate Pound Cake

Dreamy Cream Cheese Chocolate Pound Cake

This recipe creates a dense, velvety crumb thanks to the cream cheese, and using a high-quality dark chocolate makes all the difference in the depth of flavor.

Ingredients

For the Cake:

  • Dark Chocolate: 2 ounces, chopped

  • Flour: 3/4 cup (105 g) all-purpose gluten-free flour

  • Xanthan Gum: 1/2 teaspoon (omit if your blend has it)

  • Cornstarch: 1/4 cup (36 g)

  • Cocoa Powder: 1/2 cup Dutch-processed cocoa

  • Baking Powder & Salt: 1/2 tsp baking powder + 1/4 tsp salt

  • Butter: 1/2 cup (1 stick) unsalted, softened

  • Cream Cheese: 4 ounces, softened

  • Sugar: 1 1/4 cups granulated sugar

  • Eggs: 3 large, room temperature

  • Vanilla: 1 teaspoon vanilla extract

For the Chocolate Glaze:

  • 4 ounces dark chocolate, chopped

  • 1/2 cup heavy cream


Instructions

  1. Prep: Preheat your oven to 325°F (165°C). Grease and flour a standard loaf pan (approximately 9×5 inches).

  2. Melt Chocolate: Melt the 2 ounces of chopped chocolate in the microwave in 20-second bursts, stirring until smooth. Set aside to cool slightly.

  3. Dry Ingredients: In a medium bowl, whisk together the flour, xanthan gum, cornstarch, cocoa powder, baking powder, and salt.

  4. Cream Butter & Cheese: In a large bowl or stand mixer, beat the softened butter and cream cheese together until smooth. Add the sugar and beat on high speed for about 3–4 minutes until very light and fluffy.

  5. Add Eggs: Add eggs one at a time, beating well after each addition. Mix in the melted chocolate and vanilla extract.

  6. Combine: Turn the mixer to low and gradually add the dry ingredients. Mix just until combined—do not overmix, or the cake may become too dense.

  7. Bake: Pour the batter into the prepared pan. Bake for 55–65 minutes, or until a toothpick inserted into the center comes out clean (or with just a few moist crumbs).

  8. Cool: Let the cake cool in the pan for 15 minutes, then turn it out onto a wire rack to cool completely.

  9. Glaze: Heat the heavy cream until simmering, then pour it over the 4 ounces of chopped chocolate. Let it sit for 2 minutes, then stir until glossy. Pour over the cooled cake.

Refreshing Chia-Lemon Wellness Drink

Refreshing Chia-Lemon Wellness Drink

A simple, hydrating, and fiber-rich tonic

📝 Ingredients

  • 1 tbsp Chia Seeds: A powerhouse of fiber and Omega-3 fatty acids.

  • 300 ml Water: About 1 ¼ cups.

  • 1 tsp Fresh Lemon Juice: For a boost of Vitamin C and bright flavor.

  • Optional: A drop of stevia or monk fruit sweetener (to keep your “no-sweet” streak alive).

  • Optional: A tiny pinch of salt to help with electrolyte balance.

👩‍🍳 Step-by-Step Instructions

  1. Bloom the Seeds: Add the 1 tablespoon of chia seeds to a glass or jar. Pour in about 50 ml of the water first and stir well. Let it sit for 5–10 minutes. This allows the seeds to absorb liquid and form a gel-like coating, which makes them easier to digest.

  2. Combine: Pour in the remaining 250 ml of water.

  3. Add Flavor: Stir in the fresh lemon juice, your sweetener of choice, and the pinch of salt if you’re using it.

  4. The Final Mix: Stir or shake the container vigorously to ensure the chia seeds are evenly distributed and not clumped at the bottom.

  5. Enjoy: You can drink it immediately, or let it chill in the fridge for another 30 minutes for a thicker, more “gel” like consistency.


💡 Why this fits your 15 kg loss journey:

  • High Satiety: Chia seeds can absorb up to 10–12 times their weight in water, which helps you feel fuller for longer.

  • Blood Sugar Support: The fiber in chia seeds helps slow down the absorption of sugar, which supports your goal of avoiding energy spikes and crashes.

  • Heart Health: The healthy fats and fiber are known to support general cardiovascular wellness.

Homemade Fruit Juice Gumdrops

Homemade Fruit Juice Gumdrops

Soft, Chewy, and Bursting with Fruit Flavor

Ingredients

  • 2 cups Fruit Juice: Use grape, orange, or apple juice for natural color and flavor.

  • 2 tbsp Unflavored Gelatin: This provides the classic chewy gumdrop texture.

  • 1/4 cup Granulated Sugar: For the internal gumdrop mixture.

  • 1 tbsp Lemon Juice: Adds a necessary brightness and tang.

  • 1/4 tsp Salt: To balance the sweetness.

  • Optional: A few drops of food coloring if you want extra vibrant colors.

  • 3 cups Granulated Sugar: Kept in a separate bowl for the final coating.

Instructions

  1. Bloom the Gelatin: Pour 1/2 cup of your fruit juice into a small bowl and sprinkle the unflavored gelatin over the top. Let it sit for about 5 minutes until it looks thick and “bloomed.”

  2. Heat the Base: In a medium saucepan, combine the remaining 1 1/2 cups of fruit juice, the 1/4 cup of sugar, lemon juice, and salt. Bring the mixture to a gentle simmer over medium heat, stirring until the sugar is completely dissolved.

  3. Combine: Once simmering, add the bloomed gelatin mixture to the saucepan. Whisk constantly for 2–3 minutes until the gelatin has fully melted and the liquid is clear and smooth. Stir in food coloring now if using.

  4. The Set: Lightly grease a square baking dish or silicone candy molds with a tiny bit of neutral oil. Pour the mixture in. Refrigerate for at least 4 hours, or ideally overnight, until very firm.

  5. Cut: Once set, pull the block of gelatin out onto a cutting board dusted with a little sugar. Use a sharp knife (dipped in hot water) to cut the block into small, even cubes.

  6. The Signature Coating: Toss each cube in the bowl of granulated sugar until every side is heavily coated.

  7. Final Dry: Place the coated gumdrops on a wire rack at room temperature for 24 hours. This allows them to develop that slightly firm “crust” on the outside while staying soft in the middle.


Why this works for your kitchen:

  • Natural Base: Using fruit juice instead of just water and corn syrup adds vitamins and a more complex flavor profile.

  • Perfect for Gifting: These look beautiful in a glass jar and make a thoughtful homemade gift.

  • Customizable: You can experiment with different juices—cranberry or pomegranate juice makes for beautiful deep red gumdrops!

After trying this recipe, you’ll never want to buy bread again — you’ll bake it fresh at home instead.

After trying this recipe, you’ll never want to buy bread again — you’ll bake it fresh at home instead.

This classic Homemade White Bread recipe yields a soft, fluffy loaf with a golden, tender crust. Ideal for sandwiches, toast, or simply savoring warm with a pat of butter.

🍞 Homemade White Bread

Ingredients

For the Bread:

  • 4 cups all-purpose flour
  • 2 teaspoons instant yeast
  • 2 teaspoons salt
  • 2 tablespoons sugar
  • 2 tablespoons unsalted butter, softened
  • 1 ½ cups warm water

For the Topping (optional):

  • 1 tablespoon milk
  • 1 tablespoon unsalted butter, melted

Instructions

Step 1: Activate the Yeast
In a small bowl, stir together the warm water, sugar, and yeast. Let it rest for 5–10 minutes, until the mixture becomes foamy and active.

Step 2: Make the Dough
In a large mixing bowl, combine the flour, salt, softened butter, and the yeast mixture. Knead the dough on a lightly floured surface for about 10 minutes, or until it’s smooth and elastic.

Step 3: First Rise
Place the dough into a greased bowl, cover it, and set it in a warm area for 1–2 hours, or until it doubles in volume.

Step 4: Shape the Loaf
Gently punch down the dough to release trapped air. Form it into a loaf shape and place it in a greased bread

Step 5: Second Rise
Cover and let the shaped dough rise again for 30–45 minutes, until it puffs up nicely.

Step 6: Preheat & Prepare the Topping
Preheat your oven to 375°F (190°C). If you’re adding the topping, mix the milk and melted butter together.

Step 7: Bake
Brush the loaf with the milk-butter mixture if desired. Bake for 30–35 minutes, or until the top is golden brown and the loaf sounds hollow when tapped.

Step 8: Cool & Serve
Let the bread cool in the pan for a few minutes, then transfer it to a wire rack to cool completely. Slice and enjoy your homemade loaf fresh or toasted!