Vanilla Cream Afternoon Pastries

Vanilla Cream Afternoon Pastries

Prep time: 20 minutes | Cook time: 25 minutes | Servings: 12-15 pastries

Ingredients

For the Pastry Shells:

  • 1 cup water

  • 1/2 cup unsalted butter

  • 1/4 teaspoon salt

  • 1 cup all-purpose flour

  • 4 large eggs (room temperature)

For the Vanilla Cream Filling:

  • 2 cups whole milk

  • 1/2 cup granulated sugar

  • 1/4 cup cornstarch

  • 4 large egg yolks

  • 2 teaspoons vanilla extract

  • 2 tablespoons unsalted butter

For the Topping:

  • Powdered sugar (for dusting)


Detailed Directions

1. Prepare the Vanilla Cream

  • In a medium saucepan, whisk together the egg yolks, sugar, and cornstarch until smooth. Slowly whisk in the milk.

  • Place over medium heat, whisking constantly, until the mixture thickens and begins to bubble.

  • Remove from heat and stir in the vanilla extract and 2 tablespoons of butter.

  • Transfer the cream to a bowl, cover the surface directly with plastic wrap (to prevent a skin from forming), and refrigerate until completely cold.

2. Make the Pastry Dough

  • Preheat your oven to 400°F (200°C) and line a baking sheet with parchment paper.

  • In a medium saucepan, combine water, butter, and salt. Bring to a boil over medium-high heat.

  • Once boiling, add the flour all at once. Stir vigorously with a wooden spoon until the dough forms a ball and pulls away from the sides of the pan. Continue stirring for 1 minute to cook the flour slightly.

  • Remove from heat and let cool for 5 minutes.

3. Incorporate the Eggs

  • Add the eggs one at a time to the dough, beating thoroughly after each addition. The dough will initially look like it is separating but will become smooth and glossy as you continue to stir.

  • The final dough should be thick enough to hold its shape but soft enough to pipe.

4. Shape and Bake

  • Transfer the dough to a piping bag with a large round tip (or use a freezer bag with the corner cut off).

  • Pipe logs approximately 3 to 4 inches long onto the prepared baking sheet, leaving space between them.

  • Bake for 20–25 minutes until they are puffed and deep golden brown. Do not open the oven door during baking, as the steam is what makes them rise.

  • Transfer to a wire rack. Poke a small hole in the end of each pastry to let steam escape while cooling.

5. Fill and Finish

  • Once the pastry shells are completely cool, fit a piping bag with a small tip and fill it with the chilled vanilla cream.

  • Insert the tip into the hole you made earlier and fill each pastry until it feels heavy.

  • Generously dust the tops with powdered sugar before serving.


Serving Tips

  • Storage: These are best served the day they are made to maintain the crispness of the shell.

  • Variation: You can add a tablespoon of cocoa powder to the cream for a chocolate-filled version.
Fluffy Cottage Cheese Bagels

Fluffy Cottage Cheese Bagels

Prep time: 10 minutes | Cook time: 20-25 minutes | Servings: 4 bagels

Ingredients

  • 1 cup cottage cheese: This provides the protein base and moisture.

  • 2 large eggs: Used to bind the dough and help it rise.

  • 1 cup almond flour: Keeps the recipe low-carb and gluten-free (you can substitute oat flour if preferred).

  • 1 ½ tsp baking powder: Essential for achieving a light, fluffy texture.

  • Pinch of salt: To enhance the flavors.

  • Optional: Everything Bagel seasoning, sesame seeds, or poppy seeds for the topping.


Detailed Directions

1. Preheat and Prep

  • Preheat your oven to 375°F (190°C).

  • Line a baking sheet with parchment paper or a silicone baking mat to prevent sticking.

2. Blend the Base

  • For the smoothest texture, place the cottage cheese and eggs in a blender or food processor.

  • Pulse until the mixture is completely smooth and creamy.

3. Mix the Dough

  • In a medium mixing bowl, whisk together the almond flour, baking powder, and salt.

  • Pour the wet cottage cheese mixture into the dry ingredients.

  • Stir until a thick, slightly sticky dough forms.

4. Shape the Bagels

  • Divide the dough into 4 equal portions.

  • With lightly oiled hands (to prevent sticking), roll each portion into a log and join the ends to form a donut shape, or roll into a ball and poke a hole through the center.

  • Place the shaped bagels on your prepared baking sheet.

5. Add Toppings and Bake

  • If using Everything Bagel seasoning, sprinkle it generously over the tops of the bagels.

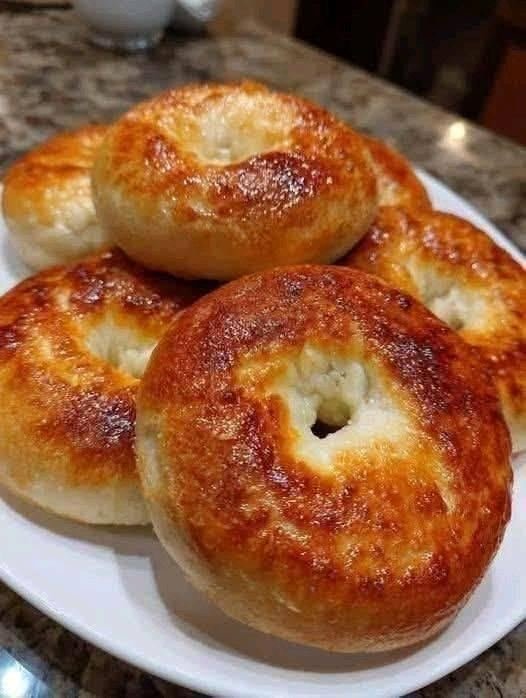
  • Bake for 20–25 minutes until the bagels are firm to the touch and a beautiful golden brown on the outside.

6. Cool

  • Allow the bagels to cool on the baking sheet for at least 10 minutes. This helps the internal structure set so they remain chewy rather than soft.


Nutrition Profile (Per Bagel)

  • Calories: ~140 kcal

  • Protein: 12g

  • Fat: 8g

  • Net Carbs: 4g

Fluffy 3-Ingredient Breakfast Bake

Fluffy 3-Ingredient Breakfast Bake

Prep time: 5 minutes | Cook time: 15-20 minutes | Servings: 2-3

Ingredients

  • 6 Large Eggs: The base of the dish; ensure they are at room temperature for the best rise.

  • 1 cup Cottage Cheese (or Greek Yogurt): This provides the protein and creates the creamy, “cheesy” interior layer.

  • 1/2 cup Shredded Cheese: Cheddar or Monterey Jack work perfectly for a savory finish.

  • Optional Seasoning: A pinch of salt and black pepper (highly recommended).


Detailed Directions

1. Prep the Oven and Pan

  • Preheat your oven to 375°F (190°C).

  • Lightly grease a small glass baking dish (approx. 8×8 or a small rectangular casserole dish) with butter or non-stick spray.

2. Separate and Whip (The Secret to the Fluff)

  • Separate the egg whites from the yolks.

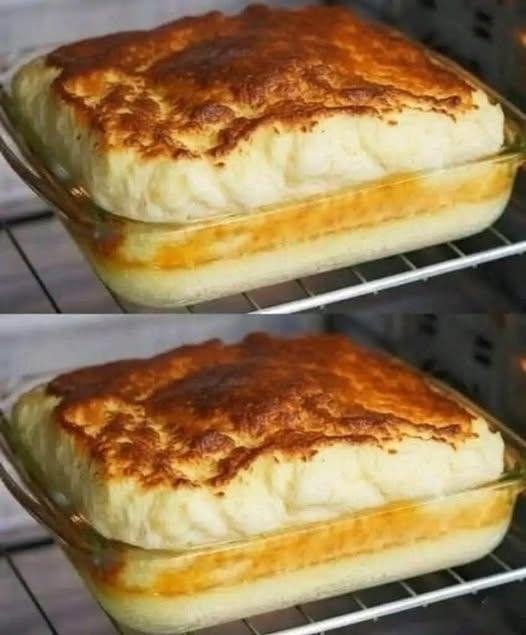
  • In a clean, dry bowl, whip the egg whites until they form stiff peaks (when you lift the beaters, the peaks should stand straight up). This creates the “cloud” texture seen in the image.

  • In a separate bowl, gently whisk the egg yolks with the cottage cheese (or yogurt) and your salt/pepper until smooth.

3. Fold and Combine

  • Slowly and gently fold the yolk mixture into the whipped egg whites. Use a spatula and a “lifting” motion rather than stirring to keep as much air in the whites as possible.

  • Fold in half of the shredded cheese.

4. Bake

  • Pour the mixture into your prepared baking dish.

  • Sprinkle the remaining shredded cheese over the top.

  • Bake for 15–20 minutes. The dish is ready when it has puffed up significantly and the top is a deep, golden brown.

5. Serve

  • Serve immediately while it is at its fluffiest. Like a souffle, it may deflate slightly as it cools, but it will remain delicious and light.


Customization Tips

  • Veggie Add-in: Fold in some finely chopped spinach or chives before baking.

  • Extra Protein: Add small bits of cooked bacon or ham to the bottom of the dish before pouring in the egg mixture.

Air-Fryer Stuffed Dates

Air-Fryer Stuffed Dates

Prep time: 5 minutes | Cook time: 5-6 minutes | Servings: As many as you’d like!

Ingredients

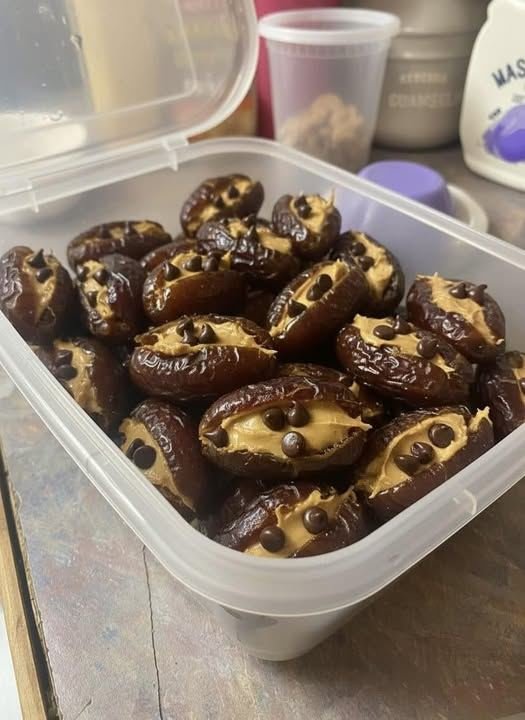
  • Whole Medjool Dates: These are the best for stuffing because they are large, soft, and naturally sweet.

  • Stuffing of Choice: Use creamy peanut butter, almond butter, or even cream cheese for a tangy twist.

  • Dark Chocolate Chips: To add a rich, melty layer.

  • Optional Toppings: A tiny pinch of flaky sea salt or crushed nuts for extra crunch.


Detailed Directions

1. Prepare the Dates

  • Using a small knife, slice each date lengthwise to create a slit.

  • Remove the pit from the center and discard it.

  • Open the date slightly to create a “pocket” for your filling.

2. Stuff and Top

  • Spoon about 1 teaspoon of peanut butter or cream cheese into the center of each date.

  • Press 3 to 5 dark chocolate chips into the filling.

  • If you’re using sea salt or nuts, sprinkle them on top now.

3. Air-Fry to Perfection

  • Preheat your air fryer to 375°F (190°C).

  • Place the stuffed dates in the air fryer basket in a single layer, making sure they aren’t touching.

  • Air fry for 5 to 6 minutes. The dates will become glossy and the chocolate will be perfectly melted.

4. Cool and Enjoy

  • Caution: The filling will be very hot! Let them sit for 2–3 minutes before eating so the “caramel” texture can set slightly.


Quick Tips for Success

  • Don’t Overcrowd: Give the hot air space to circulate so the dates caramelize evenly.

  • Storage: If you have leftovers, these stay delicious in an airtight container in the fridge for up to a week. They are even tasty served cold!

Crispy Cheesy Tuna Melt Patties

Crispy Cheesy Tuna Melt Patties

Prep time: 10 minutes | Cook time: 8 minutes | Servings: 4-6 patties

Ingredients

The Base:

  • 2 cans (5 oz each) tuna: Drained very well (moisture is the enemy of a crispy patty).

  • 1/2 cup breadcrumbs: Panko provides the best crunch, but regular works too.

  • 1/2 cup shredded cheese: Sharp cheddar or Swiss are the traditional favorites.

The Binders & Flavor:

  • 1/4 cup mayonnaise: Keeps the inside moist.

  • 1 egg, beaten: Acts as the “glue” to hold everything together.

  • 1 tsp Dijon mustard: Adds a subtle tang.

  • 1 tbsp lemon juice: Brightens up the seafood flavor.

  • 2 tbsp green onions or parsley: Finely chopped for freshness.

The Seasoning:

  • 1/2 tsp garlic powder

  • 1/2 tsp onion powder

  • 1/2 tsp salt

  • 1/4 tsp black pepper

For Cooking:

  • 1 tbsp butter or oil: For a golden-brown sear.


Detailed Directions

1. Mix the Base

In a large mixing bowl, flake the drained tuna with a fork. Add the breadcrumbs, shredded cheese, green onions, and all the dry seasonings (garlic powder, onion powder, salt, and pepper). Toss these together so the spices are evenly distributed.

2. Add the Binders

Add the beaten egg, mayonnaise, Dijon mustard, and lemon juice to the bowl. Use a spatula or fork to fold everything together until the mixture is uniform.

Pro Tip: If the mixture feels too wet to hold a shape, add another tablespoon of breadcrumbs. If it’s too crumbly, add a tiny bit more mayo.

3. Shape the Patties

Divide the mixture into 4 to 6 equal portions. Scoop a portion into your hands and press it firmly into a disc about 1-inch thick. Pressing firmly is key to ensuring they don’t fall apart in the pan.

4. The Golden Sear

Heat your butter or oil in a large non-stick skillet over medium heat. Once the pan is hot, carefully place the patties in. Cook for 3–4 minutes per side. You are looking for a deep golden-brown crust and for the cheese inside to become gooey.

5. The “Melt” Finish (Optional)

If you want extra cheesiness, place a thin slice of cheese on top of each patty during the last 60 seconds of cooking. Cover the skillet with a lid for a moment to trap the heat and melt the cheese perfectly.


Serving Suggestions

  • Classic Style: On toasted brioche buns with sliced tomato, crisp lettuce, and a smear of tartar sauce.

  • Low Carb: Serve atop a fresh Caesar salad or inside large butter lettuce cups.

  • Dip it: These pair beautifully with a spicy remoulade or a simple lemon-garlic aioli.

Zesty Ginger & Citrus Infusion

Zesty Ginger & Citrus Infusion

This drink combines the warmth of ginger with the brightness of citrus for a revitalizing beverage. While staying hydrated is a key part of wellness, it’s important to remember that no single drink can “burn fat” from specific areas of the body; however, this is an excellent, low-calorie alternative to sugary sodas.

Ingredients

  • Root: 1 to 2 inches of fresh ginger root (peeled and thinly sliced or grated)

  • Citrus: 1 large lemon (sliced into rounds or juiced)

  • Hydration: 4 to 6 cups of filtered water

  • Optional Sweetener: 1 teaspoon of honey or a few drops of stevia

  • Optional Kick: A pinch of cayenne pepper


Detailed Step-by-Step Instructions

1. Prepare the Ginger

  • Thoroughly wash the ginger root. Use the edge of a spoon to scrape off the thin skin.

  • For a mild flavor, slice the ginger into thin coins. For a more potent, spicy infusion, grate the ginger or crush it slightly to release more of its natural juices.

2. Simmer for Strength

  • Place the ginger and the water into a medium pot. Bring the water to a gentle boil, then reduce the heat to low.

  • Let the mixture simmer for 10 to 15 minutes. This heat extraction ensures you get the most flavor and warmth from the ginger.

3. Add the Citrus

  • Once the ginger water has finished simmering, remove it from the heat.

  • Add your lemon slices or fresh lemon juice. Adding lemon after boiling preserves the Vitamin C, which can be sensitive to high heat.

4. Steep and Strain

  • Let the mixture steep and cool for another 5–10 minutes.

  • Use a fine-mesh strainer to pour the liquid into a glass pitcher or jar, discarding the ginger pieces and lemon seeds.

5. Sweeten and Spice (Optional)

  • If you prefer a bit of sweetness, stir in your honey or stevia while the liquid is still slightly warm. Add a tiny pinch of cayenne pepper if you enjoy a “metabolism-boosting” spicy finish.

6. Serve Your Way

  • Hot: Enjoy it immediately as a soothing tea.

  • Cold: Allow it to cool completely and store it in the refrigerator. Serve over ice with a fresh sprig of mint for a cooling summer drink.


Success Tips

  • Batch Prepping: You can make a large batch and store it in the fridge for up to 3 to 4 days.

  • Flavor Variations: Try adding a cinnamon stick during the simmering process for a cozy, woody aroma that pairs beautifully with ginger.

A Gentle Peer Note

While ginger is fantastic for digestion and hydration, significant changes in body composition come from a consistent balance of movement and overall nutrition rather than a specific drink. Think of this as a delicious tool in your wellness kit!