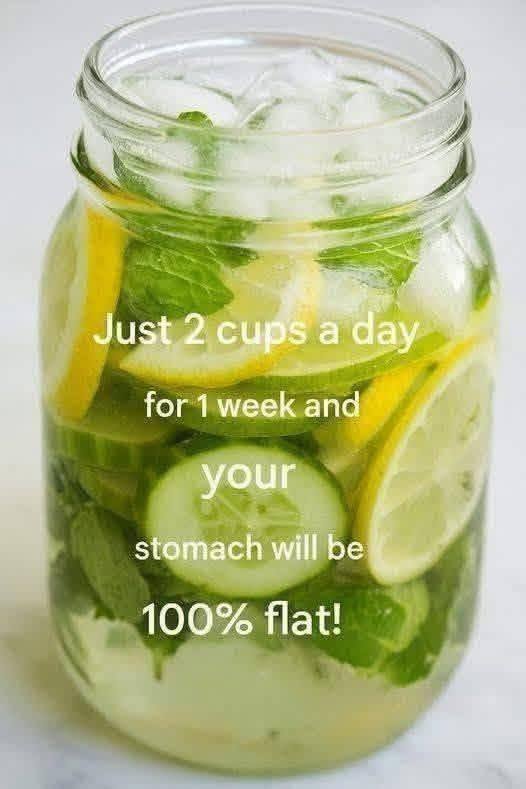
Cucumber & Citrus Infused Water

Cucumber & Citrus Infused Water

This refreshing drink is a fantastic way to enjoy the natural flavors of cucumber, lemon, and mint. While it’s often called a “detox” water, its real power lies in keeping you hydrated and providing a small boost of Vitamin C from the citrus.

Ingredients

  • Hydration Base: 8 cups (2 liters) of filtered water

  • Crisp Flavor: 1 large cucumber (thinly sliced)

  • Zest: 1 lemon (thinly sliced) and 1 lime (optional, thinly sliced)

  • Freshness: A handful of fresh mint leaves

  • Chill: 1–2 cups of ice


Detailed Step-by-Step Instructions

1. Prepare Your Produce

  • Thoroughly wash the cucumber, lemon, lime, and mint leaves under cool running water. Since these will be soaking in your water for hours, you want to ensure the skins are clean.

2. Slice Evenly

  • Use a sharp knife or a mandoline to slice the cucumber and citrus fruits into thin rounds. Thin slices allow more of the natural juices and oils to infuse into the water quickly.

3. Awaken the Mint

  • Take the mint leaves and gently “slap” them between your palms or bruise them slightly with the back of a spoon before adding them to the container. This releases the essential oils for a stronger aroma.

4. Combine

  • Place the cucumber slices, lemon, lime, and mint into a large glass pitcher or a 2-liter mason jar.

5. Add Water and Ice

  • Pour the 8 cups of water over the ingredients. Top with ice if you plan on serving it immediately.

6. The Infusion Process

  • For the best flavor, place the pitcher in the refrigerator and let it steep for at least 2 to 4 hours. This gives the ingredients time to flavor the water deeply.

7. Serving and Refilling

  • Serve chilled in a glass. You can keep refilling the pitcher with water throughout the day using the same fruit, though the flavor will become milder with each refill.


Helpful Success Tips

  • Bitterness Note: If you plan on keeping the water for more than 24 hours, it is best to remove the lemon and lime slices after about 4 hours. The white pith (the skin) of citrus can start to make the water taste bitter if left too long.

  • Keep it Fresh: Always store the infusion in the refrigerator and consume it within 2 days for the best taste and quality.

A Quick Note on Wellness

While this drink is a wonderful addition to a healthy lifestyle and can help reduce bloating by improving hydration, there is no single drink that can make a stomach “100% flat” on its own. True wellness comes from a balanced mix of nutrition, movement, and plenty of water!


Garlic & Sun-Dried Tomato Flatbread

Garlic & Sun-Dried Tomato Flatbread

This simple no-yeast recipe creates soft, pliable flatbreads that are perfect for pairing with soups, salads, or your favorite dips.

Ingredients

  • Dry Base: 2 cups all-purpose flour

  • Leavening: 1 teaspoon baking powder

  • Seasoning: 1/2 teaspoon salt and 1 teaspoon dried oregano

  • Liquid: 3/4 cup warm water and 2 tablespoons olive oil

  • Aromatics: 3 cloves garlic, minced

  • Flavor Pop: 1/4 cup chopped sun-dried tomatoes (oil-packed and drained)

  • Optional Topping: 2 tablespoons grated mozzarella or Parmesan


Detailed Step-by-Step Instructions

1. Combine Dry Ingredients

In a large mixing bowl, whisk together the all-purpose flour, baking powder, salt, and dried oregano until evenly distributed.

2. Add the Flavorings

Stir in the minced garlic and the finely chopped sun-dried tomatoes. Make sure the tomatoes are well-drained of excess oil before adding them to ensure the dough consistency remains correct.

3. Form the Dough

Create a well in the center of the dry ingredients and pour in the warm water and olive oil. Stir with a sturdy spoon until a shaggy dough forms.

4. Knead and Rest

Turn the dough onto a lightly floured surface. Knead it gently for about 2–3 minutes until it becomes smooth and elastic. Cover the dough with a clean cloth and let it rest for 10–15 minutes; this relaxes the gluten and makes it easier to roll out.

5. Divide and Shape

Divide the dough into 6 to 8 equal-sized balls. On a floured surface, use a rolling pin to flatten each ball into a thin circle (about 1/8 inch thick).

6. Sear the Flatbread

Heat a non-stick skillet or cast-iron pan over medium-high heat with a light brush of oil. Place one flatbread in the pan. Cook for about 1–2 minutes until bubbles form on the surface and the bottom has golden-brown spots.

7. Flip and Finish

Flip the flatbread and cook for another minute. If you are using the optional cheese, sprinkle it on top immediately after flipping so it melts while the other side finishes.

8. Keep Warm

Remove the flatbread from the pan and stack them on a plate wrapped in a clean kitchen towel. This traps the steam and keeps them soft and pliable until you are ready to serve.


Success Tips

  • Tomato Prep: Pat the sun-dried tomatoes dry with a paper towel after chopping to prevent the dough from becoming too orange or sticky.

  • Softness Secret: Don’t overcook them! If they stay in the pan too long, they will turn into crunchy crackers instead of soft flatbreads.

Savory Cabbage & Egg Pancakes

Savory Cabbage & Egg Pancakes

Based on your second image, these are fantastic for a quick, nutritious breakfast or snack.

Ingredients

  • Base: 2 cups finely shredded cabbage.

  • Protein: 4 large eggs.

  • Binding: 3–4 tbsp flour (all-purpose or oat flour).

  • Seasoning: A pinch of salt, black pepper, and optional red chili flakes.

  • Oil: 1–2 tbsp vegetable oil for pan-searing.

Step-by-Step Instructions

  1. Prep the Cabbage: Shred the cabbage very thinly so it cooks quickly and evenly.

  2. Mix: In a large bowl, combine the shredded cabbage and the 4 eggs. Stir well until the cabbage is thoroughly coated.

  3. Season and Bind: Add your salt, pepper, and flour. Mix until the flour disappears and creates a light batter that holds the cabbage together.

  4. Heat the Pan: Add oil to a non-stick skillet over medium heat.

  5. Form Pancakes: Scoop about 1/4 cup of the mixture into the pan for each pancake. Flatten them slightly with a spatula.

  6. Cook: Sear for 3–4 minutes on each side. They are ready when they are golden brown and firm to the touch.

  7. Serve: Enjoy them plain or with a side of Greek yogurt or soy sauce for dipping.

Swirled Individual Cheesecakes

Swirled Individual Cheesecakes

This recipe makes approximately 12 standard-sized muffin cups.

Ingredients

For the Crust:

  • 1/2 cup almond flour

  • 1 tbsp sweetener (such as erythritol or monk fruit)

  • 1/4 tsp cinnamon

  • Pinch of salt

  • 2 tbsp butter, melted

For the Cheesecake Filling:

  • 8 oz (1 block) cream cheese, softened to room temperature

  • 1/2 cup sweetener

  • 1 large egg, room temperature

  • 1/2 tsp vanilla extract

  • 1/4 tsp salt

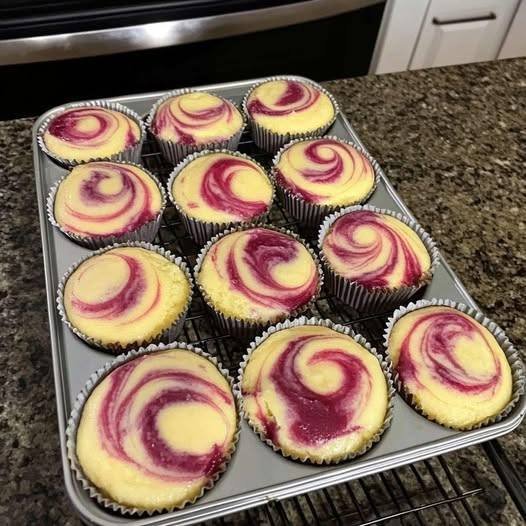
Optional Berry Swirl (as shown in image):

  • 2 tbsp sugar-free raspberry or strawberry jam (or pureed berries)


Detailed Step-by-Step Instructions

1. Preparation

  • Preheat your oven to 175°C (350°F).

  • Line a standard muffin tin with 12 paper or silicone liners.

2. Prepare the Crust

  • In a small bowl, whisk together the almond flour, sweetener, cinnamon, and salt.

  • Pour in the melted butter and stir until the mixture resembles wet sand.

  • Place about 1 tablespoon of the mixture into each muffin liner.

  • Use the back of a spoon or a small glass to press the crust down firmly until it is flat and even.

  • Bake the crusts for 5 minutes, then remove them from the oven and set aside to cool slightly. Lower the oven temperature to 160°C (325°F).

3. Create the Cheesecake Filling

  • In a large mixing bowl, beat the softened cream cheese and sweetener together until the mixture is smooth and fluffy.

  • Add the egg, vanilla extract, and salt.

  • Mix on low speed just until combined. Avoid over-mixing at this stage, as it can introduce air bubbles that may cause the cheesecakes to rise and then sink.

4. Fill the Cups

  • Divide the cheesecake batter evenly among the muffin liners, filling each one about 3/4 full over the pre-baked crusts.

5. Add the Swirl Effect

  • Place 2 or 3 small dots of your berry jam or puree on top of the cheesecake batter in each cup.

  • Using a toothpick or a thin skewer, gently swirl the jam into the batter in a circular motion to create the pattern seen in the photo.

6. Bake

  • Place the tin in the center of the oven and bake at 160°C (325°F) for 15–18 minutes.

  • The edges should be set and look slightly puffed, but the centers should still have a very slight “jiggle” when you gently shake the pan.

7. Cool and Set

  • Remove from the oven and let the cheesecakes cool completely in the pan at room temperature.

  • Once cooled, transfer the pan to the refrigerator for at least 2–3 hours (or overnight) to allow them to firm up completely before removing the liners.


Pro-Tips for Success

  • Room Temperature Ingredients: Ensure your cream cheese and egg are at room temperature before starting. This prevents lumps and ensures a silky-smooth texture.

  • Avoid Cracks: Don’t open the oven door during the first 12 minutes of baking. A steady temperature helps the cheesecakes set evenly.

  • Storage: These keep beautifully in an airtight container in the fridge for up to 5 days, or you can freeze them for up to a month.

Crispy Golden Chicken Strips

Crispy Golden Chicken Strips

This recipe uses an egg-based marinade that locks in moisture and helps the coating stay attached for a satisfying crunch.

Ingredients

  • Chicken: 2 large chicken breast fillets (sliced into even strips).

  • The Coating Base: 3 large eggs.

  • Flavorings: 2 cloves of garlic (finely minced).

  • The Breadcrumbs: 1 ½ cups Panko breadcrumbs (best for crunch) or fine breadcrumbs.

  • Seasoning Mix: 1 tsp salt, ½ tsp black pepper, 1 tsp mild paprika, and ½ tsp onion powder.

  • Cooking Oil: Enough vegetable or canola oil to cover the bottom of your pan (about 1 inch deep).


Detailed Step-by-Step Instructions

1. Prepare the Chicken and Marinade

Place your chicken strips into a clean mixing bowl. Crack the 3 eggs directly over the chicken and add the minced garlic. Use a pair of tongs or a spoon to stir everything together until every piece of chicken is fully coated in the egg.

2. Initial Seasoning

Add half of your salt and pepper to the chicken and egg mixture. Stir again. Let this sit at room temperature for about 15 minutes. This allows the garlic and salt to flavor the meat before it is cooked.

3. Set Up Your Breading Station

In a wide, shallow dish or a pie plate, combine the breadcrumbs, paprika, onion powder, and the remaining salt and pepper. Use a fork to mix the spices evenly through the crumbs.

4. Apply the Coating

Take one chicken strip at a time from the egg bowl. Place it into the breadcrumb mixture. Use your hands to press the crumbs firmly onto all sides of the chicken. You want a thick, even layer of crumbs covering the entire surface. Set the coated strips on a clean plate.

5. Heat the Cooking Oil

Pour your oil into a large skillet and turn the heat to medium. To check if the oil is ready, drop a single breadcrumb into the pan; if it sizzles immediately, the oil is at the right temperature.

6. Cook Until Golden

Carefully lay the chicken strips into the warm oil. Work in small groups so the pan isn’t too full. Cook the strips for about 3 to 4 minutes on the first side. When the edges look golden brown, gently turn them over and cook for another 3 minutes.

7. Final Safety Check

Ensure the chicken is cooked through. The thickest part of the strip should be white and opaque all the way through, reaching an internal temperature of 74°C.

8. Drain and Serve

Lift the strips out of the oil and place them onto a plate lined with paper towels or a wire cooling rack. This helps remove any extra oil and keeps the bottom of the chicken from getting soft.


Helpful Success Tips

  • Uniform Slicing: Try to cut your chicken strips to a similar thickness so they all finish cooking at the same time.

  • Dry Hands/Wet Hands: Try to use one hand for touching the “wet” egg-soaked chicken and the other hand for pressing the “dry” breadcrumbs. This prevents your fingers from getting heavily coated in dough!

☕ Mexican Oregano Wellness Tea

This is the most common “recipe” associated with the claims in your image. It’s soothing, aromatic, and great for digestion.

  • Prep time: 2 mins

  • Steep time: 5 mins

  • Servings: 1

Ingredients

  • 1 to 2 large fresh Mexican Oregano leaves (washed)

  • 1 cup boiling water

  • Optional: 1 tsp honey or a squeeze of fresh lime

Instructions

  1. Bruise the Leaf: Gently tear or bruise the fresh leaf with your fingers to release the essential oils.

  2. Steep: Place the leaf in a mug and pour the boiling water over it.

  3. Cover: Cover the mug with a saucer. This prevents the beneficial aromatic oils from escaping with the steam.

  4. Wait: Let it sit for about 5 minutes.

  5. Enjoy: Remove the leaf and add honey if you prefer a sweeter taste.

📋 Recipe Notes & Tips

  • Fresh is Best: This specific variety is much more potent when used fresh rather than dried.

  • Potency: One leaf is usually enough! The flavor is very strong—much more intense than the Mediterranean oregano you find on pizza.

  • Cooking: You can also finely mince one leaf and add it to black beans, stews, or fatty meats. It helps “cut” the heaviness and aids digestion.

💡 Benefits & Nutritional Info

Mexican Oregano contains compounds like carvacrol and thymol, which are known for:

  • Antioxidant Properties: Helping the body fight oxidative stress.

  • Digestive Support: Traditionally used to reduce bloating and gas.

  • Respiratory Comfort: The aromatic vapors can help clear nasal passages (similar to eucalyptus).

Component Level
Calories ~2 kcal per leaf
Vitamin C Trace amounts
Vitamin A High (in the form of carotenoids)
Fiber Low (if consumed as tea)

❓ Common Q&A

Q: Can I eat the leaf raw?

A: Yes, but it is very pungent and has a fuzzy, thick texture that some find unpleasant. Steeping it is usually preferred.

Q: Can I drink this every day?

A: For most people, a cup of herbal tea is safe. However, if you are pregnant, breastfeeding, or on medication, always check with a doctor first, as concentrated herbs can interact with certain treatments.

Q: Does it actually cure anxiety and insomnia?

A: No. While the ritual of drinking warm tea can be relaxing (which helps with sleep), it is not a clinical treatment for anxiety disorders.