
Low-Carb “No-Bake” Coconut Cream Pie

Low-Carb “No-Bake” Coconut Cream Pie

Prep time: 5–10 minutes (plus chilling) | Servings: 8 slices

Ingredients

For the Crust:

  • 1 ½ cups Almond flour (a great low-carb alternative to graham crackers)

  • ¼ cup Butter, melted

  • 2 tbsp Granulated monk fruit or erythritol sweetener

  • Optional: A pinch of cinnamon

For the Filling:

  • 8 oz Cream cheese, softened (low-fat or regular)

  • 1 cup Heavy whipping cream (chilled)

  • ½ cup Powdered monk fruit or erythritol sweetener

  • 1 tsp Coconut extract (or vanilla extract)

  • ½ cup Unsweetened shredded coconut

  • ½ cup Fresh raspberries or sliced strawberries (for the “red” bits seen in your photo)

For the Topping:

  • ¼ cup Toasted unsweetened coconut flakes

  • Extra whipped cream (sugar-free)


Instructions

  1. Prepare the Base: In a medium bowl, mix the almond flour, melted butter, and sweetener until it looks like wet sand. Press this firmly into the bottom and sides of a 9-inch pie dish. (Tip: If you prefer a sturdier crust, you can bake this at 350°F for 8 minutes, but for a true “no-bake” version, just chill it in the freezer while you make the filling).

  2. Whip the Cream: In a chilled bowl, beat the heavy whipping cream until stiff peaks form. Set this aside.

  3. Cream the Filling: In a separate large bowl, beat the softened cream cheese, powdered sweetener, and extract until smooth and fluffy.

  4. Fold it Together: Gently fold the whipped cream into the cream cheese mixture. Once combined, fold in the shredded coconut and the fresh berries.

  5. Assemble: Pour the filling into your prepared crust and smooth the top with a spatula.

  6. Garnish and Chill: Sprinkle the toasted coconut flakes over the top. Let the pie set in the refrigerator for at least 2–4 hours (or 1 hour in the freezer if you’re in a hurry) to get that “melt-in-your-mouth” consistency.


Helpful Tips

  • Consistency: Make sure your cream cheese is truly at room temperature before mixing, or you’ll end up with tiny lumps.

  • Toasting Coconut: To get that golden look from the photo, toss unsweetened coconut flakes in a dry pan over medium heat for 2–3 minutes until fragrant and brown.

  • Sweetener Note: I recommend powdered sweetener for the filling so it isn’t “gritty.” If you only have granulated, you can pulse it in a blender for a few seconds first.


The Surprising Health Benefits of Boiled Eggs

The Surprising Health Benefits of Boiled Eggs

  Boiled eggs have been a staple in human diets for centuries. Their simplicity, versatility, and impressive nutritional profile make them one of the most complete and affordable foods available. But beyond their convenience, doctors and nutrition experts are now highlighting that regularly eating boiled eggs can deliver an array of powerful health benefits.

For years, eggs were unfairly criticized due to their cholesterol content. However, recent research has turned that perception around, revealing that moderate egg consumption can actually support heart health, brain function, and more. Let’s dive into why the humble boiled egg deserves a regular spot on your plate.


1. A Natural Protein Powerhouse

Each boiled egg contains about 6 grams of high-quality protein — the kind your body can absorb and use efficiently. Protein is essential for muscle repair, tissue growth, and hormone production. Including boiled eggs in your daily meals helps preserve lean muscle mass, especially as you age. Athletes, fitness enthusiasts, and anyone looking to boost recovery or stay energized can benefit from this simple, nutrient-dense food.


2. Protects Eye Health

Boiled eggs are rich in lutein and zeaxanthin, two antioxidants that play a crucial role in maintaining good vision. These compounds help prevent damage from blue light and reduce the risk of cataracts and age-related macular degeneration — common causes of vision loss in older adults. Adding just one or two boiled eggs to your daily routine is a simple and effective way to protect your eyesight naturally.


3. Supports Brain Function and Memory

Eggs are one of the best natural sources of choline, a nutrient vital for brain health. Choline helps produce acetylcholine, a neurotransmitter responsible for learning, focus, and memory. Studies suggest that sufficient choline intake can reduce the risk of cognitive decline as you age. That makes boiled eggs an excellent choice for students, professionals, and older adults alike.


4. Helps Control Appetite and Weight

Thanks to their protein and healthy fat content, boiled eggs are highly satisfying and can keep you full for hours. Eating them for breakfast or as a snack can reduce overall calorie intake and help prevent cravings. This makes them ideal for those aiming to manage their weight naturally — no extreme diets required. Replacing processed snacks with a couple of boiled eggs can make a noticeable difference in your daily energy levels and hunger control.


5. Packed with Essential Nutrients

Boiled eggs provide a concentrated source of key vitamins and minerals your body needs every day. They’re loaded with:

  • Vitamin B12, which supports red blood cell production and energy metabolism.

  • Vitamin D, essential for bone health and immune support.

  • Selenium, a powerful antioxidant that protects your cells from oxidative stress.

This nutrient combination helps strengthen your immune system, support thyroid function, and promote overall well-being.


Final Thoughts

Boiled eggs are more than just a breakfast favorite — they’re a true superfood that deserves more recognition. Whether you’re looking to boost your protein intake, sharpen your mind, protect your eyes, or simply eat healthier, adding boiled eggs to your diet is a smart move.

Enjoy them as part of a balanced breakfast, in salads, or as a quick post-workout snack. Simple, affordable, and packed with nutrients, boiled eggs prove that sometimes, the healthiest foods are the ones we’ve had all along.

Ginger, Onion, Garlic, Lemon & Honey Natural Syrup

.


🍯 The “Wellness Powerhouse” Natural Syrup

A potent, home-remedy syrup for immunity, congestion, and throat relief.

  • Yield: Approx. 1 small jar (5–6 oz)

  • Shelf Life: 1–2 weeks (refrigerated)

  • Usage: 1 tablespoon as needed (or stirred into warm tea)

Ingredients

  • Onion: 1 medium (150g), finely grated or minced (Yellow or Red work best)

  • Ginger: 1 tbsp (15g) fresh ginger, grated

  • Garlic: 3 cloves (9g), minced or crushed

  • Lemon: 1 fresh lemon, juiced (approx. 30ml)

  • Honey: 3–4 tbsp (60–80ml) Raw, Unfiltered Honey

  • Water (Optional): 2 tbsp warm water (to thin the consistency)

Instructions

  1. Prep the Aromatics: Grate the onion and ginger into a medium glass bowl. By grating rather than chopping, you release more of the natural juices and potent compounds.

  2. Activate the Garlic: Mince or crush your garlic cloves and let them sit for about 5 minutes before mixing. This “rest” allows the beneficial enzyme allicin to fully develop.

  3. Combine: Add the lemon juice and the raw honey to the bowl. Stir vigorously until the honey has fully incorporated with the onion and ginger juices.

  4. The “Steeping” Phase: Cover the bowl and let the mixture sit at room temperature for at least 2 to 4 hours. This allows the honey to draw out the medicinal liquids from the onion and garlic.

  5. Strain (Optional): If you prefer a smooth syrup, pour the mixture through a fine-mesh strainer or cheesecloth into a clean glass jar, pressing down on the solids to extract every drop. If you don’t mind the texture, you can keep the bits in!

  6. Store: Seal the jar and keep it in the refrigerator.


💡 Why This Works

  • The Onion/Honey Reaction: Honey is “hygroscopic,” meaning it draws moisture out of the onion. This creates a natural expectorant that helps break up mucus.

  • Raw Honey: It’s important to use raw honey if possible, as pasteurized honey loses the enzymes and propolis that provide those antimicrobial benefits.

  • The “Kick”: If the onion/garlic flavor is too intense, don’t worry! After steeping, the honey mellows out the pungency significantly.

⚠️ A Quick Note

Safety First: Never give honey (even in a syrup like this) to infants under 1 year old due to the risk of botulism.

Apple Cider Vinegar Blood Sugar Support Drink

Apple Cider Vinegar Blood Sugar Support Drink

Description

This simple drink combines raw apple cider vinegar with warm water and optional natural flavorings. It is commonly used as a supportive wellness drink that may help improve insulin sensitivity when combined with a healthy diet and lifestyle.
⚠️ It does not cure diabetes and does not guarantee blood sugar below 100.

 Ingredients (1 Serving)

  • 1 cup warm water (not hot)

  • 1 tablespoon raw apple cider vinegar (with “the mother”)

  • ½ teaspoon cinnamon powder (optional)

  • A few drops liquid stevia (optional, diabetic-friendly)

  • 1 teaspoon lemon juice (optional)

 Instructions

  1. Add warm water to a glass.

  2. Stir in apple cider vinegar.

  3. Add cinnamon and lemon juice if using.

  4. Sweeten lightly with stevia if desired.

  5. Drink slowly.

 Notes

  • Always dilute apple cider vinegar.

  • Use a straw to protect tooth enamel.

  • Best results are seen with consistent use and balanced meals.

 Tips

  • Drink before meals or at bedtime.

  • Start with 1 teaspoon vinegar if new to it.

  • Rinse mouth with plain water after drinking.

  • Do not drink on an empty stomach if you have acidity issues.

Servings

  • 1 serving
    (You may take up to 1–2 servings per day)

Nutritional Information (Approx.)

  • Calories: 5

  • Carbohydrates: 0 g

  • Sugar: 0 g

  • Fat: 0 g

  • Sodium: 0 mg

Potential Benefits

✔ May help reduce post-meal blood sugar spikes
✔ May improve insulin sensitivity
✔ Supports digestion
✔ May help with appetite control
✔ Low-calorie and diabetic-friendly

 Q & A

Q: Can this keep blood sugar below 100?
A: No drink can guarantee that. It may support better control when paired with proper diet, exercise, and medication if prescribed.

Q: Is this safe for diabetics?
A: Generally safe in small amounts, but consult your doctor if you take insulin or blood-pressure medicine.

Q: Can I drink it daily?
A: Yes, once daily is usually safe for most people.

Q: Can I replace medication with this?
A: ❌ No. This is a supportive drink, not a treatment.
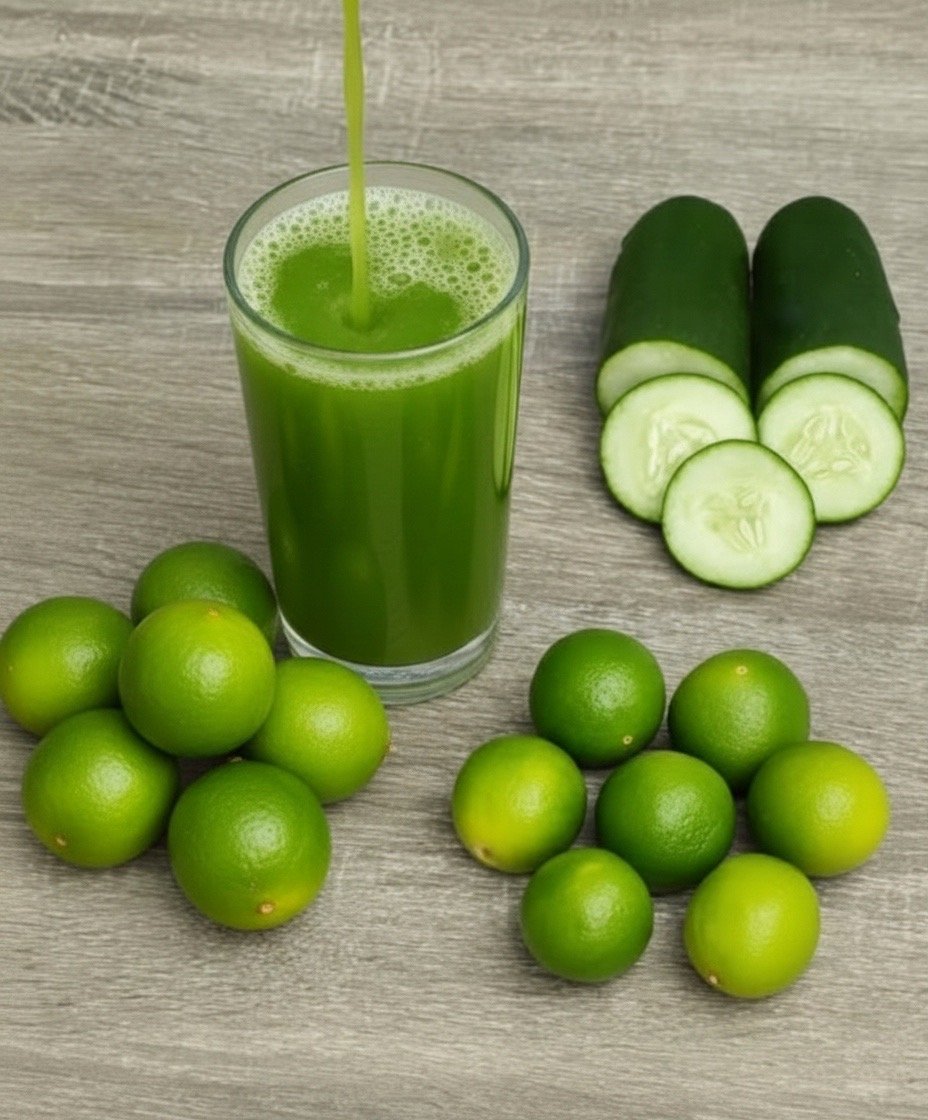
Cucumber Lime Detox Juice


Cucumber Lime Detox Juice

A refreshing, hydrating green juice made with fresh cucumber and lime. This simple detox-style drink is packed with vitamins, antioxidants, and electrolytes—perfect for mornings, post-workout, or hot days.

 Description

Cucumber Lime Detox Juice is a light, cleansing beverage made primarily from fresh cucumbers and lime juice. It’s naturally low in calories, hydrating, and helps support digestion and skin health. The bright citrus flavor balances the mild, cooling taste of cucumber.

Ingredients (1–2 Servings)

  • 2 medium cucumbers

  • 4–6 fresh limes (juiced)

  • ½ cup cold water (optional, for blending)

  • 1–2 teaspoons honey or stevia (optional)

  • Ice cubes (optional)

  • Fresh mint leaves (optional, for garnish)

 Instructions

If Using a Blender:

  1. Wash cucumbers thoroughly (peel if desired).

  2. Chop into chunks.

  3. Add cucumber and water to blender.

  4. Blend until smooth.

  5. Strain through a fine mesh sieve or cheesecloth (optional for smoother juice).

  6. Stir in fresh lime juice.

  7. Add sweetener if desired.

  8. Serve over ice and garnish with mint.

If Using a Juicer:

  1. Feed cucumbers into juicer.

  2. Stir in freshly squeezed lime juice.

  3. Add sweetener if desired.

  4. Serve chilled.

 Notes

  • Keeping the cucumber peel adds extra nutrients and fiber.

  • Persian or English cucumbers work best because they are less bitter.

  • Adjust lime based on preferred tartness.

Tips for Best Results

  • Use chilled cucumbers for a naturally cold drink.

  • Roll limes on the counter before juicing to release more juice.

  • Add a small piece of ginger for a metabolism boost.

  • Drink immediately for maximum freshness and nutrient retention.

Servings

  • Makes: 1–2 servings

  • Serving size: About 1 cup (250 ml)

 Nutritional Information (Per 1 Cup Approx.)

  • Calories: 45–60

  • Carbohydrates: 10–14g

  • Sugar: 6–8g (natural sugars)

  • Fiber: 1–2g (if unstrained)

  • Vitamin C: ~35–50% Daily Value

  • Potassium: ~200mg

  • Fat: 0g

  • Protein: 1g

(Values vary depending on lime quantity and sweetener used.)

Health Benefits

✅ Hydration Support – Cucumbers are ~95% water.

✅ Rich in Vitamin C – Boosts immunity and skin health.
✅ Digestive Aid – Lime helps stimulate digestive enzymes.
✅ Low Calorie – Great for weight management.
✅ Detox Support – Supports natural liver function.
✅ Skin Glow – Antioxidants help reduce oxidative stress.

 Q & A

Q: Can I drink this every day?
Yes! It’s safe for daily consumption unless you have acid sensitivity.

Q: Is it good for weight loss?
It supports weight management due to low calories and high hydration, but it’s not a magic solution.

Q: Can I store it?
Best consumed fresh. You can refrigerate for up to 24 hours in an airtight container.

Q: Can I add other ingredients?
Absolutely! Try mint, ginger, celery, or a splash of apple juice.

Q: Is it safe for kids?
Yes, just reduce lime if they prefer less tartness.

Baked Coconut Custard Pie


Baked Coconut Custard Pie


🧾 Ingredients

  • ½ cup Bisquick or 1 cup all-purpose flour
  • ¾ cup sugar
  • 4 large eggs
  • 2 cups milk
  • 1 cup flaked coconut
  • 1 teaspoon vanilla extract
  • 1 tablespoon butter (softened)

👩‍🍳 Step-By-Step Instructions

1️⃣ Preheat the Oven

  • Preheat your oven to 400°F (200°C).
  • Grease a 9-inch round pie pan or baking dish with butter or oil.

2️⃣ Mix the Ingredients

  • In a large mixing bowl, add:
    • Bisquick (or flour)
    • Sugar
    • Eggs
    • Milk
    • Flaked coconut
    • Vanilla extract
    • Softened butter
  • Beat everything together using a whisk or hand mixer.
  • Mix until the batter becomes smooth and lump-free.

3️⃣ Pour into Pan

  • Pour the smooth batter into the greased pie pan.
  • Do not stir after pouring.

4️⃣ Bake

  • Place the pan in the preheated oven.
  • Bake for 30 minutes.
  • The top should turn light golden brown.
  • The center should be set but slightly jiggle when gently shaken.

5️⃣ Cool Completely

  • Remove from oven.
  • Let it cool at room temperature for at least 1 hour.
  • As it cools, it will firm up properly.

6️⃣ Slice & Serve

  • Cut into slices.
  • Serve plain or sprinkle with powdered sugar.

✨ Tips

✔ It creates its own soft crust while baking.

✔ Tastes even better after chilling in the fridge.

✔ You can add a pinch of cinnamon for extra flavor.