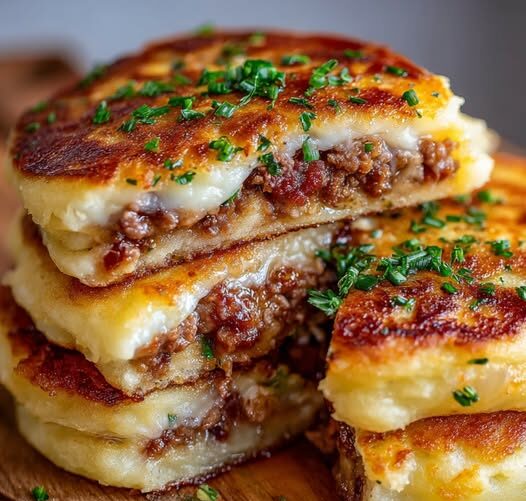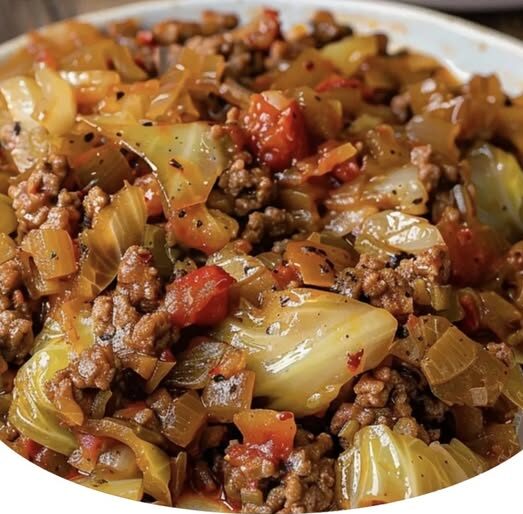
Cabbage Beef Bake

A hearty, low-carb casserole with ground beef, tender cabbage, and melty cheese — a simple, family-friendly comfort dish that comes together in under an hour.

Prep Time: 15 minutes
Cook Time: 30 minutes
Total Time: ~45 minutes
Servings: 6
Calories per serving: 290 kcal | Net Carbs: 5g | Protein: 22g | Fat: 20g

Ingredients

  • Ground beef – 1 lb

  • Cabbage – 1 small head, chopped

  • Onion – 1 medium, diced

  • Garlic – 2 cloves, minced

  • Diced tomatoes – 1 can (14.5 oz), undrained

  • Italian seasoning – 1 tsp

  • Paprika – 1 tsp

  • Salt & black pepper – to taste

  • Mozzarella cheese – 1 cup, shredded

  • Olive oil – 2 tbsp

Instructions

  1. Preheat the oven: Set to 350°F (175°C). Grease a 9×13-inch baking dish.

  2. Cook the aromatics & beef: In a large skillet, heat olive oil over medium heat. Sauté onion and garlic until translucent. Add ground beef and cook until browned, breaking it apart with a spoon. Drain excess fat.

  3. Add cabbage & seasonings: Stir in chopped cabbage, diced tomatoes, Italian seasoning, paprika, salt, and pepper. Cook for 5–7 minutes, until the cabbage softens slightly.

  4. Assemble: Transfer the mixture to the prepared baking dish. Sprinkle shredded mozzarella evenly over the top.

  5. Bake: Cook uncovered for 25–30 minutes, or until the cheese is melted, bubbly, and golden.

  6. Cool & serve: Let rest for a few minutes before slicing and serving.

Quick Notes & Pro Tips

  • Veggie boost: Add chopped bell peppers or mushrooms for extra flavor and nutrition.

  • Cheese options: Swap mozzarella for cheddar, Monterey Jack, or an Italian blend.

  • Make it spicy: Add a pinch of red pepper flakes or diced jalapeños.

Why You’ll Love It

This dish is satisfying, budget-friendly, and naturally low in carbs. It’s also a great way to incorporate more veggies into your dinner without sacrificing flavor.

Variations & Serving Suggestions

  • Keto-friendly: Serve as is for a low-carb meal.

  • Make it a full dinner: Pair with a side salad or roasted veggies.

  • Turn it into a one-pan meal: Skip baking and melt cheese directly in the skillet for a stovetop version.

Storage & Make-Ahead

  • Refrigerate: Store leftovers in an airtight container for up to 4 days.

  • Freeze: Cool completely, wrap tightly, and freeze for up to 3 months. Thaw overnight before reheating.

  • Reheat: Warm in the oven at 350°F until heated through, or microwave individual portions.

FAQs

Q: Can I use ground turkey or chicken instead?
A: Yes — ground turkey or chicken works well as a leaner alternative.

Q: Can I make it ahead?
A: Absolutely! Assemble up to a day in advance, refrigerate, then bake when ready.

Q: Can I skip the cheese?
A: Yes, but the melty cheese adds a great texture and flavor.

Personal Note

This recipe reminds me of a rustic stuffed cabbage roll but in casserole form — all the flavor with half the effort. It’s been a lifesaver for busy weeknights and a hit at family dinners.
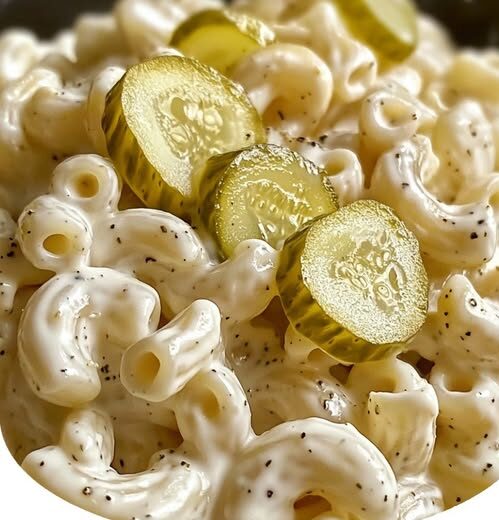
Dill Pickle Macaroni Salad

A creamy, tangy, and refreshing pasta salad packed with dill pickles, fresh dill, and a zesty dressing — perfect for picnics, barbecues, or as a make-ahead side dish.

Prep Time: 10 minutes
Cook Time: 10 minutes
Chill Time: 1 hour
Total Time: ~1 hour 20 minutes
Servings: 6–8

Ingredients

  • Macaroni pasta – 2 cups

  • Mayonnaise – ½ cup

  • Sour cream – ¼ cup

  • Pickle juice – ¼ cup

  • Dill pickles – 1 cup, chopped

  • Red onion – ¼ cup, diced

  • Fresh dill – ¼ cup, chopped

  • Salt & black pepper – to taste

Instructions

  1. Cook the pasta:
    Bring a large pot of salted water to a boil. Add macaroni and cook according to package directions until tender. Drain well and let cool completely to prevent the dressing from becoming watery.

  2. Make the dressing:
    In a large mixing bowl, whisk together mayonnaise, sour cream, and pickle juice until smooth and creamy.

  3. Combine:
    Add the cooled macaroni, chopped pickles, red onion, and fresh dill to the bowl. Gently toss until all ingredients are evenly coated with the dressing.

  4. Season:
    Taste and season with salt and pepper as needed (remember, the pickles and juice already add saltiness).

  5. Chill:
    Cover and refrigerate for at least 1 hour to allow flavors to meld.

  6. Serve:
    Stir well before serving. Garnish with extra fresh dill or pickle slices for presentation.

Quick Notes & Pro Tips

  • Cool the pasta completely: This is key for keeping the dressing creamy instead of watery.

  • Pickle juice matters: Use juice from your favorite dill pickles — it gives the dressing its zesty kick.

  • Make it heartier: Add diced ham, shredded cheese, or even chopped hard-boiled eggs for extra protein.

Why You’ll Love It

This isn’t your typical macaroni salad — it’s creamy, tangy, and bursting with dill flavor. It’s a crowd-pleaser for BBQs, potlucks, or weekday lunches.

Variations & Serving Suggestions

  • Add-ins: Try peas, shredded carrots, or celery for extra crunch.

  • Make it spicy: Stir in a spoonful of diced pickled jalapeños or a splash of hot sauce.

  • Pair it with: Grilled burgers, BBQ chicken, or sandwiches.

Storage & Make-Ahead

  • Refrigerate: Store in an airtight container for up to 3 days.

  • Make-ahead: Prepare the day before — it tastes even better after sitting overnight.

FAQs

Q: Can I use a different pasta shape?
A: Yes! Shells, rotini, or penne work well for this salad.

Q: Can I use Greek yogurt instead of sour cream?
A: Absolutely — it adds a bit of tang and cuts the richness slightly.

Q: What if I want it creamier?
A: Add an extra 2–3 tablespoons of mayonnaise or sour cream.

Personal Note

This is one of those recipes I always bring to summer cookouts — it disappears fast! The combo of fresh dill, pickle crunch, and creamy dressing makes it irresistible.

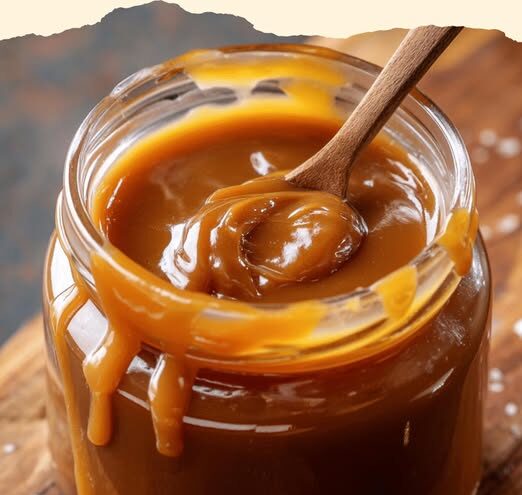
Brown Sugar Caramel Sauce

A quick and decadent caramel sauce made with brown sugar, butter, and cream — perfect for drizzling over ice cream, pancakes, or your favorite desserts.

Prep Time: 5 minutes
Cook Time: 8–10 minutes
Total Time: ~15 minutes
Yield: ~1.5 cups
Dietary: Gluten-free, Vegetarian

Ingredients

  • Light brown sugar – 1 cup, packed

  • Unsalted butter – ½ cup

  • Heavy cream – ½ cup (slightly warmed)

  • Salt – ¼ tsp

  • Vanilla extract – 1 tsp

Instructions

  1. Prepare ingredients: Measure all ingredients. Warm the heavy cream slightly in a small saucepan or microwave (about 30 seconds) to prevent seizing.

  2. Melt sugar: In a heavy-bottomed saucepan over medium heat, add the brown sugar. Stir constantly with a wooden spoon or heatproof spatula until the sugar begins to melt and bubble (2–3 minutes). Continue until smooth.

  3. Add butter: Add the butter all at once. Expect vigorous bubbling — keep stirring until fully incorporated (1–2 minutes).

  4. Add cream: Slowly pour in the warmed cream while stirring. The mixture will bubble up dramatically — keep stirring until smooth and cohesive (about 1–2 minutes).

  5. Season & finish: Remove from heat. Stir in the salt and vanilla extract. Taste and adjust salt as needed.

  6. Cool & serve: Let the sauce cool for 5–10 minutes. It will thicken as it cools to the perfect drizzling consistency.

Quick Notes & Pro Tips

  • Temperature control: Keep the heat at medium to avoid burning the sugar.

  • Use a heavy-bottomed pan: It helps distribute heat evenly and prevents scorching.

  • Don’t panic at the bubbling: This is normal when adding butter and cream — just keep stirring.

  • Make it salted caramel: Increase the salt to ½ tsp for a salted caramel variation.

Why You’ll Love It

This recipe is foolproof, quick, and delivers a rich, buttery caramel flavor with a touch of molasses from the brown sugar. It’s pourable when warm and thickens to a spoonable consistency when cooled — perfect for desserts, breakfast treats, or even as a dip for fruit.

Serving Suggestions

  • Drizzle over ice cream, cheesecake, or apple pie

  • Spoon onto pancakes, waffles, or crepes

  • Swirl into coffee or hot chocolate for a caramel latte

  • Use as a dip for apple slices or churros

Storage & Make-Ahead

  • Refrigerate: Store in a jar or airtight container for up to 2 weeks.

  • Reheat: Warm gently in the microwave or on the stovetop over low heat.

  • Freeze: Store in a freezer-safe container for up to 3 months. Thaw overnight in the fridge before reheating.

FAQs

Q: Can I use dark brown sugar?
A: Yes, but expect a deeper, more pronounced molasses flavor.

Q: Why is my sauce grainy?
A: It may have crystallized from high heat. Stir constantly and avoid overcooking.

Q: Can I double this recipe?
A: Absolutely — just use a larger saucepan and stir continuously for even cooking.

Personal Note

This is my go-to caramel when I need a fast, luxurious topping. It takes only minutes, yet the flavor is incredible — the perfect finishing touch for homemade desserts or even a weekday treat.

Mashed Potato Pancakes with Meat Filling

Crispy on the outside, fluffy on the inside, and packed with a flavorful beef filling — these stuffed potato pancakes are the ultimate comfort food.

Prep Time: 20 minutes
Cook Time: 20 minutes
Total Time: ~40 minutes
Servings: 4
Calories: ~350 kcal per serving

Ingredients

For the potato pancakes:

  • Mashed potatoes – 3 cups (preferably chilled)

  • All-purpose flour – ½ cup

  • Egg – 1 large

  • Salt & black pepper – to taste

  • Oil – for frying

For the meat filling:

  • Ground beef – ½ lb

  • Onion – 1 small, finely chopped

  • Garlic – 2 cloves, minced

  • Paprika – ½ tsp

  • Dried thyme – ½ tsp

  • Salt & black pepper – to taste

  • Olive oil – 1 tbsp

Instructions

  1. Prepare the filling:

    • Heat olive oil in a skillet over medium heat.

    • Sauté onion and garlic for 3–4 minutes until softened.

    • Add ground beef, paprika, thyme, salt, and pepper. Cook until beef is fully browned, breaking it up as it cooks. Remove from heat and set aside.

  2. Prepare the potato mixture:

    • In a large bowl, combine mashed potatoes, flour, egg, salt, and pepper. Mix until well combined and workable.

  3. Assemble pancakes:

    • Divide the potato mixture into equal portions.

    • Flatten one portion in your hand, add a spoonful of meat filling in the center, and fold the potato mixture over to seal. Shape into a round pancake. Repeat with remaining portions.

  4. Fry to perfection:

    • Heat oil in a large skillet over medium heat.

    • Fry each pancake for 3–4 minutes per side, or until golden brown and crispy.

    • Transfer to a paper towel-lined plate to drain excess oil.

  5. Serve:

    • Enjoy hot with sour cream, garlic sauce, or your favorite dipping sauce.

Quick Notes & Pro Tips

  • Chilled mashed potatoes: Cold potatoes hold their shape better, making them easier to work with.

  • Seal well: Be sure to fully seal the edges to prevent filling from spilling during frying.

  • Add cheese: Stir in shredded cheddar or mozzarella to the filling for an extra cheesy twist.

Why You’ll Love It

These golden, crispy potato pancakes are hearty enough for a main dish but also make a fantastic appetizer or snack. They’re a great way to repurpose leftover mashed potatoes into something exciting and delicious.

Variations & Serving Suggestions

  • Different proteins: Swap ground beef for ground chicken, turkey, or pork.

  • Veggie-packed: Add sautéed mushrooms or bell peppers to the filling.

  • Serving ideas: Pair with sour cream, tzatziki, or spicy mayo for dipping.

Storage & Make-Ahead

  • Refrigerate: Store leftovers in an airtight container for up to 3 days.

  • Reheat: Warm in an oven or air fryer at 350°F for 5–7 minutes to re-crisp.

  • Freeze: Assemble uncooked pancakes, freeze on a baking sheet, then transfer to freezer bags. Fry from frozen, adding a few extra minutes to cook time.

FAQs

Q: Can I make these without eggs?
A: Yes — replace the egg with 1 tbsp cornstarch or a flaxseed egg for binding.

Q: What if my potato mixture is too sticky?
A: Add a little extra flour until the mixture is easy to handle.

Q: Can I bake them instead of frying?
A: Yes — bake at 400°F for 20–25 minutes, flipping halfway through.

Personal Note

These stuffed potato pancakes remind me of Eastern European comfort food — simple, hearty, and satisfying. Perfect for a cozy family dinner or an impressive appetizer.

Creamy Chicken Noodle Casserole

A cozy, family-friendly casserole loaded with tender egg noodles, shredded chicken, creamy sauce, veggies, and melty cheese — topped with a buttery cracker crust for the ultimate comfort dish.

Prep Time: 15 minutes
Cook Time: 25–30 minutes
Total Time: ~45 minutes
Servings: 6–8
Dietary: Comfort food, Kid-friendly

Ingredients

Base:

  • Egg noodles – 12 oz, cooked and drained

  • Shredded chicken – 3 cups, cooked (rotisserie works great)

  • Cream of chicken soup – 1 can (10.5 oz)

  • Sour cream – ½ cup

  • Milk – ½ cup

Cheese & veggies:

  • Cheddar cheese – 1½ cups shredded, divided

  • Peas & carrots – 1 cup, frozen and thawed

Seasonings:

  • Garlic powder – ½ tsp

  • Onion powder – ½ tsp

  • Salt – ½ tsp

  • Black pepper – ¼ tsp

Optional topping:

  • Butter crackers or breadcrumbs – ½ cup, crushed

  • Melted butter – 2 tbsp

Instructions

  1. Preheat oven: Set to 375°F (190°C). Grease a 9×13-inch baking dish.

  2. Mix the filling: In a large bowl, whisk together cream of chicken soup, sour cream, milk, garlic powder, onion powder, salt, and pepper. Stir in chicken, peas, carrots, and 1 cup of shredded cheese.

  3. Add noodles: Fold in cooked noodles until fully coated. Spread mixture evenly into the prepared dish.

  4. Top & bake: Sprinkle remaining ½ cup cheese over the casserole. For a crunchy topping, mix crushed crackers with melted butter and sprinkle over the cheese. Bake uncovered for 25–30 minutes until bubbly and lightly golden.

  5. Cool & serve: Let sit for 5 minutes before serving.

Quick Notes & Pro Tips

  • Shortcut: Use rotisserie chicken to save time.

  • Veggie swaps: Substitute peas and carrots with broccoli, green beans, or corn.

  • Soup base: Swap cream of chicken for cream of mushroom for a flavor variation.

  • Crunch factor: Add French-fried onions on top instead of crackers for a different texture.

Why You’ll Love It

This casserole is creamy, cheesy, and hearty — the perfect weeknight dinner that feels like a hug in a dish. It’s versatile, easy to prep, and great for feeding a crowd.

Variations & Serving Suggestions

  • Spicy kick: Add a pinch of cayenne or a handful of diced green chiles.

  • Extra cheesy: Stir in ½ cup Parmesan or Monterey Jack cheese.

  • Make it a meal: Serve with a side salad or steamed veggies for balance.

Storage & Make-Ahead

  • Refrigerate: Store leftovers in an airtight container for up to 3 days.

  • Freeze: Assemble without the topping, wrap tightly, and freeze up to 3 months. Bake from frozen at 350°F, adding 15–20 minutes.

  • Make-ahead: Assemble the casserole up to a day in advance and refrigerate. Bake just before serving.

FAQs

Q: Can I use canned chicken?
A: Yes, but freshly cooked or rotisserie chicken gives better texture and flavor.

Q: Can I make this gluten-free?
A: Use gluten-free noodles, gluten-free cream soup, and substitute crushed GF crackers for the topping.

Q: Can I double the recipe?
A: Absolutely! Use two 9×13 pans or one deep dish and adjust baking time slightly.

Personal Note

This dish has become one of my go-to “busy night” meals — simple ingredients, little prep, and it makes the whole house smell like home.

Cheesy Vegetable Beignets

Golden, crispy, and packed with veggies and melted cheese — these savory fritters are perfect as a snack, side, or appetizer with your favorite dipping sauce.

Prep Time: 20 minutes
Cook Time: 15 minutes
Total Time: ~35 minutes
Servings: 12–15 beignets
Dietary: Vegetarian

Ingredients

For the beignets:

  • Carrots – 1 cup, grated

  • Parsnips – 1 cup, grated

  • Onion – ½ cup, finely chopped

  • Parsley (yellow, green, or Russian) – 1 tsp, finely chopped

  • Grated cheese – 2 cups (cheddar, mozzarella, or a blend)

  • All-purpose flour – ½ cup

  • Cornmeal – ½ tsp

  • Baking powder – 1 tsp

  • Salt – 1 tsp

  • Black pepper – ½ tsp

  • Ground almonds – 1 tsp

  • Paprika or chili powder – 1 tsp

  • Eggs – 2 large

  • Milk – ½ tbsp (plus a little extra if needed)

  • Fresh parsley or dried coriander – 1 tbsp (optional, for garnish)

For frying:

  • Vegetable oil – for shallow frying

Instructions

  1. Prep the vegetables:

    • Grate carrots and parsnips. Wrap them in a clean towel and press to remove as much moisture as possible (this helps keep the beignets crispy).

    • Finely chop onion and parsley.

  2. Make the batter:

    • In a large bowl, combine grated vegetables, onions, parsley, and cheese.

    • In another bowl, whisk together flour, cornmeal, baking powder, salt, black pepper, ground almonds, and paprika.

    • Beat eggs in a separate bowl, whisk in milk, then gradually fold into the vegetable-cheese mixture along with the dry ingredients.

    • Stir until fully combined. If the batter feels too thick, add a splash of extra milk.

  3. Fry the beignets:

    • Heat about ¼ cup of vegetable oil in a large skillet over medium heat.

    • Using a spoon, scoop small portions of batter and gently shape into patties.

    • Fry in batches for 3–4 minutes per side, or until golden brown and crispy.

    • Transfer to a paper towel-lined plate to drain excess oil.

  4. Serve:

    • Enjoy warm, garnished with fresh parsley or coriander. Serve with ranch, sour cream, or spicy mayo for dipping.

Quick Notes & Pro Tips

  • Drain well: Removing moisture from the veggies is key to crispiness.

  • Cheese choice: A mix of cheddar and mozzarella gives great flavor and texture.

  • Oil temperature: Make sure the oil is hot enough before frying — if too cool, the beignets will absorb oil and turn greasy.

Why You’ll Love It

These beignets are savory, cheesy, and satisfying — perfect for sneaking in extra vegetables while still feeling indulgent. They make a great snack, party appetizer, or side dish.

Variations & Serving Suggestions

  • Spice it up: Add diced chili or cayenne for a kick.

  • Make it Mediterranean: Use feta instead of cheddar and add chopped fresh dill.

  • Dipping sauces: Pair with garlic aioli, tzatziki, or chipotle mayo.

Storage & Make-Ahead

  • Refrigerate: Store leftovers in an airtight container for up to 3 days.

  • Reheat: Re-crisp in a skillet or air fryer at 375°F for 3–4 minutes.

  • Freeze: Freeze uncooked patties on a tray, then store in freezer bags. Fry from frozen, adding a few extra minutes to cooking time.

FAQs

Q: Can I bake these instead of frying?
A: Yes — bake at 400°F for 20–25 minutes on a parchment-lined sheet, flipping halfway through.

Q: Can I use other vegetables?
A: Absolutely! Zucchini, sweet potatoes, or bell peppers work beautifully.

Q: How do I keep them from falling apart?
A: Make sure to remove excess veggie moisture and don’t skip the eggs — they help bind the mixture.

Personal Note

These cheesy vegetable beignets are one of my favorite “clean out the fridge” recipes — endlessly customizable, quick to whip up, and always a hit with both kids and adults.