Creamy Bacon & Corn Chowder

A hearty, comforting chowder packed with smoky bacon, tender potatoes, and sweet corn — perfect for cozy nights in.

Servings: 6
Prep Time: 10 minutes
Cook Time: 20 minutes
Total Time: 30 minutes
Dietary Badges: Contains Dairy, Contains Pork, Gluten-Containing

Ingredients

  • Chopped bacon

  • Diced onion

  • Minced garlic

  • Small diced red potatoes

  • Frozen corn

  • Vegetable broth

  • Dried thyme

  • Kosher salt

  • Ground black pepper

  • Heavy cream

  • All-purpose flour

  • Fresh chives, chopped

Instructions

  1. Sauté Bacon: Set a 6-quart Crock-Pot® Express Crock to Brown/Sauté. Once hot, cook the chopped bacon until crisp (about 6 minutes). Transfer bacon to a paper towel–lined plate.

  2. Cook Aromatics: Add diced onion to the pot and cook until softened, about 3–4 minutes. Stir in minced garlic and cook for 1 minute more.

  3. Combine Base Ingredients: Return cooked bacon to the pot. Add potatoes, corn, vegetable broth, thyme, salt, and pepper.

  4. Pressure Cook: Secure the lid, set to High Pressure, and cook for 10 minutes.

  5. Finish Chowder: Release pressure, remove the lid, and stir in heavy cream and flour until well combined and thickened.

  6. Serve: Ladle into bowls and garnish with fresh chives.

Notes:

  • Use fresh, ripe corn when in season for even more sweetness.

  • For a gluten-free option, replace the flour with cornstarch slurry (1 Tbsp cornstarch + 2 Tbsp water).

Brief Introduction

This creamy bacon & corn chowder is the ultimate weeknight comfort food — rich, smoky, and satisfying in just 30 minutes. Perfect for chilly evenings, it uses simple pantry and freezer staples to create something indulgent yet effortless.

Step-by-Step Cooking Guide

Making the Base

  1. Crisp the Bacon: Heat the multi-cooker on Brown/Sauté. Add chopped bacon and cook until golden and crisp. Tip: Stir occasionally for even browning and to render maximum flavor into the pot.

  2. Soften the Onion: Add onion to the bacon drippings and cook until translucent with a slight golden edge. Tip: If onions start to stick, add a splash of broth to deglaze.

  3. Add Garlic: Stir in garlic for 1 minute until fragrant — avoid browning to prevent bitterness.

Building the Chowder

  1. Layer the Flavors: Return bacon to the pot along with potatoes, corn, broth, thyme, salt, and pepper. Stir to combine.

  2. Pressure Cook: Lock the lid, set to High Pressure, and cook for 10 minutes. This infuses the potatoes with flavor while tenderizing them perfectly.

Finishing Touches

  1. Creamy Perfection: Carefully release pressure. Stir in heavy cream and flour until smooth and thickened. Tip: Whisk flour with a little cream first to avoid lumps.

  2. Serve & Garnish: Ladle into bowls, sprinkle with chives, and serve hot.

Ingredient Details & Substitution Tips

  • Bacon: Adds smoky depth. For a vegetarian option, skip bacon and sauté onions in olive oil; add smoked paprika for a similar flavor note.

  • Potatoes: Red potatoes hold their shape well. Substitute Yukon Golds for a creamier bite.

  • Frozen Corn: Convenient and sweet year-round; use fresh kernels in summer for brighter flavor.

  • Vegetable Broth: Keeps it vegetarian-friendly (if omitting bacon). Chicken broth works for extra richness.

  • Heavy Cream: Creates a luscious texture. Substitute half-and-half for a lighter version.

  • Flour: Thickens the chowder. Gluten-free flour or cornstarch can be used.

Recipe Variations & Serving Suggestions

  • Spicy Kick: Add diced jalapeños or 1/2 tsp crushed red pepper flakes.

  • Seafood Twist: Stir in cooked shrimp or crab meat at the end.

  • Cheesy Upgrade: Add 1 cup shredded cheddar when stirring in cream for a richer flavor.

  • Serving Ideas: Pair with crusty bread, a side salad, or serve in bread bowls for a cozy presentation.

Storage & Make-Ahead Information

  • Refrigeration: Store in an airtight container for up to 4 days.

  • Freezing: Freeze in portions for up to 2 months. Thaw in the fridge overnight.

  • Reheating: Warm on the stovetop over medium-low heat, adding a splash of broth if too thick.

  • Make-Ahead: Prepare the base (steps 1–4) a day ahead; add cream and flour just before serving.

Nutrition Facts (per serving)

Calories: ~320 kcal | Carbs: 28g | Protein: 9g | Fat: 20g | Fiber: 3g | Sodium: 620mg

FAQs

Q: Can I make this without a pressure cooker?
A: Yes — simmer in a large pot on the stovetop for 25–30 minutes, until potatoes are tender.

Q: How do I thicken without flour?
A: Use a cornstarch slurry or blend 1 cup of chowder and stir it back in.

Q: Can I make it dairy-free?
A: Yes — use coconut milk or unsweetened oat cream instead of heavy cream.

Personal Story

I first made this chowder on a rainy Sunday when all I had in my fridge was bacon, potatoes, and a bag of frozen corn. The result? A warm, creamy bowl of pure comfort — and it’s been on repeat ever since.


🥔 Garlic Parmesan Scalloped Potatoes

A rich, creamy, and cheesy potato bake that’s perfect for holidays, potlucks, or Sunday dinners.

Ingredients

Sauce

  • 4 tablespoons butter

  • 1 tablespoon garlic, minced (or 4 large cloves, minced)

  • 4 tablespoons all-purpose flour

  • 4 cups milk (skim, 2%, or whole)

  • 1 teaspoon chicken bouillon powder or Kosher salt

  • 1 pinch salt, to taste

  • ½ teaspoon black pepper

Main

  • 2½ lbs Yukon Gold or Russet potatoes, peeled & sliced ⅛–¼ inch thick

  • 2 cups shredded mozzarella cheese

  • ¾ cup freshly grated Parmesan cheese

  • 1 tablespoon fresh chives, divided

Instructions

  1. Preheat Oven – Heat to 400°F (200°C) and lightly grease a 9×13-inch baking dish.

  2. Make Garlic Cream Sauce

    • In a medium saucepan, melt butter over medium heat.

    • Add garlic; sauté 30 seconds until fragrant.

    • Whisk in flour; cook 2 minutes, stirring constantly to make a smooth roux.

    • Reduce heat to medium-low and gradually whisk in milk, ¼ cup at a time, to keep it lump-free.

    • Bring to a gentle boil; cook until slightly thickened.

    • Stir in bouillon powder, salt (if needed), and black pepper. Remove from heat.

  3. Assemble Layers

    • Arrange half the potatoes in the prepared baking dish.

    • Pour over half the cream sauce.

    • Sprinkle with half the mozzarella and half the Parmesan.

    • Repeat with remaining potatoes, sauce, and cheeses.

  4. Bake

    • Cover tightly with foil and bake 40 minutes, until potatoes are nearly tender.

    • Remove foil; bake another 30 minutes, until golden and bubbly.

    • For a crisp top, broil 2–3 minutes, watching closely.

  5. Garnish & Serve – Sprinkle with fresh chives before serving.

Tips

  • For richer flavor, use half-and-half instead of milk.

  • Slice potatoes evenly for consistent cooking.

  • If you love extra garlic, roast a head of garlic and mash it into the sauce.

🥖 Ham & Cheese Pizza Dough Roll-Up

A golden, cheesy baked roll that’s perfect for slicing into party-friendly bites.

Ingredients

  • 1 ball pizza dough

  • 8 oz thinly sliced deli ham

  • 1 cup shredded mozzarella cheese

Optional for Serving

  • Fresh parsley, chopped (for garnish)

  • Mustard or horseradish sauce

Instructions

  1. Preheat Oven – Heat to 400°F (200°C). Lightly flour your work surface.

  2. Roll Dough – Roll pizza dough into a 12 × 8-inch rectangle.

  3. Layer Filling – Arrange ham evenly over the dough, leaving a ½-inch border. Sprinkle mozzarella evenly over the ham.

  4. Roll & Seal – Starting from a short end, roll up the dough tightly into a log. Pinch seam to seal. Place seam-side down on a greased baking sheet.

  5. Bake – Bake for 45–50 minutes, or until deep golden brown.

  6. Rest & Slice – Let rest 10 minutes. Slice into 8 pieces with a serrated knife.

  7. Serve – Garnish with parsley and serve with mustard or horseradish sauce, if desired.

Tips

  • Letting it cool slightly prevents cheese from oozing too much while slicing.

  • Swap mozzarella for provolone or Swiss for a flavor twist.

🥜 Peanut Butter Stuffed Cookie Bites

Soft, buttery cookie dough filled with a creamy peanut butter center and topped with melty chocolate — baked in muffin tins for the perfect bite-sized treat.

Ingredients

Dough Base

  • 1 cup unsalted butter, softened

  • ¾ cup brown sugar

  • ½ cup granulated sugar

  • 1 egg (optional)

  • 1 tsp vanilla extract

  • 2 cups all-purpose flour

Peanut Butter Layer

  • ½ cup creamy peanut butter

  • ¼ cup powdered sugar

Mix-ins & Toppings

  • 1½ cups semi-sweet chocolate chips

  • ¼ cup crushed Reese’s Pieces, chopped peanuts, or mini M&Ms (optional)

For Finishing

  • 1 egg yolk + 1 tbsp water (for egg wash)

Instructions

  1. Prep – Preheat oven to 350°F (175°C). Line a muffin tin with paper liners.

  2. Make the Dough – In a large bowl, cream butter, brown sugar, and granulated sugar until light and fluffy. Mix in egg (if using) and vanilla. Gradually add flour until a soft dough forms.

  3. Make the Filling – In a separate bowl, beat peanut butter with powdered sugar until smooth. Roll into 24–30 small balls and refrigerate for 10 minutes.

  4. Assemble – Press a portion of cookie dough into each muffin cup, creating a well. Place a chilled peanut butter ball inside. Top with chocolate chips and any optional add-ins. Cover partially with a bit more dough.

  5. Egg Wash – Brush tops lightly with the egg yolk wash for a golden finish.

  6. Bake – Bake 12–15 minutes, until edges are lightly golden and centers are set.

  7. Cool – Let rest in pan for 5 minutes before transferring to a wire rack. The peanut butter center will be gooey warm and set as it cools.

Tips

  • Use a cookie scoop for even sizes.

  • For gluten-free, swap in a GF flour blend.

  • Store in an airtight container at room temp up to 5 days.

  • Freeze unbaked cookie bites up to 3 months — bake from frozen, adding 2–3 minutes.

  • For extra indulgence, add chopped Reese’s Peanut Butter Cups inside.

🧄 Creamy Parmesan Crusted Chicken

Tender, juicy chicken breasts baked under a rich, cheesy topping that’s golden, bubbly, and full of flavor.

Ingredients

For the Chicken

  • 4 boneless, skinless chicken breasts (1.5–2 lbs)

  • Salt & freshly ground black pepper (to taste)

  • 1 tbsp olive oil (optional, for searing)

For the Creamy Topping

  • 1 cup sour cream

  • ½ cup mayonnaise

  • 1 tsp garlic powder

  • 1 tsp onion powder

  • ½ tsp smoked paprika

  • ½ tsp salt

  • ¼ tsp freshly ground black pepper

  • 1 cup freshly grated Parmesan cheese

Optional Extras

  • ½ cup shredded mozzarella or cheddar cheese

  • Fresh parsley or chives, for garnish

  • Red pepper flakes, for heat

Instructions

  1. Preheat Oven – Set oven to 375°F (190°C). Lightly grease a 9×13-inch baking dish. If chicken is thick, slice in half horizontally or pound to 1″ thick for even cooking. Pat dry and season with salt & pepper.

  2. Optional Sear – Heat olive oil in a skillet over medium-high heat. Sear chicken 2–3 min per side until golden. Transfer to prepared baking dish. (Skip this step for a simpler version.)

  3. Make the Topping – In a bowl, mix sour cream, mayo, garlic powder, onion powder, smoked paprika, salt, pepper, and Parmesan until smooth.

  4. Assemble – Spread creamy mixture generously over each chicken breast. If desired, sprinkle mozzarella or cheddar on top.

  5. Bake – Bake uncovered 35–40 min, until chicken reaches 165°F internal temp. For a golden crust, broil 2–3 min at the end—watch closely.

  6. Rest & Serve – Let rest 5 min before serving. Garnish with parsley or chives.

Tips

  • Moisture Lock – The creamy topping seals in juices, keeping chicken tender.

  • Flavor Boost – Fresh Parmesan gives richer flavor, but pre-grated works fine.

  • Spicy Kick – Sprinkle red pepper flakes into the topping mix.

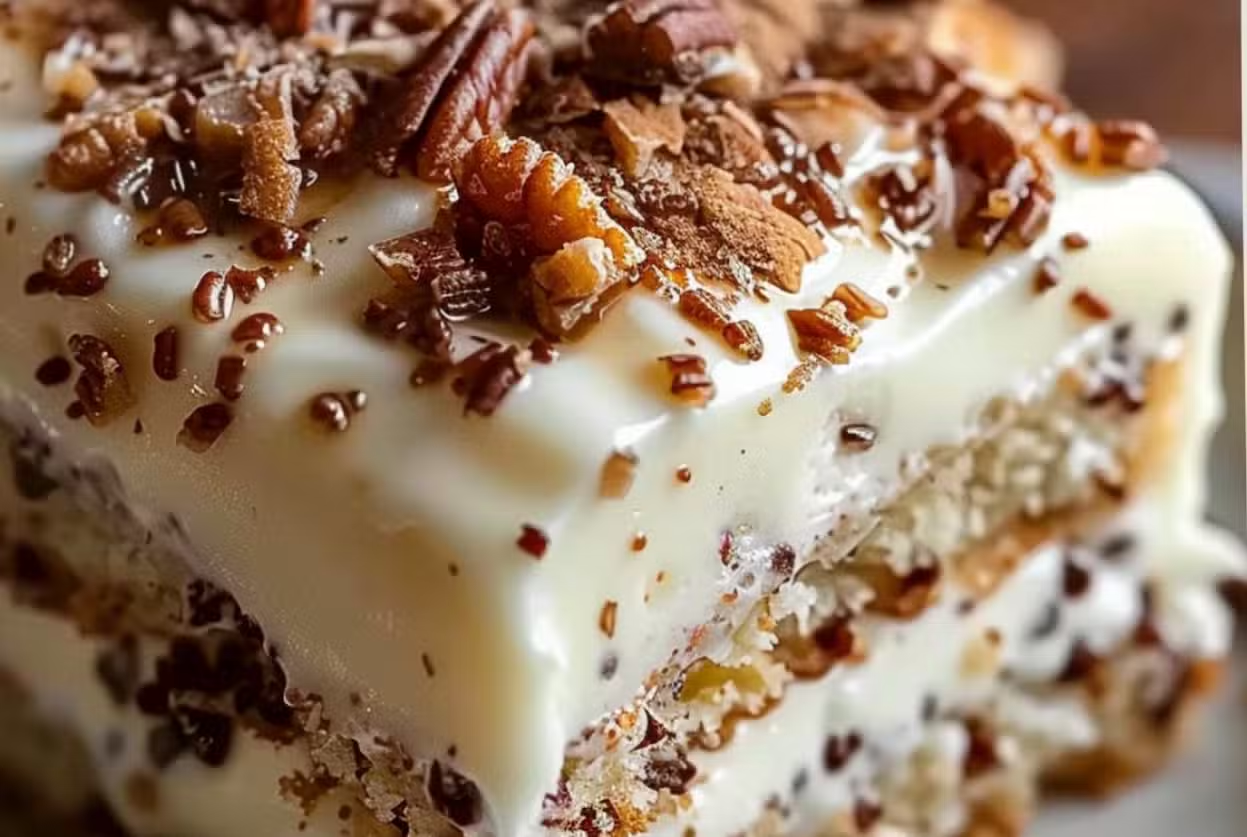
🍍 Pineapple Pecan Poke Cake

A moist, tropical-inspired cake layered with sweet pineapple glaze and fluffy cream cheese frosting—perfect for potlucks or summer gatherings.

Ingredients

Cake Base

  • 1 box white cake mix (plus ingredients listed on box)

  • 1 tsp vanilla extract (divided: ½ for glaze, ½ for frosting)

Pineapple Glaze

  • 1 can (20 oz) crushed pineapple with juice

  • 1 cup granulated sugar

Frosting

  • 8 oz cream cheese, softened

  • ½ cup (1 stick) butter, softened

  • 3–4 cups powdered sugar (adjust for desired sweetness & texture)

  • 1 cup crushed pecans (divided: some in frosting, some for topping)

Instructions

  1. Bake Cake – Prepare cake mix according to package directions in a 9×13-inch pan. Cool completely.

  2. Poke Holes – Use the handle of a wooden spoon to poke holes all over the cooled cake.

  3. Make Pineapple Glaze – In a saucepan, combine pineapple (with juice), sugar, and ½ tsp vanilla. Bring to a gentle boil, stirring until slightly thickened.

  4. Glaze the Cake – Spoon hot pineapple mixture over cake, letting it soak into the holes. Cool slightly.

  5. Make Frosting – Beat cream cheese and butter until smooth. Add powdered sugar gradually, then the remaining ½ tsp vanilla. Stir in most of the pecans.

  6. Frost – Spread frosting evenly over pineapple layer.

  7. Finish & Chill – Sprinkle remaining pecans on top. Cover and refrigerate at least 6 hours (preferably overnight).

Notes & Tips

  • Flavor Boost – Add shredded coconut or citrus zest to the glaze.

  • Nutty Upgrade – Toast pecans before adding for extra flavor.

  • Serving Tip – Serve cold for best texture and flavor.