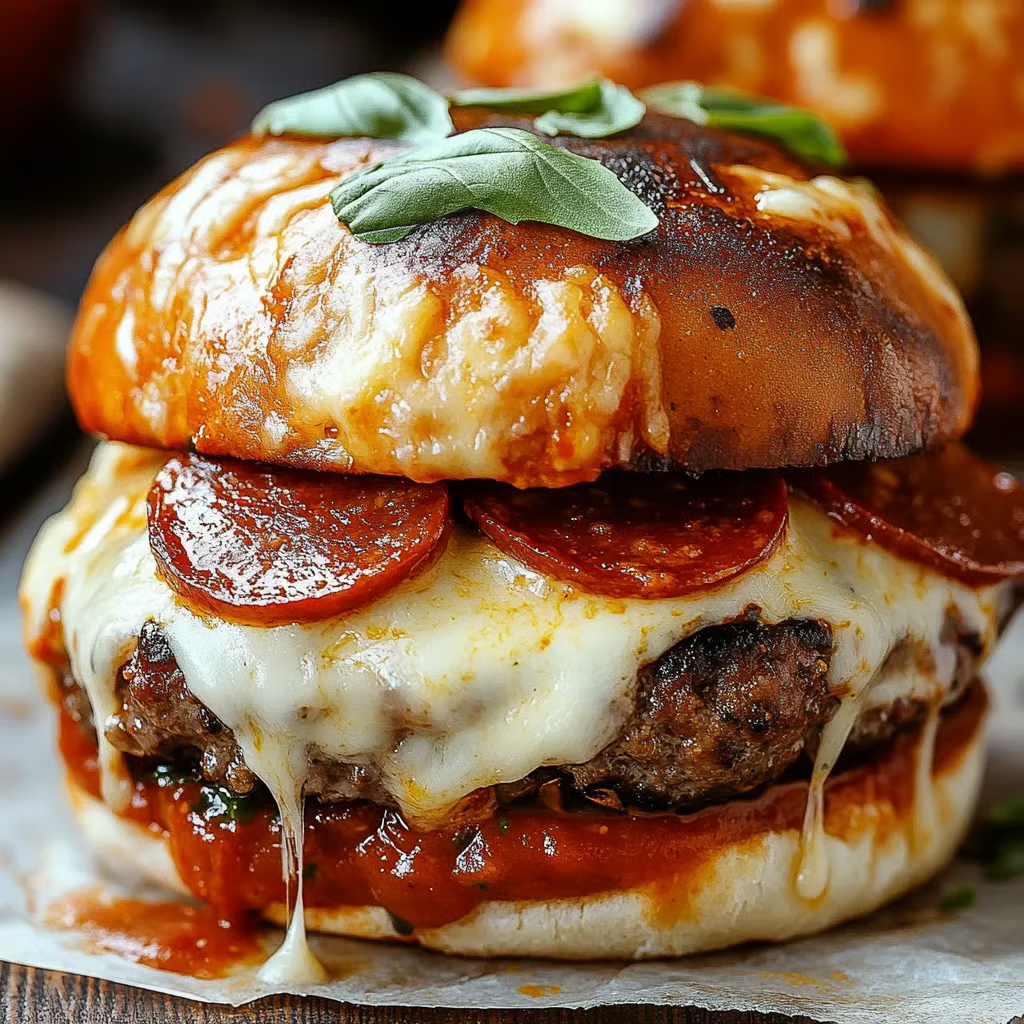
Pizza Burgers with Melty Pepperoni & Mozzarella

Juicy grilled beef patties topped with gooey mozzarella, crispy pepperoni, and tangy pizza sauce — the best of pizza and burgers in every bite.

Servings: 4
Prep Time: 15 minutes
Cook Time: 15 minutes
Total Time: 30 minutes
Dietary Badges: Contains Dairy, Contains Gluten, Contains Meat

Ingredients

Seasoned Burger Patties

  • Ground beef (80% lean, 20% fat)

  • Italian seasoning

  • Garlic powder

  • Salt

  • Freshly ground black pepper

Pizza Toppings and Assembly

  • Hamburger buns, split

  • Pizza sauce

  • Shredded mozzarella cheese

  • Pepperoni slices

Instructions

  1. Season & Form Patties: In a large bowl, mix beef with Italian seasoning, garlic powder, salt, and pepper until just combined. Form into 4 patties. Rest while prepping toppings.

  2. Toast Buns: Preheat grill or grill pan to medium-high and turn on broiler. Place buns cut-side up on a baking sheet; broil until golden. Set top halves aside.

  3. Grill Patties: Cook patties 4–5 minutes per side until fully cooked and grill-marked.

  4. Prep Bottom Buns: While patties cook, warm pizza sauce in a small pan. Spread half the sauce over toasted bottom buns, top with half the mozzarella and half the pepperoni. Broil 2–3 minutes until cheese melts.

  5. Assemble Burgers: Place patties on prepared buns. Top with remaining sauce, cheese, and pepperoni. Broil again until cheese is bubbly and pepperoni edges are crisp.

  6. Finish & Serve: Add top buns and serve hot.

Notes:

  • Resting formed patties helps them hold shape while cooking.

  • Toasted buns stay sturdy under sauce and cheese.

Brief Introduction

These pizza burgers take everything you love about pepperoni pizza and stack it on top of a juicy burger patty. They’re cheesy, saucy, and a little messy — exactly how comfort food should be.

Step-by-Step Cooking Guide

Burger Base

  1. Season & Shape: Combine beef with spices, form patties, and let rest.

  2. Toast the Buns: Broil until golden to avoid sogginess.

Pizza Transformation

  1. Grill to Juicy Perfection: Cook patties until browned and cooked through.

  2. First Layer Melt: Sauce, cheese, and pepperoni on the bottom buns, then broil until melty.

  3. Final Assembly: Add patties, more sauce, cheese, and pepperoni. Broil again for a crispy, bubbly finish.

Ingredient Details & Substitution Tips

  • Ground Beef: 80/20 blend balances juiciness and flavor; ground turkey or chicken can be used for a leaner option.

  • Mozzarella Cheese: Shreds melt best; fresh mozzarella adds extra creaminess but may be wetter.

  • Pepperoni: Turkey pepperoni for lighter option or swap with salami for a twist.

  • Pizza Sauce: Use homemade for fresher flavor; marinara works in a pinch.

Recipe Variations & Serving Suggestions

  • Veggie Pizza Burgers: Add sautéed mushrooms, onions, or bell peppers before the final broil.

  • Extra Spicy: Use hot pepperoni or add red pepper flakes to the sauce.

  • Serving Ideas: Pair with crispy fries, a side salad, or garlic breadsticks for the full pizzeria vibe.

Storage & Make-Ahead Information

  • Refrigeration: Store patties separately from buns/toppings for up to 3 days.

  • Freezing: Freeze raw patties up to 3 months; thaw before cooking.

  • Reheating: Warm patties in a skillet, then assemble with fresh toppings and broil to melt cheese.

  • Make-Ahead: Shape patties and prep toppings ahead; cook and assemble fresh.

Nutrition Facts (per serving, 4 servings)

Calories: ~620 kcal | Carbs: 35g | Protein: 35g | Fat: 35g | Sodium: 1100mg

FAQs

Q: Can I cook these indoors without a grill?
A: Yes — use a cast-iron skillet or grill pan on the stove.

Q: How do I prevent soggy buns?
A: Toast well under the broiler before adding sauce, and serve immediately.

Q: Can I make these open-faced?
A: Definitely — serve on toasted bread halves for a fork-and-knife version.

Personal Story

The first time I made these was for a game night with friends — I couldn’t decide between making pizza or burgers, so I made both in one dish. They disappeared before halftime, and now they’re my go-to crowd-pleaser.

If you’d like, I can create process photo captions for this recipe so your blog post matches the full visual step-by-step style from your outline. Would you like me to prepare those next?
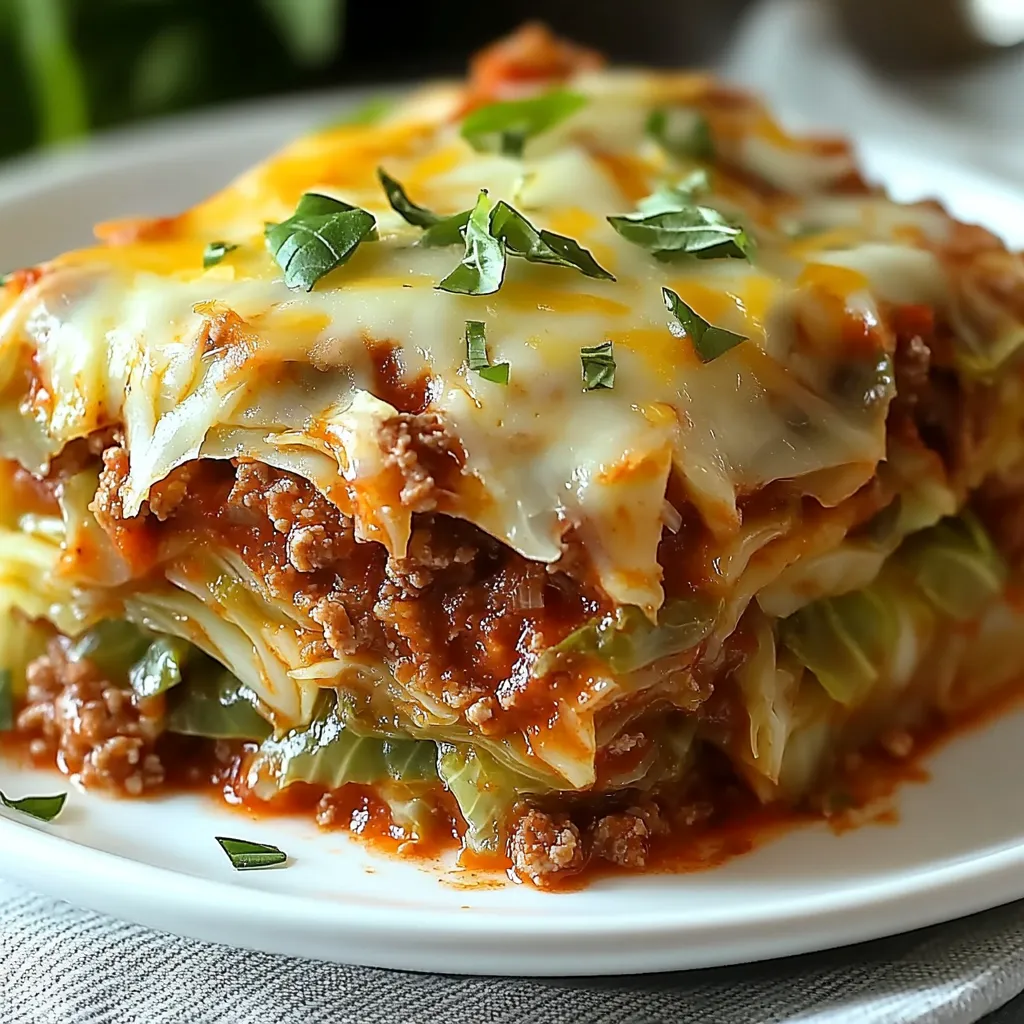
Easy Cabbage and Beef Casserole Bake

All the hearty flavors of stuffed cabbage rolls in an effortless, one-pan casserole — no rolling required!

Servings: 8
Prep Time: 15 minutes
Cook Time: 1 hour 30 minutes
Rest Time: 5–10 minutes
Total Time: 1 hour 45 minutes
Dietary Badges: Contains Meat, Gluten-Free (if using GF broth and rice)

Ingredients

Main Ingredients

  • Ground beef

  • Cabbage, chopped

  • White onion, chopped

  • Uncooked white rice

  • Salt

Sauce and Liquid

  • Tomato sauce

  • Beef broth

Instructions

  1. Preheat & Prep: Heat oven to 350°F (175°C). Gather and prep all ingredients.

  2. Brown Beef: In a large skillet over medium-high heat, cook ground beef for 5–7 minutes until browned, breaking up as it cooks. Drain excess grease.

  3. Mix Base: In a large bowl, combine chopped cabbage, tomato sauce, onion, uncooked rice, salt, and cooked beef. Stir well to combine.

  4. Assemble: Transfer mixture to a 9×13-inch casserole dish and spread evenly.

  5. Add Liquid: Pour beef broth evenly over the mixture. Cover tightly with foil.

  6. First Bake: Bake covered for 1 hour.

  7. Stir & Continue Baking: Remove from oven, stir gently, cover again, and bake an additional 20–30 minutes until cabbage is tender and rice is fully cooked.

  8. Rest & Serve: Let casserole rest 5–10 minutes before serving.

Notes:

  • For a cheesy version, add shredded cheese on top during the last 10 minutes of baking.

  • Swap ground beef with turkey or pork for a lighter variation.

Brief Introduction

This casserole delivers the same cozy satisfaction as traditional stuffed cabbage rolls but skips the time-consuming rolling. It’s a simple, budget-friendly dish that makes a big batch — perfect for feeding a crowd or meal prepping.

Step-by-Step Cooking Guide

Preparing the Base

  1. Brown the Beef: Cook in a large skillet until no longer pink. Drain excess fat for a lighter result.

  2. Mix the Ingredients: Combine cabbage, onion, rice, tomato sauce, salt, and beef in a large bowl.

Layering & Baking

  1. Assemble in Dish: Spread the mixture evenly in the casserole dish.

  2. Add Broth & Bake: Pour beef broth over the top, cover tightly, and bake.

  3. Final Bake: Stir after 1 hour, then continue baking until cabbage is soft and rice is tender.

Ingredient Details & Substitution Tips

  • Ground Beef: Use lean beef for less grease; substitute turkey or pork as desired.

  • Cabbage: Green cabbage works best, but savoy or napa cabbage can be used for a softer texture.

  • Rice: White rice cooks evenly in the oven; brown rice or quinoa can be substituted (adjust liquid and baking time).

  • Beef Broth: Use low-sodium broth to control salt levels; vegetable broth works for a lighter flavor.

Recipe Variations & Serving Suggestions

  • Cheesy Top: Sprinkle with mozzarella, cheddar, or Monterey Jack during the last 10 minutes.

  • Extra Veggies: Add chopped bell peppers, carrots, or zucchini for more color and nutrition.

  • Serving Ideas: Pair with crusty bread or a light green salad for a complete meal.

Storage & Make-Ahead Information

  • Refrigeration: Store in an airtight container up to 4 days.

  • Freezing: Portion and freeze for up to 3 months.

  • Reheating: Bake covered at 300°F until hot, or microwave individual servings.

  • Make-Ahead: Assemble up to 24 hours before baking; store covered in the fridge.

Nutrition Facts (per serving, 8 servings)

Calories: ~310 kcal | Carbs: 27g | Protein: 20g | Fat: 14g | Fiber: 4g | Sodium: 720mg

FAQs

Q: Can I use cooked rice?
A: Yes, but reduce the broth to about 1 cup and shorten baking time by 20–25 minutes.

Q: How do I keep it from being watery?
A: Make sure to cover tightly during baking and allow resting time so excess liquid is absorbed.

Q: Can I make it vegetarian?
A: Yes — replace beef with lentils or plant-based crumbles and use vegetable broth.

Personal Story

This casserole was inspired by my grandmother’s cabbage rolls, which she made in huge batches for family gatherings. I wanted the same flavor but without the hours of prep, so I turned it into a bake — and now it’s a weeknight regular in my kitchen.

If you’d like, I can prepare photo captions for each step so you can directly drop them into your blog’s visual guide section, keeping this post fully in line with your outlined recipe structure. Would you like me to do that?

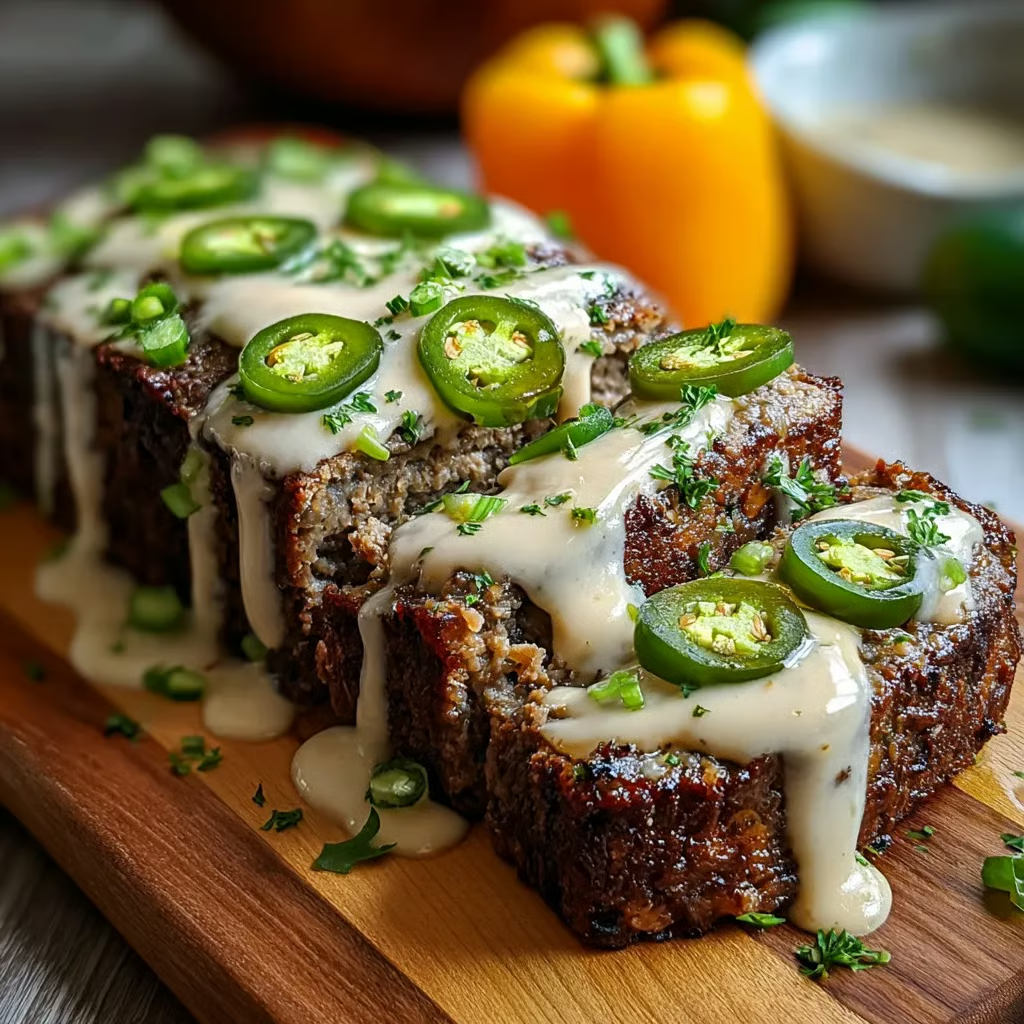
Smoky Jalapeño Popper Meatloaf

Classic comfort food meets jalapeño popper magic — a tender, smoky meatloaf with a creamy, cheesy, bacon-studded surprise center, finished with a cool ranch drizzle.

Servings: 6–8
Prep Time: 20 minutes
Cook Time: 50 minutes
Rest Time: 10 minutes
Total Time: 1 hour 20 minutes
Dietary Badges: Contains Dairy, Contains Gluten, Contains Pork

Ingredients

Meatloaf Base

  • Ground beef

  • Ground pork or sausage

  • Smoked paprika

  • Garlic powder

  • Onion powder

  • Salt

  • Ground black pepper

  • Breadcrumbs

  • Large eggs

Cheesy Jalapeño Center

  • Jalapeños, finely chopped (seeded for less heat)

  • Cream cheese, softened

  • Shredded cheddar cheese

  • Cooked bacon, crumbled

Cool Ranch Drizzle

  • Ranch dressing

  • Sour cream

  • Optional: Lime juice or fresh herbs

Instructions

  1. Prep Oven & Pan: Preheat to 375°F (190°C). Line a loaf pan with parchment or grease well.

  2. Mix Meat Base: In a large bowl, gently combine ground beef, pork, paprika, garlic powder, onion powder, breadcrumbs, eggs, salt, and pepper. Avoid overmixing for a tender texture.

  3. Make Filling: In another bowl, mix cream cheese, cheddar, jalapeños, and bacon until smooth.

  4. Assemble Loaf: Press half the meat mixture into the loaf pan. Spread the cheese filling evenly on top, then cover with the remaining meat mixture. Press edges to seal.

  5. Bake: Cook for 45–55 minutes, until the internal temperature reaches 160°F (71°C).

  6. Rest: Let meatloaf rest for at least 10 minutes before slicing.

  7. Make Drizzle: While resting, whisk ranch dressing, sour cream, and optional lime juice. Drizzle over slices before serving.

Notes:

  • Use gloves when handling jalapeños to avoid skin irritation.

  • Substitute pepper jack cheese for an extra kick.

  • For a gluten-free version, use gluten-free breadcrumbs.

Brief Introduction

If a jalapeño popper and a meatloaf had a love child, this would be it — smoky, cheesy, spicy, and outrageously comforting. It’s the perfect mash-up for anyone who wants bold flavor in a familiar, cozy package.

Step-by-Step Cooking Guide

Building the Base

  1. Mixing the Meat: Combine ground beef and pork with seasonings, eggs, and breadcrumbs. Keep it gentle — overmixing leads to dense meatloaf.

  2. Cheese Filling Prep: Blend softened cream cheese with cheddar, chopped jalapeños, and bacon.

Layering & Baking

  1. Layering: Press half the meat mixture into the pan, spread filling, and seal with remaining meat.

  2. Baking to Juicy Perfection: Bake until fully cooked and golden brown on top.

  3. Resting & Finishing: Rest 10 minutes to retain juices, then serve with a drizzle of ranch-sour cream sauce.

Ingredient Details & Substitution Tips

  • Ground Pork/Sausage: Adds moisture and richness. Swap with all beef if preferred.

  • Jalapeños: Control heat by removing seeds and ribs. Use pickled jalapeños for tang.

  • Cheddar Cheese: Sharp cheddar balances the creaminess; pepper jack or gouda are great alternatives.

  • Breadcrumbs: Regular or panko for texture; GF options work too.

  • Ranch Drizzle: Greek yogurt can replace sour cream for extra tang.

Recipe Variations & Serving Suggestions

  • BBQ Glaze: Brush top with BBQ sauce for a smoky-sweet twist.

  • Mini Loaves: Make individual portions for faster cooking and easy serving.

  • Serving Ideas: Pair with roasted veggies, mashed potatoes, or a crisp salad.

Storage & Make-Ahead Information

  • Refrigeration: Store leftovers in an airtight container for up to 4 days.

  • Freezing: Wrap slices individually and freeze up to 3 months.

  • Reheating: Warm in a 350°F oven or microwave in short bursts until heated through.

  • Make-Ahead: Assemble and refrigerate raw loaf for up to 24 hours before baking.

Nutrition Facts (per serving, 8 servings)

Calories: ~420 kcal | Carbs: 9g | Protein: 26g | Fat: 30g | Sodium: 730mg

FAQs

Q: Can I make this less spicy?
A: Yes — remove jalapeño seeds and ribs, or swap with diced green bell pepper.

Q: Can I stuff with different cheeses?
A: Absolutely — cream cheese + gouda or mozzarella works beautifully.

Q: Can I cook it without a loaf pan?
A: Yes — shape into a freeform loaf on a baking sheet; cooking time may be slightly shorter.

Personal Story

I created this recipe after a friend brought jalapeño poppers to a potluck, and I couldn’t stop thinking about them. Blending that spicy, cheesy indulgence into a hearty meatloaf turned out to be a flavor bomb — now it’s my most-requested dinner when friends come over.

If you want, I can add process photo captions for this meatloaf so it’s 100% ready for a step-by-step blog post. That would complete the “Hero Image & Visual Guide” section from your outline. Would you like me to prepare those next?

Unstuffed Cabbage Roll Casserole

All the comforting flavors of classic cabbage rolls — without the fuss of rolling! A hearty beef, cabbage, and rice bake that’s as easy as it is satisfying.

Servings: 6
Prep Time: 15 minutes
Cook Time: 45 minutes
Total Time: 1 hour
Dietary Badges: Contains Meat, Gluten-Free (if using GF Worcestershire sauce)

Ingredients

Hearty Base

  • Ground beef

  • Onion, finely chopped

  • Cabbage, shredded

Flavor Builders

  • Diced tomatoes (with juice)

  • Cooked rice

  • Worcestershire sauce

  • Paprika

  • Garlic powder

  • Salt

  • Ground black pepper

Instructions

  1. Preheat Oven: Heat to 350°F (175°C).

  2. Cook Beef & Onion: In a large skillet over medium heat, brown ground beef with onion until meat is cooked through and onion is translucent.

  3. Add Remaining Ingredients: Stir in shredded cabbage, diced tomatoes (with juice), cooked rice, Worcestershire sauce, paprika, garlic powder, salt, and pepper.

  4. Simmer: Reduce heat and simmer for 5 minutes to let flavors meld.

  5. Bake: Transfer mixture to a baking dish, cover tightly with foil, and bake 30–35 minutes until cabbage is tender.

  6. Serve: Let rest a few minutes before serving.

Notes:

  • For deeper flavor, use fire-roasted diced tomatoes.

  • Adjust seasoning after baking, as the cabbage will mellow the overall flavor.

Brief Introduction

This unstuffed cabbage roll casserole takes all the savory, tomato-rich goodness of traditional stuffed cabbage rolls and turns it into a one-pan, no-roll bake. It’s cozy, budget-friendly, and weeknight-easy.

Step-by-Step Cooking Guide

Flavor Base

  1. Sauté & Brown: Brown beef with onion until no pink remains.
    Tip: Drain excess fat for a lighter dish.

  2. Layer in the Comfort: Add cabbage, tomatoes, rice, Worcestershire, paprika, and garlic powder.

Simmer & Bake

  1. Gentle Simmer: Let everything simmer for 5 minutes so the tomatoes start to break down.

  2. Oven Finish: Transfer to a baking dish, cover, and bake until the cabbage is tender and flavors have blended.

Ingredient Details & Substitution Tips

  • Ground Beef: Use lean beef to reduce grease; turkey or chicken can be substituted.

  • Cabbage: Green cabbage is traditional; savoy adds a softer texture.

  • Rice: White rice is classic, but brown rice or quinoa also work (ensure pre-cooked).

  • Worcestershire Sauce: Adds umami depth; soy sauce is a quick substitute (use GF if needed).

  • Tomatoes: Fire-roasted or seasoned diced tomatoes add extra flavor.

Recipe Variations & Serving Suggestions

  • Cheesy Top: Add shredded cheddar or mozzarella during the last 10 minutes of baking.

  • Spicy Kick: Stir in ½–1 tsp crushed red pepper flakes.

  • Serving Ideas: Pair with crusty bread or a side salad for a complete meal.

Storage & Make-Ahead Information

  • Refrigeration: Store covered for up to 4 days.

  • Freezing: Freeze in portions for up to 2 months; thaw overnight in fridge.

  • Reheating: Warm in oven at 325°F until heated through, or microwave in short bursts.

  • Make-Ahead: Assemble up to 24 hours before baking; refrigerate and bake as directed.

Nutrition Facts (per serving, 6 servings)

Calories: ~280 kcal | Carbs: 18g | Protein: 17g | Fat: 15g | Fiber: 4g | Sodium: 550mg

FAQs

Q: Can I make this with uncooked rice?
A: No — rice must be pre-cooked to avoid undercooked grains and excess liquid.

Q: Can I skip the oven step?
A: You can simmer on the stovetop for 20–25 minutes covered, until cabbage is tender.

Q: How do I make it vegetarian?
A: Replace beef with lentils or plant-based crumbles and use vegetable broth instead of Worcestershire (or a vegan version).

Personal Story

This recipe started as a shortcut when I didn’t have the patience to roll cabbage leaves — and now it’s my go-to. It keeps all the cozy flavors of the original but comes together in one dish with almost no fuss. Perfect for chilly nights when you want something hearty with minimal cleanup.

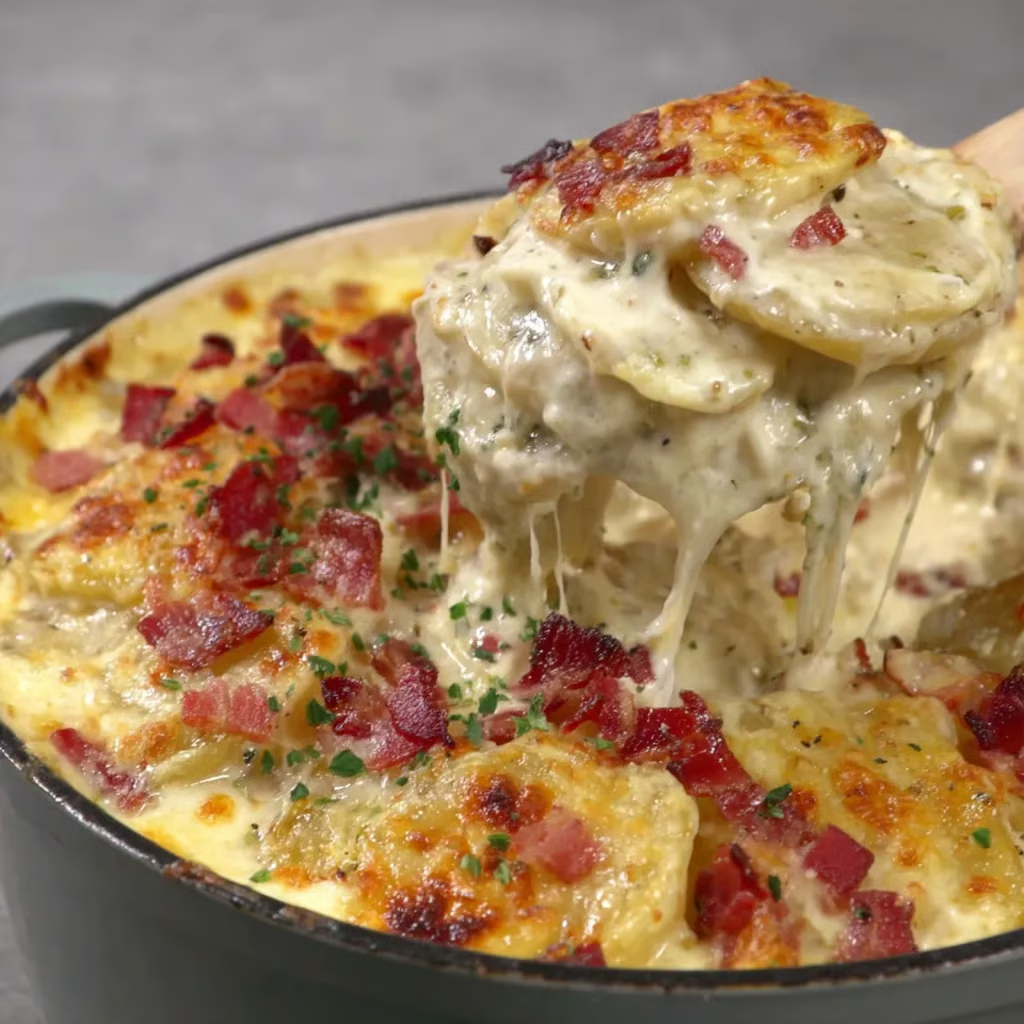
Roasted Garlic Cheddar Scalloped Potatoes with Bacon

A rich, creamy scalloped potato bake infused with roasted garlic, two kinds of cheddar, fresh herbs, and smoky bacon — the perfect indulgent side dish for any occasion.

Servings: 6–8
Prep Time: 25 minutes
Cook Time: 1 hour 10 minutes
Total Time: 1 hour 35 minutes
Dietary Badges: Contains Dairy, Contains Gluten, Contains Pork

Ingredients

  • Bacon, chopped

  • Garlic bulbs, roasted

  • Unsalted butter (add extra if skipping bacon)

  • All-purpose flour

  • Whole milk

  • Chicken broth

  • Sharp cheddar cheese, shredded

  • Sweet paprika

  • Fresh thyme, chopped

  • Fresh rosemary, chopped

  • Sharp white cheddar cheese, shredded

  • Yukon Gold potatoes, peeled & thinly sliced

  • Salt

  • Ground black pepper

  • Parsley, for garnish

Instructions

  1. Roast Garlic: Preheat oven to 400°F (200°C). Slice tops off garlic bulbs, drizzle with olive oil, wrap in foil, and bake 30–35 minutes until soft and golden.

  2. Par-Cook Potatoes: Slice potatoes thinly and boil for 8 minutes. Transfer to ice water to stop cooking.

  3. Cook Bacon: In a large skillet, cook bacon until crispy. Remove and set aside.

  4. Make Roux: In the bacon fat, melt butter. Whisk in flour and cook 1–2 minutes until golden.

  5. Build Sauce: Gradually whisk in milk and chicken broth. Add roasted garlic, salt, pepper, paprika, thyme, and rosemary. Mash garlic into sauce if desired. Stir in cheeses until smooth and creamy.

  6. Assemble: Arrange potatoes in a baking dish. Pour cheese sauce evenly over them. Bake uncovered at 350°F (175°C) for 30 minutes.

  7. Finish Topping: Remove from oven, sprinkle mozzarella (optional) and bacon over top. Bake 10–15 minutes until golden and bubbly, or broil briefly for extra char.

  8. Serve: Garnish with parsley and let rest a few minutes before serving.

Notes:

  • If omitting bacon, add 2 extra tablespoons butter for richness.

  • Yukon Golds are ideal for their buttery flavor and creamy texture.

Brief Introduction

This scalloped potato recipe takes the classic to the next level — roasted garlic adds depth, fresh herbs bring aroma, and two kinds of cheddar create a silky, savory sauce. Smoky bacon on top seals the deal for a dish that’s equally at home at a holiday feast or Sunday dinner.

Step-by-Step Cooking Guide

Flavor Foundation

  1. Roast Garlic: Wrap garlic bulbs in foil with olive oil and roast until soft — this step builds sweet, mellow garlic flavor.
    Tip: You can roast garlic a day ahead and store in the fridge.

  2. Par-Cook Potatoes: Boil sliced potatoes briefly, then shock in ice water to prevent overcooking.

Creating the Sauce

  1. Bacon Crisping: Render bacon fat in a skillet for flavor.

  2. Golden Roux: Melt butter into the bacon fat, whisk in flour, and cook until golden to form the thickening base.

  3. Cheesy Garlic Cream: Slowly whisk in milk and broth. Stir in roasted garlic (mashed for even flavor), herbs, paprika, salt, and pepper. Add shredded cheeses until creamy.

Assembling & Baking

  1. Layer & Pour: Spread potatoes in dish, pour over cheese sauce, and bake until tender.

  2. Topping Finish: Add bacon and extra cheese, bake again until bubbly, and optionally broil for a crisp top.

Ingredient Details & Substitution Tips

  • Bacon: Adds smoky richness; use pancetta or turkey bacon as alternatives.

  • Cheddar Cheeses: Sharp cheddar + sharp white cheddar give depth. Swap one for Gruyère for a nutty twist.

  • Yukon Gold Potatoes: Creamy and hold shape; Russets work for a softer texture.

  • Roasted Garlic: Gives sweet, caramelized flavor; if in a hurry, sauté minced garlic instead.

  • Herbs: Thyme & rosemary pair beautifully with potatoes, but parsley or chives can be added for freshness.

Recipe Variations & Serving Suggestions

  • Vegetarian Version: Skip bacon, use vegetable broth instead of chicken.

  • Extra Creamy: Add ½ cup heavy cream to the sauce.

  • Loaded Potato Style: Top with sour cream and green onions before serving.

  • Serving Ideas: Perfect alongside roast chicken, grilled steak, or a holiday ham.

Storage & Make-Ahead Information

  • Refrigeration: Store leftovers in an airtight container for up to 4 days.

  • Freezing: Freeze fully baked casserole for up to 2 months. Thaw overnight before reheating.

  • Reheating: Bake at 350°F for 20–25 minutes, or microwave individual portions.

  • Make-Ahead: Assemble (without final topping) up to 24 hours ahead, refrigerate, then bake as directed.

Nutrition Facts (per serving, 8 servings)

Calories: ~420 kcal | Carbs: 32g | Protein: 15g | Fat: 25g | Sodium: 750mg

FAQs

Q: Can I skip par-cooking the potatoes?
A: You can, but baking time will increase by 20–25 minutes and the texture may be less even.

Q: Can I make this without flour?
A: Yes — thicken sauce with cornstarch slurry (2 Tbsp cornstarch + ¼ cup cold milk).

Q: Can I prepare roasted garlic ahead of time?
A: Absolutely. Store roasted garlic cloves in olive oil in the fridge for up to a week.

Personal Story

I first made these scalloped potatoes for Thanksgiving, when I wanted something more indulgent than the usual mash. The roasted garlic and cheddar combination won over even the “meat and potatoes” traditionalists in my family — now it’s requested at every holiday table.

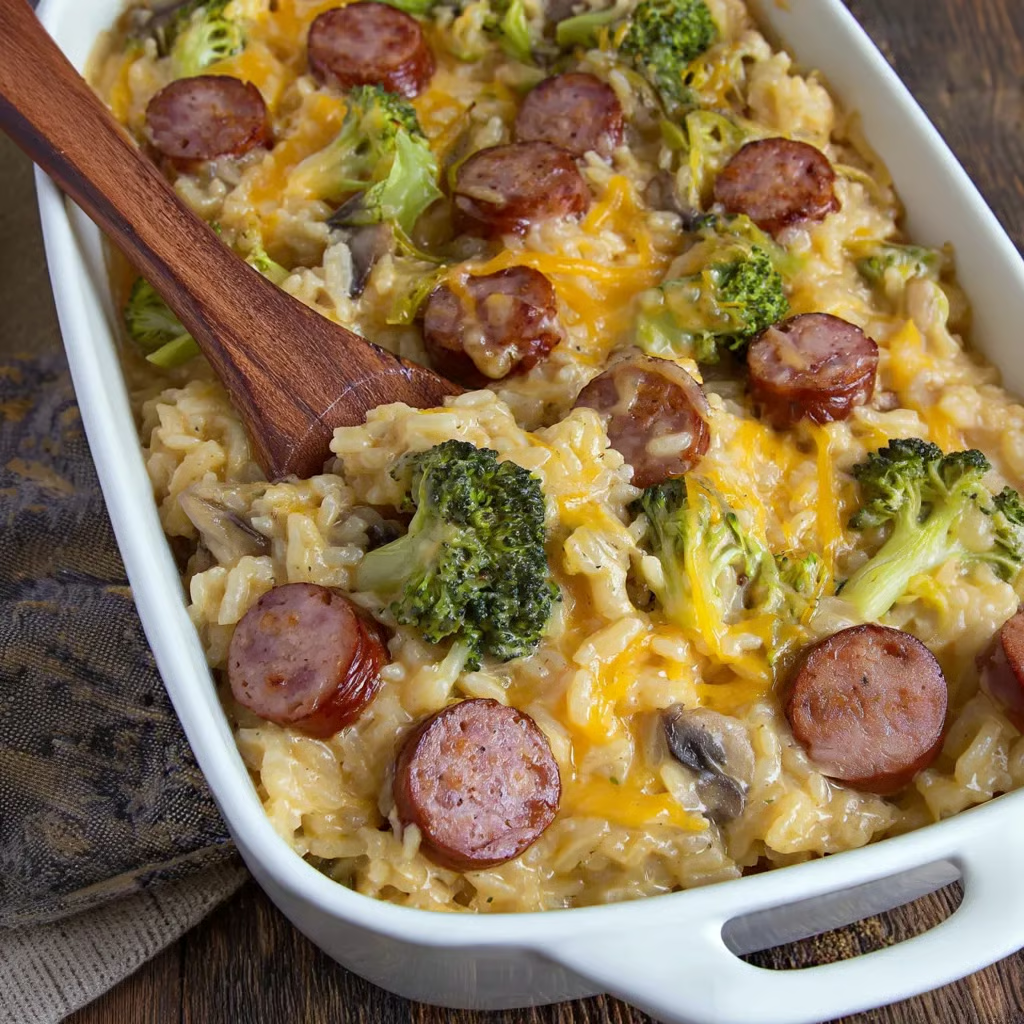
Smoked Sausage & Broccoli Rice Casserole

A hearty, cheesy casserole loaded with smoky sausage, tender rice, and broccoli — pure comfort food in one dish.

Servings: 6–8
Prep Time: 15 minutes
Cook Time: 30 minutes
Total Time: 45 minutes
Dietary Badges: Contains Dairy, Contains Gluten, Contains Meat

Ingredients

  • Smoked sausage links, sliced into ½-inch pieces

  • Cooked white rice

  • Cream of mushroom soup

  • Milk

  • White onion, chopped

  • Celery, chopped

  • Broccoli, chopped and cooked

  • Medium cheddar cheese, shredded

  • Seasoned salt

  • Salt

  • Ground black pepper

  • Olive oil

Instructions

  1. Preheat Oven: Set oven to 350°F (175°C). Grease a 9×13-inch casserole dish.

  2. Brown Sausage: Heat olive oil in a large skillet over medium heat. Sauté sausage slices for about 5 minutes, until browned.

  3. Cook Vegetables: Add onion and celery to the skillet and cook for 3–4 minutes, until tender.

  4. Mix Base: In a large bowl, combine cooked rice, cream of mushroom soup, and milk. Stir until smooth.

  5. Combine: Add the sausage mixture, cooked broccoli, 1½ cups cheese, seasoned salt, salt, and pepper. Mix well.

  6. Assemble: Transfer to prepared casserole dish. Sprinkle with remaining cheese.

  7. Bake: Cook for 25–30 minutes, until bubbly and golden.

  8. Serve: Let rest 5 minutes before serving.

Notes:

  • Use pre-cooked rice for faster prep.

  • Frozen broccoli can be used — just thaw and drain before adding.

Brief Introduction

This smoked sausage & broccoli rice casserole is the ultimate one-pan dinner — cheesy, savory, and satisfying. It’s perfect for using up cooked rice and makes a crowd-pleasing family meal any night of the week.

Step-by-Step Cooking Guide

Browning & Building Flavor

  1. Preheat & Prep Dish: Heat oven to 350°F and grease the casserole dish to prevent sticking.

  2. Brown the Sausage: In a skillet with olive oil, sauté sausage slices until browned. Tip: Browning enhances the smoky flavor.

  3. Cook Aromatics: Add onion and celery; cook until softened. Tip: Keep heat medium to prevent burning.

Combining the Casserole

  1. Mix the Base: In a large mixing bowl, stir together rice, cream of mushroom soup, and milk until smooth.

  2. Fold in Add-Ins: Add sausage mixture, cooked broccoli, most of the cheese, seasoned salt, salt, and pepper. Mix until evenly combined.

Baking to Perfection

  1. Assemble: Spread mixture in prepared dish and top with the rest of the cheese.

  2. Bake: Cook until the cheese is melted and edges are bubbly, about 25–30 minutes.

  3. Cool Slightly: Rest for 5 minutes before serving for cleaner slices.

Ingredient Details & Substitution Tips

  • Smoked Sausage: Adds richness and smoky depth. Swap for turkey sausage, chicken sausage, or plant-based sausage.

  • Cooked Rice: White rice is classic, but brown rice, quinoa, or wild rice blends also work.

  • Cream of Mushroom Soup: You can use cream of chicken or cream of celery soup instead.

  • Cheddar Cheese: Medium cheddar melts beautifully; try mozzarella for a milder flavor or pepper jack for spice.

  • Broccoli: Use fresh or frozen; other vegetables like cauliflower or peas make great swaps.

Recipe Variations & Serving Suggestions

  • Spicy Version: Add 1–2 tsp hot sauce or a pinch of cayenne to the mixture.

  • Loaded Veggie: Stir in chopped bell peppers or spinach for extra color and nutrition.

  • Extra Creamy: Mix ½ cup sour cream or cream cheese into the base.

  • Serving Ideas: Pair with a simple green salad or garlic bread.

Storage & Make-Ahead Information

  • Refrigeration: Store in an airtight container for up to 4 days.

  • Freezing: Freeze portions for up to 2 months. Thaw overnight before reheating.

  • Reheating: Bake at 350°F for 15–20 minutes, or microwave in short bursts.

  • Make-Ahead: Assemble up to 24 hours ahead, cover, and refrigerate; bake as directed.

Nutrition Facts (per serving, 8 servings)

Calories: ~420 kcal | Carbs: 29g | Protein: 18g | Fat: 26g | Fiber: 2g | Sodium: 960mg

FAQs

Q: Can I use uncooked rice?
A: No — the recipe requires pre-cooked rice to ensure proper texture and cooking time.

Q: Can I make this without cream soup?
A: Yes — use 1 cup homemade white sauce (butter, flour, milk) plus ½ cup broth instead.

Q: How do I make it gluten-free?
A: Use a gluten-free condensed soup and ensure your sausage and seasonings are GF-certified.

Personal Story

This casserole was born from a fridge clean-out on a Sunday afternoon — leftover rice, a pack of sausage, and some broccoli came together in one bubbling, cheesy bake. It’s been a family favorite ever since because it’s as easy as it is comforting.