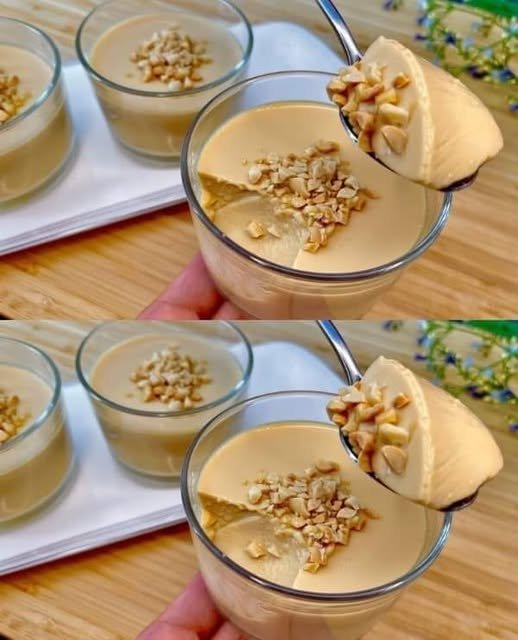
No-Bake 3-Ingredient Milk Pudding

🍮 No-Bake 3-Ingredient Milk Pudding

Smooth • Creamy • Simple Custard-Style Dessert

This easy milk pudding is a soft, creamy dessert made with just milk, sugar, and eggs. It sets gently in the refrigerator and has a smooth, comforting texture similar to classic custard. With careful low-heat cooking and constant stirring, you get a silky pudding without baking or complicated steps.


Recipe Overview

  • Prep Time: 5 minutes

  • Cook Time: 10–15 minutes

  • Chill Time: 2–3 hours

  • Servings: 4 small bowls


Ingredients

Main Ingredients

  • 2 cups (500 ml) milk

  • ⅓ cup (70 g) sugar

  • 2 large eggs

Optional (Recommended)

  • 1 teaspoon vanilla extract
    (adds aroma and smooth flavor)

Optional Toppings

  • Chopped peanuts or walnuts

  • Caramel drizzle

  • Fresh fruit


Equipment Needed

  • Medium saucepan

  • Whisk or silicone spatula

  • Fine-mesh strainer

  • Serving bowls or ramekins


Step-by-Step Instructions

1. Mix the Eggs and Sugar

  • Place the saucepan on the counter (do not heat yet)

  • Add eggs and sugar

  • Whisk until the sugar is mostly dissolved and the mixture looks slightly pale and smooth


2. Add the Milk

  • Slowly pour the milk into the egg mixture

  • Whisk continuously to keep everything smooth

  • Add vanilla extract if using


3. Cook Gently

  • Place the saucepan over low heat

  • Stir constantly using a whisk or spatula

  • Scrape the bottom and sides of the pan to prevent sticking

⚠️ Important: Keep the heat low. High heat can cause the eggs to cook unevenly.


4. Thicken the Pudding

  • Continue stirring for 10–12 minutes

  • The mixture will gradually thicken

  • It is ready when it:

    • Coats the back of a spoon

    • Looks creamy but still pours easily

(It will firm up more as it cools.)


5. Strain for Smoothness

  • Remove from heat

  • Pour the mixture through a fine strainer into a bowl or jug

  • This step ensures a silky, lump-free texture


6. Chill and Set

  • Pour the pudding into serving bowls or ramekins

  • Let cool at room temperature for about 20 minutes

  • Cover and refrigerate for 2–3 hours, until fully set


7. Serve

  • Serve chilled

  • Add nuts, caramel, or fruit just before serving if desired


Texture & Flavor

  • Texture: Smooth, soft, custard-like

  • Flavor: Lightly sweet, creamy, comforting


Helpful Tips

  • Stir continuously for best texture

  • Never let the mixture boil

  • Use room-temperature eggs for smoother blending

  • For extra richness, replace ¼ cup of milk with cream


Optional Variation (Firmer Texture)

If you prefer a firmer, pudding-style set:

  • Mix 1 tablespoon cornstarch into the cold milk before heating

  • Proceed with the recipe as written


Storage

  • Store covered in the refrigerator

  • Best enjoyed within 2 days

Moist Orange Pound Cake

🍊 Moist Orange Pound Cake

Soft • Fragrant • Naturally Citrus-Forward

This orange pound cake is tender, moist, and filled with fresh orange flavor from real juice and zest. It has a fine crumb, a golden crust, and a bright citrus glaze that soaks gently into the cake. Perfect for tea time, breakfast, or dessert, this cake stays soft for days and slices beautifully.


Recipe Overview

  • Prep Time: 15 minutes

  • Bake Time: 65–70 minutes

  • Oven Temperature: 350°F (175°C)

  • Yield: 1 loaf or bundt-style cake (10–12 slices)


Ingredients

Dry Ingredients

  • 2½ cups (300 g) all-purpose flour

  • ¾ teaspoon baking powder

  • ¼ teaspoon salt


Wet Ingredients

  • 1 cup (200 g) granulated sugar

  • 2 tablespoons fresh orange zest
    (from about 3 oranges)

  • ¾ cup (180 ml) fresh orange juice

  • 1 cup (240 ml) vegetable oil

  • 3 large eggs, room temperature

  • 1 tablespoon vanilla extract


Orange Glaze

  • 1 cup (120 g) powdered sugar

  • Zest of ½ orange

  • 2 tablespoons fresh orange juice


Equipment Needed

  • Mixing bowls

  • Whisk

  • Rubber spatula

  • Loaf pan or bundt pan

  • Fine grater (for zest)

  • Wire cooling rack


Step-by-Step Instructions

1. Prepare the Oven and Pan

  • Preheat oven to 350°F (175°C)

  • Grease a loaf or bundt pan thoroughly

  • Lightly dust with flour and tap out excess

  • Set aside


2. Combine Dry Ingredients

  • In a large bowl, sift together:

    • Flour

    • Baking powder

    • Salt

  • Whisk briefly to distribute evenly

  • Set aside


3. Infuse the Sugar with Orange Zest

  • Place sugar and orange zest in a separate bowl

  • Rub them together using clean fingertips

  • Continue until the sugar feels slightly moist and fragrant
    (this step releases natural citrus oils for stronger flavor)


4. Mix the Wet Ingredients

  • Add to the orange-sugar mixture:

    • Eggs

    • Orange juice

    • Vegetable oil

    • Vanilla extract

  • Whisk until smooth and well blended


5. Make the Batter

  • Pour the wet mixture into the dry ingredients

  • Fold gently using a spatula

  • Mix just until no dry flour remains

  • Do not overmix to keep the cake tender


6. Bake the Cake

  • Pour batter evenly into prepared pan

  • Smooth the top gently

  • Bake for 65–70 minutes

  • Test with a toothpick inserted into the center

    • It should come out clean or with a few soft crumbs


7. Cool

  • Let cake cool in the pan for 10–15 minutes

  • Carefully remove and transfer to a wire rack

  • Allow to cool until slightly warm


Glaze Instructions

8. Prepare the Orange Glaze

  • In a small bowl, whisk:

    • Powdered sugar

    • Orange zest

    • Orange juice

  • Adjust consistency if needed

    • Add more juice for thinner glaze

    • Add more sugar for thicker glaze


9. Glaze the Cake

  • Drizzle glaze over the slightly warm cake

  • Allow glaze to set before slicing


Texture & Flavor

  • Texture: Moist, soft, fine crumb

  • Flavor: Bright orange with gentle sweetness

  • Finish: Light citrus glaze that soaks into the cake


Storage Tips

  • Store covered at room temperature for 2 days

  • Refrigerate for up to 5 days

  • Bring to room temperature before serving for best texture


Optional Variations

  • Add ½ teaspoon cardamom or cinnamon

  • Replace half the oil with melted butter for richer flavor

  • Add chopped almonds for texture

  • Use lemon instead of orange for a citrus swap

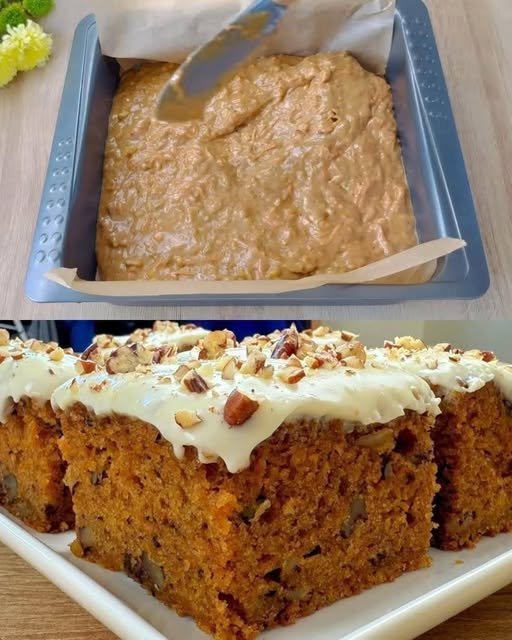
🥕 Moist Carrot Cake with Cream Cheese Frosting

🥕 Moist Carrot Cake with Cream Cheese Frosting

Soft • Spiced • Rich • Perfectly Balanced

This classic carrot cake is incredibly moist and tender, made with freshly grated carrots, warm spices, and a smooth cream cheese frosting. It bakes evenly, slices beautifully, and tastes even better the next day as the flavors deepen.


Recipe Overview

  • Prep Time: 20 minutes

  • Bake Time: 35–40 minutes

  • Cooling Time: 1 hour

  • Total Time: About 2 hours

  • Yield: 1 square cake (9–12 servings)


Why This Recipe Works

  • Oil keeps the cake moist for days

  • Fresh carrots add natural sweetness and texture

  • Balanced spices enhance flavor without overpowering

  • Cream cheese frosting adds gentle tang and richness

  • Simple mixing method prevents a dense crumb


Ingredients

For the Cake

  • 2 cups (250 g) all-purpose flour

  • 2 teaspoons baking powder

  • ½ teaspoon baking soda

  • ½ teaspoon salt

  • 1 teaspoon ground cinnamon

  • ½ teaspoon ground nutmeg

  • 1 cup (200 g) granulated sugar

  • 4 large eggs, room temperature

  • 1 cup (240 ml) vegetable oil

  • 2 cups (240 g) finely grated carrots

  • ½ cup (120 g) chopped walnuts or pecans (optional)


For the Cream Cheese Frosting

  • 8 oz (225 g) cream cheese, softened

  • ½ cup (115 g) unsalted butter, softened

  • 2 cups (250 g) powdered sugar, sifted

  • 1 teaspoon vanilla extract


Optional Garnish

  • Chopped nuts

  • Light dusting of cinnamon


Equipment Needed

  • 8×8-inch or 9×9-inch square baking pan

  • Mixing bowls

  • Whisk

  • Hand mixer or spatula

  • Parchment paper

  • Cooling rack


Step-by-Step Instructions

1. Prepare the Oven and Pan

  • Preheat oven to 350°F (180°C)

  • Line a square baking pan with parchment paper or grease well

  • Set aside


2. Mix the Dry Ingredients

  • In a medium bowl, whisk together:

    • Flour

    • Baking powder

    • Baking soda

    • Salt

    • Cinnamon

    • Nutmeg

This ensures even spice distribution.


3. Mix the Wet Ingredients

  • In a large bowl, whisk sugar and vegetable oil until smooth

  • Add eggs one at a time, mixing well after each addition

  • The mixture should look glossy and well blended


4. Combine and Fold

  • Gradually add the dry ingredients to the wet mixture

  • Fold gently until just combined

⚠️ Do not overmix to keep the cake tender.

  • Fold in grated carrots

  • Stir in chopped nuts if using


5. Bake

  • Pour batter into the prepared pan

  • Spread evenly

  • Bake for 35–40 minutes, or until a toothpick inserted in the center comes out clean


6. Cool Completely

  • Let the cake cool in the pan for 15 minutes

  • Transfer to a wire rack

  • Cool completely before frosting


Cream Cheese Frosting Instructions

7. Prepare the Frosting

  • In a bowl, beat softened cream cheese and butter until smooth

  • Gradually add powdered sugar, mixing slowly

  • Add vanilla extract

  • Beat until creamy, fluffy, and spreadable


8. Frost and Serve

  • Spread frosting evenly over the cooled cake

  • Garnish with chopped nuts if desired

  • Slice into squares and serve


Texture & Flavor Notes

  • Cake: soft, moist, and lightly spiced

  • Frosting: creamy, smooth, and gently tangy

  • Flavor improves after resting overnight


Storage Tips

  • Room temperature: Up to 1 day (covered)

  • Refrigerator: Up to 5 days

  • Freezer: Unfrosted cake freezes well up to 2 months


Optional Variations

  • Add ½ cup crushed pineapple, well drained

  • Mix in raisins or shredded coconut

  • Use brown sugar for deeper flavor

  • Make as cupcakes (bake 18–22 minutes)

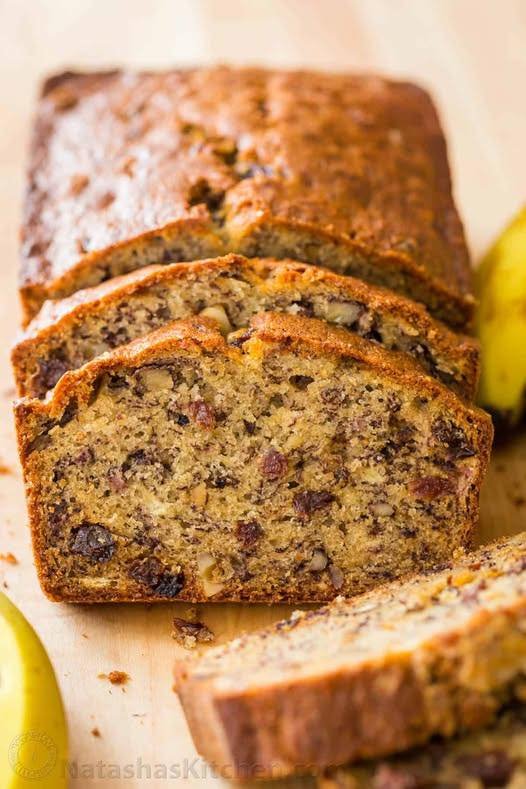
Moist Banana Nut Bread

Moist Banana Nut Bread

Soft • Rich • Nutty • Stays Fresh for Days

This classic Banana Nut Bread is perfectly moist with a tender crumb and a rich banana flavor. Made with very ripe bananas and toasted walnuts, it’s ideal for breakfast, tea time, or sharing as a homemade gift. The loaf slices cleanly and tastes even better the next day.


Recipe Overview

  • Prep Time: 10 minutes

  • Bake Time: 55–60 minutes

  • Total Time: About 1 hour 10 minutes

  • Yield: 1 loaf (about 10 slices)


Why This Recipe Works

  • Very ripe bananas add natural sweetness and moisture

  • Butter provides rich flavor and soft texture

  • Toasted walnuts enhance aroma and crunch

  • Gentle mixing keeps the loaf tender

  • Balanced ingredients prevent dryness or heaviness


Ingredients

Wet Ingredients

  • 3 very ripe bananas (medium to large)

  • ½ cup (8 tablespoons) unsalted butter, room temperature

  • ¾ cup granulated sugar
    (Honey may be used as a substitute for deeper flavor)

  • 2 large eggs, lightly beaten

  • ½ teaspoon vanilla extract


Dry Ingredients

  • 1½ cups all-purpose flour

  • 1 teaspoon baking soda

  • ½ teaspoon salt


Mix-Ins

  • 1 cup walnuts, toasted and coarsely chopped

  • ½ cup raisins
    (or chocolate chips, if preferred)


Equipment Needed

  • 9×5-inch loaf pan

  • Mixing bowls

  • Whisk

  • Rubber spatula

  • Wire cooling rack


Step-by-Step Instructions

1. Prepare the Oven and Pan

  • Preheat oven to 350°F (175°C)

  • Grease a 9×5-inch loaf pan with butter

  • Lightly dust with flour or line with parchment paper


2. Toast the Walnuts

  • Place walnuts in a dry skillet over medium heat

  • Stir continuously for 3–5 minutes, until fragrant

  • Remove from heat, let cool, then chop coarsely

Tip: Toasting brings out the natural oils and flavor of the nuts.


3. Cream Butter and Sugar

  • In a large bowl, beat the softened butter and sugar together

  • Mix until smooth, creamy, and pale

This step helps create a soft, even crumb.


4. Prepare the Banana Mixture

  • Mash bananas with a fork until they resemble chunky applesauce

  • Add mashed bananas to the butter mixture

  • Stir in the beaten eggs and vanilla extract

  • Mix until fully combined


5. Combine Dry Ingredients

  • In a separate bowl, whisk together:

    • Flour

    • Baking soda

    • Salt


6. Make the Batter

  • Add dry ingredients to the wet mixture

  • Gently fold until just combined

⚠️ Do not overmix — stop as soon as no dry flour remains.

  • Fold in the toasted walnuts and raisins evenly


7. Bake

  • Pour batter into the prepared loaf pan

  • Smooth the top gently

  • Bake for 55–60 minutes


8. Test for Doneness

  • Insert a toothpick into the center

  • It should come out clean or with a few moist crumbs

If needed, bake an additional 5 minutes and check again.


9. Cool Properly

  • Let the bread cool in the pan for 10 minutes

  • Transfer carefully to a wire rack

  • Cool completely before slicing


Texture & Flavor Notes

  • Inside: moist, soft, and banana-rich

  • Top: lightly golden with nutty crunch

  • Flavor deepens after resting overnight


Storage Tips

  • Room temperature: Wrap tightly, keeps fresh for 2–3 days

  • Refrigerator: Up to 5 days

  • Freezer: Slice and freeze up to 3 months


Optional Variations

  • Add ½ teaspoon cinnamon for warmth

  • Replace half the flour with whole wheat flour

  • Use pecans instead of walnuts

  • Add banana slices on top before baking for decoration

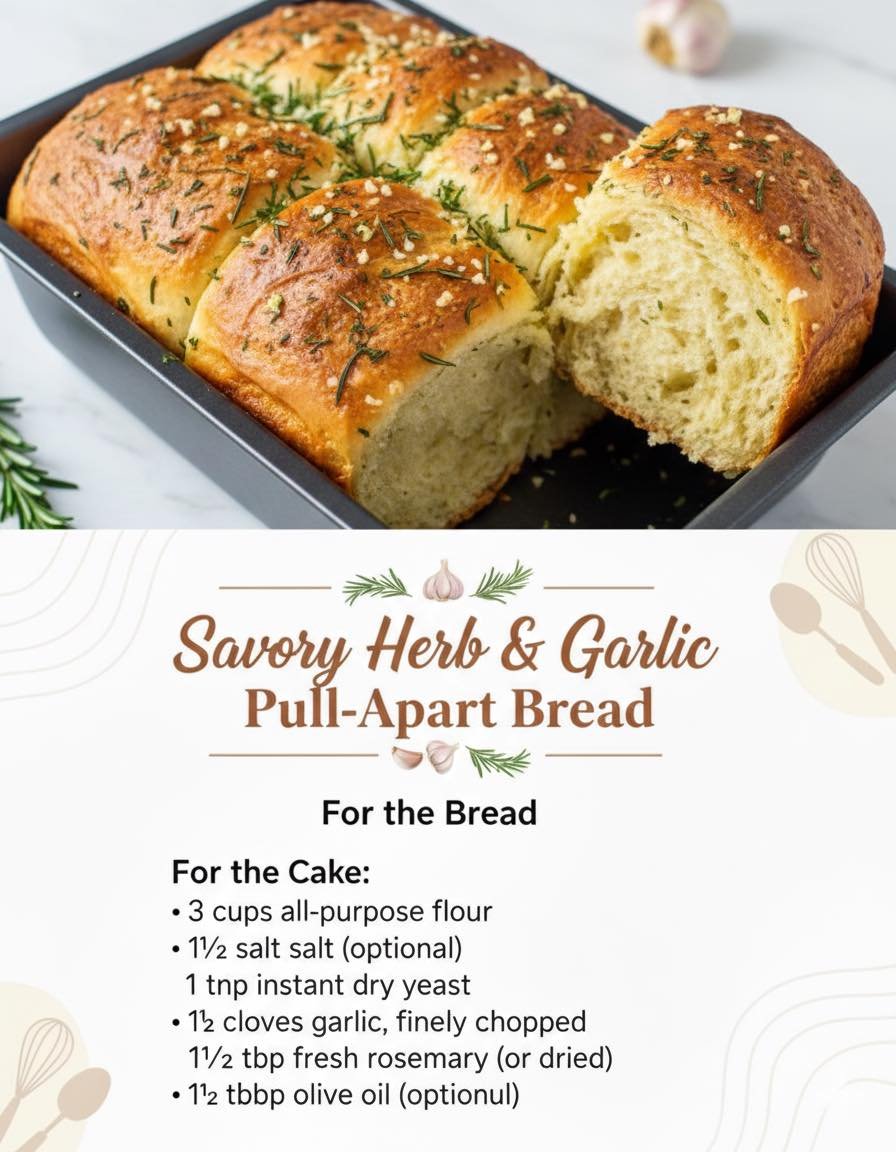
🧀 Savory Herb & Garlic Pull-Apart Bread

🧀 Savory Herb & Garlic Pull-Apart Bread

Soft • Aromatic • Golden • Perfect for Sharing

This Savory Herb & Garlic Bread is fluffy on the inside with a lightly crisp, golden top. Fresh garlic and herbs infuse every bite, while olive oil keeps the crumb tender and flavorful. Designed as a pull-apart loaf, it’s ideal for serving warm at the table.


Why This Recipe Works

  • Proper yeast activation ensures a light, airy texture

  • Olive oil adds softness and rich flavor

  • Fresh garlic and herbs create deep aroma

  • Two rises give excellent structure and fluffiness

  • Pull-apart shaping makes it easy to serve


Ingredients

For the Dough

  • 3 cups all-purpose flour, plus extra for dusting

  • 1 teaspoon salt

  • 2 teaspoons sugar

  • 2¼ teaspoons instant dry yeast (1 standard packet)

  • 1 cup warm water (about 105–110°F / 40–43°C)

  • 3 tablespoons olive oil

Flavor Add-Ins

  • 3 cloves garlic, finely minced

  • 1½ tablespoons fresh rosemary, finely chopped
    (or 1 teaspoon dried rosemary)

For the Top (Optional but Recommended)

  • 1–2 tablespoons olive oil or melted butter

  • Optional: pinch of salt or grated cheese


Step-by-Step Instructions

1. Activate the Yeast

  • In a small bowl, combine:

    • Warm water

    • Sugar

    • Yeast

  • Stir gently and let sit for 5–10 minutes

  • The mixture should become slightly foamy

Tip: If it doesn’t foam, the yeast may be inactive—start again for best results.


2. Mix the Dough

  • In a large bowl, whisk together:

    • Flour

    • Salt

    • Minced garlic

    • Chopped rosemary

  • Make a well in the center

  • Pour in:

    • Yeast mixture

    • Olive oil

  • Mix with a spoon or your hands until a shaggy dough forms


3. Knead the Dough

  • Transfer dough to a lightly floured surface

  • Knead for 5–8 minutes until:

    • Smooth

    • Elastic

    • Slightly tacky but not sticky

Adjustment Tip:
If the dough sticks, add flour 1 tablespoon at a time.


4. First Rise

  • Lightly oil a clean bowl

  • Place dough inside and turn once to coat

  • Cover with a damp cloth or plastic wrap

  • Let rise in a warm place for about 1 hour, or until doubled in size


5. Shape the Pull-Apart Pieces

  • Gently punch down the dough to release air

  • Divide into 8–10 equal portions

  • Roll each portion into a smooth ball

  • Arrange balls snugly in a greased loaf pan


6. Second Rise

  • Cover the pan loosely

  • Let rise again for 30 minutes

This step ensures a light, fluffy final texture.


7. Bake

  • Preheat oven to 375°F (190°C)

  • Brush the top with olive oil or melted butter

  • Bake for 25–30 minutes, until:

    • Top is golden brown

    • Bread sounds hollow when tapped


8. Cool and Serve

  • Let bread cool in the pan for 10 minutes

  • Remove gently and serve warm

  • Pull apart and enjoy the soft, herbed layers


Texture & Flavor Notes

  • Interior: soft, fluffy, and aromatic

  • Exterior: lightly crisp and golden

  • Flavor: savory garlic with fresh herb warmth


Storage Tips

  • Room temperature: Wrap and store up to 2 days

  • Refrigerator: Up to 4 days (reheat before serving)

  • Freezer: Freeze baked bread up to 2 months


Optional Variations

  • Add grated cheese between dough balls

  • Mix in parsley or thyme

  • Sprinkle sesame or herb seasoning on top

  • Brush with garlic-infused butter after baking

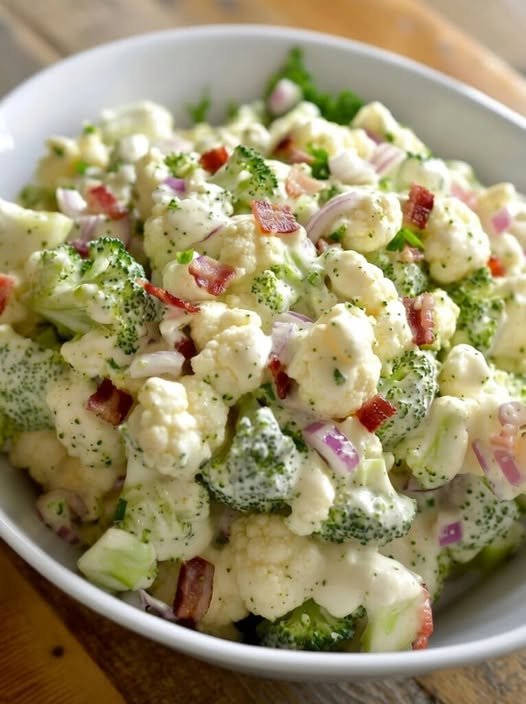
Creamy Broccoli Cauliflower Salad

Creamy Broccoli Cauliflower Salad

Crunchy • Creamy • Savory-Sweet • Perfect for Gatherings

This classic Creamy Broccoli Cauliflower Salad is a well-loved favorite for potlucks, picnics, and family meals. Crisp fresh vegetables are paired with smoky, crunchy bacon, sharp cheese, and a tangy-sweet dressing that coats every bite beautifully. It improves with time, making it ideal for preparing ahead.


Why This Recipe Works

  • Raw broccoli and cauliflower stay crisp and refreshing

  • Creamy dressing balances tang and sweetness

  • Bacon adds depth and crunch

  • Chilling time allows flavors to blend perfectly

  • Easy to customize for different diets


Ingredients

The Salad Base

  • 3 cups fresh broccoli florets, chopped into bite-sized pieces

  • 3 cups fresh cauliflower florets, chopped small

  • 6 slices bacon, cooked until crisp and crumbled

  • ¾ cup sharp cheddar cheese, freshly grated

  • ⅓ cup red onion, finely diced

  • ½ cup roasted sunflower seeds
    (or chopped almonds for a nutty variation)

  • Optional: ½ cup dried cranberries or raisins for gentle sweetness


The Creamy Dressing

  • ¾ cup mayonnaise, good quality

  • ¼ cup sour cream or plain Greek yogurt

  • 2 tablespoons apple cider vinegar

  • 2 tablespoons granulated sugar
    (or honey or maple syrup)

  • ½ teaspoon salt

  • ¼ teaspoon black pepper


Step-by-Step Instructions

1. Prepare the Vegetables

  • Wash broccoli and cauliflower thoroughly

  • Pat completely dry using a clean kitchen towel

Important Tip: Dry vegetables allow the dressing to cling properly instead of sliding off.

  • Chop into small, evenly sized pieces for the best texture and flavor in every bite


2. Cook the Bacon

  • Cook bacon in a skillet or oven until deeply crisp

  • Transfer to paper towels to cool

  • Crumble into small pieces

Make-Ahead Tip: Store bacon separately and add just before serving to keep it crunchy.


3. Make the Dressing

  • In a medium bowl, whisk together:

    • Mayonnaise

    • Sour cream (or yogurt)

    • Apple cider vinegar

    • Sugar

    • Salt

    • Black pepper

  • Whisk until smooth and creamy

  • Taste and adjust:

    • Add more vinegar for tang

    • Add a touch more sweetener if desired


4. Assemble the Salad

  • In a large mixing bowl, combine:

    • Broccoli

    • Cauliflower

    • Red onion

    • Cheddar cheese

    • Sunflower seeds

  • Pour dressing over the salad

  • Fold gently until all vegetables are evenly coated


5. Chill for Best Flavor

  • Cover and refrigerate for at least 30 minutes

  • For best results, chill 3–4 hours to allow flavors to blend

  • Stir in the crumbled bacon just before serving
    (or sprinkle on top for presentation)


Texture & Flavor Notes

  • Crisp vegetables with creamy coating

  • Savory, slightly sweet, and tangy balance

  • Bacon adds crunch and smoky depth


Customization & Variations

Lighter Version

  • Replace half the mayonnaise with Greek yogurt

  • Use honey or reduce sweetener

Low-Carb Version

  • Omit sugar and dried fruit

  • Add extra bacon or chopped hard-boiled eggs

Plant-Based Version

  • Use dairy-free mayonnaise

  • Replace bacon with toasted seeds or smoked seasoning


Storage & Make-Ahead Tips

  • Make Ahead:

    • Chop vegetables and prepare dressing up to 24 hours in advance

    • Store separately and combine 1–2 hours before serving

  • Leftovers:

    • Store in an airtight container in the refrigerator

    • Keeps well for up to 3 days

    • Stir before serving as some moisture may release

  • Freezing:

    • Not recommended due to texture changes