Best Walnut & Raisin Banana Bread

Best Walnut & Raisin Banana Bread

Moist • Dense • Naturally Sweet • Nutty Crunch

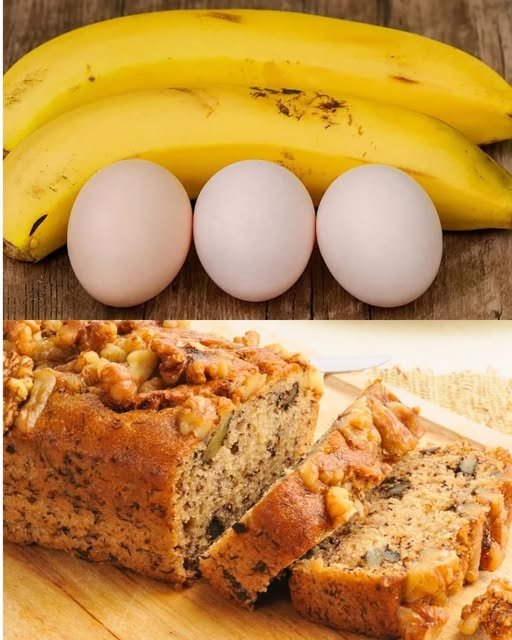
This classic Walnut & Raisin Banana Bread is rich, moist, and deeply flavorful. Overripe bananas provide natural sweetness and softness, while toasted walnuts add crunch and raisins bring gentle bursts of sweetness. This loaf is perfect for breakfast, tea time, or a comforting homemade snack.


Why This Recipe Works

  • Uses very ripe bananas for maximum flavor and moisture

  • Balanced fat and sugar for a soft yet sturdy crumb

  • Toasted walnuts enhance aroma and texture

  • Gentle mixing prevents a tough loaf

  • Bakes evenly with a beautifully golden top


Ingredients

The Base

  • 3 ripe bananas, thoroughly mashed
    (The peels should be heavily speckled or brown)

  • ½ cup unsalted butter (1 stick), softened to room temperature
    (Butter adds richness and moisture)

  • ¾ cup white sugar
    (You may substitute with 1 scant cup honey for a deeper flavor)

  • 1 large egg, lightly beaten
    (One egg keeps the bread soft and tender)

  • 1 teaspoon vanilla extract

  • 1 teaspoon baking soda

  • A pinch of salt

  • 1½ cups all-purpose flour, sifted


The Mix-Ins

  • ½ cup walnuts, chopped and lightly toasted

  • ½ cup raisins
    (Soak in warm water for 5 minutes, then drain and pat dry for plumpness)


Equipment Needed

  • 4×8-inch loaf pan

  • Mixing bowls

  • Whisk or spoon

  • Rubber spatula

  • Wire cooling rack


Step-by-Step Instructions

1. Prepare the Oven and Pan

  • Preheat your oven to 350°F (175°C)

  • Grease a 4×8-inch loaf pan with butter or non-stick spray

  • Optionally line with parchment paper for easy removal


2. Toast the Walnuts

  • Place chopped walnuts in a dry skillet over medium heat

  • Stir frequently for 3–5 minutes, until lightly golden and fragrant

  • Remove from heat and allow to cool completely

Tip: Toasting walnuts brings out their natural oils and enhances flavor.


3. Cream the Butter and Sugar

  • In a large mixing bowl, combine softened butter and sugar

  • Beat until smooth, creamy, and slightly fluffy

This step helps create a soft crumb.


4. Add Wet Ingredients

  • Stir in the beaten egg until fully incorporated

  • Add vanilla extract

  • Mix in mashed bananas until smooth and uniform


5. Add Dry Ingredients

  • Sprinkle baking soda and salt evenly over the batter

  • Gently fold in the flour using a spatula

  • Mix just until no dry flour remains

⚠️ Do not overmix — overmixing can make the bread dense


6. Fold in Walnuts and Raisins

  • Gently fold in:

    • All the raisins

    • Half of the toasted walnuts

Reserve remaining walnuts for topping.


7. Bake

  • Pour batter evenly into the prepared loaf pan

  • Sprinkle remaining walnuts on top

  • Bake for 50–60 minutes


8. Check for Doneness

  • Insert a toothpick into the center

  • It should come out clean or with a few moist crumbs

If needed, bake 5 minutes longer and check again.


9. Cool Properly

  • Let the bread cool in the pan for 10 minutes

  • Carefully remove and transfer to a wire rack

  • Allow to cool completely before slicing


Texture & Flavor Notes

  • Inside: moist, tender, and banana-rich

  • Top: golden with a nutty crunch

  • Flavor deepens even more the next day


Storage Tips

  • Room temperature: Wrap tightly, keeps fresh for 2 days

  • Refrigerator: Up to 5 days

  • Freezer: Slice, wrap individually, and freeze up to 3 months

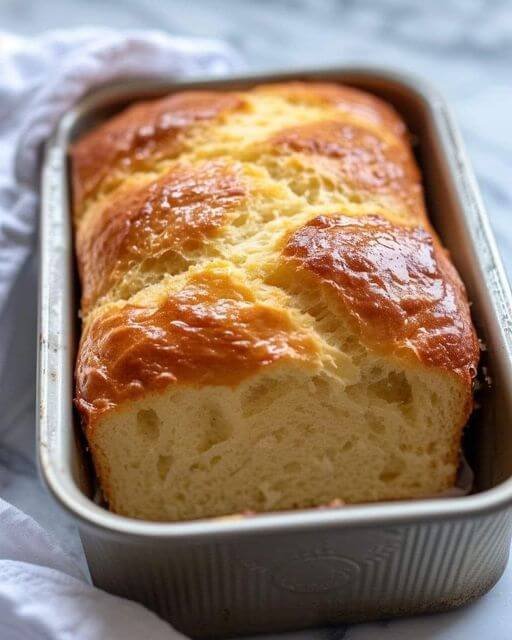
Soft Oven-Baked Tray Bread (Bakery-Style)

Soft Oven-Baked Tray Bread (Bakery-Style)

Yield: 2 large flatbreads
Prep Time: 25 minutes
Resting Time: 1½–2 hours
Bake Time: 18–22 minutes
Difficulty: Easy–Intermediate


🧾 INGREDIENTS

For the Dough

  • All-purpose flour – 4½ cups (560 g)

  • Warm milk – 1 cup (240 ml)

  • Warm water – ½ cup (120 ml)

  • Instant yeast – 2¼ teaspoons (1 sachet)

  • Sugar – 2 tablespoons

  • Salt – 1½ teaspoons

  • Oil or melted butter – 4 tablespoons

  • Yogurt – 3 tablespoons (for softness)


For Topping

  • Egg yolk – 1

  • Milk – 2 tablespoons

  • Sesame seeds – 1½ tablespoons

  • Nigella seeds (kalonji) – 1 tablespoon


For Tray

  • Semolina or cornmeal – 2 tablespoons (prevents sticking)


👩‍🍳 STEP-BY-STEP METHOD


🔹 Step 1: Activate the Yeast

  1. In a bowl, mix warm milk + warm water + sugar

  2. Sprinkle yeast on top

  3. Let rest 8–10 minutes until foamy

✔️ If it bubbles, yeast is active


🔹 Step 2: Make the Dough

  1. In a large bowl add:

    • Flour

    • Salt

  2. Pour in:

    • Yeast mixture

    • Oil

    • Yogurt

  3. Mix with a spoon, then knead by hand 10–12 minutes

➡️ Dough should be soft, slightly sticky, elastic

(Add 1–2 tbsp flour only if needed.)


🔹 Step 3: First Rise

  1. Lightly oil the bowl

  2. Place dough inside and cover

  3. Let rise in warm place 1–1½ hours

✔️ Dough should double in size


🔹 Step 4: Shape the Bread

  1. Punch down dough gently

  2. Divide into 2 equal portions

  3. Shape each into an oval or round loaf

  4. Place on baking tray dusted with semolina


🔹 Step 5: Second Rest

Cover loosely and let rest 20–25 minutes

This step gives extra fluffiness


🔹 Step 6: Topping & Design

  1. Mix egg yolk and milk.

  2. Brush generously over dough

  3. Sprinkle sesame and nigella seeds

  4. Press shallow finger lines or crisscross pattern on top

(This is traditional and helps even baking.)


🔹 Step 7: Bake

  • Preheat oven to 200°C (390°F)

  • Bake 18–22 minutes

  • Bread should be:

    • Deep golden

    • Soft when pressed

    • Lightly crisp on top


🔹 Step 8: Finish

  • Brush lightly with butter (optional)

  • Cover with cloth for 5 minutes to soften crust


🫓 FINAL RESULT

  • Golden bakery-style bread

  • Soft, airy crumb

  • Slight crunch from seeds

  • Perfect for dipping, wraps, or sandwiches


💡 PRO TIPS

✔ Yogurt makes it extra soft
✔ Semolina prevents soggy bottoms
✔ Do not overbake
✔ Can be frozen after cooling


🍽 SERVING IDEAS

  • With butter & honey

  • With curry or daal

  • As sandwich bread

  • With tea or soup

🫒 Mediterranean Garden Slaw with Creamy Lemon-Tahini Dressing

🥗 Creamy Mediterranean Crunch Salad (Dairy-Free)

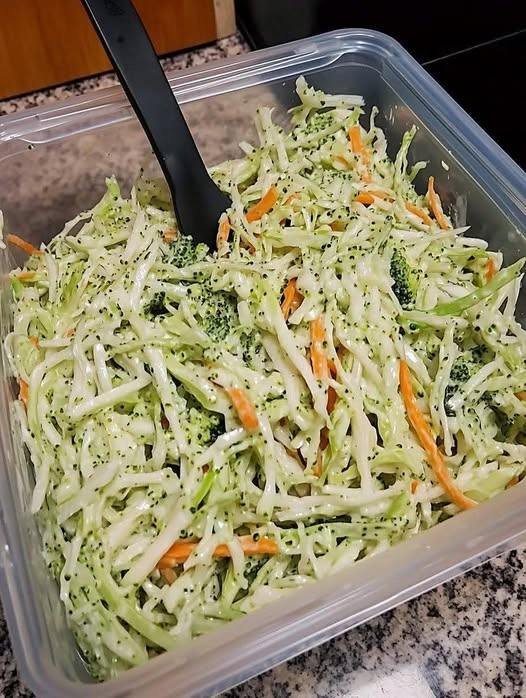
A vibrant, crunchy Mediterranean salad packed with fresh vegetables, fragrant herbs, and a silky tahini-based dressing. This salad improves as it rests, making it ideal for meal prep, gatherings, or light meals.


🌿 Why This Recipe Works

  • Light yet creamy without mayo or dairy

  • Rich in Mediterranean staples: olive oil, lemon, garlic, herbs

  • Excellent for meal prep—stays crunchy for days

  • Versatile: side dish, wrap filling, or main with protein


🧾 Ingredients

🥬 Vegetable Base

  • 4 cups green cabbage, finely shredded

  • 1½ cups broccoli slaw (julienned broccoli stems)

  • 1 cup carrots, julienned

  • ½ cup red onion, very thinly sliced

  • ¼ cup fresh parsley, finely chopped

  • 2 tablespoons fresh dill, chopped (optional but recommended)

  • 2 tablespoons green onions, thinly sliced


🫒 Mediterranean Creamy Dressing

  • ⅓ cup tahini

  • ¼ cup extra-virgin olive oil

  • ¼ cup fresh lemon juice

  • 1½ tablespoons red wine vinegar

  • 2 garlic cloves, finely grated or minced

  • 1 tablespoon Dijon mustard

  • 1½ teaspoons honey or maple syrup

  • ¾ teaspoon sea salt (adjust to taste)

  • ½ teaspoon freshly ground black pepper

  • ½ teaspoon dried oregano

  • ¼ teaspoon ground cumin

  • 2–4 tablespoons water (to thin, as needed)


➕ Optional Mediterranean Add-Ins

  • ½ cup crumbled feta cheese (omit for dairy-free)

  • ⅓ cup sliced Kalamata olives

  • ¼ cup toasted sunflower seeds or pine nuts

  • 1 cup cooked chickpeas, drained and rinsed

  • Grilled chicken, shrimp, or falafel for a complete meal


👩‍🍳 Instructions

1️⃣ Prepare the Vegetables

Finely shred the cabbage for the best texture.
In a large mixing bowl, combine cabbage, broccoli slaw, carrots, red onion, parsley, dill, and green onions. Toss gently to distribute evenly.


2️⃣ Make the Dressing

In a bowl or blender, whisk together:

  • Tahini

  • Olive oil

  • Lemon juice

  • Red wine vinegar

  • Garlic

  • Dijon mustard

  • Honey or maple syrup

  • Salt, pepper, oregano, and cumin

Slowly add water, one tablespoon at a time, until the dressing becomes smooth, creamy, and pourable.

💡 The dressing should lightly coat the vegetables, not overwhelm them.


3️⃣ Combine

Pour the dressing over the vegetables and toss thoroughly until everything is evenly coated.


4️⃣ Rest & Marinate

Cover and refrigerate for 30–60 minutes.
This allows the cabbage to soften slightly and absorb the Mediterranean flavors.


5️⃣ Final Taste Adjustment

Before serving, adjust if needed:

  • Extra lemon juice for brightness

  • Additional salt for depth

  • A light drizzle of olive oil for richness


🍽️ Serving Suggestions

  • Serve alongside grilled fish, chicken, or lamb

  • Stuff into warm pita or flatbread with falafel

  • Pair with Mediterranean rice or quinoa

  • Ideal for meal prep—keeps well up to 4 days refrigerated


🌿 Mediterranean Nutrition Highlights

  • Heart-healthy fats from olive oil and tahini

  • Fiber-rich vegetables for digestion

  • Plant-based protein from tahini and chickpeas

  • No refined sugars, heavy creams, or processed dressings

Hearty Grilled Steak Salad with Avocado & Fresh Vegetables

This recipe showcases a beautifully composed steak salad that balances fresh, crisp vegetables with tender, juicy slices of perfectly grilled steak. It’s an ideal meal for those seeking a balance between indulgence and healthy eating. Packed with lean protein, healthy fats, and a variety of fresh vegetables, this steak salad is a satisfying and nutritious option for lunch or dinner. Let’s break down the components and discuss what makes this dish such a great choice.

1. Grilled Steak
Ingredients:

Steak (flank, ribeye, or sirloin)
Olive oil
Salt and pepper
Garlic powder or fresh garlic
Optional: a squeeze of lemon juice or balsamic vinegar for extra flavor
Why It Works: The steak is the centerpiece of this salad, providing a rich and flavorful protein source. Seasoned simply with olive oil, salt, pepper, and garlic, the steak is grilled to perfection, achieving a juicy, tender texture with a caramelized crust. Steak is an excellent source of high-quality protein, which helps build and repair tissues, and it’s rich in iron, an essential mineral that supports healthy blood cells and oxygen transport.

The grilling method gives the steak a smoky flavor, while the simplicity of the seasoning allows the natural taste of the meat to shine. Slicing the steak thinly ensures that each bite is tender and easy to eat, perfectly complementing the crunchy vegetables beneath it.

Pro Tip: Let the steak rest for about 5 minutes after grilling to ensure the juices redistribute, making the meat more tender and flavorful. For added depth, marinate the steak for an hour in olive oil, garlic, and a splash of balsamic vinegar before grilling.

2. Fresh Avocado Slices
Ingredients:

Ripe avocado
Salt and pepper for seasoning
Lemon or lime juice (optional)
Why It Works: Avocado adds a creamy, buttery element to the salad, providing healthy fats that help you stay full longer and support heart health. Avocados are rich in monounsaturated fats, which are known to improve cholesterol levels, and they’re also packed with fiber, potassium, and vitamins C, E, and K. Their mild, creamy texture balances the bold flavors of the steak, making every bite rich and satisfying.

Pro Tip: Sprinkle the avocado slices with a bit of lemon or lime juice to enhance their flavor and prevent them from browning. Season lightly with salt and pepper for extra taste.

3. Crisp Leafy Greens
Ingredients:

Lettuce (green leaf or romaine)
Optional: mixed greens, spinach, or arugula
Why It Works: The foundation of the salad is made up of fresh, crisp lettuce, providing a light and crunchy texture. Lettuce is low in calories and high in water content, making it a hydrating and refreshing base. It also offers a dose of fiber, which helps with digestion and keeps you feeling satisfied without adding excess calories.

Green leafy vegetables are a powerhouse of nutrients, including vitamins A and K, and antioxidants that help protect your body from inflammation and oxidative stress. The subtle flavor of the lettuce allows the other components of the salad to stand out.

Pro Tip: For added texture and flavor, mix in some peppery arugula or baby spinach, which also provides additional nutrients like iron and folate.

4. Cherry Tomatoes
Ingredients:

Cherry tomatoes (halved)
Salt and pepper
Why It Works: Cherry tomatoes bring a burst of sweetness and acidity to the salad, balancing the richness of the steak and avocado. These small, juicy tomatoes are packed with vitamins C and K, as well as lycopene, a powerful antioxidant that supports heart health and may help reduce the risk of certain cancers.

The pop of color from the tomatoes adds visual appeal to the plate, making it not only nutritious but also beautiful to serve. The acidity of the tomatoes complements the savory steak and creamy avocado, adding a refreshing contrast in each bite.

Pro Tip: Lightly season the tomatoes with salt and pepper to enhance their natural sweetness and flavor.

5. Onion Rings
Ingredients:

White or red onion, thinly sliced
Why It Works: Onions add a crisp, sharp bite to the salad, which contrasts well with the other more tender components. Whether using white or red onions, their slightly sweet and pungent flavor complements the richness of the steak and avocado. Onions also provide a dose of vitamin C and antioxidants, making them a great addition to this nutrient-dense meal.

Pro Tip: If you prefer a milder onion flavor, soak the sliced onions in cold water for about 10 minutes before adding them to the salad. This will reduce their pungency while keeping their crisp texture.

Nutritional Benefits of the Steak Salad
This steak salad offers a perfect balance of nutrients, making it both satisfying and healthy:

Protein: The steak provides a high-quality protein source, essential for muscle repair and overall health.
Healthy Fats: The avocado adds heart-healthy fats, which help with satiety and the absorption of fat-soluble vitamins.
Vitamins and Antioxidants: The fresh vegetables (lettuce, tomatoes, and onions) provide an array of vitamins, antioxidants, and fiber, supporting immune function and digestive health.
Low in Carbohydrates: This salad is low in refined carbohydrates, making it a great option for those on low-carb or ketogenic diets while still providing essential nutrients from vegetables.
How to Make the Perfect Steak Salad at Home
Grill the Steak: Season your choice of steak (ribeye, flank, or sirloin) with olive oil, salt, pepper, and garlic powder. Grill over medium-high heat until cooked to your desired doneness (about 4-5 minutes per side for medium-rare). Let it rest for 5 minutes before slicing thinly.

Prepare the Vegetables: While the steak is grilling, slice the avocado, halve the cherry tomatoes, and thinly slice the onions. Wash and dry the lettuce or mixed greens.

Assemble the Salad: In a large bowl or plate, arrange the lettuce, cherry tomatoes, avocado slices, and onion rings. Top with the grilled steak slices.

Dress the Salad: Lightly drizzle olive oil and a splash of lemon juice or balsamic vinegar over the salad. Season with salt and pepper to taste.

Final Thoughts: A Hearty and Healthy Steak Salad
This steak salad is not only visually stunning but also packed with nutrients that make it a well-balanced meal. The combination of juicy, flavorful steak, creamy avocado, fresh vegetables, and a light dressing creates a dish that is satisfying, filling, and nutrient-dense. Whether you’re looking for a protein-packed lunch or a light yet hearty dinner, this salad hits all the right notes. Plus, it’s easy to customize by adding your favorite greens or topping it with extras like feta cheese or a boiled egg.

Give this steak salad a try and enjoy a healthy, delicious meal that leaves you feeling full and energized!

2-Ingredient Ice Cream Bread

2-Ingredient Ice Cream Bread

Yields: 1 Loaf | Prep time: 5 mins | Bake time: 40–45 mins

Ingredients

  • 2 cups (approx. 475ml) Full-fat vanilla ice cream (slightly softened)

  • 1 ½ cups (approx. 190g) Self-rising flour

  • Note: It is essential to use full-fat ice cream (not “light” or “low-fat”) because the fat content acts as the shortening for the bread.


Detailed Instructions

1. Prep the Oven and Pan

Preheat your oven to 350°F (175°C). Grease a standard loaf pan thoroughly with butter or non-stick spray, or line it with parchment paper for easy removal.

2. Soften the Ice Cream

Allow your ice cream to sit at room temperature for about 10–15 minutes until it is soft and easily scoopable, but not completely melted into a liquid.

3. Mix the Batter

In a large mixing bowl, combine the softened ice cream and the self-rising flour. Stir gently with a spatula just until the flour is incorporated. Do not overmix, as this will result in a tough, dense bread rather than a fluffy one.

4. Transfer and Smooth

Pour the batter into your prepared loaf pan. Use a spatula to smooth the top so it bakes evenly.

5. Bake to Perfection

Place the pan on the center rack and bake for 40–45 minutes. The bread is done when the top is golden brown and a toothpick inserted into the center comes out clean.

6. Cool and Serve

Let the bread cool in the pan for about 10 minutes before transferring it to a wire rack. This bread is best served warm with a little bit of butter or a drizzle of honey.


Why This Recipe Works

  • Self-rising flour already contains the baking powder and salt needed for the bread to rise.

  • Full-fat ice cream provides the liquid, sugar, and fat (cream), which are the core components of a traditional quick-bread batter.

Creative Variations

  • Chocolate Chip: Fold in 1/2 cup of chocolate chips before baking.

  • Berry Swirl: Use strawberry ice cream instead of vanilla for a fruity pink loaf.

  • Birthday Cake: Use “Funfetti” or cake-batter flavored ice cream and add extra sprinkles on top.

Soft Cheese-Stuffed Bread Boats with Herb Tomato Glaze

Soft Cheese-Stuffed Bread Boats with Herb Tomato Glaze

Yields: 10–12 Boats | Prep time: 20 mins (+1 hour rising) | Cook time: 20–25 mins

Ingredients

The Dough:

  • 200 ml Lukewarm milk

  • 200 ml Lukewarm water

  • 1 tbsp Sugar

  • 7 g (1 packet) Active dry yeast

  • 600-650 g All-purpose flour

  • 1 tsp Salt

  • 50 ml Vegetable oil

The Filling:

  • 300 g Feta cheese or soft white cheese, crumbled

  • 1 cup Shredded mozzarella

  • 1 Egg (optional, to bind)

  • Fresh parsley, chopped

The Herb Tomato Glaze:

  • 2 tbsp Tomato paste

  • 3 tbsp Olive oil

  • 1 tsp Dried oregano or Italian herbs

  • 1 clove Garlic, minced

  • Fresh parsley, finely chopped


Detailed Instructions

1. Prepare the Yeast Base

  • In a large mixing bowl, combine the 200 ml lukewarm milk, 200 ml lukewarm water, and 1 tbsp sugar.

  • Sprinkle 7 g of active dry yeast over the top and stir gently.

  • Let the mixture sit for about 5–10 minutes until it becomes foamy.

2. Mix and Knead the Dough

  • Add 50 ml vegetable oil and 1 tsp salt to the yeast mixture.

  • Gradually add 600-650 g of flour, mixing until a soft dough forms.

  • Knead the dough on a floured surface for 8–10 minutes until it is smooth and elastic.

3. First Rise

  • Place the dough in a lightly greased bowl and cover it with a warm, damp cloth.

  • Let it rise in a warm, draft-free spot for 1 hour or until it has doubled in size.

4. Shape the Boats

  • Punch the dough down to release air and divide it into 10–12 equal pieces.

  • Roll each piece into an oval shape.

  • Place a generous amount of the cheese filling (the crumbled feta, mozzarella, and parsley) in the center.

  • Fold the edges of the dough over the cheese and twist the ends to create a “boat” or twisted loaf shape.

5. Apply the Herb Tomato Glaze

  • Whisk together the 2 tbsp tomato paste, 3 tbsp olive oil, 1 tsp herbs, 1 clove minced garlic, and fresh parsley.

  • Use a pastry brush to coat the tops of the dough boats generously with this savory glaze.

6. Bake

  • Preheat your oven to 375°F (190°C).

  • Arrange the boats on a baking sheet lined with parchment paper.

  • Bake for 20–25 minutes until the bread is golden brown and the cheese is melted and bubbly.

7. Serve

  • Let the bread boats cool for a few minutes so the cheese sets slightly.

  • These are best served warm when the bread is at its softest.