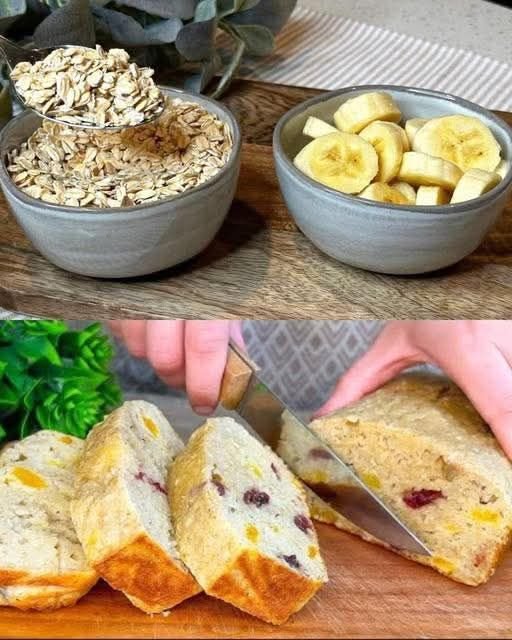
Oatmeal Banana Breakfast Bake

Oatmeal Banana Breakfast Bake

Ingredients:

    • 1 cup oatmeal
    • 150 ml milk
    • 2 bananas, mashed
    • 2 eggs, beaten (be sure to wash your eggs before using them)
    • A pinch of vanillin
    • 50 g cranberries
    • 50 g dried apricots, chopped
    • 30 g almond flakes
  • 1 teaspoon baking powder
  • Vegetable oil (for greasing)

Instructions:

  1. Prepare the Oatmeal Mixture:
      • In a bowl, combine the oatmeal and milk. Mix well and let stand for 10 minutes to allow the oats to absorb the milk and soften.


  2. Combine Ingredients:
      • Mash the bananas and add them to the oatmeal mixture.
      • Add the beaten eggs, vanillin, cranberries, chopped dried apricots, almond flakes, and baking powder. Mix thoroughly to ensure all ingredients are well combined.


  3. Prepare the Baking Pan:
      • Preheat the oven to 180°C (360°F).
      • Line a baking pan with baking paper and grease it with vegetable oil to prevent sticking.


  4. Bake the Mixture:
      • Pour the oatmeal mixture into the prepared baking pan, spreading it evenly.
      • Bake in the preheated oven for 40 minutes, or until the top is golden brown and a toothpick inserted into the center comes out clean.


  5. Serve:
      • Allow the breakfast bake to cool slightly before slicing.
      • Serve warm or at room temperature.


Serving Suggestions:

    • Enjoy a slice of the breakfast bake with a dollop of Greek yogurt or a drizzle of honey.
    • Pair with a fresh fruit salad for a complete breakfast.

Cooking Tips:

  • Make sure to mix the oatmeal and milk well and let it stand to ensure the oats are adequately softened.
  • You can substitute dried apricots and cranberries with other dried fruits like raisins or dates if preferred.

Nutritional Benefits:

    • Oats provide a good source of fiber, which aids in digestion and keeps you full longer.
  • Bananas are rich in potassium and vitamins, making them a great addition to a healthy breakfast.
  • Almond flakes add healthy fats and a delightful crunch to the bake.

Dietary Information:

    • Vegetarian: Yes
  • Gluten-Free: Can be made with gluten-free oats
  • Nut-Free: Omit the almond flakes or substitute with sunflower seeds

Storage:

    • Store any leftovers in an airtight container in the refrigerator for up to 3 days.
  • Reheat individual slices in the microwave for a quick and easy breakfast.

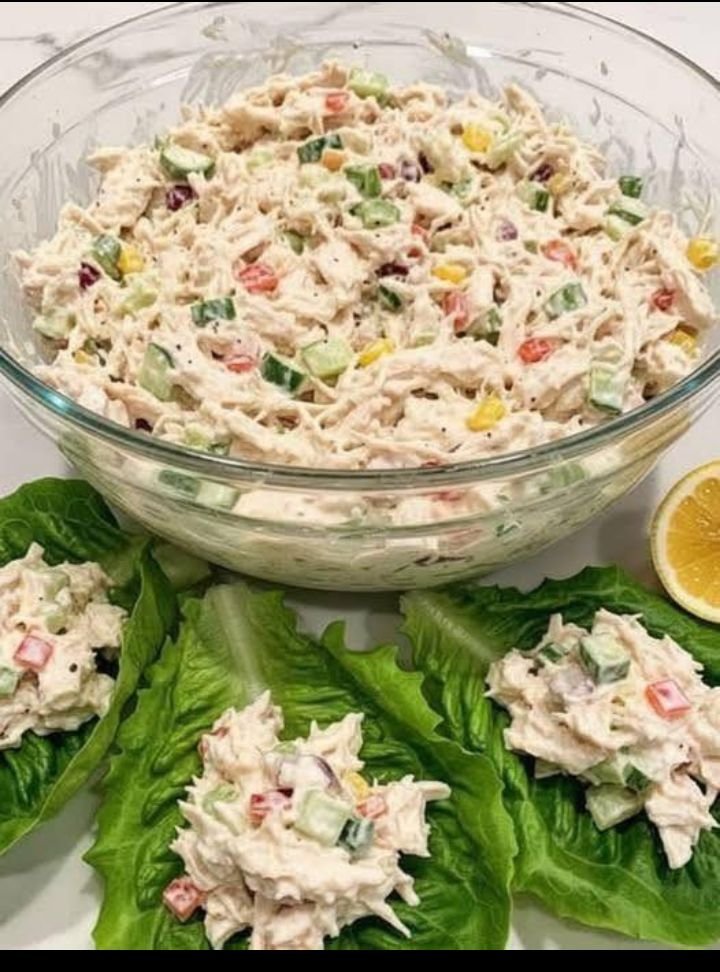
Creamy Chicken Lettuce Wraps, Savory, saucy chicken wrapped in crisp lettuce cups.

  • Servings: 2
  • Total Time: 10 minutes
  • Difficulty: Easy
  • Calories per Serving: 285 kcal
  • Macros: Protein: 38g / Net Carbs: 5g / Fat: 11g / Fiber: 1g

Stay Full and Energized with This Keto Lunch

Finding a lunch that actually keeps you in ketosis while satisfying your cravings for something crunchy and creamy can be a challenge. These Keto Chicken Lettuce Wraps are the ultimate solution for those busy afternoons when you need high-protein fuel without the carb-heavy slump. By swapping out traditional heavy mayo for Greek yogurt or rich cream cheese, you get a tangy, nutrient-dense filling that feels indulgent but stays completely within your macros.

This keto chicken recipe is designed for maximum efficiency. Whether you are using leftover rotisserie chicken or meal-prepped shredded breast, you can have a gourmet-level meal on the table in under ten minutes. It is the perfect balance of fresh vegetables and savory protein, making it a staple for anyone following a clean ketogenic lifestyle.

The beauty of this meal lies in its simplicity. It’s a no-cook, low-carb lunch option that focuses on whole-food ingredients to support fat-burning and steady energy levels. If you have been looking for a quick keto meal prep idea that doesn’t taste like “diet food,” this is the one you’ll want on repeat.


Look at the Recipe

  • Sensory Appeal: Cool, crisp lettuce shells provide a satisfying crunch that contrasts perfectly with the velvety, creamy chicken salad filling.
  • Flavor Highlight: A bright pop of lemon juice and fresh cucumber cuts through the richness, creating a zesty Mediterranean-inspired profile.
  • Key Keto Benefit: Exceptionally low in net carbs and high in lean protein, helping you maintain muscle mass while staying in a fat-burning state.

Ingredients Needed

The Chicken Base

  • 2 cups shredded chicken breast (cooked and chilled)
  • Butter lettuce leaves or romaine hearts (for wrapping)

The Creamy Binder

  • ½ cup plain Greek yogurt (or full-fat cream cheese for a higher fat-to-protein ratio)
  • 1 tsp fresh lemon juice

The Crunch & Flavor

  • ¼ cup finely chopped cucumber
  • ¼ cup diced bell pepper (any color)
  • A dash of garlic powder
  • Sea salt and cracked black pepper to taste

How to Make Our Keto Chicken Lettuce Wraps

1. Prepare Your Filling In a large mixing bowl, combine the shredded chicken, Greek yogurt (or softened cream cheese), chopped cucumber, and diced bell peppers. The cucumber adds a necessary hydration and crunch that makes this keto chicken salad stand out.

2. Season for Success Sprinkle in the garlic powder, salt, and pepper. Drizzle the lemon juice over the mixture. Use a sturdy spoon to fold the ingredients together until the chicken is thoroughly coated and the texture is creamy and well-combined.

3. Assemble the Wraps Lay your lettuce leaves flat on a clean surface. Spoon a generous amount of the chicken mixture into the center of each leaf.

4. Roll and Serve Gently roll the leaves up like mini wraps or tacos. If you are using butter lettuce, these will naturally form “cups” that are easy to pick up and eat immediately.

Storage & Serving Suggestions

  • Storing: Store the chicken salad mixture in an airtight container in the refrigerator for up to 3 days. For the best experience, keep the lettuce leaves separate until you are ready to eat to prevent wilting.
  • Reheating: This dish is intended to be served cold, making it ideal for office lunches or picnics where a microwave isn’t available.
  • Freezing: I do not recommend freezing this recipe, as the Greek yogurt and fresh vegetables will lose their texture upon thawing.
  • Serving Pairings: Pair these wraps with a handful of raw almonds or a side of sliced avocado to increase the healthy fat content for a more traditional keto macro split.

Tips & FAQs (SEO-Optimized)

Can I make this dairy-free? Yes! To make this a dairy-free keto recipe, substitute the Greek yogurt with a high-quality avocado oil mayonnaise or a dairy-free cashew cream.

What is the best lettuce for keto wraps? Butter lettuce (Bibb or Boston) is the most flexible and easiest to wrap. Romaine hearts offer the best crunch, while cabbage leaves can be used if you want a sturdier wrap for on-the-go eating.

How do I make the chicken more flavorful? If you have extra time, try poaching your chicken in a broth with herbs or using a rotisserie chicken for extra depth of flavor and a higher fat content.

Can I add more fats to this recipe? Absolutely. To boost the fat macros, mix in some diced avocado or add a tablespoon of MCT oil into the creamy base.

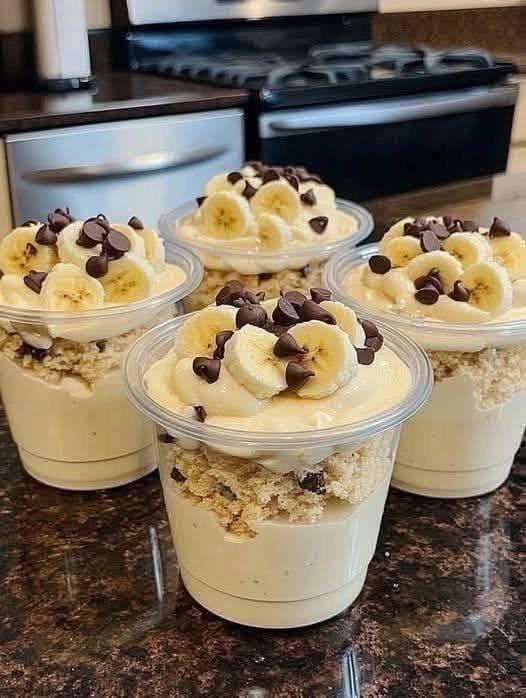
Low Point Banana Cream Protein Pudding

Servings: 2 Total Time: 2 hours 10 minutes (includes chilling) Difficulty: Easy Calories per Serving: 165 kcal Macros: Protein 15g / Net Carbs 4g / Fat 7g / Fiber 5g

A Guilt-Free Banana Pudding for Weight Watchers

One of the biggest challenges on a weight loss journey is satisfyng a craving for a decadent, creamy dessert without using up a whole day’s worth of points. This Banana Cream Protein Pudding delivers that classic, nostalgic flavor without the high sugar or heavy cream found in traditional recipes. By using banana extract, you get all the tropical aroma and sweetness you love while keeping the carb count exceptionally low.

This recipe is a game-changer for those following the WW program because it utilizes high-volume, low-point ingredients like unsweetened almond milk and chia seeds. The result is a thick, custard-like consistency that feels like a splurge but fits perfectly into a healthy lifestyle. It is designed to keep you full and satisfied, thanks to the protein boost and the fiber from the chia seeds.

Whether you need a quick afternoon pick-me-all or a late-night treat that won’t derail your progress, this pudding is the perfect solution. It is light, airy, and incredibly easy to whip up with just a few pantry staples. Best of all, it is completely meal-prep friendly, so you can always have a smart choice waiting for you in the fridge.

Look at the Recipe

  • Velvety Smooth Texture: The combination of protein powder and chia seeds creates a rich, spoonable pudding that rivals any boxed mix.
  • Intense Banana Flavor: The banana extract provides a bright, fruity punch that satisfies your sweet tooth instantly.
  • High-Protein Fuel: Packed with 15g of protein per serving, making it a functional dessert that supports muscle recovery and satiety.

Ingredients Needed

The Pudding Base

  • 2 cups unsweetened almond milk
  • 1 scoop vanilla protein powder (ensure it is low-carb or sugar-free)
  • 1 to 1.5 tsp banana extract (adjust to your flavor preference)
  • 2 tbsp black or white chia seeds
  • 1 tsp vanilla extract
  • 1-2 tbsp zero-calorie sweetener (such as monk fruit or erythritol)
  • A tiny pinch of sea salt

The Creamy Finish

  • 2 tbsp light whipped cream or fat-free half & half

How to Make Our Banana Cream Protein Pudding

Whisk together the unsweetened almond milk, protein powder, sweetener, banana extract, vanilla, and salt in a medium mixing bowl. Continue to stir until the protein powder is fully dissolved and the liquid is smooth.

Fold in the light whipped cream or fat-free half & half. This adds a layer of richness that makes the pudding feel much more indulgent than its point count suggests.

Stir in the chia seeds. Let the mixture sit at room temperature for about 5 minutes, then whisk a second time. This step is crucial to prevent the chia seeds from clumping at the bottom, ensuring an even set.

Chill the mixture in the refrigerator for at least 2 hours. For the best “pudding” consistency, leaving it overnight is ideal.

Portion the pudding into two individual cups or jars. Serve cold, topped with your favorite low-point garnishes.

Storage & Serving Suggestions

Storing: This pudding keeps beautifully in the refrigerator for up to 4 days. Store in glass mason jars with tight-fitting lids to maintain freshness.

Serving Pairings: For a more substantial dessert, top with a few slices of fresh strawberry or a sprinkle of toasted coconut. If you have extra points to spare, a crushed graham cracker on top adds a delightful crunch.

Reheating: This dish is intended to be served cold. If the pudding becomes too thick after sitting, simply stir in a splash of almond milk to loosen the texture.

🔄 Meal-Prep Optimization

  • Batch Cooking: This recipe scales perfectly. You can easily double or triple the ingredients to prep a whole week of snacks in under 10 minutes.
  • Individual Jars: Prep the pudding directly in small 8 oz mason jars. This makes them easy to grab on your way out the door for a work snack.
  • Scaling Note: When doubling the recipe, ensure you use a large enough whisk to fully aerate the mixture, which helps keep the pudding light.

Tips & FAQs

Can I use real bananas? While this recipe is designed to be a “zero-point-friendly” banana hack, you can certainly mash in half a banana if your plan allows. Be sure to account for the extra natural sugars and points.

What if I don’t like the texture of chia seeds? If you prefer a completely smooth pudding, simply pour the finished (and set) pudding into a high-speed blender and pulse for 30 seconds. This breaks down the seeds while keeping the thickness.

Which protein powder works best? A whey-casein blend usually results in a thicker, creamier pudding, but any high-quality vanilla protein powder you enjoy will work well here.
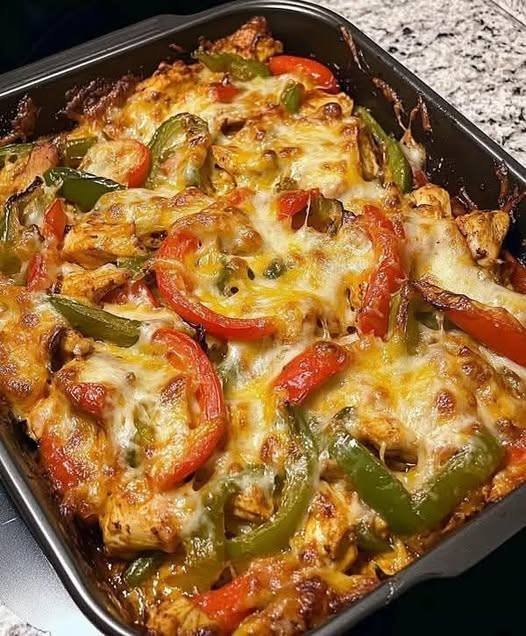
Easy Fajita Chicken Breasts Casserole

The  Fajita Chicken Breasts Casserole is a delightful twist on a classic Tex-Mex favorite, carefully crafted to be both flavorful and health-conscious. This wholesome dish features tender chicken breasts seasoned with a harmonious blend of cumin, chili powder, garlic, and paprika, offering a burst of vibrant flavors with every bite. The addition of colorful bell peppers and minced onions not only adds a pleasing visual appeal but also contributes a delightful crunch and sweetness to the dish. Topped with a generous sprinkling of reduced-fat mozzarella cheese, this casserole bakes to golden perfection, creating a satisfyingly gooey and cheesy layer over the succulent chicken and vegetables.

Garnished with freshly chopped cilantro or parsley for a final touch of brightness, this dish is as visually stunning as it is delicious. Whether served over cauliflower rice, steamed vegetables, or enjoyed on its own, this Fajita Chicken Breasts Casserole promises to be a comforting and nutritious meal option that’s perfect for any occasion. With its balanced flavors, customizable spice level, and suitability for meal prep, it’s a versatile recipe that’s sure to become a household favorite among those following a  plan or simply looking for a lighter take on a beloved classic.

Ingredients:

  • 3-4 small boneless, skinless chicken breasts (about 1 1/2 lbs/750g), or 2 large chicken breasts, sliced lengthwise
  • 2 bell peppers (1 red and 1 green), seeded and sliced into strips
  • 1 medium onion, minced
  • 1 teaspoon ground cumin
  • 1 1/2 teaspoons chili powder
  • 1 teaspoon garlic powder or minced garlic
  • 2 teaspoons paprika
  • Salt and freshly ground black pepper to taste
  • 1 tablespoon vegetable oil
  • 1 cup grated reduced-fat mozzarella cheese or your favorite reduced-fat cheese
  • Chopped fresh cilantro or parsley for garnish

Directions:

  1. Preheat your oven to 400°F (200°C) and lightly coat a baking dish with cooking spray.
  2. Season chicken breasts on both sides with cumin, chili powder, garlic, paprika, salt, and pepper. Reserve some seasoning for later use.
  3. Place the chicken breasts in the prepared baking dish and drizzle with oil. Top with peppers and onions, and sprinkle with the remaining fajita seasonings. Finish with grated reduced-fat mozzarella cheese.
  4. Bake the chicken fajita casserole for 20 to 30 minutes (depending on thickness) or until the chicken is cooked through and reaches an internal temperature of 165°F (74°C). You can broil the dish for 2 minutes at the end to crisp the top if desired.
  5. Serve immediately over cauliflower rice, steamed vegetables, zucchini noodles, or on its own.
  6. Garnish with chopped fresh cilantro or parsley before serving.

Points:

  • This recipe makes approximately 4 servings.
  • Points per serving (without accompaniments): Each serving is approximately 4-5  SmartPoints, depending on specific ingredients used.

Notes:

  • Adjust the spiciness according to your preference by increasing or decreasing the amount of chili powder and black pepper.
  • For a smoky flavor, you can substitute the paprika with smoked paprika.
  • This recipe is great for meal prep as it can be easily reheated for a quick and delicious lunch or dinner.

Anti-Inflammatory Italian Nonna Lemon Custard Cake

This Italian Nonna Lemon Custard Cake is a soft, lightly sweet dessert with a creamy custard center and delicate citrus aroma. Inspired by traditional Italian grandmother recipes, this anti-inflammatory version uses fresh lemon, olive oil, and minimal refined sugar to support digestion and reduce inflammation. Light, comforting, and naturally elegant, it’s perfect with tea or coffee.


Ingredients

Dry Ingredients

  • 1 cup all-purpose flour (or almond flour for gluten-friendly option)

  • ½ cup natural cane sugar or coconut sugar

  • 1 tsp baking powder

  • ¼ tsp sea salt

  • ¼ tsp turmeric powder (optional, anti-inflammatory boost)

Wet Ingredients

  • 3 large eggs, room temperature

  • ½ cup full-fat milk or almond milk

  • ⅓ cup extra virgin olive oil

  • Zest of 2 organic lemons

  • ¼ cup fresh lemon juice

  • 1 tsp pure vanilla extract


Instructions / Directions

  1. Preheat oven to 170°C (340°F). Grease an 8-inch round cake pan and line the base with parchment paper.

  2. In a bowl, whisk flour, baking powder, salt, and turmeric.

  3. In another bowl, beat eggs and sugar until light and creamy.

  4. Slowly add olive oil while whisking.

  5. Mix in milk, lemon juice, lemon zest, and vanilla extract.

  6. Gently fold dry ingredients into the wet mixture until smooth.

  7. Pour batter into prepared pan. The mixture will be thin.

  8. Bake for 45–50 minutes until the top is lightly golden and the center has a soft custard jiggle.

  9. Cool completely before slicing to allow custard to set.


Pro Tips (Diet & Health Related)

  • Use organic lemons for maximum antioxidant benefits.

  • Do not overbake; a soft center creates the custard texture.

  • Olive oil is key for heart-healthy fats and inflammation control.

  • For dairy-free, use almond or oat milk.

  • Chill for 1 hour for a firmer custard slice.


Nutrition (Per Slice – Approx.)

  • Calories: ~210 kcal

  • Fat: 11g

  • Saturated Fat: 2g

  • Carbohydrates: 24g

  • Protein: 5g

  • Sugar: 10g

  • Anti-Inflammatory Benefits: Vitamin C, polyphenols, healthy fats


Q & A

Q: Why is this cake anti-inflammatory?
Fresh lemon, olive oil, turmeric, and low sugar help reduce inflammation and support digestion.

Q: Can I make it gluten-free?
Yes. Replace flour with almond flour or gluten-free baking blend.

Q: How should I store it?
Refrigerate in an airtight container for up to 3 days.

Q: Is this cake overly sweet?
No. It’s lightly sweet with a fresh lemon balance, Italian-style.

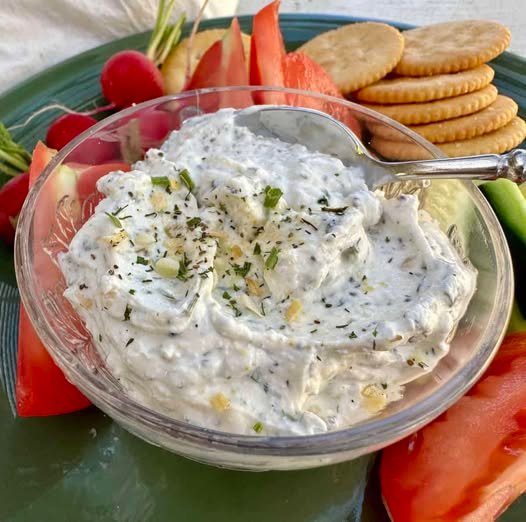
🌿 Creamy High-Protein Herb Dip

🌿 Creamy High-Protein Herb Dip

A thick, savory, and cooling dip that packs 12 g of protein per serving. Perfect for keto meal prep or as a healthy party appetizer.

  • Servings: 6

  • Total Time: 10 minutes

  • Difficulty: Easy

  • Diet: Keto, Low-Carb, High-Protein, WW-Friendly


📊 Nutrition Facts (Per Serving)

Calories Protein Net Carbs Fat Fiber
~95 12 g 3g 4g 1g

📝 Ingredients

The Base

  • 1 ½ cups plain nonfat Greek yogurt

  • ½ cup low-fat cottage cheese

  • 1 scoop unflavored or savory whey protein powder

Herbs & Seasoning

  • 2 tbsp fresh parsley, finely chopped1


  • 1 tbsp fresh dill, finely chopped

  • 1 tbsp fresh chives, minced

  • 1 clove garlic, grated or finely minced

  • 1 tsp lemon zest

  • 1 tbsp lemon juice

  • ½ tsp onion powder

  • ½ tsp salt (adjust to taste)

  • ¼ tsp black pepper

Optional Add-Ins

  • 1–2 tsp olive oil (for keto richness)

  • Pinch of red pepper flakes (for heat)


👩‍🍳 Detailed Instructions

  1. Create the Silky Base: Place the Greek yogurt, cottage cheese, and protein powder into a blender or food processor. Blend on high until the mixture is completely smooth and no cottage cheese curds remain.

  2. Incorporate Flavors: Pour the blended base into a medium mixing bowl. Add the chopped parsley, dill, chives, garlic, lemon zest, and lemon juice. Fold gently until the herbs are evenly distributed.

  3. Season: Stir in the onion powder, salt, and black pepper. Taste the dip—if you prefer more zing, add an extra splash of lemon juice.

  4. The “Bloom” Phase: Cover and refrigerate for at least 20–30 minutes. This allows the dried seasonings and fresh herbs to “bloom” (release their flavors) into the dairy base and helps the texture firm up.

  5. Serve: Garnish with a sprinkle of fresh herbs or a drizzle of olive oil.


💡 Storage & Tips

  • Fridge: Store in an airtight container for 3–4 days. Give it a quick stir before serving if any natural whey separation occurs.

  • Keto Adjustment: To increase the healthy fats for a strict keto diet, stir in 1 tablespoon of extra virgin olive oil or a tablespoon of softened cream cheese.

  • Dipping Ideas: This is excellent with cucumber slices, bell pepper strips, celery, or even as a sauce for grilled chicken or salmon.