Avocado Chicken Salad

Avocado Chicken Salad
Fresh, creamy, and perfect for small portions + protein goals!
Ingredients:
1 small ripe avocado (mashed for creaminess)
4 oz cooked chicken breast, finely shredded (or canned chicken for convenience)
½ cup diced cucumber (crunch + hydration)
½ cup cherry tomatoes, halved
1 tbsp plain Greek yogurt (extra protein, keeps it light)
Pinch of salt, pepper, garlic powder, and squeeze of lemon juice
Instructions:
In a small bowl, mash the avocado and mix with Greek yogurt until smooth.
Fold in shredded chicken, cucumber, and cherry tomatoes.
Season with salt, pepper, garlic powder, and lemon juice to taste.
Chill for 10 minutes (optional) for flavors to blend.
Packs ~28g protein, healthy fats, and fiber with way fewer carbs than chickpeas. Perfect for wraps, lettuce cups, or just a few spoonfuls as a mini meal.

Homemade Strawberry Vanilla Bean Ice Cream

Homemade Strawberry Vanilla Bean Ice Cream
Ingredients:
1 vanilla bean, split and seeds scraped
2 cups heavy cream
1 cup whole milk
3/4 cup granulated sugar
Pinch of salt
6 large egg yolks
1 teaspoon pure vanilla extract
1 cup fresh strawberries, hulled and diced
2 tablespoons sugar (for strawberries)
Directions:
Prepare the Strawberries:
Toss the diced strawberries with 2 tablespoons of sugar. Let them sit for about 30 minutes to macerate, which helps bring out their natural juices and sweetness.
Heat Milk and Cream Mixture:
In a saucepan over medium heat, combine the heavy cream, milk, half of the granulated sugar, salt, and the seeds from the vanilla bean (including the bean pod). Bring the mixture just to a boil, then remove from heat.
Temper the Egg Yolks:
In a separate bowl, whisk together the egg yolks and the remaining granulated sugar until smooth.
Gradually pour the hot milk mixture into the egg yolks, a little at a time, whisking constantly to prevent the eggs from scrambling.
Cook the Custard:
Return the mixture to the saucepan and cook over low heat, stirring constantly with a wooden spoon, until the custard thickens enough to coat the back of the spoon (about 170-175°F on a thermometer).
Chill the Custard:
Remove the custard from heat and strain through a fine-mesh sieve into a bowl. Stir in the vanilla extract. Cover and chill the custard thoroughly in the refrigerator, at least 4 hours or overnight.
Process in Ice Cream Maker:
Once chilled, remove the vanilla bean pod and churn the custard in an ice cream maker according to the manufacturer’s instructions.
During the last few minutes of churning, add the macerated strawberries.
Freeze:
Transfer the ice cream to an airtight container and freeze until firm, at least 2-4 hours, before serving.
Serve and Enjoy

Homemade Creamy Ice Cream Recipe – No Machine Required, Makes 2 Liters

Hello everyone! Welcome to our food blog, your favorite place to find delicious recipes. Here you will find desserts, snacks, breakfast, appetizers, fresh salads. Let’s get started!

Meal Prep: Creamy Ice Cream Recipe

Learn how to prepare easy desserts with step-by-step recipes inspired by the best online cooking schools. Whether you’re an aspiring chef or just love gourmet cooking at home, these professional recipe ideas are perfect for busy days and high-quality meals.

Recipe ingredients:

  • 1 packet of powdered drink mix (strawberry or any flavor you like) (25 g / 0.88 oz)
  • 1 can of sweetened condensed milk (395 g / 13.9 oz)
  • 3 tablespoons of powdered milk (approx. 30 g / 1 oz)
  • 1 liter of milk (1000 ml / 33.8 fl oz / 4 ¼ cups)
  • 4 tablespoons of sugar (approx. 50 g / 1.76 oz)

Instructions:

In a blender, combine the powdered milk, condensed milk, milk, sugar, and powdered drink mix. Blend for about 5 minutes until smooth and well mixed.

Pour the mixture into a bowl and place it in the freezer for 1 hour and 30 minutes.

Remove from the freezer and transfer the semi-frozen mixture into a stand mixer or bowl. Beat it on high speed for 3 minutes to make it extra creamy.

Pour the whipped mixture into a container with a lid and freeze for at least 7 hours until firm.

Serving Tip:

You can top it with fruits, syrup, chocolate chips, or granola for added texture and flavor.

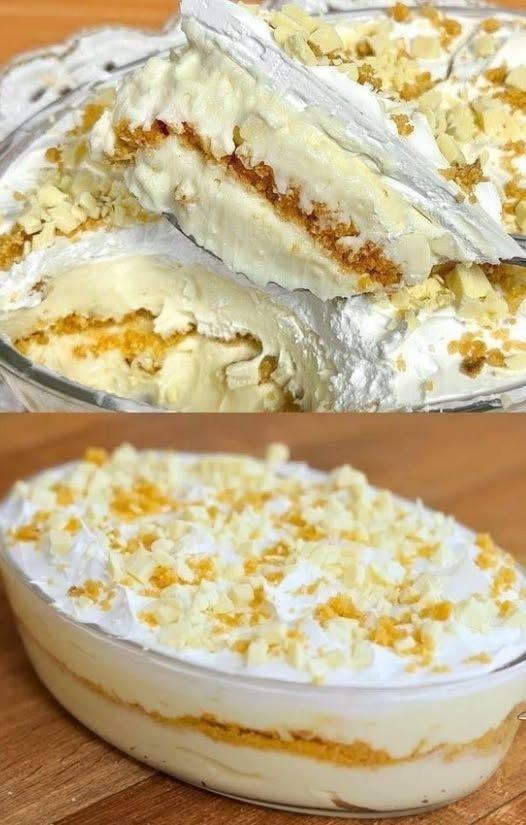
Creamy Pie with a Special 4-Milk Cream: Wonderful Recipe-I Always Make It for Dessert

Hi, everyone! Welcome back to our cooking blog, where we share delicious recipes every week. Today, we’re preparing a Creamy Pie. So, grab your pen and paper to jot down the ingredients and let’s dive into this easy, step-by-step recipe that’s perfect for breakfast, appetizers or even to accompany fresh salads!

How to Make Creamy Pie with a Special 4-Milk Cream

The Creamy Pie is an irresistible dessert with a smooth texture and rich flavor—perfect for ending a meal in style. You don’t need cooking classes or costly meal delivery services to prepare something delicious at home. With a bit of planning and our detailed meal prep guide, you can create amazing dishes with confidence and ease.

Recipe Ingredients:

For the Four-Milk Cream:

  • 1 2/3 cups milk (13.5 fl oz / 400ml)
  • 1 carton of table cream or heavy cream (7 oz / 200g)
  • 1 can sweetened condensed milk (14 oz / 395g)
  • 1 small bottle of coconut milk (6.8 fl oz / 200ml)
  • 4 tablespoons powdered milk (about 1 oz / 30g)
  • 3 tablespoons cornstarch (about 1 oz / 25g)

For the Biscuit Crumble:

  • 2 tablespoons melted butter (about 1 oz / 30g)
  • 4.6 oz milk biscuits or cookies (130g)

For Assembly:

  • Whipped cream, beaten to stiff peaks, to taste
  • 3.5 oz chopped white chocolate (100g)

Instructions:

Four Milk Cream:
First, in a saucepan, add the cornstarch, powdered milk, and sweetened condensed milk. Stir well until everything is fully dissolved.
Next, add the coconut milk, heavy cream, and regular milk. Mix again until smooth. Then, place the mixture over low heat, stirring constantly until it starts to boil and thickens.
After that, let it cook for another 2 minutes to ensure it’s well done. Finally, remove from heat and allow it to cool to room temperature before using.

Cookie Crumb Mixture:
To start, place the cookies in a food processor and blend until you get a fine crumb texture.
Then, add the melted butter and blend a little more until you have a moist crumb mixture.

Assembly:
In a glass baking dish, spread half of the cream evenly. After that, make a layer with the cookie crumbs and then a layer of chopped white chocolate.
Next, add the remaining cream on top, spreading it gently. Lastly, top it with whipped cream beaten to stiff peaks and sprinkle a bit more of the cookie crumbs on top to decorate.
To finish, refrigerate for at least 3 hours. Serve this creamy and beautiful Belgian-style dessert well chilled!

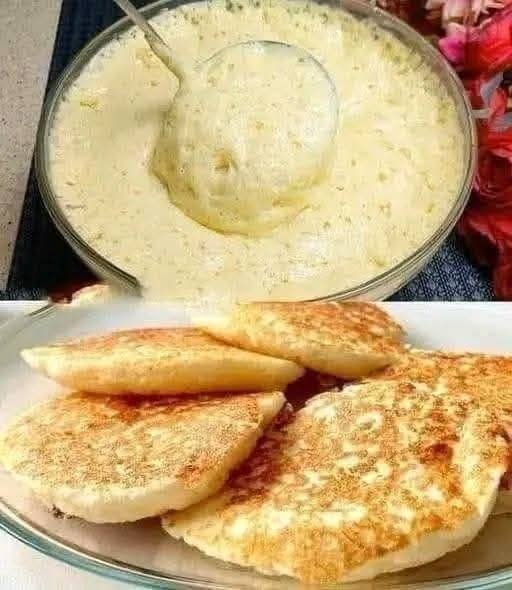
Fluffy Cottage Cheese Pancakes (Soft & Protein-Packed)

Description:
These pancakes are soft, fluffy, and naturally rich in protein thanks to cottage cheese and eggs. They’re slightly golden on the outside and tender inside—perfect for breakfast or a snack.


Ingredients (Makes ~6 pancakes)

  • 1 cup cottage cheese
  • 2 large eggs
  • ½ cup all-purpose flour or oats (for a healthier version, use rolled oats)
  • ½ teaspoon baking powder
  • ¼ teaspoon salt
  • ¼ teaspoon cinnamon (optional)
  • 1–2 tablespoons sugar or honey (optional, for sweetness)
  • 1 teaspoon vanilla extract (optional)
  • Butter or coconut oil, for cooking

Instructions

  1. Prepare the Batter:
    • In a large bowl, mix together cottage cheese and eggs until smooth.
    • Add flour or oats, baking powder, salt, cinnamon, and sugar/honey if using. Stir until combined. The batter should be thick but scoopable.
    • Optional: Add vanilla extract for extra flavor.
  2. Heat the Pan:
    • Heat a non-stick skillet or frying pan over medium-low heat.
    • Add a small amount of butter or coconut oil to grease the pan.
  3. Cook the Pancakes:
    • Scoop 3–4 tablespoons of batter per pancake into the skillet.
    • Spread slightly to form a round shape.
    • Cook for 3–4 minutes until the bottom is golden brown.
    • Flip carefully and cook another 3–4 minutes until cooked through.
    • Reduce heat if they brown too quickly before the inside cooks.
  4. Serve:
    • Serve warm with honey, maple syrup, fresh fruit, or yogurt.
    • Store leftovers in an airtight container in the fridge for up to 3 days.

💡 Tips:

  • For extra fluffiness, blend the cottage cheese slightly before mixing with the other ingredients.
  • You can also fold in mashed banana for natural sweetness and extra moisture.
  • These pancakes can be reheated in a skillet or microwave.

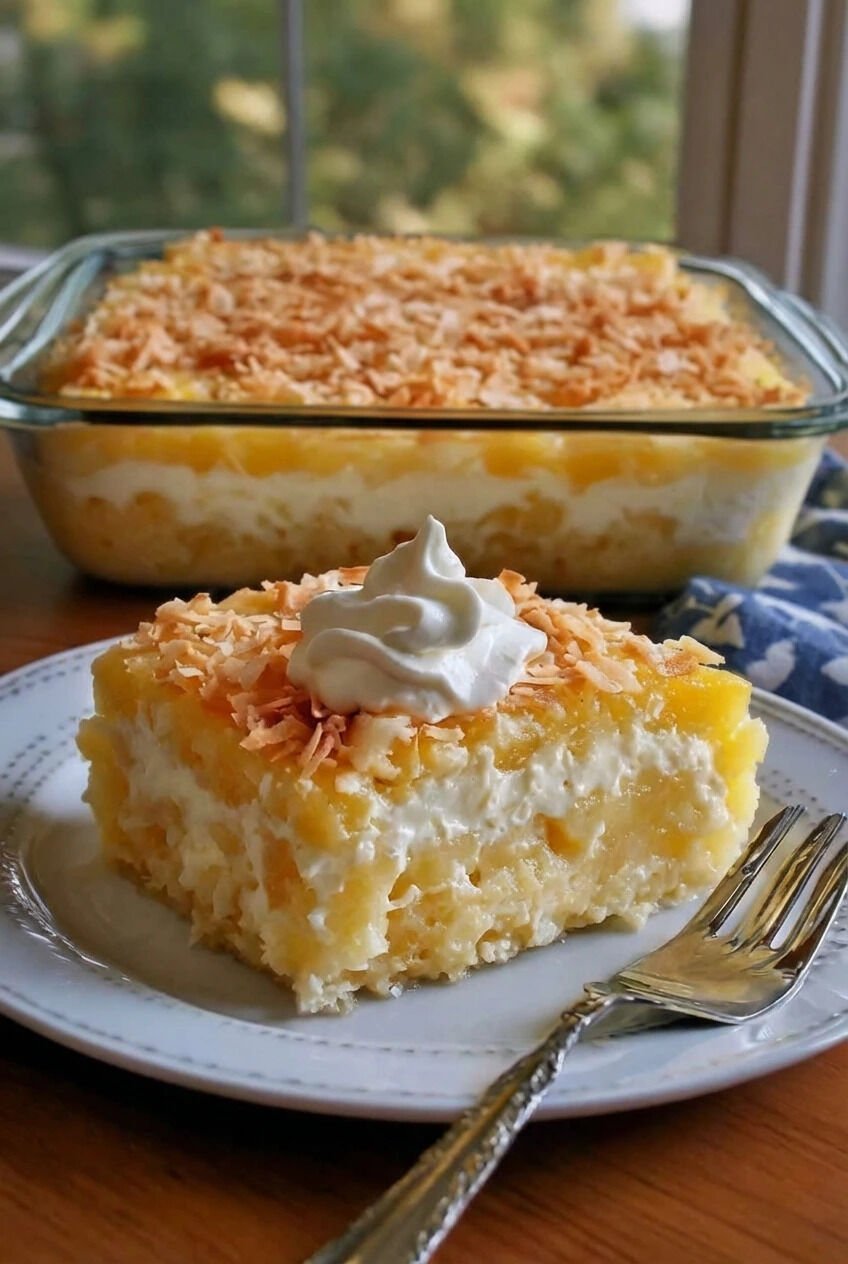
Pineapple Coconut Dream Cake

Pineapple Coconut Dream Cake

Ingredients

For the Cake

  • 2 cups all-purpose flour
  • 1 ½ teaspoons baking powder
  • ½ teaspoon baking soda
  • ½ teaspoon salt
  • ¾ cup granulated sugar
  • ½ cup unsalted butter softened
  • 2 large eggs room temperature
  • 1 cup crushed pineapple well drained
  • ¾ cup coconut milk
  • 1 teaspoon vanilla extract
  • ½ cup shredded coconut unsweetened or sweetened

For the Coconut Cream Topping

  • 1 cup heavy whipping cream cold
  • ½ cup cream cheese softened
  • ⅓ cup powdered sugar
  • ½ teaspoon vanilla extract
  • ½ cup toasted shredded coconut for garnish

Instructions

Prepare the Cake

  • Preheat your oven to 350°F (180°C). Grease and lightly flour a 9-inch round or square cake pan.
  • In a medium bowl, whisk together the flour, baking powder, baking soda, and salt.
  • In a separate large bowl, beat the butter and sugar until light and fluffy. Add the eggs one at a time, mixing well after each.
  • Stir in the vanilla extract, coconut milk, and crushed pineapple. Gradually add the dry ingredients and mix until just combined. Fold in the shredded coconut.
  • Pour the batter into the prepared pan and smooth the top.

Bake

  • Bake for 35–40 minutes, or until a toothpick inserted in the center comes out clean.
  • Remove from the oven and let the cake cool completely.

Make the Topping

  • In a bowl, beat the cream cheese until smooth. Add powdered sugar and vanilla, mixing until creamy.
  • In another bowl, whip the cold heavy cream until soft peaks form. Gently fold the whipped cream into the cream cheese mixture.

Assemble

  • Spread the coconut cream topping evenly over the cooled cake. Sprinkle with toasted coconut for extra flavor and texture.

Chill & Serve

  • Refrigerate for at least 30 minutes before slicing. Serve chilled or slightly cool for the best taste.