Tropical Mango Coconut Smoothie

🥭 Tropical Mango Coconut Smoothie

Prep time: 5 minutes | Servings: 2 smoothies

Ingredients

  • 2 Cups Frozen mango chunks (this makes the smoothie thick and cold)

  • 1 Cup Coconut milk (canned for richness, or carton for a lighter version)

  • 1/2 Cup Greek yogurt (adds protein and extra creaminess)

  • 1 Tablespoon Honey or maple syrup (optional, depending on the sweetness of the mangoes)

  • 1 Teaspoon Lime juice (to brighten the flavor)

  • Toppings: Shredded coconut and fresh mango slices for the rim.


Instructions

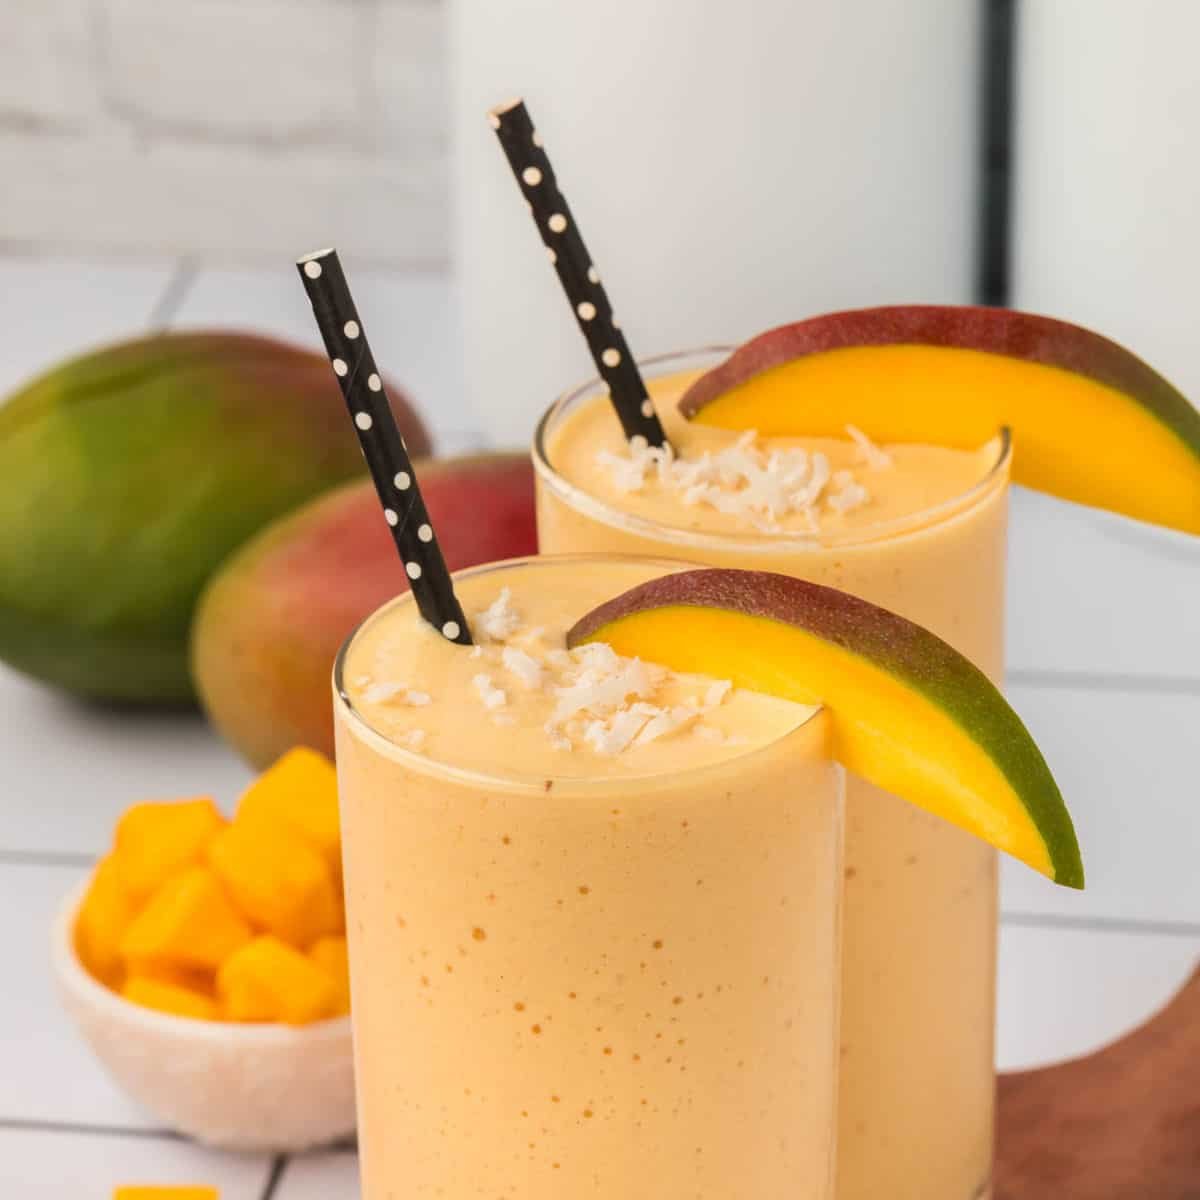
  1. Prepare the Fruit: If you are using fresh mango instead of frozen, peel and dice the fruit, then freeze it for at least 2 hours to achieve that thick, milkshake-like texture seen in the photo.

  2. Combine: Add the frozen mango, coconut milk, yogurt, lime juice, and sweetener into a high-speed blender.

  3. Blend: Start on a low speed and gradually increase to high. Blend for 45–60 seconds until the mixture is completely smooth and there are no frozen lumps.

  4. Adjust:

    • If it’s too thick: Add a splash more coconut milk or water.

    • If it’s too thin: Add a few more frozen mango chunks or a handful of ice.

  5. Serve: Pour into tall glasses. Garnish with a sprinkle of shredded coconut on top and a fresh mango wedge on the rim as shown in your image.


✨ Tips for Success

  • The Mango: Use “Kent” or “Ataulfo” mangoes if buying fresh; they are less fibrous and much smoother when blended.

  • Make it Vegan: Simply swap the Greek yogurt for a coconut-based yogurt or add half an avocado for that same creamy texture.

  • Layering: For a fancy look, you can pour a little extra coconut milk down the inside of the glass before pouring the smoothie to create white swirls.
🥛 The Ultimate Oreo Milkshake

🥛 The Ultimate Oreo Milkshake

Prep time: 5 minutes | Servings: 1 large or 2 small shakes

Ingredients

  • 4-5 Large Scoops of premium Vanilla bean ice cream (about 2 cups)

  • 1/2 Cup Whole milk (use less for a thicker shake)

  • 6-8 Oreo Cookies (plus extra for topping)

  • 1/2 Teaspoon Vanilla extract (optional, for extra depth)

  • Toppings: Whipped cream, crushed Oreo crumbs, and one whole cookie for the rim.


Instructions

  1. Chill Your Glass: For the best experience, place your serving glasses in the freezer for 10 minutes before you start. This keeps the shake from melting too quickly.

  2. Blend the Base: Add the vanilla ice cream, milk, and vanilla extract into your blender. Blend on high for about 15–20 seconds until the mixture is smooth and creamy.

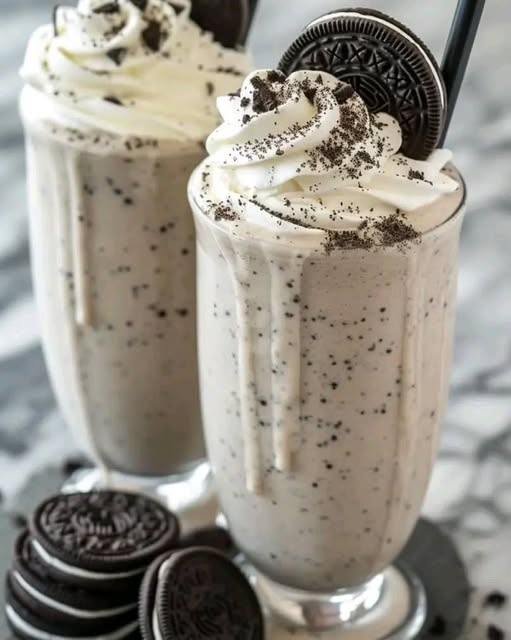
  3. Add the Cookies: Drop in the Oreo cookies. Pro-Tip: Pulse the blender 4–6 times rather than blending continuously. This leaves delicious “cookie chunks” throughout the shake instead of turning it into a grey liquid.

  4. Check Consistency: * Too thick? Add a splash more milk.

    • Too thin? Add another scoop of ice cream.

  5. Assemble: Pour into your chilled glass. Top with a generous swirl of whipped cream, a sprinkle of cookie dust, and a whole Oreo tucked into the side.


đź’ˇ Tips for the Best Shake

  • Don’t use ice: Adding ice cubes will water down the flavor. Stick to ice cream and cold milk for that rich, professional texture.

  • Softened Ice Cream: Let your ice cream sit on the counter for 2–3 minutes before scooping. It blends much smoother without needing as much milk.

  • Double Stuff: If you love the filling, use “Double Stuf” Oreos for an even creamier, sweeter result.

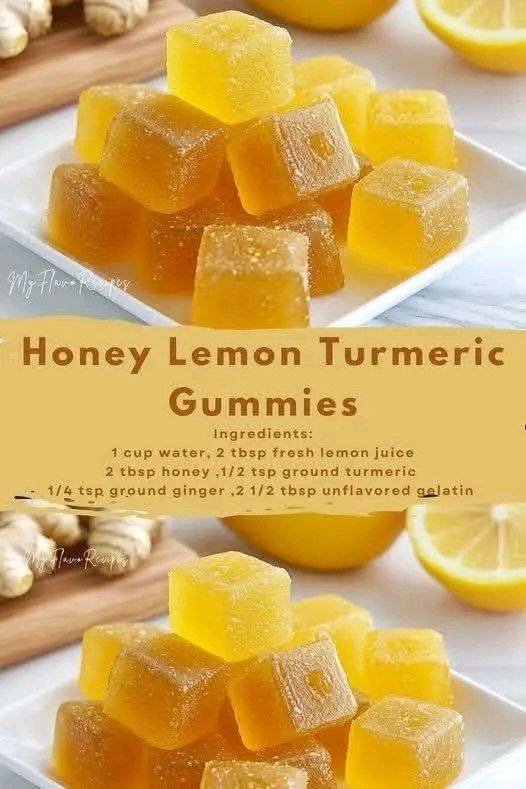
Honey Lemon Turmeric Gummies

Honey Lemon Turmeric Gummies

These bright golden gummies are a soothing, immunity-supporting treat made with simple ingredients. Packed with turmeric, lemon, and honey, they offer gentle digestive support, natural anti-inflammatory benefits, and a comforting citrus sweetness. Perfect for kids and adults, they’re easy to make and store beautifully in the fridge.

Ingredients (Makes 30–40 Gummies)

  • 1 cup water
  • 1 cup fresh orange juice or lemon water (optional for more citrus flavor)
  • 2–3 tbsp fresh lemon juice
  • 2 tbsp honey (add 1 extra tbsp if you prefer sweeter gummies)
  • 1 tbsp ground turmeric
  • ½ tsp ground ginger (optional but boosts warmth & digestion)
  • â…› tsp black pepper (helps your body absorb turmeric)
  • 3 tbsp gelatin (grass-fed recommended)
  • ½ tsp vanilla extract (optional, for a smooth flavor)

Instructions

1. Warm the Base

In a small saucepan, combine:

  • Water
  • Lemon juice
  • Optional orange juice
  • Turmeric
  • Ginger
  • Black pepper

Heat on low only, stirring gently. Warm the mixture for 2–3 minutes—avoid boiling because high heat reduces the natural nutrients in lemon and turmeric.

2. Add Honey

Remove the pot from heat and wait 1 minute so the mixture is warm but not hot.
Whisk in the honey until fully dissolved. Adding honey at a cooler temperature keeps its natural enzymes and antioxidants intact.

3. Bloom the Gelatin

Slowly sprinkle the gelatin over the warm liquid while whisking continuously.
Let it rest for 1 minute to “bloom,” then whisk again until smooth and fully melted. This step is key to getting firm, springy gummies without graininess.

See also  Apple Oat Pancakes Recipe

4. Pour Into Molds

Carefully pour the mixture into silicone molds (bears, hearts, or simple squares) or into a shallow glass dish.

5. Chill

Refrigerate for 2 hours or until fully set.

6. Unmold

Pop gummies out of the molds, or if using a dish, slice into small cubes.

Storage

Store gummies in an airtight container in the refrigerator for up to 10 days.
They can also be frozen and thaw instantly in seconds.

Benefits (Natural & Safe)

  • Turmeric + pepper → increased absorption & anti-inflammatory properties
  • Lemon → vitamin C & digestive support
  • Honey → soothing, antibacterial sweetness
  • Gelatin → gut-friendly, helps hair/skin/nails

Zucchini Patties

Ingredients
2 medium zucchinis, shredded (about 3 cups)
1/2 cup breadcrumbs (you can use panko for extra crunch)
1/4 cup grated Parmesan cheese (optional for extra flavor)
1/4 cup shredded mozzarella cheese (optional)
1/4 cup fresh parsley, finely chopped (or use dried parsley)
1/4 teaspoon garlic powder
1/2 teaspoon onion powder
1/2 teaspoon dried oregano (optional)
1/2 teaspoon salt (or to taste)
1/4 teaspoon black pepper (or to taste)
1 large egg
2 tablespoons olive oil (for frying)
Instructions
Prepare the Zucchini
Shred the Zucchini
Start by washing and trimming the ends of the zucchinis. Using a box grater or food processor, shred the zucchini into fine strips. You should have around 3 cups of shredded zucchini.
Remove Excess Moisture
Zucchini has a high water content, so it’s essential to remove excess moisture before making the patties. Place the shredded zucchini in a clean kitchen towel or cheesecloth, and gently squeeze or press out the liquid. You can also place the shredded zucchini in a fine-mesh strainer and press it with the back of a spoon. Removing the water helps the patties hold together better and become crispy when frying. Make the Patty Mixture
Combine Ingredients
In a large mixing bowl, combine the drained zucchini, breadcrumbs, Parmesan cheese, mozzarella cheese, fresh parsley, garlic powder, onion powder, oregano, salt, and black pepper.
Add the Egg
Crack the egg into the mixture and stir everything together with a spoon or fork until the ingredients are well combined and the mixture holds together. The egg helps bind the ingredients, making it easier to form patties.
Form the Patties
Shape the Patties
Using your hands, scoop a small portion of the mixture and shape it into a small patty, about 2 to 3 inches in diameter. Repeat with the remaining mixture, making around 8-10 patties, depending on how large you want them. If the mixture feels too wet, add a little extra breadcrumbs to help bind the mixture.
Cook the Zucchini Patties
Heat the Pan
Heat 2 tablespoons of olive oil in a large non-stick skillet or frying pan over medium heat. Once the oil is hot, it’s time to start frying the patties.
Fry the Patties
Carefully place the patties in the hot oil, cooking them in batches if needed to avoid overcrowding the pan. Fry the patties for 3-4 minutes on each side or until they are golden brown and crispy. Use a spatula to gently flip them to ensure even cooking.
Drain Excess Oil
Once the patties are cooked, transfer them to a plate lined with paper towels to absorb any excess oil.
Serve
Serve the Zucchini Patties hot, either on their own with a dipping sauce or as a side dish. They’re great with a simple yogurt dip, garlic aioli, or even a drizzle of sour cream. You can also use them as a filling for sandwiches or wraps, or serve them alongside a salad for a lighter meal.

Air Fryer Garlic Toast Pizza-Low Carb

Quick Description:
Indulge in cheesy, crispy mini pizzas without the carb overload! This low-carb, high-protein version of Air Fryer Garlic Toast Pizza is ready in just 10 minutes—perfect for a quick snack or dinner.

Servings & Timing:

  • Prep Time: 5 minutes
  • Cook Time: 5 minutes
  • Total Time: 10 minutes
  • Servings: 8
  • Course: Air Fryer Main Dish
  • Cuisine: American

Dietary Badges: Low-Carb, Kid-Friendly, Quick & Easy

Ingredients

  • 8 slices Low-Carb Garlic Bread (or low-carb/high-protein bread of choice)
  • ½ cup Sugar-Free Pizza Sauce (tomato puree with herbs works too)
  • ½ cup Turkey Pepperoni or Lean Chicken Pepperoni
  • 1 ½ cups Shredded Part-Skim Mozzarella Cheese
  • Optional: Chopped veggies like bell peppers, mushrooms, or spinach

Instructions

Step 1: Prepare the Base

  1. Place the low-carb garlic bread slices in a single layer in the air fryer basket.

Step 2: Add the Sauce

  1. Spread pizza sauce evenly over each slice, leaving a small crust edge.

Step 3: Layer the Toppings

  1. Add turkey or chicken pepperoni slices.
  2. Sprinkle shredded mozzarella generously on top.
  3. Optional: Add low-carb veggies for extra fiber and flavor.

Step 4: Air Fry

  1. Cook at 360°F (182°C) for 5–6 minutes, until the cheese is melted and bubbly.

Step 5: Serve

  1. Remove from the air fryer and serve hot. Enjoy immediately!

Ingredient Notes & Substitutions

  • Low-Carb Bread: Brands like Sola, ThinSlim, or homemade almond/coconut flour bread work best.
  • Turkey/Chicken Pepperoni: Lower in fat and carbs than regular pepperoni while adding protein.
  • Cheese: Part-skim mozzarella boosts protein and reduces fat.
  • Pizza Sauce: Look for no-added-sugar versions or blend tomato paste with spices.

Recipe Variations & Serving Suggestions

  • Extra Protein: Add grilled chicken, cooked turkey sausage, or a fried egg on top.
  • Veggie Boost: Use spinach, zucchini, mushrooms, or bell peppers.
  • Spicy Kick: Sprinkle crushed red pepper flakes or paprika.
  • Party Style: Cut into small squares for appetizers.
  • Serving Tip: Pair with a green salad for a balanced low-carb meal.

Storage & Make-Ahead Tips

  • Storage: Store leftovers in an airtight container in the fridge for up to 2 days.
  • Reheating: Air fry or microwave for 1–2 minutes to melt cheese again.
  • Make-Ahead: Assemble toppings on low-carb bread slices in advance and refrigerate until cooking.

Nutrition (Approx. Per Serving, 1 slice)

  • Calories: 110–130 kcal
  • Carbs: 5–6 g
  • Protein: 9–10 g
  • Fat: 5–6 g

FAQs

Q: Can I use regular garlic bread?

  • Yes, but carbs will increase. Low-carb bread is preferred for this version.

Q: Can I make it vegetarian?

  • Swap pepperoni with mushrooms, olives, or grilled veggies.

 Can I add more protein?

  • Absolutely! Add grilled chicken, cooked turkey sausage, or extra cheese.

Personal Note

This slightly low-carb, high-protein Air Fryer Garlic Toast Pizza became my go-to for fast weeknight dinners. It’s cheesy, satisfying, and guilt-free enough to enjoy without breaking your macros. Bonus: cooking takes under 10 minutes and cleanup is minimal!

Give it a try and let me know your favorite toppings in the comments!

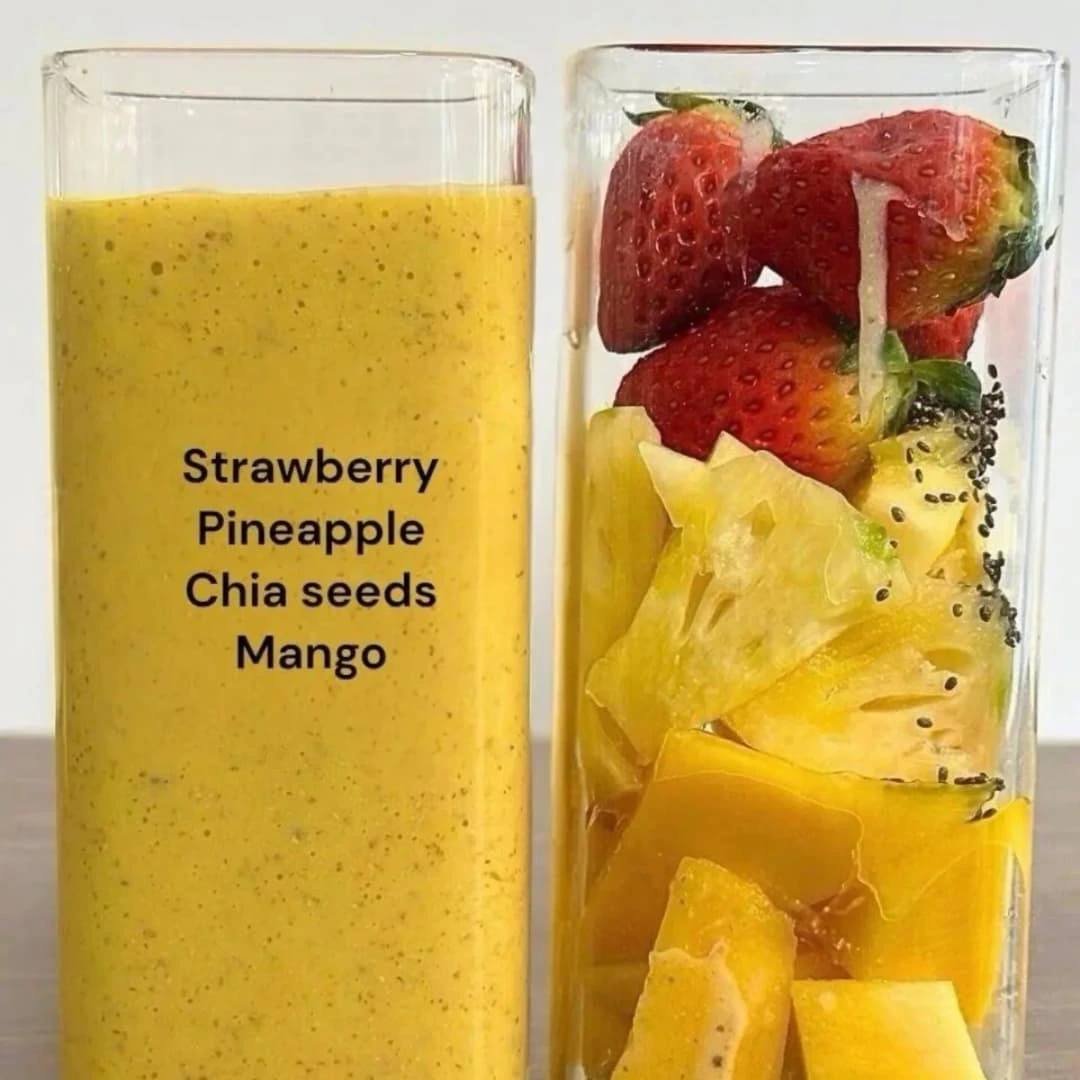
Strawberry Pineapple Mango Smoothie

Strawberry Pineapple Mango Smoothie

Ingredients

  • Strawberry: 4–5 fresh or frozen berries.

  • Pineapple: 1/2 cup fresh or frozen chunks.

  • Mango: 1/2 cup fresh or frozen chunks.

  • Chia Seeds: 1 tablespoon.

  • Liquid Base: 1 cup of your choice (Water, Coconut Water, or Almond Milk work best for this flavor profile).

  • Optional: A squeeze of lime or a teaspoon of honey if you prefer it extra sweet.


Instructions

  1. Prep the Fruit: Wash the strawberries and remove the green stems. If using fresh mango and pineapple, peel and dice them into cubes.

  2. Combine: Add the strawberries, pineapple, mango, and chia seeds into your blender.

  3. Add Liquid: Pour in your chosen liquid base. Using frozen fruit will result in a thicker, colder smoothie; if using fresh fruit, you may want to add 1/2 cup of ice.

  4. Blend: Start on a low speed and gradually increase to high. Blend for about 45–60 seconds until the chia seeds are well incorporated and the mixture is completely smooth.

  5. Serve: Pour into a glass and enjoy immediately.


Why this combination works:

  • Mango & Pineapple: Provide a creamy texture and a burst of tropical Vitamin C.

  • Strawberries: Add a light tartness and antioxidants.

  • Chia Seeds: These are “powerhouse” seeds that add healthy Omega-3 fatty acids and help keep you feeling full longer.