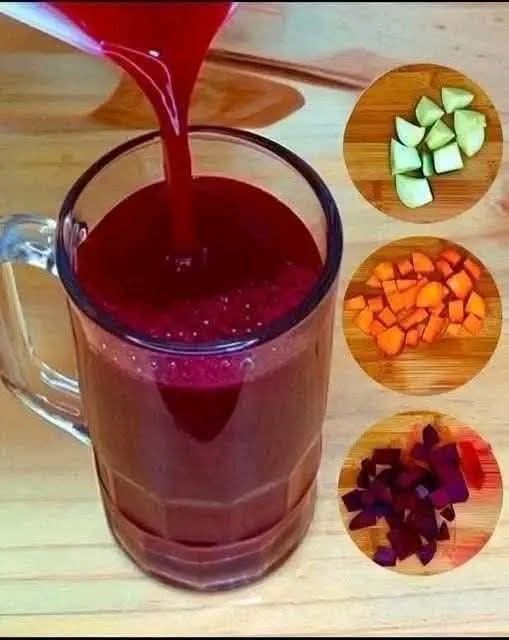
ABC Detox Juice Recipe

ABC Detox Juice Recipe

Ingredients

  • 1 Medium Apple: (Green apples add tartness; red apples make it sweeter).

  • 1 Large Carrot: Provides a natural sweetness and vitamin A.

  • 1/2 Medium Beetroot: This gives the drink its deep ruby color.

  • Optional Add-ins: * 1/2 inch of fresh Ginger (for a spicy kick and digestion).

    • A squeeze of Lemon juice (to brighten the flavor).

    • A splash of water (if using a blender).

Instructions

1. Prepare the Ingredients Wash all the produce thoroughly. You don’t necessarily need to peel the apple or carrot if they are organic, but you should peel the beetroot as the skin can be quite earthy. Chop everything into small cubes.

2. Choose Your Method

  • If using a Juicer: Simply feed the apple, carrot, beetroot, and ginger through the machine. The juice will separate from the pulp automatically.

  • If using a Blender: Place the chopped pieces into the blender with about 1/2 cup of water. Blend on high until completely smooth.

3. Strain (Optional) If you used a blender and prefer a smooth juice, pour the mixture through a fine-mesh strainer or a nut milk bag into a glass. If you like the extra fiber, you can drink it as a thick smoothie.

4. Season and Serve Stir in a squeeze of fresh lemon juice. It is best enjoyed fresh, ideally on an empty stomach in the morning to maximize nutrient absorption.


Quick Tips

  • Chill it: It tastes much better cold! You can chill the vegetables in the fridge before juicing or add a few ice cubes.

  • The Ratio: Most people prefer a 1:1:1 ratio, but if you find the beetroot taste too strong, start with a smaller piece and add more carrots.


Loaded Baked Potato Soup

Loaded Baked Potato Soup

Ingredients

  • Potatoes: 4 large Russet potatoes (peeled and cubed into 1-inch pieces).

  • Bacon: 6-8 slices, chopped.

  • Aromatics: 1 small yellow onion (diced) and 3 cloves garlic (minced).

  • Base: 1/4 cup all-purpose flour and 4 cups chicken or vegetable broth.

  • Dairy: 2 cups whole milk (or half-and-half for extra richness) and 1/2 cup sour cream.

  • Seasoning: Salt and black pepper to taste.

  • Toppings (as seen in the photo): * Shredded sharp cheddar cheese.

    • Crispy bacon bits.

    • Freshly sliced chives or green onions.

    • An extra dollop of sour cream.


Instructions

  1. Crisp the Bacon: In a large pot or Dutch oven, cook the chopped bacon over medium heat until crispy. Use a slotted spoon to remove the bacon and set it aside on a paper towel, but keep the bacon drippings in the pot.

  2. Sauté Aromatics: Add the diced onion to the bacon fat and cook until translucent (about 5 minutes). Stir in the minced garlic and cook for 1 more minute until fragrant.

  3. Create the Roux: Sprinkle the flour over the onions and garlic. Whisk constantly for 1–2 minutes to cook out the raw flour taste (it should look like a light paste).

  4. Simmer: Slowly pour in the broth and milk while whisking to prevent lumps. Add the cubed potatoes. Bring to a gentle boil, then reduce heat and simmer for 15–20 minutes, or until the potatoes are fork-tender.

  5. Thicken & Cream: * For a chunky soup (like the photo): Leave as is.

    • For a creamier texture: Use a potato masher to crush some of the potatoes directly in the pot.

    • Stir in the sour cream and half of your shredded cheese until melted. Season with salt and pepper.

  6. Serve: Ladle into bowls. Top generously with the reserved bacon, more cheddar cheese, chives, and a swirl of sour cream.


Tips for Success

  • The Potatoes: Russets are best for this recipe because their high starch content helps thicken the soup naturally.

  • Avoid Curdling: When adding the sour cream, make sure the soup is at a low simmer, not a rolling boil, to keep the texture smooth.

Baked Cheesy Garlic Chicken Wraps

These Baked Cheesy Garlic Chicken Wraps are crispy on the outside and filled with a gooey, savory center. Using pre-cooked chicken makes this a quick 20-minute meal.

Ingredients

For the Filling:

  • 2 cups Cooked chicken, diced or shredded (rotisserie chicken works great).

  • 1 cup Shredded sharp cheddar cheese.

  • ½ cup Shredded mozzarella cheese.

  • 1-2 cloves Fresh garlic, finely minced.

  • ½ tsp Onion powder and ½ tsp Paprika.

  • 2 tbsp Chopped fresh parsley (plus extra for garnish).

  • ¼ cup Cream cheese (softened) or ½ cup creamy garlic sauce.

For the Wraps & Coating:

  • 4 large Flour tortillas.

  • 2 tbsp Butter, melted.

  • ½ tsp Garlic powder and a pinch of salt.


Instructions

  1. Prepare the Filling: In a large bowl, mix the cooked chicken, shredded cheeses, minced garlic, onion powder, paprika, parsley, and cream cheese (or garlic sauce) until well combined.

  2. Assemble the Wraps: Lay a tortilla flat. Spoon a generous portion of the chicken mixture onto the lower third of the tortilla.

  3. Fold and Roll: Fold the sides of the tortilla inward over the filling, then roll tightly from the bottom to create a sealed wrap.

  4. Add the Garlic Butter: Mix the melted butter with garlic powder and a little extra parsley. Brush this mixture generously over the outside of each wrap.

  5. Bake (or Pan-Fry): * To Bake: Place wraps seam-side down on a parchment-lined baking sheet. Bake at 400°F (200°C) for 10–12 minutes until golden and the cheese is melted.

    • To Pan-Fry (for extra crisp): Heat a non-stick skillet over medium heat. Place wraps seam-side down and cook for 2–4 minutes per side until crispy.

  6. Serve: Slice the wraps diagonally and garnish with fresh parsley.


Pro Tips

  • Melty Success: For the best results, shred your own cheese from a block; pre-shredded cheese often has coatings that prevent it from melting smoothly.

  • Heat it Through: If pan-frying, use a lid to cover the pan for the first few minutes; this traps steam to ensure the cheese in the center is fully melted before the outside burns.

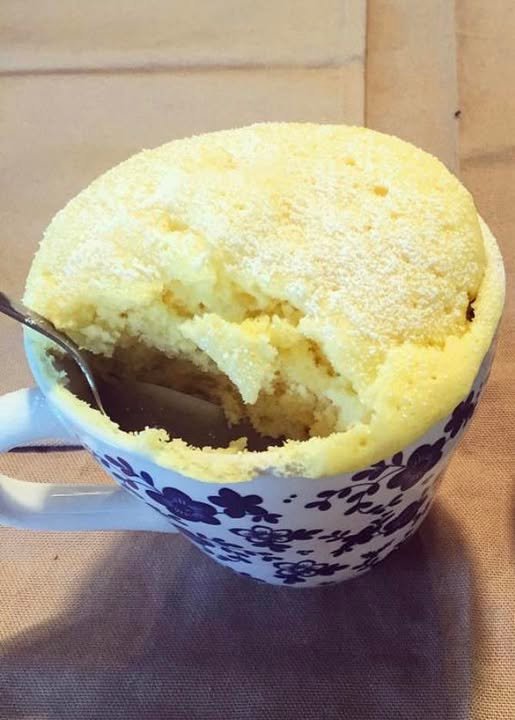
Quick Lemon Mug Cake

Quick Lemon Mug Cake

Ingredients

The Cake Base:

  • 4 tbsp All-purpose flour

  • 2 tbsp Granulated sugar

  • ¼ tsp Baking powder

  • 3 tbsp Milk (dairy or plant-based)

  • 1 tbsp Melted butter or vegetable oil

  • 1 tbsp Fresh lemon juice

  • ½ tsp Lemon zest (optional, for extra flavor)

  • A drop of vanilla extract

The Topping:

  • 1 tsp Powdered sugar (for dusting, as seen in your image)


Instructions

  1. Mix Dry Ingredients: In a standard microwave-safe mug, whisk together the flour, sugar, and baking powder until there are no clumps.

  2. Add Wet Ingredients: Pour in the milk, melted butter/oil, lemon juice, vanilla, and zest. Stir with a small fork or spoon until the batter is smooth.

  3. Microwave: Place the mug in the center of the microwave. Cook on high for 90 seconds.

    • Note: Every microwave is different. If it looks wet on top after 90 seconds, add another 15 seconds. It should look puffed and spongy.

  4. Cool & Dust: Let the cake sit for about 1 minute (it will finish “setting” during this time). Dust the top generously with powdered sugar.

  5. Serve: Enjoy it warm straight from the mug!


Tips for Success

  • Don’t Overmix: Once you add the liquid, stir just until the flour disappears to keep the cake light and airy.

  • The Mug Matters: Use a mug that holds at least 10–12 ounces to prevent the batter from overflowing while it rises.

  • Add a “Zing”: If you like it extra tart, you can poke a few holes in the finished cake and pour a tiny bit of extra lemon juice over it before adding the powdered sugar.

Fat Bomb Fluff ( Low-Carb Dessert)

Fat Bomb Fluff ( Low-Carb Dessert)

Description

Fat Bomb Fluff is a rich, creamy, no-bake keto dessert that tastes like a cross between cheesecake fluff and cookie dough ice cream. It’s high in healthy fats, low in carbs, and incredibly satisfying—perfect for curbing sweet cravings while staying keto or low-carb. Serve it chilled, frozen, or straight from the bowl.

 Ingredients

  • 8 oz cream cheese, softened

  • ½ cup unsalted butter, softened

  • ½ cup powdered erythritol or monk fruit sweetener (to taste)

  • 1 tsp vanilla extract

  • 1 cup heavy whipping cream, cold

  • ¾–1 cup sugar-free chocolate chips

  • Optional add-ins:

    • Pinch of salt (enhances flavor)

    • 1–2 tbsp peanut butter or almond butter

    • 1–2 tbsp cocoa powder (for chocolate version)

 Instructions

  1. In a large bowl, beat cream cheese and butter until smooth and fluffy (2–3 minutes).

  2. Add sweetener, vanilla, and salt. Beat again until fully combined.

  3. In a separate bowl, whip the heavy cream until stiff peaks form.

  4. Gently fold the whipped cream into the cream cheese mixture in batches.

  5. Fold in chocolate chips and any optional add-ins.

  6. Serve immediately or chill for 30–60 minutes for a firmer texture.

 Servings

  • 6 servings

  • Serving size: ~¾ cup

Nutritional Information (Per Serving – Approx.)

  • Calories: 270–290

  • Fat: 26–28g

  • Protein: 3–4g

  • Net Carbs: 2–3g

  • Sugar: 0g

(Values may vary depending on brands used)

 Benefits

  • ✅ Keto & low-carb friendly

  • ✅ No baking required

  • ✅ High-fat for satiety

  • ✅ Helps curb sugar cravings

  • ✅ Customizable flavors

  • ✅ Can be frozen or eaten chilled

 Recipe Notes

  • Use powdered sweetener, not granulated, to avoid grainy texture.

  • Let cream cheese and butter fully soften before mixing.

  • Fold whipped cream gently to keep the fluff airy.

  • Chill longer if you prefer an ice-cream-like consistency.

 Tips & Variations

  • Frozen Treat: Freeze in individual portions for 1–2 hours.

  • Chocolate Lover: Add cocoa powder and extra chocolate chips.

  • Cookie Dough Style: Add vanilla + chopped keto cookies.

  • Dairy-Free: Use dairy-free cream cheese, butter, and coconut cream.

  • Extra Protein: Mix in unflavored or vanilla collagen powder.


Q & A

Q: Is Fat Bomb Fluff keto-friendly?
A: Yes! It’s low in net carbs and high in fats, perfect for keto diets.

Q: Can I freeze it?
A: Absolutely. Freeze for a firmer texture—let it sit 5–10 minutes before serving.

Q: How long does it last?
A: Up to 5 days in the fridge or 2 months in the freezer (airtight container).

Q: Can I make it less sweet?
A: Yes, reduce sweetener or add a pinch of salt to balance flavors.

Q: Can I use flavored cream cheese?
A: You can, but check carb counts carefully.

Creamy Cucumber Salad with Dill & Red Onion

Creamy Cucumber Salad with Dill & Red Onion

🛒 Ingredients

3 large cucumbers, thinly sliced (English or Persian work best)
½ medium red onion, thinly sliced
¾ cup sour cream or Greek yogurt
2 tbsp mayonnaise (optional, for extra creaminess)
1–2 tbsp fresh lemon juice (to taste)
2 tbsp fresh dill, finely chopped
½ tsp garlic powder (or 1 small clove garlic, minced)
Salt, to taste
Freshly ground black pepper, to taste
Optional: pinch of sugar or honey (to balance acidity)

👩‍🍳 Instructions

1️⃣ Prepare the cucumbers
Place sliced cucumbers in a colander, sprinkle lightly with salt, and let sit for 10 minutes to release excess water. Pat dry with a paper towel.
2️⃣ Make the creamy dressing
In a bowl, whisk together sour cream (or yogurt), mayonnaise, lemon juice, dill, garlic powder, salt, pepper, and optional sugar.
3️⃣ Combine
Add cucumbers and red onion to the dressing. Gently toss until evenly coated.
4️⃣ Chill
Cover and refrigerate for 20–30 minutes to let flavors meld.
5️⃣ Serve
Give a final stir, adjust seasoning, and serve cold.