Creamy Peaches & Cream Smoothie

Creamy Peaches & Cream Smoothie

This recipe serves one large glass or two smaller ones. It’s naturally sweet, velvety, and packed with vitamins.


Ingredients

2 cups Frozen Peach Slices: (Frozen gives it that thick, soft-serve texture seen in your photo).


1 cup Milk of choice: (Whole milk, almond milk, or oat milk all work great).


1/2 cup Greek Yogurt: Vanilla or plain for extra creaminess and protein.


1 tbsp Honey or Maple Syrup: Optional, depending on how sweet your peaches are.


1/4 tsp Vanilla Extract: To give it that “peaches and cream” flavor profile.


Optional: A pinch of cinnamon or a scoop of protein powder.


Instructions

Layer the Blender: Pour your liquid (milk) in first, followed by the yogurt, vanilla, and sweetener. Adding liquids first helps the blender blades move freely.


Add the Fruit: Add the frozen peach slices on top.


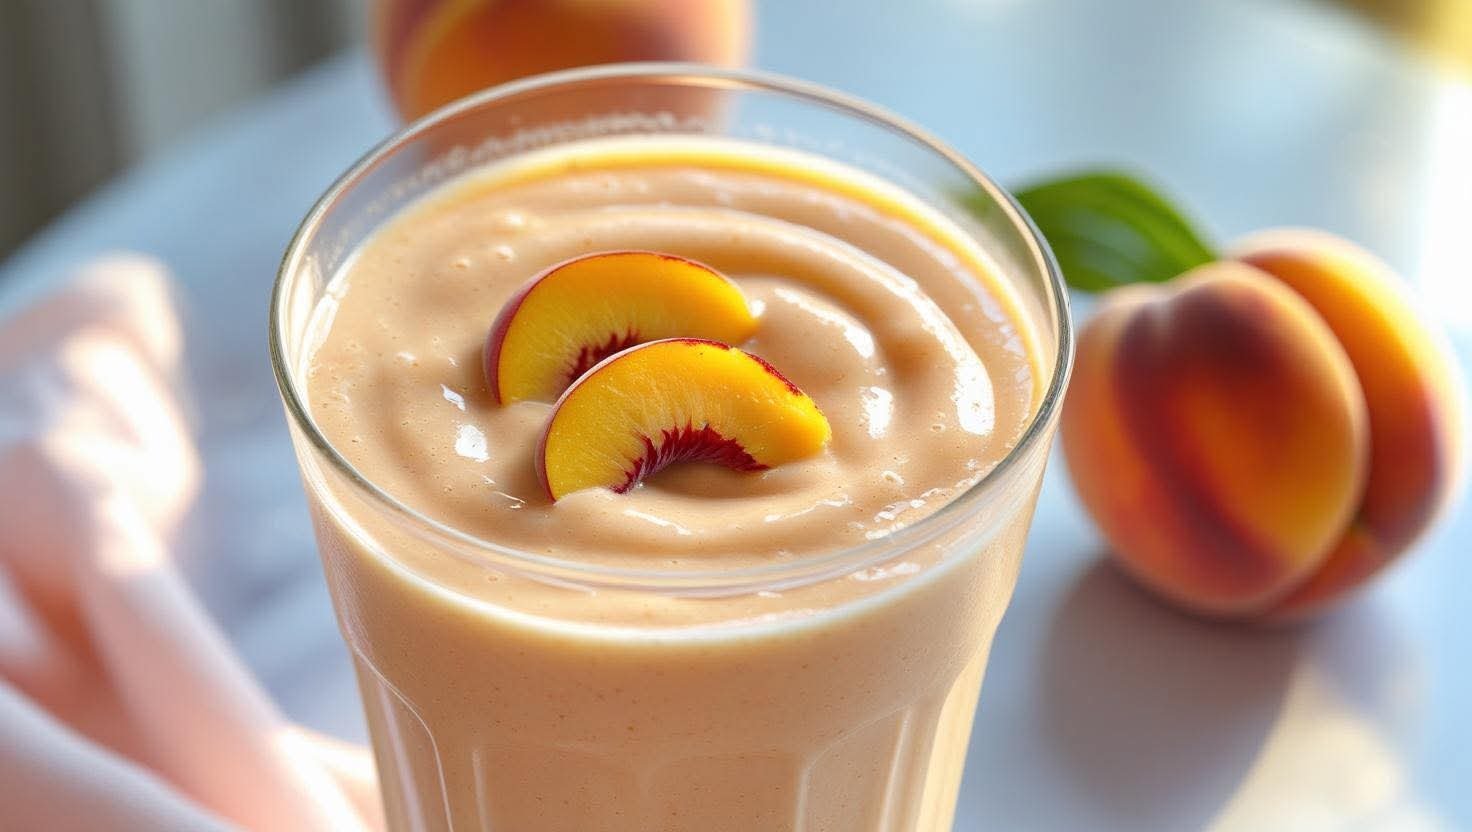
Blend: Start on a low speed and gradually increase to high. Blend until the mixture is completely smooth and those beautiful swirls form.


Check Consistency: If it’s too thick, add a splash more milk. If you want it thicker, add a few more frozen peaches or a couple of ice cubes.


Garnish: Pour into a tall glass and top with two fresh thin peach slices, just like in your picture!


Quick Tips for the Best Results

The Peach “Hack”: If you only have fresh peaches, peel and slice them, then freeze them on a tray for 2 hours before blending. This prevents the smoothie from becoming watery.


Nutrient Boost: Toss in a tablespoon of chia seeds or flax seeds; they won’t change the flavor but will add healthy fats and fiber.

Tropical Raspberry Glow Smoothie

Tropical Raspberry Glow Smoothie

This recipe makes one large or two small servings. It is naturally sweet, creamy, and packed with antioxidants.


Ingredients

1 cup Frozen Raspberries: Gives that beautiful pink color and a tart kick.


1/2 cup Mango Cubes: Provides a tropical sweetness and silky texture.


1 medium Banana: Best if sliced and frozen for a thicker, “milkshake” consistency.


1 cup Liquid Base: You can use almond milk, coconut water, or oat milk.


1/2 cup Greek Yogurt (Optional): Add this if you want extra protein and a creamier finish.


Fresh Mint: For garnish (as seen in your photo).


Instructions

Layer the Ingredients: Add your liquid base to the blender first. This helps the blades move freely and prevents the frozen fruit from getting stuck.


Add the Fruit: Add the frozen raspberries, mango cubes, and banana.


Blend: Start on a low speed and gradually increase to high. Blend for about 45–60 seconds until completely smooth.


Check Consistency: If it’s too thick, add a splash more liquid. If you prefer it thicker (like a smoothie bowl), add a few more ice cubes or frozen fruit pieces.


Serve: Pour into a chilled glass. Top with a sprig of fresh mint and use a glass straw to match your picture!


Quick Tips for the Best Result

Use Frozen Fruit: Using frozen fruit instead of ice ensures the flavor stays concentrated and the texture remains frosty.


Sweetness: If your berries are a bit tart, you can add a teaspoon of honey or maple syrup.


Storage: This is best enjoyed immediately, but you can store it in an airtight jar in the fridge for up to 24 hours (just give it a good shake before drinking).

Blueberry Custard Cake

Blueberry Custard Cake

Prep time: 10 mins | Bake time: 40–45 mins | Servings: 8


Ingredients

2 cups fresh blueberries (frozen works too, do not thaw)


3 large eggs


½ cup all-purpose flour


½ cup granulated sugar


1 ¼ cups whole milk (or half-and-half for extra richness)


2 tablespoons butter, melted (plus extra for greasing)


1 tablespoon vanilla extract


1 teaspoon lemon zest (optional, for brightness)


Pinch of salt


Powdered sugar for dusting


Instructions

Prepare the Oven and Pan: Preheat your oven to 350°F (175°C). Generously butter a 9-inch square baking dish or a deep pie plate.


Layer the Berries: Wash and dry your blueberries thoroughly. Spread them in an even layer across the bottom of the prepared dish.


Mix the Batter: In a large bowl, whisk the eggs and sugar together until slightly pale. Slowly whisk in the melted butter, vanilla, lemon zest, and salt.


Combine with Dry Ingredients: Add the flour to the wet mixture and whisk until smooth. Gradually pour in the milk, whisking constantly to ensure there are no lumps. The batter will be very thin, similar to a crepe or pancake batter.


Bake: Carefully pour the batter over the blueberries. Place the dish in the center of the oven and bake for 40 to 45 minutes.


Test for Doneness: The cake is done when the edges are golden brown and the center has puffed up and is “just set” (it should have a slight, firm jiggle but not be liquid).


Cool and Serve: Let the cake rest for at least 15 minutes. It will sink slightly as it cools—this is normal! Dust with powdered sugar and serve warm or at room temperature.


Tips for Success

No Sinking Berries: If you find your berries always sink to the bottom, you can toss them in a tablespoon of flour before placing them in the pan.


Add a Topping: This cake is delicious with a dollop of whipped cream or a small scoop of vanilla bean ice cream.


Storage: Store any leftovers in the refrigerator for up to 3 days. It tastes wonderful when chilled the next morning!

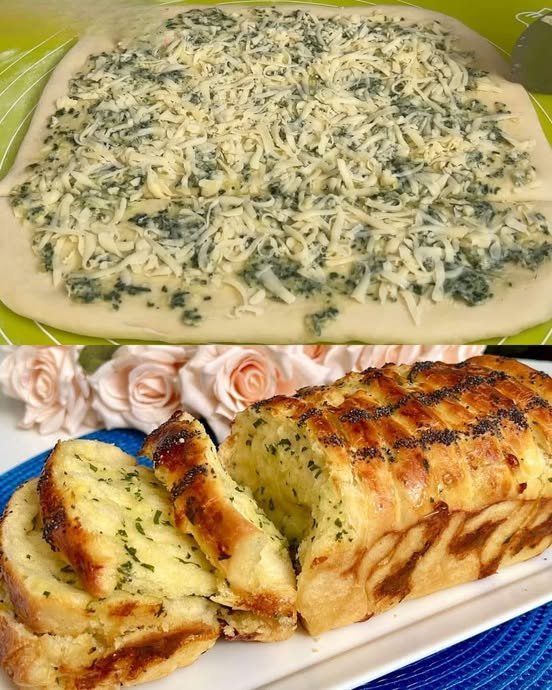
Garlic and Mozzarella Cheese-Stuffed Bread

Garlic and Mozzarella Cheese-Stuffed Bread

Soft, flavorful bread with a garlic-parsley butter filling and melted mozzarella center

Yield

1 loaf or 8–10 rolls

Oven Temperature

180°C (350°F)


Ingredients

Dough

  • 70 ml warm water

  • 70 ml warm milk

  • 1 teaspoon dry yeast

  • 1 teaspoon sugar

  • 250 g all-purpose flour

  • ½ teaspoon salt

  • 20 ml vegetable oil or melted butter

Filling

  • 100 g mozzarella cheese, shredded

  • 2 tablespoons unsalted butter, softened

  • 2 cloves garlic, minced

  • 1 tablespoon fresh parsley, finely chopped

Topping

  • 1 egg, beaten (for egg wash)

  • 1 teaspoon poppy seeds


Instructions


1. Prepare the Dough

  1. In a medium mixing bowl, combine the warm water, warm milk, sugar, and dry yeast.

  2. Stir gently and allow to stand for 5–10 minutes, until the mixture becomes frothy.

  3. Add the flour, salt, and oil to the yeast mixture. Mix until a soft, cohesive dough forms.

  4. Transfer the dough to a lightly floured surface and knead for about 5 minutes, until smooth and elastic.

  5. Place the dough in a lightly oiled bowl, cover with a clean damp cloth, and allow it to rise in a warm, draft-free area for approximately 1 hour, or until doubled in size.


2. Prepare the Filling

  1. In a small bowl, combine the softened butter, minced garlic, and chopped parsley.

  2. Mix until a smooth, spreadable paste forms.


3. Shape and Fill

  1. Punch down the risen dough to release air.

  2. Roll the dough into a large rectangle on a lightly floured surface.

  3. Spread the garlic-parsley butter evenly over the dough.

  4. Sprinkle the shredded mozzarella cheese evenly on top of the butter layer.

  5. Roll the dough tightly from one edge into a log.

  6. Optional shaping:

    • Cut the log into thick slices for individual rolls, or

    • Slice the log lengthwise, twist the two strands together, and form a braided loaf.


4. Final Rise and Bake

  1. Place the shaped loaf or rolls in a greased loaf pan or baking tray.

  2. Cover and allow to rise for 20 minutes in a warm place.

  3. Preheat the oven to 180°C (350°F).

  4. Brush the top of the dough with the beaten egg and sprinkle poppy seeds evenly.

  5. Bake for 25–30 minutes, until the bread is golden brown and the mozzarella inside is fully melted.


5. Cooling and Serving

  1. Remove the bread from the oven and allow it to cool for at least 10 minutes before slicing.

  2. Serve warm. This bread pairs well with soups, salads, or as a savory snack on its own.


Storage

  • Store at room temperature in an airtight container for up to 2 days

  • Refrigerate for longer storage; reheat in a preheated oven to restore freshness

Fried Vegetable and Cheese Bread Bites

Fried Vegetable and Cheese Bread Bites

Light, airy, vegetable-filled bread bites with a crisp golden exterior

Yield

Approximately 20–24 small bites, depending on size

Equipment

  • Deep frying pan or skillet

  • Slotted spoon

  • Mixing bowls

  • Parchment paper or paper towels for draining


Ingredients

Dough

  • 1 large egg

  • 200 ml warm milk

  • 200 ml warm water

  • 10 g dry yeast

  • 20 g granulated sugar

  • 8 g salt

  • 540 g all-purpose flour

Vegetable and Cheese Mix-ins

  • 1 medium potato, peeled and finely diced

  • 1 red bell pepper, finely diced

  • 2 green bell peppers, finely diced

  • 1 medium onion, finely chopped

  • A handful of fresh parsley, finely chopped

  • 80 g Tulum cheese (or a crumbly cheese such as feta), crumbled

For Frying

  • 400 ml vegetable oil


Instructions


1. Prepare the Yeast Base

  1. In a large mixing bowl, combine the warm milk, warm water, sugar, and dry yeast.

  2. Whisk gently to dissolve and let the mixture stand for 5 minutes, until slightly frothy.


2. Mix the Dough

  1. Add the egg and salt to the yeast mixture and mix until fully combined.

  2. Gradually incorporate the flour, stirring with a spatula until a soft, sticky dough forms.

    • Do not add extra flour beyond the recipe unless absolutely necessary; the dough should remain soft and hydrated to ensure a light, airy texture.


3. Add Vegetables and Cheese

  1. Fold the finely diced potato, red pepper, green peppers, onion, and parsley into the dough.

  2. Gently mix in the crumbled cheese until evenly distributed.

  3. Ensure all ingredients are well combined, but avoid overmixing, which could deflate the dough.


4. Allow the Dough to Rise

  1. Cover the bowl with plastic wrap or a clean, damp cloth.

  2. Let the dough rise in a warm, draft-free environment for 45–60 minutes, until it has roughly doubled in volume and shows a light, web-like structure when gently pulled.


5. Shape and Fry the Bites

  1. Heat the vegetable oil in a deep frying pan over medium heat. The oil should reach approximately 170–180°C (340–355°F).

  2. Shape the dough into small portions using two lightly oiled spoons or a piping bag with a large tip.

  3. Carefully drop the dough portions into the hot oil, frying in small batches to prevent overcrowding.

  4. Fry, turning occasionally, until each bite is evenly golden brown and crispy on all sides, approximately 3–5 minutes per batch.

  5. Remove the bites with a slotted spoon and place them on a plate lined with paper towels to drain excess oil.


6. Serve

  • Serve warm as a snack or side dish.

  • Suggested accompaniments: yogurt-garlic dip, spicy tomato chutney, or a simple herb sauce.


Storage

  • Best consumed on the day of frying for maximum crispness.

  • Store any leftovers in an airtight container in the refrigerator for up to 1 day; reheat in a preheated oven to restore crispness.

Lemon Jam Cake with Coconut Topping

Lemon Jam Cake with Coconut Topping

A soft lemon-flavored cake with a fruit jam center and coconut finish

Yield

1 round cake (20–22 cm / 8–9 inches)
Serves 8–10

Oven Temperature

180°C (350°F)


Ingredients

Cake Batter

  • 2 large eggs, at room temperature

  • 100 g (½ cup) granulated sugar

  • 1 packet vanilla sugar (or 1 teaspoon vanilla extract)

  • Juice of 1 lemon

  • 50 ml (¼ cup) vegetable oil

  • 50 ml (¼ cup) milk

  • 200 g (1⅓ cups) all-purpose flour

  • 10 g (2 teaspoons) baking powder

Filling and Topping

  • Fruit jam (apricot, strawberry, or preferred variety)

  • Shredded coconut, for topping


Instructions


1. Prepare the Batter

  1. In a large mixing bowl, combine the eggs, granulated sugar, and vanilla sugar.

  2. Whisk for 2–3 minutes, until the mixture becomes pale and slightly thickened.

  3. Add the lemon juice, vegetable oil, and milk. Mix until fully combined.

  4. Sift the flour and baking powder together.

  5. Gradually fold the dry ingredients into the wet mixture using a spatula, mixing just until smooth and free of lumps.


2. Assemble the Cake

  1. Preheat the oven to 180°C (350°F).

  2. Lightly grease a round baking pan and line the base with parchment paper if desired.

  3. Pour half of the batter into the prepared pan and spread evenly.

  4. Spoon the jam over the batter in small portions, keeping a slight margin from the edges of the pan.

  5. Carefully pour the remaining batter over the jam layer and smooth the surface gently.


3. Bake

  1. Place the pan in the preheated oven.

  2. Bake for 25–30 minutes, until the cake is evenly golden and a skewer inserted into the cake portion comes out clean.

  3. Remove from the oven and allow the cake to rest in the pan for 10 minutes.


4. Finish the Cake

  1. While the cake is still warm, spread a thin, even layer of jam over the surface.

  2. Sprinkle shredded coconut evenly across the top.

  3. Allow the cake to cool further before slicing.


Storage

  • Store at room temperature in a covered container for up to 2 days

  • Refrigerate for longer storage if preferred


Serving Notes

This cake can be served warm or at room temperature. The lemon flavor provides balance to the sweetness of the jam, while the coconut topping adds texture.