No-Sugar Banana Oat Breakfast Cups

No-Sugar Banana Oat Breakfast Cups


Description

A creamy, naturally sweet breakfast made with bananas, oats, and a protein-rich base. No added sugar, no cooking, and ready in minutes. It keeps you full for hours, supports weight loss, and tastes like dessert—so kids love it too.


Ingredients (1 serving)

1 ripe banana 🍌


½ cup plain Greek yogurt (or blended cottage cheese)


¼ cup rolled oats (or oat granola with no added sugar)


1–2 tbsp dark chocolate chips (optional, sugar-free or 85% cocoa)


Splash of milk or water (optional, for blending)

Instructions

  1. Blend the cream
    Blend ½ banana with Greek yogurt until smooth and thick.

  2. Layer

    • Bottom: banana-yogurt cream

    • Middle: oats or granola

    • Top: banana slices + a few chocolate chips

  3. Chill or eat immediately
    Can be eaten right away or refrigerated overnight.

 Notes

  • The sweetness comes only from bananas

  • Protein + fiber keeps blood sugar stable

  • Works great as a meal prep breakfast

 Tips & Variations

  • Higher protein: add 1 scoop unflavored protein powder

  • Dairy-free: use coconut or almond yogurt (unsweetened)

  • Extra fiber: add chia or flax seeds

  • No chocolate: swap for nuts or cinnamon

  • For kids: freeze it slightly—tastes like ice cream 🍦

 Servings

  • 1 cup = 1 serving

  • Multiply ingredients easily for meal prep (lasts 3 days refrigerated)

 Estimated Nutritional Info (per serving)

(Approximate, depends on exact brands)

  • Calories: 280–320 kcal

  • Protein: 15–20 g

  • Carbs: 35–40 g

  • Fiber: 6–8 g

  • Fat: 6–9 g

  • Added sugar: 0 g

 Benefits

✔ Supports weight loss
✔ No refined sugar
✔ Budget-friendly
✔ Keeps you full for hours
✔ Kid-approved
✔ Improves digestion
✔ Helps control cravings

Q & A

Q: Can I eat this every day?
A: Yes—especially if you rotate toppings (nuts, seeds, berries).

Q: Is it good for weight loss?
A: Yes. It’s high in protein and fiber, low in sugar, and very filling.

Q: Can I make it the night before?
A: Absolutely—perfect overnight breakfast.

Q: Can diabetics eat this?
A: Usually yes in moderation, but portion size matters—check with a doctor.

Q: Can I skip oats?
A: Yes—replace with nuts or seeds for lower carbs.

Festive Apple Puff Pastry Delight

Ingredients

For the pastry

  • 1 sheet puff pastry (or homemade dough, rectangular)
  • 1 egg (for egg wash)
  • For the apple filling
    • 4 medium apples, grated
    • 4–5 tbsp sugar (white or brown)
    • 1.5 tsp cinnamon
    • 1 tsp vanilla
    • 2–3 tbsp melted butter
    • 1 tbsp lemon juice
    • Optional:
      • 2–3 tbsp ground walnuts OR breadcrumbs to absorb moisture
      • Raisins (optional)
  • Instructions
  • 1. Prepare the filling
    1. Peel or leave peel on the apples (your image shows peel on).
    2. Grate all apples finely.
    3. Add:
      • sugar
      • cinnamon
      • vanilla
      • lemon juice
      • melted butter
    4. Mix well and squeeze out extra juice so the pastry doesn’t get soggy.
    5. If needed, add walnuts or breadcrumbs.

2. Roll the pastry

  1. Spread the puff pastry sheet on your counter.
  2. Distribute the apple mixture evenly over the whole sheet (as in your photo).
  3. Roll tightly from one side to form a long roll.
  4. Slice into equal pieces (about 6–8 rolls).

3. Bake

  1. Place rolls on a baking tray lined with parchment.
  2. Brush tops with beaten egg for shine.
  3. Bake at 190°C / 375°F for 20–25 minutes, or until golden and crispy.

4. Finish

  • Let cool slightly.
  • Dust with powdered sugar.
  • Add mint leaves if desired.

🍏 

Tips for Best Results

  • Use firm apples (Gala, Honeycrisp, Fuji).
  • Adding a little butter inside keeps filling juicy.
  • If apples release too much liquid, drain well.
  • Serve warm with vanilla ice cream or caramel drizzle.


💗Dona Ana’s Fried Dough!

💗Dona Ana’s Fried Dough!

Aww, classic and comforting 💗

Here’s the full, detailed recipe for Dona Ana’s Fried Dough — crispy outside, soft and fluffy inside, just like the traditional homemade treat 😍

💗 Dona Ana’s Fried Dough (Full Detail Recipe)

⏱ Time

  • Prep: 10 minutes
  • Rest: 30 minutes
  • Frying: 10 minutes
  • Total: ~50 minutes

🍩 Yield

  • 10–12 pieces

📝 Ingredients

  • 2½ cups all-purpose flour
  • 1 tbsp sugar
  • ½ tsp salt
  • 1 tsp instant yeast
  • ¾ cup warm milk or water
  • 2 tbsp oil or melted butter
  • Oil for deep frying

👩‍🍳 Step-by-Step Instructions

1️⃣ Activate the Yeast

  1. In a bowl, mix warm milk (or water), sugar, and yeast.
  2. Rest 5–7 minutes until foamy.

Make the Dough

  1. Add flour, salt, and oil to the yeast mixture.
  2. Mix until a soft dough forms.
  3. Knead for 8–10 minutes until smooth and elastic.
  4. Dough should be soft, not sticky.

3️⃣ First Rest

  1. Lightly grease the bowl.
  2. Place dough inside, cover.
  3. Let rest in a warm place for 30 minutes or until doubled.

4️⃣ Shape the Dough

  1. Punch down gently.
  2. Divide dough into small balls.
  3. Roll or stretch each into a thin disc (not too thin).
  4. Make a small slit or hole in the center (helps even frying).

Fry the Dough

  1. Heat oil on medium heat (not too hot).
  2. Fry dough pieces 1–2 minutes per side until golden.
  3. Flip once only.
  4. Remove and drain on paper towel.

🍯 Serving Options

  • Dust with powdered sugar
  • Drizzle honey or chocolate syrup
  • Sprinkle cinnamon sugar
  • Serve plain with tea or coffee ☕

🔥 Pro Tips (Very Important!)

  • Oil temperature should be medium, not high
  • If oil is too hot → outside browns, inside stays raw
  • Don’t overcrowd the pan
  • Softer dough = fluffier fried dough

🧁 Variations

  • Add ½ tsp vanilla to dough
  • Add orange zest for aroma
  • Stuff with cream, Nutella, or jam after frying

✅ Why This Recipe Is Loved

✔ Soft & airy inside
✔ Golden & crisp outside
✔ Budget-friendly
✔ Old-fashioned taste

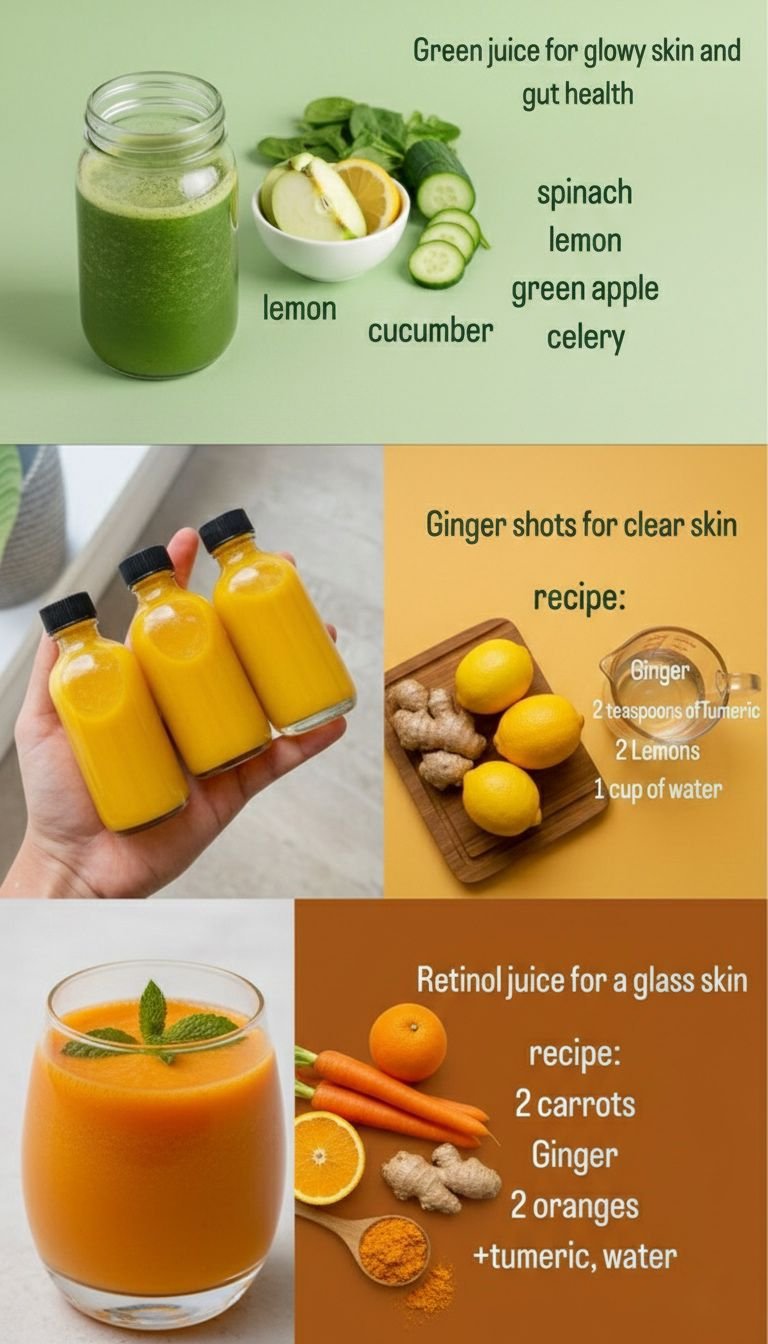
Fresh & Vibrant Juice Recipes for Daily Wellness

Fresh & Vibrant Juice Recipes for Daily Wellness

1. Refreshing Green Juice

A crisp and vibrant juice, perfect for hydration and a natural boost of nutrients.

Ingredients (Serves 1–2)

  • 2 cups fresh baby spinach

  • 1 large green apple, cored and sliced

  • ½ large cucumber, sliced

  • 2–3 celery stalks

  • ½ lemon, peeled

Instructions

1. Prep the Produce:

  • Wash all ingredients thoroughly to remove dirt or residues.

  • Core and slice the apple, peel the lemon, and chop cucumber and celery to fit your juicer.

2. Juice the Ingredients:

  • Begin with the spinach, followed by celery, apple, cucumber, and lemon. This order helps extract maximum juice from leafy greens first.

3. Serve:

  • Stir the juice and pour into a glass over ice if desired.

  • Drink immediately to enjoy maximum freshness and nutrient content.

Tip: You can store leftover juice in a sealed jar in the refrigerator for up to 24 hours, but it tastes best fresh.


2. Zesty Ginger & Turmeric Shots

A concentrated, invigorating shot with ginger and turmeric for a flavorful pick-me-up.

Ingredients (Makes 2–3 small shots)

  • 2-inch knob of fresh ginger, peeled

  • 2 teaspoons turmeric powder or 1-inch fresh turmeric root, peeled

  • Juice of 2 fresh lemons

  • 1 cup filtered water

Instructions

1. Blend:

  • Combine ginger, turmeric, lemon juice, and water in a high-speed blender. Blend until smooth.

2. Strain:

  • Pour the mixture through a fine-mesh strainer, nut milk bag, or cheesecloth into a jar to remove pulp for a smooth shot.

3. Portion & Store:

  • Pour into small shot glasses or airtight bottles.

  • Keep refrigerated for 3–5 days. Shake well before drinking.

Tip: Start with a small amount if you’re new to concentrated ginger or turmeric, as they have strong, warming flavors.


3. Vibrant Orange & Carrot Blend

A naturally sweet, nutrient-rich juice packed with beta-carotene and vitamin C.

Ingredients (Serves 1–2)

  • 2 large carrots, washed and trimmed

  • 2 oranges, peeled

  • 1-inch knob of fresh ginger, peeled

  • A pinch of turmeric powder

  • ½ cup water (adjust for desired consistency)

Instructions

1. Prep Ingredients:

  • Roughly chop carrots and ginger to make blending easier. Peel oranges completely.

2. Process:

  • If using a juicer: Juice the carrots, oranges, and ginger.

  • If using a blender: Combine chopped carrots, oranges, ginger, and water. Blend until smooth.

3. Add Turmeric:

  • Stir in a pinch of turmeric powder. Mix well.

4. Optional Straining:

  • For a smoother juice, strain through a fine-mesh sieve.

  • For added fiber, enjoy it as-is with the pulp.

Tip: Serve immediately over ice for a refreshing drink, or store in a sealed jar in the fridge for up to 24 hours.

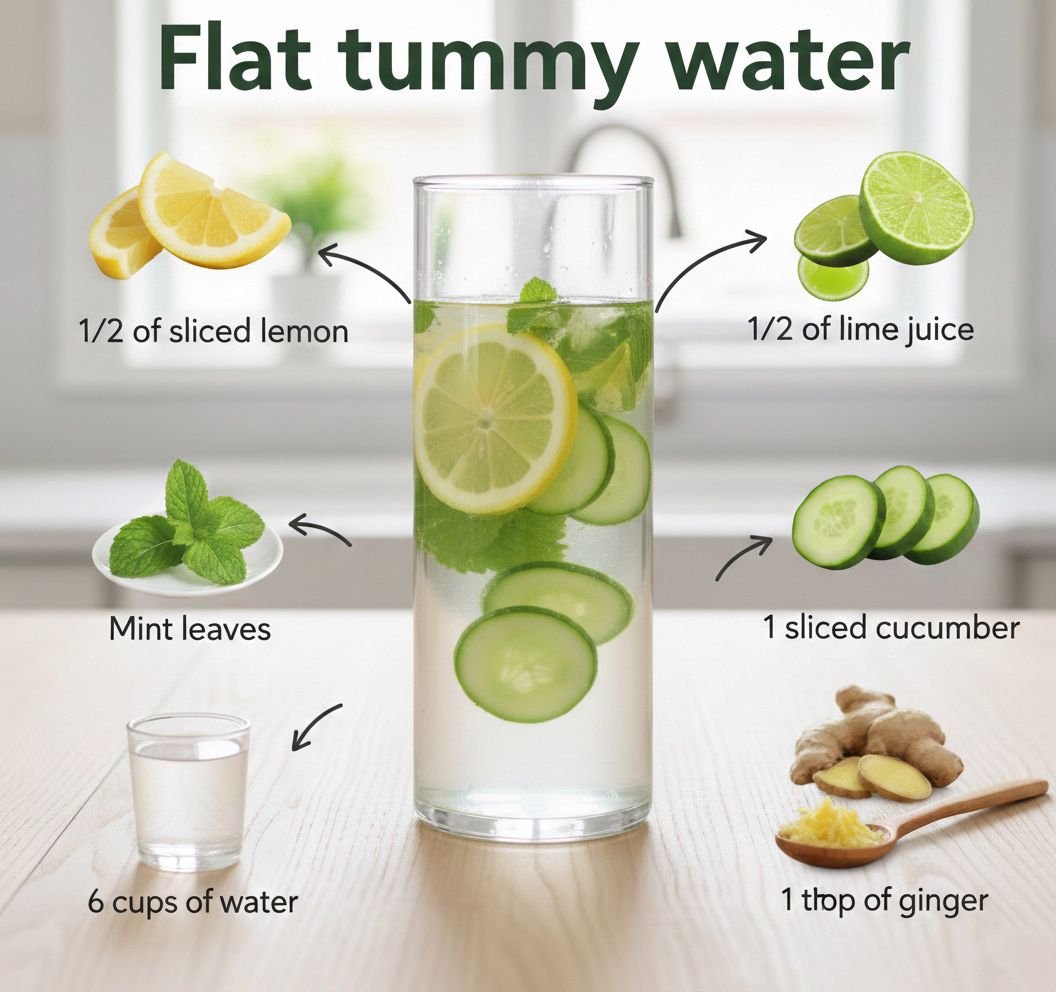
Refreshing Citrus & Cucumber Infusion

Refreshing Citrus & Cucumber Infusion

A crisp, hydrating, and naturally flavorful water that’s perfect for staying refreshed throughout the day. This recipe makes approximately 1.5 liters (6 cups).

Ingredients

  • Water: 6 cups (filtered or spring water is best)

  • Cucumber: 1 medium, thinly sliced

  • Lemon: ½ large lemon, thinly sliced (remove seeds)

  • Lime: Juice of ½ fresh lime

  • Ginger: 1 tablespoon, fresh and either grated or thinly sliced

  • Mint: 10–12 fresh leaves, gently bruised to release flavor


Instructions

1. Prep the Ingredients

  • Wash the cucumber, lemon, lime, and mint thoroughly.

  • Thinly slice the cucumber and lemon. Remove any seeds from the lemon slices.

  • Grate or slice the ginger.

  • Lightly bruise the mint leaves with your fingers to release their natural oils.

2. Combine the Ingredients

  • Place the cucumber slices, lemon slices, ginger, and mint leaves into a large glass pitcher or carafe.

3. Add the Liquids

  • Squeeze the juice of ½ lime over the ingredients.

  • Pour in the 6 cups of filtered water.

4. Infuse the Flavors

  • Stir gently with a long spoon to mix the ingredients.

  • Cover the pitcher and refrigerate for at least 2 to 4 hours. For a stronger flavor, allow it to infuse overnight.

5. Serve

  • Pour the infused water into a glass. Ice cubes are optional.

  • You can refill the pitcher with water throughout the day using the same ingredients; the flavor will gradually become milder.


Benefits of the Ingredients

  • Cucumber: Naturally hydrating and cooling.

  • Lemon & Lime: Add a bright, refreshing taste and are a source of Vitamin C.

  • Ginger: Supports digestion in a gentle way.

  • Mint: Adds a clean, refreshing flavor.


Tips for Best Results

  • Use organic produce when possible, since the ingredients are consumed raw.

  • For an extra twist, you can add a few slices of fresh orange or a handful of berries.

  • Drink throughout the day to stay hydrated, ideally alongside balanced meals.

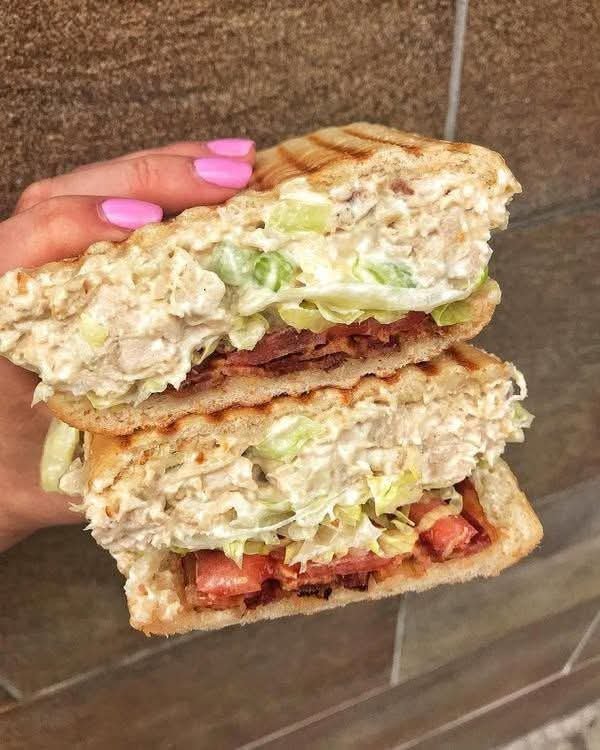
🥪 Creamy Chicken & Bacon Panini

🥪 Creamy Chicken & Bacon Panini

Prep time: 15 mins | Cook time: 10 mins | Serves: 2


Ingredients

For the Chicken Salad:


2 cups Cooked chicken breast (shredded or finely chopped)


1/2 cup Mayonnaise


1 tsp Dijon mustard


1/4 cup Celery (finely diced for crunch)


1 tbsp Fresh chives or green onions (sliced thin)


Salt and black pepper to taste


For the Sandwich Build:


4 slices Sourdough or Ciabatta bread


4-6 strips Crispy cooked bacon


1 Large tomato (sliced)


1 cup Shredded iceberg or romaine lettuce


2 tbsp Butter (softened, for the bread)


Instructions

Mix the Filling: In a medium bowl, combine the shredded chicken, mayonnaise, mustard, celery, and chives. Season with salt and pepper. Stir until the chicken is well-coated and creamy.


Prep the Bread: Lightly butter the outside of each slice of bread. This ensures a golden, crispy crust.


Layer the Flavors: * Place two slices of bread butter-side down.


Add a layer of crispy bacon.


Top with a generous scoop of the chicken salad mixture.


Add tomato slices and shredded lettuce.


Close the sandwich with the remaining bread (butter-side up).


The Toasting: Heat a panini press or a heavy skillet over medium heat.


If using a press: Grill for 3–5 minutes until the bread is golden brown with clear grill marks.


If using a skillet: Place the sandwich in the pan and weight it down with a second heavy pan. Flip after 3 minutes and repeat on the other side.


Serve: Slice diagonally and enjoy while the bread is still warm and crunchy.


Pro-Tip: If you want a little extra zing, add a squeeze of fresh lemon juice or a dash of hot sauce to the chicken mixture before assembling!