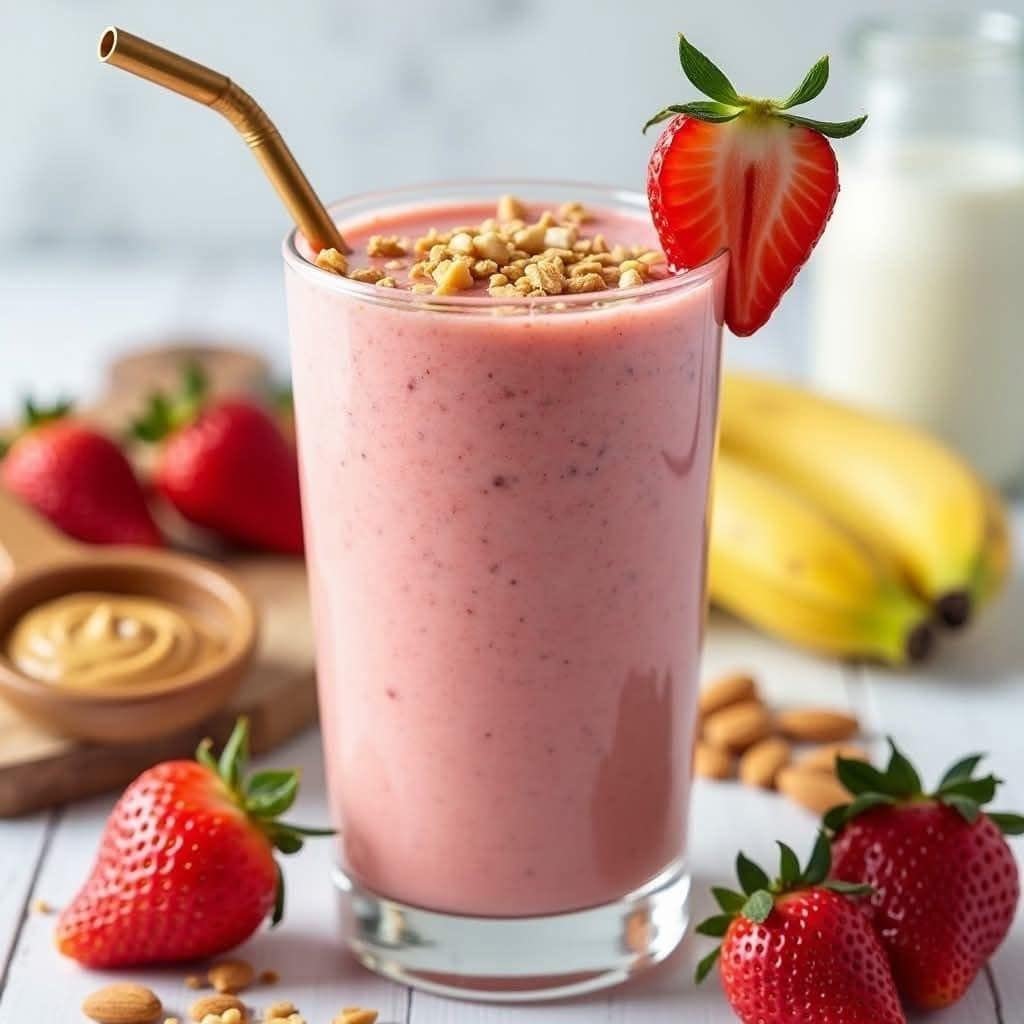
Strawberry & Peanut Butter Power Smoothie

Strawberry & Peanut Butter Power Smoothie

Prep time: 5 minutes | Servings: 1 large glass

Ingredients

  • 1 cup Fresh or frozen strawberries (plus one for garnish)

  • 1 Ripe banana (frozen works best for a creamy texture)

  • 1 tbsp Creamy peanut butter

  • 1 cup Milk of your choice (dairy, almond, or oat milk all work great)

  • 1/4 cup Greek yogurt (optional, for extra thickness)

  • Toppings: A sprinkle of crushed peanuts or granola and a few whole almonds.


Instructions

  1. Prep the Fruit: Wash the strawberries and remove the green stems. Peel your banana.

  2. Layer the Blender: To keep things moving smoothly, add your liquid (milk) first, followed by the peanut butter and yogurt, then the fruit.

  3. Blend: Start on a low speed and gradually increase to high. Blend for about 45–60 seconds until the mixture is completely smooth and those little strawberry seeds are well-incorporated.

  4. Adjust Consistency: * If it’s too thick, add a splash more milk.

    • If it’s too thin, add a couple of ice cubes or more frozen fruit and blend again.

  5. Garnish: Pour into a tall glass. Sprinkle the crushed peanuts or granola on top. Slice a strawberry halfway up the middle and slide it onto the rim of the glass.


Pro-Tip for Texture

Using a frozen banana is the secret to getting that milkshake-like consistency without watering it down with ice. If you have extra bananas, peel them and keep them in a freezer bag for future smoothies!
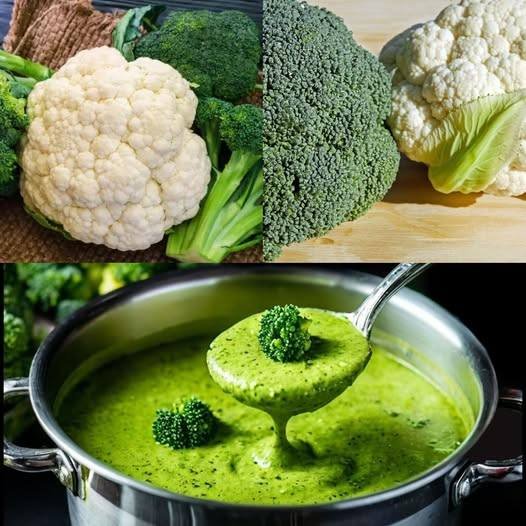

Creamy Broccoli & Cauliflower Soup

Creamy Broccoli & Cauliflower Soup

Ingredients

  • Broccoli: 1 large head (approx. 500g), cut into florets.

  • Cauliflower: 1/2 large head (approx. 300g), cut into florets.

  • Aromatics: 1 medium yellow onion (diced) and 3 cloves of garlic (minced).

  • Liquid: 4 cups (1 liter) of vegetable or chicken broth.

  • Creaminess: 1/2 cup heavy cream (or coconut milk for a dairy-free version).

  • Seasoning: Salt, black pepper, and a pinch of nutmeg.

  • Optional: 1/2 cup grated sharp cheddar or parmesan for extra depth.


Instructions

  1. Sauté the Base: In a large pot, heat a tablespoon of olive oil or butter over medium heat. Add the onion and sauté until translucent (about 5 minutes). Add the garlic and cook for another minute until fragrant.

  2. Simmer the Veggies: Add the broccoli and cauliflower florets to the pot. Pour in the broth. Bring the mixture to a boil, then reduce the heat, cover, and simmer for 12–15 minutes or until the vegetables are very tender.

  3. The Secret to the Color: To keep that bright green color seen in your photo, don’t overcook the broccoli! If you want it extra green, you can toss in a handful of fresh spinach right before blending.

  4. Blend: Use an immersion blender (stick blender) directly in the pot to blend until smooth. If using a standard blender, work in batches and be careful with the hot liquid.

  5. Finish: Stir in the cream and cheese (if using). Season with salt, pepper, and nutmeg to taste. Heat through for 2 minutes on low heat—do not let it boil again once the cream is added.

  6. Garnish: Serve hot. Reserve a few small, steamed broccoli florets to place on top just like in the picture!


Quick Tips for Success

  • Stems are flavor: Don’t throw away the broccoli stems! Peel the woody outer layer, chop the inside, and boil them with the florets—they add great body to the soup.

  • Texture: If the soup is too thick, splash in a little extra broth until it reaches your preferred consistency.

Ingredients:
For the pastry:
4 cups (500g) all-purpose flour
200g cold Butter, cubed
2 Eggs
1 teaspoon Salt
1 tablespoon sugar
1 teaspoon baking powder
1/4 cup (60ml) cold water
For the filling:
•3/4 pound (350g) Ground beef
1 Potato, peeled and diced into small cubes
1 Large Onion, chopped
1 Large Carrot, peeled and diced
1 cup (240ml) Water/beef broth
Salt to taste
Pepper to taste
1 teaspoon Thyme
2 tablespoons flour
2 tablespoons Oil
1 egg for brushing
How to prepare:
-Make the pastry: in a large bowl mix together flour, sugar, salt and baking powder.
-Add cubed butter and rub it with the flour until you get a crumbly texture.
-Beat 2 eggs with cold water and add it to the flour mixture, mix until dough is formed. Cover for 30mins.
-Make the filling: in a large pan heat oil. Add onion and sauté for 5-6 mins.
-Add diced carrots and potatoes and cook for 3-4 mins.
-Add the meat, breaking it apart, for 4-5 mins; Season with salt, pepper, thyme and flour.
-Divide the dough into 4 pieces. Roll out the dough into 1/8-inch thickness. Cut out a round shape with your desired sized.
-8. Place about 1-2 tablespoons of the meat mixture in the center and fold over the dough. Seal it with your fingers or with a fork. Poke the pies with a fork to create a steam outlet.
-Bake for 25-30 minutes, until golden. Cool slightly before serving.

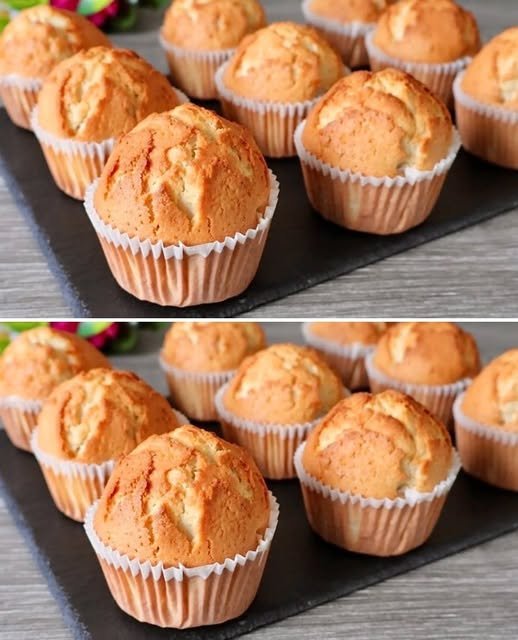
Easy and Fluffy Vanilla Muffins

Easy and Fluffy Vanilla Muffins

Prep Time: 10 minutes
Bake Time: 20–25 minutes
Yields: 12 standard muffins

Soft, airy, and golden muffins that are simple to make and perfect for breakfast, snacks, or dessert.


🧾 Ingredients

  • 2 eggs

  • 125 ml (½ cup) vegetable oil

  • 250 ml (1 cup) milk

  • 200 g (1 cup) sugar

  • 360 g (3 cups) all-purpose flour

  • 1 teaspoon baking powder

  • ½ teaspoon salt

  • 100 g (⅔ cup) raisins or chocolate chips (optional)

  • 1 teaspoon vanilla extract (optional, for extra flavor)


👩‍🍳 Step-by-Step Instructions

🔥 Step 1: Prepare Oven and Muffin Pan

  1. Preheat oven to 375°F (190°C).

  2. Line a 12-cup muffin tin with paper liners or grease each cup lightly with butter or oil.


🥄 Step 2: Whisk Wet Ingredients

  1. In a large mixing bowl, whisk eggs and sugar until pale and slightly frothy.

  2. Add vegetable oil, milk, and vanilla extract (if using).

  3. Whisk until fully combined.


🥣 Step 3: Combine with Dry Ingredients

  1. Sift flour, baking powder, and salt directly into the wet mixture.

  2. Use a spatula or wooden spoon to fold gently until just combined.

    • Stop mixing when flour streaks disappear to keep muffins light and fluffy.


🍫 Step 4: Add Mix-ins (Optional)

  1. Gently fold in raisins or chocolate chips if desired.


🧁 Step 5: Fill Muffin Cups

  1. Divide batter evenly among the 12 cups, filling about ¾ full.

  2. Place the tin in the center of the oven.


🔥 Step 6: Bake

  1. Bake for 20–25 minutes.

  2. Muffins are done when:


❄ Step 7: Cool

  1. Let muffins cool in the tin for 5 minutes.

  2. Transfer to a wire rack to cool completely.


🌟 Pro-Tips for Success

  • Room Temperature Ingredients: Eggs and milk at room temperature give a smoother, well-incorporated batter.

  • Storage: Keep in an airtight container at room temperature for up to 3 days. Freeze for up to 2 months.

  • Optional Flavors: Add cinnamon, nutmeg, or lemon zest for a flavor twist.

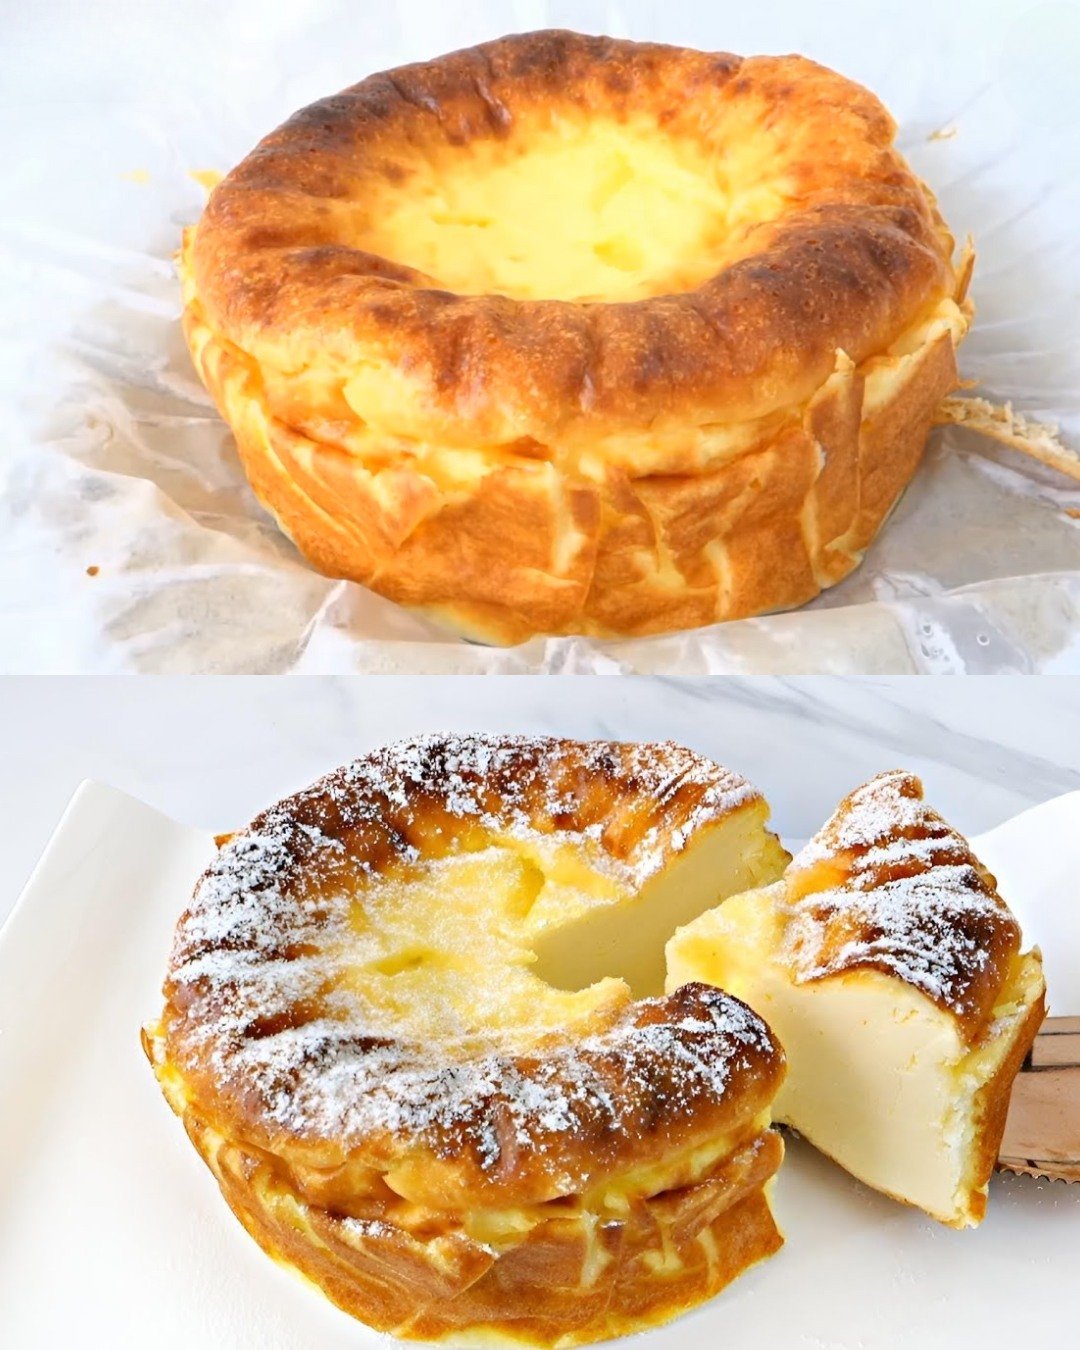
3-Ingredient Yogurt Cake

3-Ingredient Yogurt Cake

Yield: 1 round cake (8 slices)
Prep Time: 10 minutes
Bake Time: 45–55 minutes

This cake is soft, creamy, and lightly sweet. It’s perfect for tea time or as a simple dessert when you want something comforting with very few ingredients.


🧾 Ingredients

  • 500 g (2 cups) plain yogurt
    (Greek yogurt or any thick yogurt works best)

  • 4 large eggs

  • ½ cup (100 g) sugar

✔ Optional for flavor (not counted as ingredients):

  • 1 teaspoon vanilla extract

  • Powdered sugar for dusting


👩‍🍳 Instructions

1. Prepare the Pan and Oven

Preheat the oven to 170°C (340°F).
Line a round cake pan with parchment paper, allowing some paper to rise up the sides. This helps remove the cake easily after baking.


2. Mix the Batter

In a large bowl, add the yogurt and sugar.
Whisk until smooth and creamy.

Add the eggs one at a time, whisking well after each addition until the mixture is fully blended and silky.


3. Pour and Level

Pour the batter into the prepared pan.
Gently tap the pan on the counter once or twice to release air bubbles.


4. Bake

Place the pan in the oven and bake for 45–55 minutes, until the top is lightly golden and the center is set.

The cake should look firm around the edges and slightly soft in the center.


5. Cool

Remove from the oven and let the cake cool completely in the pan.
As it cools, it will gently settle and become more compact.


6. Serve

Lift the cake out using the parchment paper.
Dust with powdered sugar if desired.
Slice and serve chilled or at room temperature.


🌟 Helpful Tips

  • Use thick yogurt for the best texture.

  • Do not overbake; this keeps the cake creamy inside.

  • Refrigerate for 2–3 hours for clean slices.

  • Store in the refrigerator up to 3 days.

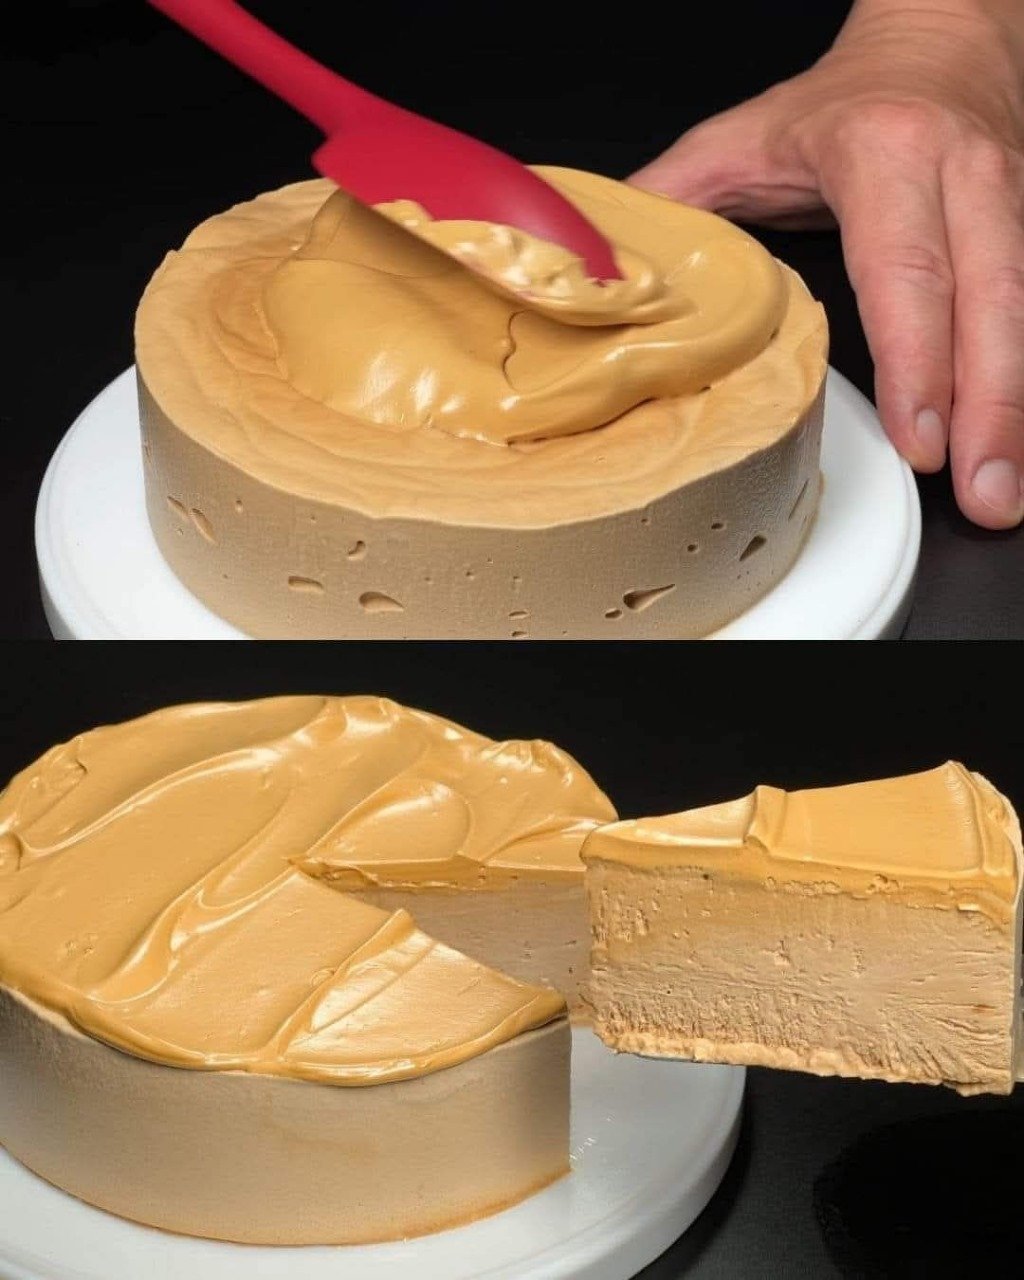
No-Bake Coffee Mousse Cake

No-Bake Coffee Mousse Cake

Yield: 1 round cake (8–10 slices)
Prep Time: 20 minutes
Chill Time: 4–6 hours

This dessert has a soft, creamy texture with a light coffee flavor. It sets beautifully in the refrigerator and can be sliced like a cake without baking.


🧾 Ingredients

For the Coffee Mousse

  • 2 cups heavy cream (cold)

  • 2 tablespoons instant coffee or espresso powder

  • 3 tablespoons hot water

  • ½ cup powdered sugar

  • 1 teaspoon vanilla extract

  • 2 teaspoons unflavored gelatin

  • 3 tablespoons warm milk


For the Base (optional, but recommended)

  • 150 g crushed biscuits (tea biscuits or digestive)

  • 5 tablespoons melted butter


👩‍🍳 Instructions

1. Prepare the Coffee

In a small bowl, dissolve the coffee in hot water.
Set aside to cool to room temperature.


2. Prepare the Base

Mix crushed biscuits with melted butter until evenly combined.
Press mixture firmly into the bottom of a lined cake ring or springform pan.
Refrigerate while preparing the mousse.


3. Activate the Gelatin

In a small bowl, mix gelatin with warm milk.
Stir gently until completely dissolved.
Let cool slightly (not hot).


4. Whip the Cream

In a large bowl, whip cold cream until soft peaks form.
Add powdered sugar and vanilla extract.
Continue whipping until smooth and fluffy.


5. Combine

Slowly pour the cooled coffee into the whipped cream while gently folding.
Add the dissolved gelatin and fold carefully until fully mixed.


6. Assemble

Pour the mousse over the chilled base.
Smooth the top with a spatula.


7. Chill

Refrigerate for at least 4–6 hours, or until fully set.


8. Serve

Carefully remove from the mold.
Slice with a warm knife for clean cuts.


🌟 Helpful Tips

  • Use cold cream for best volume.

  • Let coffee cool before mixing to avoid thinning the cream.

  • You can flavor with cocoa powder or caramel if desired.

  • Store in refrigerator up to 3 days.