Green Power Smoothie Recipe

Green Power Smoothie Recipe

This blend is high in fiber, healthy fats, and plant-based protein, making it an excellent breakfast or post-workout fuel.

Ingredients

  • 1 ½ cups Fresh baby spinach (tightly packed)

  • 1 large Frozen banana (chunks make it creamier)

  • 1 cup Unsweetened almond milk (or your preferred milk)

  • 1 tbsp Hemp hearts (plus more for topping)

  • 1 tbsp Pumpkin seeds (pepitas)

  • ½ tsp Vanilla extract (optional, for flavor)

  • Ice cubes (optional, if you want it extra cold)


Instructions

  1. Liquid First: Pour your milk into the blender. Adding liquid first helps the blades spin freely and prevents sticking.

  2. Add Greens: Add the spinach. If you have a lower-powered blender, pulse the milk and spinach together first to ensure there are no leafy bits left.

  3. Add Bulk & Seeds: Toss in the frozen banana chunks, hemp hearts, and pumpkin seeds.

  4. Blend: Start on a low speed and gradually increase to high. Blend for 45–60 seconds until the texture is completely smooth and vibrant green.

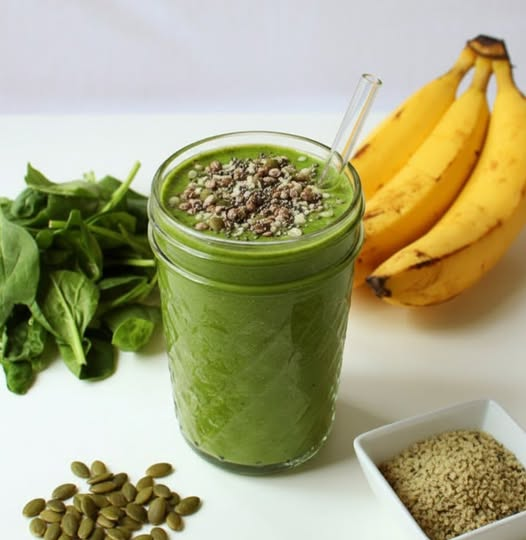
  5. Garnish: Pour into a glass and top with an extra sprinkle of hemp hearts and pumpkin seeds for that satisfying crunch seen in your photo.


Why This Works

  • Spinach: Provides iron and vitamins without a strong “vegetable” taste.

  • Banana: Acts as a natural sweetener and provides potassium.

  • Hemp & Pumpkin Seeds: These are the “hidden gems” in your photo, providing Omega-3 fatty acids and magnesium.

Pro Tip: If you want even more protein, you can add a scoop of vanilla protein powder or a tablespoon of almond butter to the mix.
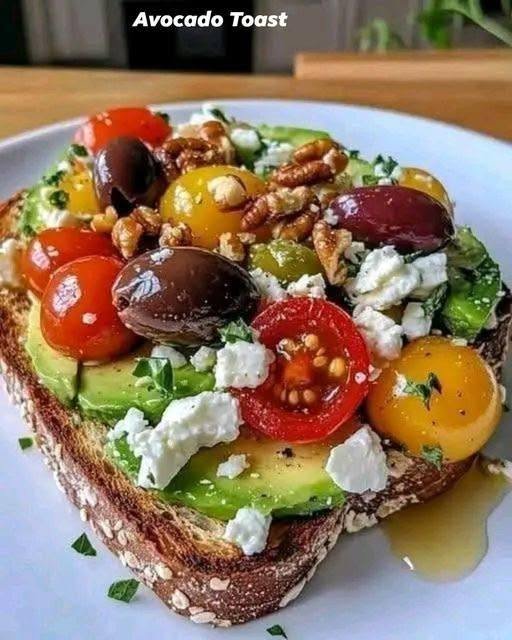
Loaded Avocado Toast with Cherry Tomatoes Goat Cheese and Balsamic Drizzle

Loaded Avocado Toast with Cherry Tomatoes Goat Cheese and Balsamic Drizzle 

This is not your average avocado toast — it is a flavor-packed gourmet version that is perfect for breakfast brunch or a light lunch. Creamy avocado meets juicy cherry tomatoes tangy goat cheese crunchy walnuts sweet dried cranberries and a luscious balsamic glaze all piled on crispy rustic sourdough bread. Fresh herbs top it off for a bright fresh finish. Each bite is a delicious mix of creamy crunchy sweet tangy and savory. It is quick to make beautiful to serve and totally satisfying!

Prep and Cook Time:

Prep time: 10 minutes

Cook time (to toast bread): 5 minutes

Total time: 15 minutes

Ingredients:

1 slice rustic sourdough bread

1 ripe avocado

Handful of cherry tomatoes (red and yellow)

2 tablespoons goat cheese crumbles

1 tablespoon chopped walnuts

1 tablespoon dried cranberries

1 tablespoon balsamic glaze

Fresh basil or parsley leaves

Salt and pepper to taste

Instructions:

Toast the sourdough bread until golden and crisp

Slice the avocado thinly and lay the slices evenly over the toast

Cut the cherry tomatoes in halves and scatter them over the avocado

Sprinkle the goat cheese crumbles over the top

Add chopped walnuts and dried cranberries

Drizzle generously with balsamic glaze

Tear some fresh basil or parsley and sprinkle over the toast

Season lightly with salt and pepper if desired

Serve immediately and enjoy

Tips:

Use a perfectly ripe avocado for the creamiest texture

Toast the bread well so it holds up under all the toppings

Cut ingredients small for easier biting and better flavor balance

Add balsamic glaze just before serving to avoid sogginess

Use a serrated knife to slice the toast cleanly without smashing the toppings

Variations:

Swap goat cheese with feta blue cheese or ricotta

Add a fried or poached egg on top for extra protein

Use mixed seeds instead of walnuts for a nut-free option

Try sun-dried tomatoes instead of fresh for deeper flavor

Drizzle with hot honey instead of balsamic for a spicy kick

Add microgreens or arugula for more freshness

Rub the toast with a garlic clove before adding avocado for extra flavor

Q&A:

Can I make this ahead of time?

It is best made fresh because the avocado can brown and the toast can get soggy

What bread is best for this recipe?

Thick rustic breads like sourdough multigrain or artisan white work best

Can I skip the cheese?

Yes you can leave it out or replace it with a dairy-free alternative

Nutrition (per serving estimate):

Calories 350 to 400

Protein 8 grams

Fat 25 grams

Carbohydrates 28 grams

Fiber 7 grams

Sugar 8 grams

Note Nutrition values can vary based on specific ingredients and portion sizes

Conclusion:

This loaded avocado toast is the perfect combination of creamy fresh sweet savory and crunchy. It is quick beautiful and totally satisfying whether you are making it for a busy morning a weekend brunch or a healthy snack. Customize it with your favorite toppings and enjoy every bite.

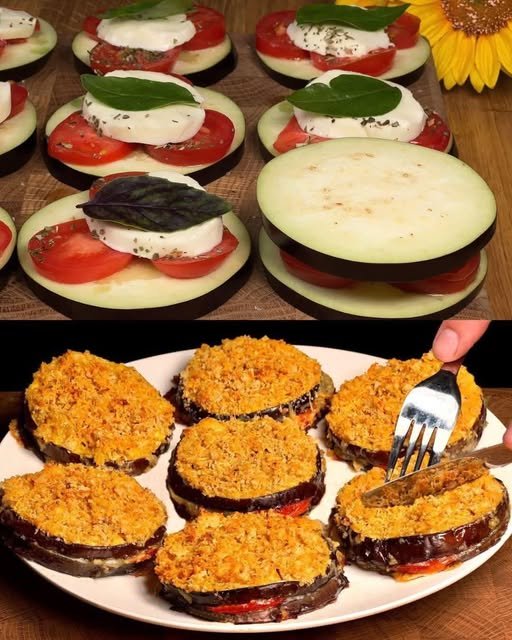
Crispy Eggplant & Mozzarella Bake

Crispy Eggplant & Mozzarella Bake

Prep Time: 10 minutes
Cook Time: 15–20 minutes
Servings: 3–4 portions

Golden, crisp eggplant layered with juicy tomatoes and melted mozzarella. Light, comforting, and perfect as a main dish or side.


🧾 Ingredients

  • 2 large eggplants

  • 3 eggs

  • 180 g mozzarella cheese, shredded

  • 6–8 cherry tomatoes (or 2 medium tomatoes), sliced

  • 1 tablespoon mayonnaise or Greek yogurt

  • Olive oil, for brushing

  • Breadcrumbs or Panko (for coating)

  • Sea salt, to taste

  • Ground black pepper, to taste

Optional

  • Fresh basil leaves (for garnish)

  • Dried oregano (for flavor)


👩‍🍳 Step-by-Step Instructions

🍆 Step 1: Prepare the Eggplant

  1. Wash the eggplants and trim off the ends.

  2. Slice into rounds about ½ inch (1 cm) thick.

  3. If desired, sprinkle lightly with salt and let sit for 5 minutes.

  4. Pat dry with a paper towel to remove extra moisture.


🥚 Step 2: Make the Egg Coating

  1. In a shallow bowl, whisk together:

    • Eggs

    • Mayonnaise (or yogurt)

    • Salt

    • Black pepper

  2. Mix until smooth.


🍞 Step 3: Coat the Slices

  1. Dip each eggplant slice into the egg mixture.

  2. For extra crispness, coat with breadcrumbs or Panko.

  3. Place coated slices on a plate while preparing the pan.


🧀 Step 4: Assemble the Layers

  1. Preheat oven to 400°F (200°C).

  2. Line a baking tray with parchment paper and lightly brush with olive oil.

  3. Arrange half of the eggplant slices on the tray.

  4. Top each slice with:

    • A slice of tomato

    • A generous pinch of mozzarella

    • A sprinkle of dried oregano (optional)

  5. Add another eggplant slice on top to form stacks
    (or bake as single layers if preferred).


🔥 Step 5: Bake

  1. Lightly brush the tops with olive oil.

  2. Bake for 15–20 minutes until:

    • Eggplant is tender

    • Cheese is melted and lightly golden

    • Coating is crisp


🌿 Step 6: Serve

  1. Garnish with fresh basil leaves.

  2. Serve warm for best texture and flavor.


🌟 Helpful Tips

✔ Use Panko for extra crunch
✔ Add garlic powder for extra flavor
✔ Serve with a green salad or yogurt dip
✔ Best enjoyed fresh and warm

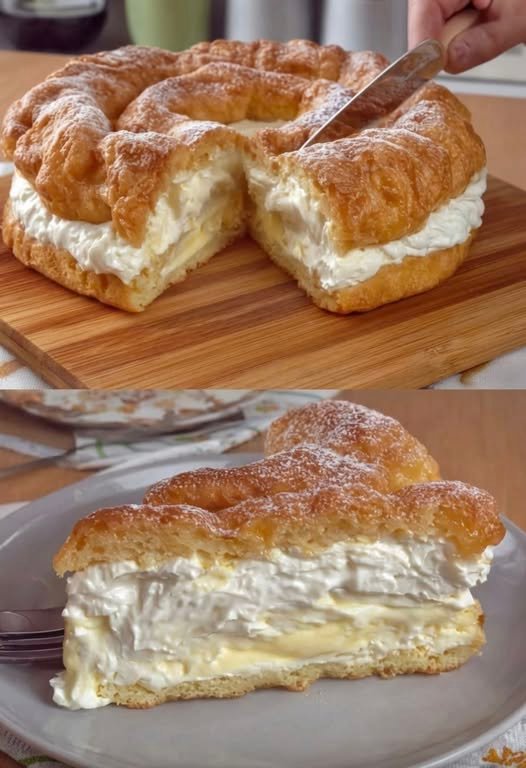
paris brest

This easy Paris Brest recipe, or cream puff wreath, is one of my favorite recipes to make when I want to create a show-stopping dessert for guests. Made with choux pastry, custard, and homemade whipped cream, you’re bound to love this indulgent French dessert!

Ingredients

for the pate a choux pastry dough

  • 1 cup water
  • 1/2 cup unsalted butter
  • 1 tsp sugar
  • 1/2 tsp salt
  • 1 cup all-purpose flour
  • 4 eggs

for the custard

  • 2 cups whole milk
  • 3 eggs
  • 1 egg yolk
  • 2/3 cup granulated sugar
  • 1/4 cup cornstarch
  • 1/4 cup all-purpose flour
  • 1/8 tsp salt
  • 1 tsp vanilla extract

for the whipped cream

  • 2 cups heavy whipping cream
  • 1/4 cup powdered sugar, plus more for dusting the top of the wreath
  • 1 tsp vanilla extract

Instructions

  1. Begin creating the recipe several hours before (or the night before, if possible) by first creating your custard filling. In a large bowl, whisk the eggs and egg yolk with the granulated sugar until thick and pale yellow. Add the cornstarch, flour and salt, and whisk again to combine.
  2. In a medium saucepan, heat milk until it’s scalding hot, but not boiling. Then remove from heat. Pour about 1/4 cup of the milk into your bowl with the eggs, and whisk vigorously to combine. Pour the entire egg mixture into the saucepan, and move the saucepan back over to the stove. With the heat on medium-low, continue to whisk the mixture until it thickens into a thick, pudding-like consistency. Do not take your eyes off the mixture and continue to whisk the entire time. This can take around 7 to 9 minutes, but the thickening will be happen in a flash so keep your eyes on the custard.
  3. Pour the hot custard into a large bowl, then add the vanilla extract. Whisk to incorporate the vanilla and smooth out any clumps in the custard. Cover the custard with a sheet of plastic wrap, placing the plastic wrap directly onto the custard. Refrigerate until chilled.
  4. On the day you’d like to serve the dessert, you’ll want to create the pate a choux (the pastry dough). Begin by heating the butter, water, sugar, and salt in a small saucepan over medium heat. Once the butter has melted and the mixture has come to a simmer, remove the saucepan from heat.
  5. Add in the flour and stir with a wooden spoon. Move the saucepan back over to low heat and continue to stir the mixture until the flour is completely incorporated and the dough no longer sticks to the bottom or sides of the pan. You should be stirring over the stove for at least a good minute or two as you want to make sure there is no moisture left in the dough. Remove the pan from heat and turn off stove.
  6. Add in the eggs, stirring very well after each addition. The mixture will look glossy at first when you stir in the egg, but once the egg is mixed in well, the mixture should start looking like a paste/dough. You want to make sure each egg is mixed in well before adding another. This will feel hard to do but just be patient and keep mixing. The finished result should look like a thick, goopy paste. Let the dough rest in the saucepan while you move to the next step.
  7. Use a ruler, cake board, or just a large round bowl to measure out a 9 inch circle on a piece of parchment paper (don’t use permanent marker; use a pencil to trace). Flip the parchment paper over so that the side with the drawn circle is facing down on a baking sheet. You should still be able to see the faint circumference of the circle.
  8. Use a cookie scooper (or a pastry bag) to place round mounds of pate a choux (about 1 1/2 to 2 inches in length) along the circumference of the circle, placing the mounds right next to each other so that they are touching.
  9. Place the baking sheet in the oven at 425°F for 10 minutes. Then, WITHOUT opening the oven door, lower the heat to 375°F and continue to bake for another 20-25 minutes, or until the pate a choux is a deep golden hue. Once the pate a choux has finished baking, open the oven door and gently pierce each mound with a sharp knife to let out steam. Let the puffs rest in the oven, with the oven door slightly ajar and the oven completely turned off, for another 15 minutes. Finally, remove from oven and let completely cool on a wire rack.
  10. Create the whipped cream by whisking the heavy cream on high speed for 1 minute, until it begins to thicken and the whisk leaves indentations in the cream. Add in the powdered sugar and vanilla extract and continue to whisk on high speed until soft peaks have formed and the cream sticks to the sides of the bowl.
  11. Take a sharp knife and horizontally slice through the center of the entire wreath of puffs. If a couple mounds separate, it’s not a big deal. Gently lift the top half of the wreath and set aside.
  12. Use a spoon to scoop custard into each puff’s bottom half cavity. Pipe or spoon the whipped cream on top of the custard. Gently transfer the top half of the wreath back into place and finish with a dusting of powdered sugar.

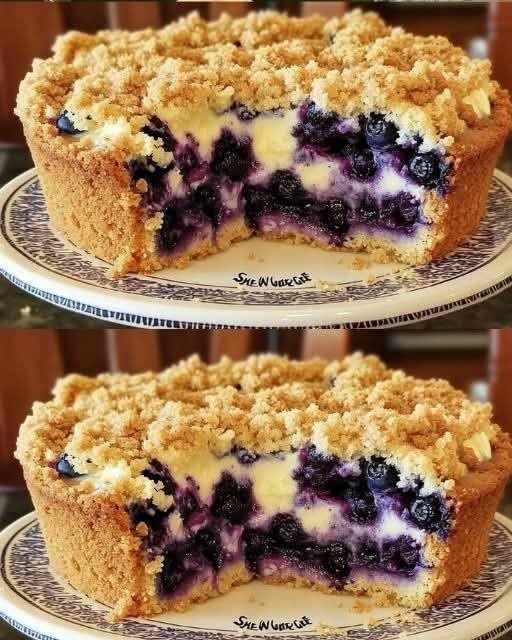
Blueberry Cream Cheese Crumb Cake

 Blueberry Cream Cheese Crumb Cake

Description

A luscious, bakery-style treat featuring a soft, buttery cake base layered with tangy cream cheese, juicy blueberries, and a sweet crumbly streusel topping. This cake is perfect for brunch, tea time, or dessert, offering richness and fruitiness in every bite.

Ingredients

For the Cake Batter:

  • 1/2 cup (1 stick) unsalted butter, softened
  • 3/4 cup granulated sugar
  • 2 large eggs
  • 1 tsp vanilla extract
  • 1 1/2 cups all-purpose flour
  • 1 1/2 tsp baking powder
  • 1/4 tsp salt
  • 1/2 cup whole milk

For the Cream Cheese Layer:

  • 8 oz cream cheese, softened
  • 1/4 cup granulated sugar
  • 1 egg yolk
  • 1/2 tsp vanilla extract

For the Blueberry Layer:

  • 1 1/2 cups fresh or frozen blueberries
  • 1 tbsp all-purpose flour (optional, to coat berries and prevent sinking)

For the Crumb Topping:

  • 1/2 cup all-purpose flour
  • 1/4 cup brown sugar
  • 1/4 cup granulated sugar
  • 1/2 tsp ground cinnamon
  • 1/4 cup unsalted butter, melted

Instructions

  1. Preheat Oven:
    Preheat your oven to 350°F (175°C). Grease and flour a 9-inch springform or square baking pan.
  2. Prepare Cake Batter:
    • In a bowl, cream the softened butter and sugar together until light and fluffy.
    • Beat in the eggs, one at a time, then add vanilla.
    • In a separate bowl, whisk together flour, baking powder, and salt.
    • Alternate adding the dry ingredients and milk into the butter mixture, mixing just until combined.
    • Spread the batter evenly into the prepared pan.
  3. Cream Cheese Layer:
    • In a bowl, beat the cream cheese, sugar, egg yolk, and vanilla extract until smooth.
    • Gently spread this mixture over the cake batter in the pan.
  4. Blueberry Layer:
    • Toss blueberries with 1 tbsp flour (optional).
    • Evenly distribute the blueberries over the cream cheese layer.
  5. Crumb Topping:
    • In a bowl, combine flour, brown sugar, granulated sugar, cinnamon, and melted butter. Mix until crumbly.
    • Sprinkle over the top of the blueberry layer.
  6. Bake:
    • Bake for 45–55 minutes, or until the top is golden and a toothpick inserted in the center comes out mostly clean (it’s okay if a little cream cheese clings).
    • Let the cake cool in the pan for 10 minutes, then remove to a wire rack to cool completely.

Notes

  • Frozen blueberries? Don’t thaw before using—just coat in flour to prevent sinking.
  • For a lemon twist: Add 1 tsp lemon zest to the cream cheese mixture.
  • Storage: Store leftovers in the fridge for up to 4 days because of the cream cheese layer.

Tips

  • Don’t overmix the cake batter—this keeps it soft and tender.
  • Use a springform pan for easy removal and a clean presentation.
  • Serve slightly warm or at room temperature for best flavor.

Servings

Makes 8–10 generous slices.

Nutritional Information (Per serving, approx.):

  • Calories: 370
  • Protein: 5g
  • Fat: 20g
  • Carbohydrates: 42g
  • Sugar: 24g
  • Fiber: 2g
  • Calcium: 6% DV
    (Values may vary depending on specific ingredients.)

Benefits

  • Rich flavor with creamy, fruity, and crumbly textures.
  • Great make-ahead dessert—tastes even better the next day!
  • Blueberries provide antioxidants and vitamin C.
  • Versatile—works as a dessert, breakfast, or tea-time treat.

Q&A Section

Q: Can I use other berries instead of blueberries?

A: Yes! You can use raspberries, blackberries, or chopped strawberries. Keep the total berry amount to about 1 1/2 cups for best texture.

Q: Can I freeze this cake?

A: Absolutely. Slice the cake, wrap tightly in plastic wrap and foil, and freeze for up to 2 months. Thaw overnight in the fridge or microwave for a quick treat.

Q: Can I make this gluten-free?

A: Yes. Use a 1:1 gluten-free flour blend in place of the all-purpose flour for all components of the cake.

Q: What’s the best way to serve it?

A: Slightly warm, dusted with powdered sugar or topped with whipped cream.

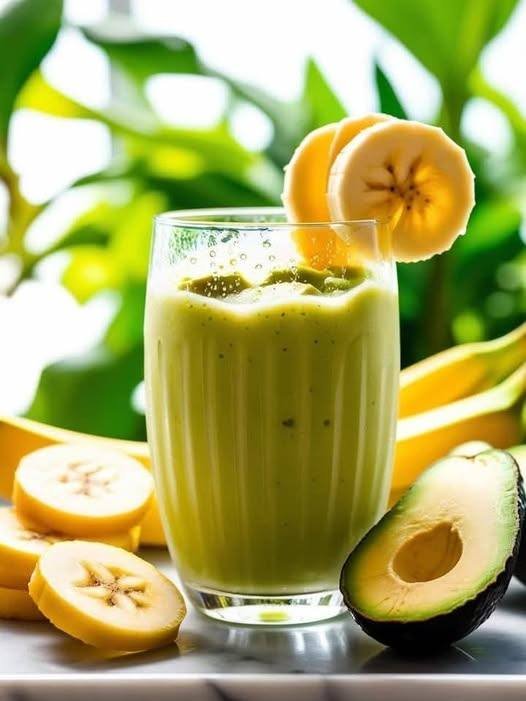
🥤 Creamy Avocado Banana Smoothie

🥤 Creamy Avocado Banana Smoothie

Prep time: 5 minutes | Servings: 1

Ingredients

  • 1 ripe banana (frozen bananas make it extra creamy)

  • 1/2 ripe avocado (pitted and scooped)

  • 1 cup milk of choice (almond, oat, or dairy)

  • 1/2 cup Greek yogurt (plain or vanilla)

  • 1 tbsp honey or maple syrup (optional, for sweetness)

  • A handful of ice cubes (if using a fresh banana)

  • Optional: A small squeeze of lime juice to keep the color vibrant.


Instructions

  1. Prep: Peel the banana and scoop out the avocado flesh.

  2. Combine: Place the banana, avocado, milk, yogurt, and sweetener into a high-speed blender.

  3. Blend: Start on a low setting and gradually increase to high. Blend for 45–60 seconds until the texture is completely smooth and velvety.

  4. Adjust: If it’s too thick, add a splash more milk. If you want it colder, add a few more ice cubes and pulse.

  5. Serve: Pour into a tall glass. For the aesthetic in your photo, garnish the rim with thin banana slices and enjoy immediately.


Pro-Tips for the Best Texture

  • The “Cold” Factor: Using a frozen banana is the secret to a milkshake-like consistency without watering it down with too much ice.

  • Nutrient Boost: Feel free to toss in a tablespoon of chia seeds or flax seeds; the avocado is so creamy you won’t even notice the extra texture!