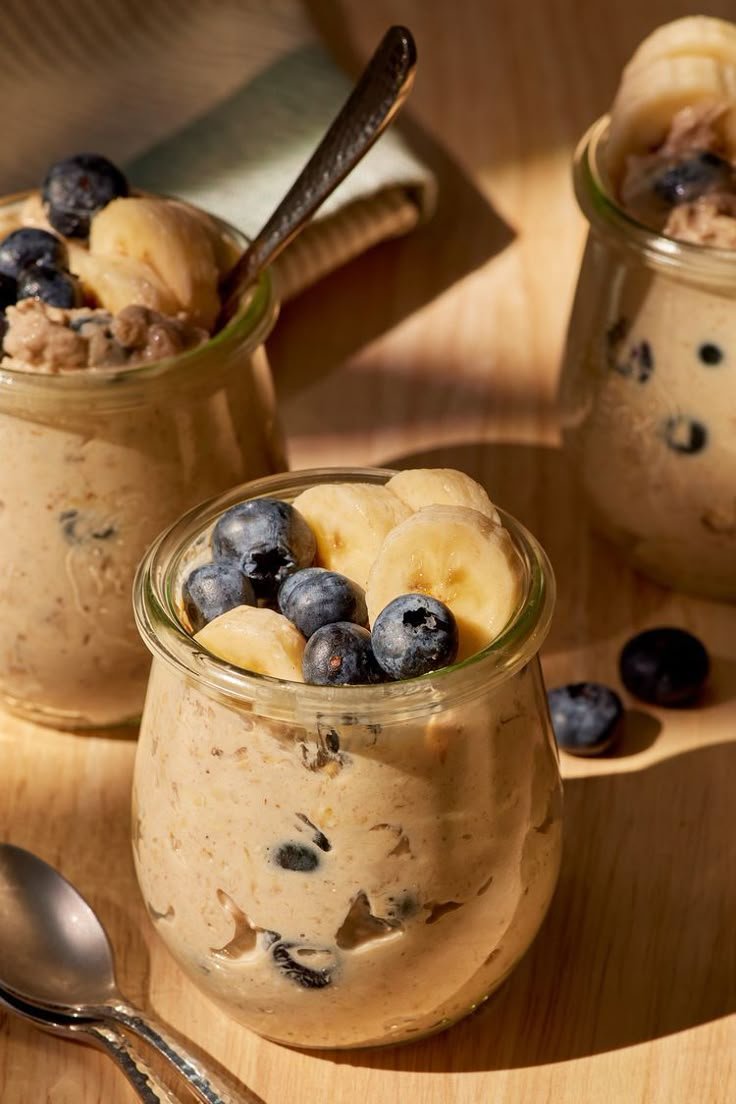
🍌 Blueberry Banana Overnight Oats


🍌 Blueberry Banana Overnight Oats

Prep time: 5 minutes | Chill time: 6+ hours | Servings: 1


Ingredients

Old Fashioned Rolled Oats: 1/2 cup (do not use instant oats, or they’ll get mushy!)


Milk of choice: 2/3 cup (dairy, almond, oat, or soy all work great)


Greek Yogurt: 1/4 cup (adds creaminess and protein)


Chia Seeds: 1 tablespoon (helps thicken the texture)


Maple Syrup or Honey: 1–2 teaspoons (adjust to your sweetness preference)


Vanilla Extract: 1/4 teaspoon


Fresh Blueberries: A handful


Banana: 1/2 sliced (save some for the topping!)


Instructions

Mix the Base: In a glass jar or airtight container, combine the oats, chia seeds, milk, yogurt, vanilla, and sweetener. Stir well until no clumps remain.


Add the Fruit: Gently fold in most of your blueberries and half of the sliced bananas.


The Wait: Seal the jar and place it in the refrigerator for at least 6 hours, though overnight is best for the creamiest texture.


Serve: In the morning, give it a quick stir. If it’s too thick, splash in a little extra milk. Top with the remaining fresh banana slices and blueberries right before eating.


Quick Tips for Success

Nut Butter: For extra richness, swirl in a tablespoon of almond or peanut butter before chilling.


Texture: If you prefer a “cake-like” texture, you can blend the oats into a flour first, though the standard rolled oats (as seen in your photo) provide a nice chew.


Storage: These stay fresh in the fridge for up to 4 days, making them perfect for meal prep.
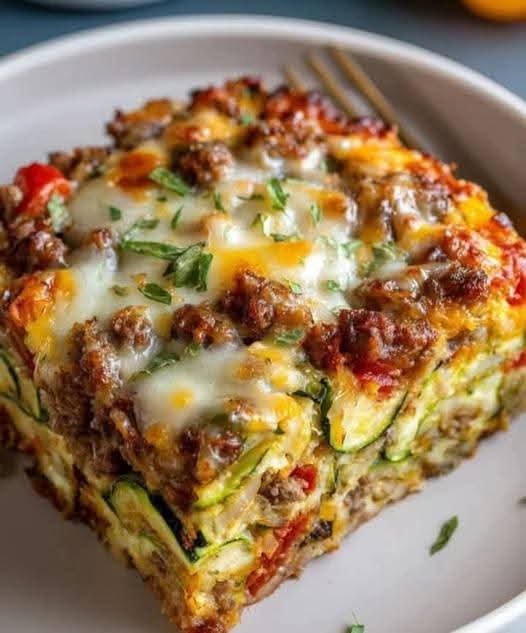
Anti-Inflammatory Zucchini Pizza Casserole

Full recipe>>> Ingredients


Vegetable Base


3 medium zucchinis, sliced into thin rounds


1 tbsp olive oil (extra-virgin preferred)


½ tsp sea salt


¼ tsp black pepper


Pizza Layer


1 cup no-sugar-added marinara or pizza sauce


1½ cups shredded mozzarella cheese (or dairy-free mozzarella)


¼ cup grated Parmesan cheese (optional)


1 tsp dried oregano


½ tsp dried basil


½ tsp garlic powder


Optional Toppings


½ cup sliced mushrooms


¼ cup sliced black olives


½ cup bell peppers, thinly sliced


¼ cup red onion, thinly sliced


Fresh basil leaves (for garnish)


👩‍🍳 Instructions


Preheat oven to 375°F (190°C). Lightly grease an 8×8-inch baking dish.


Prep zucchini: Toss zucchini slices with olive oil, salt, and pepper.


Pre-bake zucchini: Arrange in a single layer on a baking sheet and bake for 10–12 minutes to release moisture.

(This prevents a watery casserole.)


Assemble casserole:


Spread a thin layer of marinara sauce on the bottom of the baking dish.


Add a layer of zucchini.


Sprinkle mozzarella, Parmesan, herbs, and optional toppings.


Repeat layers, finishing with cheese on top.


Bake uncovered for 20–25 minutes until bubbly and lightly golden.


Rest & serve: Let cool for 5–10 minutes before slicing. Garnish with fresh basil if desired.


🍽 Servings


Serves: 4

Serving size: About 1½ cups

“If you make these, be prepared for nonstop requests! My family is already asking when I’m making them again

Full recipe>>> Servings


Serves: 6 people

Yield: About 10–12 slices


🛒 Ingredients

For the Potato Base


2½ lbs (1.1 kg) potatoes, peeled and cubed


2 tbsp butter


½ cup shredded mozzarella or cheddar


1 egg


½ tsp salt


½ tsp black pepper


½ tsp garlic powder


For the Beef Filling


1 lb (450 g) ground beef


1 small onion, finely chopped


2 cloves garlic, minced


1 tsp paprika


½ tsp cumin


½ tsp dried thyme or Italian seasoning


Salt and pepper, to taste


1 tbsp olive oil


Optional Topping


Fresh parsley or thyme, finely chopped


Extra cheese for sprinkling


👩‍🍳 Instructions


Cook the Potatoes

Boil potatoes in salted water until fork-tender. Drain well and mash until smooth.


Make the Potato Dough

Mix mashed potatoes with butter, cheese, egg, salt, pepper, and garlic powder. Let cool slightly.


Prepare the Beef Filling

Heat olive oil in a skillet. Sauté onion until soft, add garlic, then beef. Cook until browned. Stir in spices, salt, and pepper. Let cool.


Assemble the Roll

Spread potato mixture evenly on parchment paper into a rectangle (about ½-inch thick). Spread beef filling evenly over the top.


Roll & Slice

Carefully roll into a tight log using the parchment. Chill for 15–20 minutes (important!). Slice into 1½-inch rounds.


Bake

Arrange slices in a greased baking dish. Bake at 375°F (190°C) for 25–30 minutes, until golden and lightly crisp.


Finish & Serve

Garnish with herbs and optional extra cheese. Serve hot.

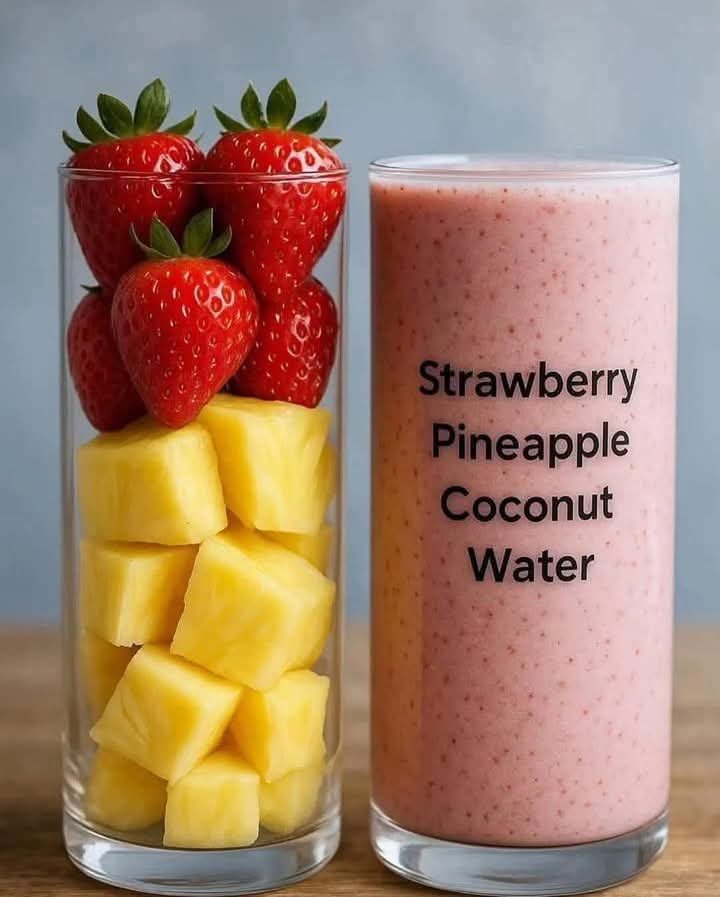
Strawberry Pineapple Coconut Water Smoothie

Strawberry Pineapple Coconut Water Smoothie

This recipe makes a refreshing and hydrating smoothie with a tropical flavor. It’s perfect for a quick breakfast, a post-workout drink, or a light snack.


Yields: 1 serving Prep time: 5 minutes


Ingredients

1 cup fresh strawberries: Washed, hulled, and halved. For a colder, thicker smoothie, you can use frozen strawberries.

1 cup fresh pineapple chunks: You can use frozen pineapple chunks for a thicker texture.

1 cup coconut water: Chilled. Use a high-quality, pure coconut water for the best flavor and hydration benefits.

Optional additions (for extra flavor, nutrition, or texture):

1/2 a ripe banana: Adds creaminess and natural sweetness.

1 tablespoon chia seeds or flax seeds: Boosts fiber and omega-3 fatty acids.

1 scoop vanilla or unflavored protein powder: For a protein-rich smoothie.

A squeeze of lime juice: Brightens the flavors.

A few mint leaves: Adds a fresh, herbal note.


Instructions

Prepare the fruit: Ensure your strawberries are hulled and your pineapple is cut into chunks. If using frozen fruit, there’s no need to thaw it.

Combine ingredients: Place all of the ingredients into a blender. Start with the liquid (coconut water) first, as this helps the blades move more easily.

Blend until smooth: Secure the lid and blend on high speed for 30-60 seconds, or until the mixture is completely smooth and no large chunks of fruit remain. If the smoothie is too thick, add a little more coconut water, a tablespoon at a time, until you reach your desired consistency.

Taste and adjust: Taste the smoothie and add any optional ingredients if you wish. You can add a little honey or maple syrup if you prefer a sweeter drink, though the fruits usually provide enough sweetness.

Serve immediately: Pour the smoothie into a tall glass and serve immediately. Garnish with a fresh strawberry or a small piece of pineapple if desired.

Enjoy your delicious and healthy Strawberry Pineapple Coconut Water Smoothie!

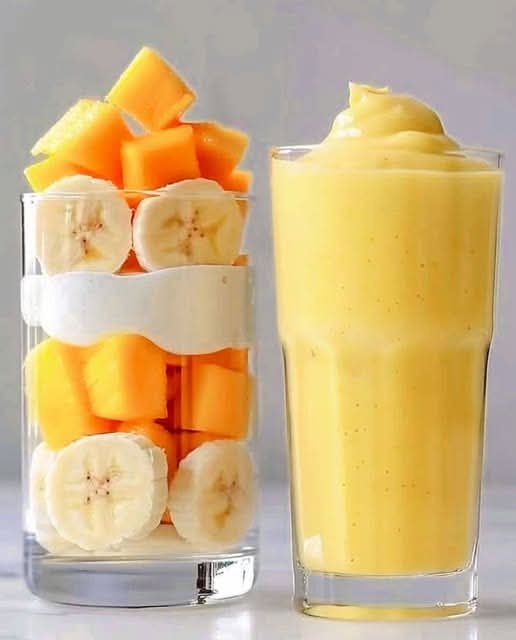
Creamy Mango Banana Smoothie

Creamy Mango Banana Smoothie

Prep time: 5 minutes | Servings: 1


Ingredients

1 cup Frozen Mango Cubes: Using frozen mango is key to getting that thick, whipped texture shown in the image.


1 Frozen Banana: Sliced before freezing for easier blending.


1/2 cup Greek Yogurt: This provides the creamy white layer and adds protein.


1/4 to 1/2 cup Milk of choice: (Dairy, almond, or oat milk all work well). Start with less to keep it thick.


Optional: A squeeze of honey or a splash of vanilla extract for extra sweetness.


Instructions

Prep the Fruit: If your fruit isn’t already frozen, peel and slice the banana and cube the mango, then freeze for at least 4 hours.


Layer the Blender: Add the liquid (milk) first, followed by the yogurt, then the frozen mango and banana. Adding liquid first helps the blades move more easily.


Blend: Start on a low speed and gradually increase to high. If you have a tamper for your blender, use it to push the frozen fruit down.


Tip: If it’s too thick to move, add milk one tablespoon at a time until it blends smoothly.


Assemble (Optional): To match the photo, you can place a few fresh banana slices and mango chunks against the inside of your glass before pouring the smoothie in.


Serve: Pour the mixture into a glass. It should be thick enough to hold a “swirl” on top!


Pro-Tips for Success

For a “Smoothie Bowl” Texture: Use only a splash of milk. The less liquid you use, the more it will resemble the thick, whipped consistency in the picture.


Naturally Sweet: Make sure your bananas are spotty and ripe before you freeze them; this ensures the smoothie is sweet without needing added sugar.

Homemade Strawberry Vanilla Bean Ice Cream

Homemade Strawberry Vanilla Bean  Ice Cream
Ingredients:
1 vanilla bean, split and seeds scraped
1 cup whole  milk
3/4 cup granulated sugar
Pinch of salt
6 large egg yolks
1 teaspoon pure vanilla extract
1 cup fresh strawberries, hulled and diced
2 tablespoons sugar (for strawberries)
Directions:
Prepare the Strawberries:
Toss the diced strawberries with 2 tablespoons of sugar. Let them sit for about 30 minutes to macerate, which helps bring out their natural juices and sweetness.
Heat Milk and Cream Mixture:
In a saucepan over medium heat, combine the heavy cream, milk, half of the granulated sugar, salt, and the seeds from the vanilla bean (including the bean pod). Bring the mixture just to a boil, then remove from heat.
Temper the Egg Yolks:
In a separate bowl, whisk together the egg yolks and the remaining granulated sugar until smooth.
Gradually pour the hot milk mixture into the egg yolks, a little at a time, whisking constantly to prevent the eggs from scrambling.
Cook the Custard:
Return the mixture to the saucepan and cook over low heat, stirring constantly with a wooden spoon, until the custard thickens enough to coat the back of the spoon (about 170-175°F on a thermometer).
Chill the Custard:
Remove the custard from heat and strain through a fine-mesh sieve into a bowl. Stir in the vanilla extract. Cover and chill the custard thoroughly in the refrigerator, at least 4 hours or overnight.
Process in Ice Cream Maker:
Once chilled, remove the vanilla bean pod and churn the custard in an ice cream maker according to the manufacturer’s instructions.
During the last few minutes of churning, add the macerated strawberries.
Freeze:
Transfer the ice cream to an airtight container and freeze until firm, at least 2-4 hours, before serving.
Serve and Enjoy