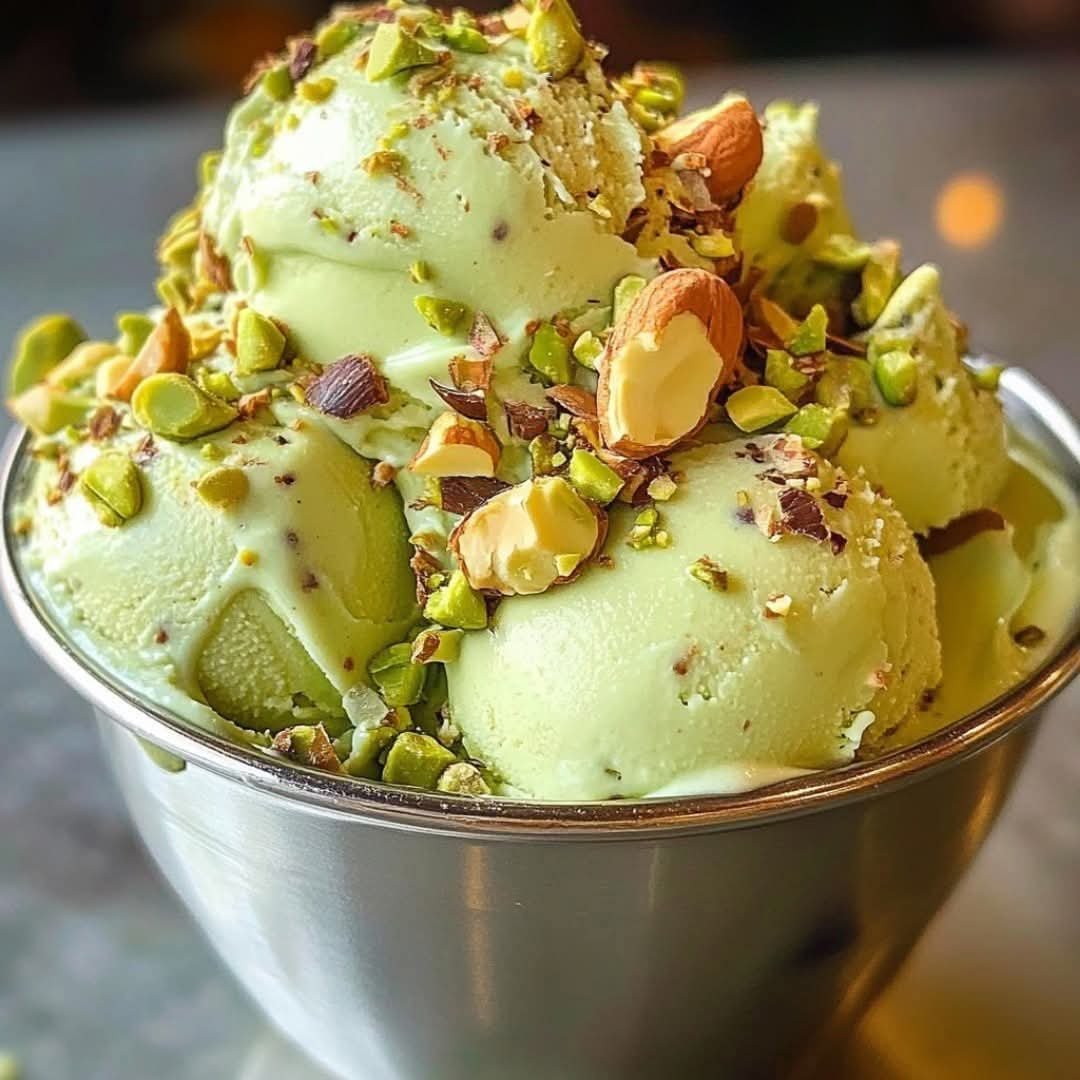
🍦 Pistachio & Almond Delight Recipe

🍦 Pistachio & Almond Delight Recipe


Ingredients


The Base: 2 cups heavy cream, 1 cup whole milk, and Âľ cup granulated sugar.


The Flavor: 1 cup shelled, unsalted pistachios (plus extra for topping).


The Texture: 4 large egg yolks and a pinch of sea salt.


The Crunch: ½ cup toasted slivered almonds.


The Secret Touch: ½ tsp almond extract and 1 tsp vanilla extract.

Step-by-Step Instructions


Prepare the Pistachio Paste: Place the pistachios in a food processor. Pulse until they turn into a fine, smooth paste. If it’s too dry, add a teaspoon of the milk to help it come together.


Heat the Dairy: In a medium saucepan, combine the milk, sugar, salt, and half of the heavy cream. Warm over medium heat until the sugar dissolves and it just begins to steam (do not let it boil). Stir in your pistachio paste.

Temper the Eggs: In a separate bowl, whisk the egg yolks. Slowly pour about half a cup of the warm milk mixture into the yolks while whisking constantly. This prevents the eggs from scrambling. Pour the egg mixture back into the saucepan.


Thicken the Custard: Cook over low heat, stirring constantly, until the mixture thickens enough to coat the back of a spoon. Remove from heat immediately.

Chill and Infuse: Stir in the remaining heavy cream, vanilla, and almond extract. Pour the mixture through a fine-mesh strainer into a bowl to ensure it’s perfectly smooth. Cover and refrigerate for at least 4 hours (overnight is best).


Churn: Pour the chilled mixture into your ice cream maker and churn according to the manufacturer’s directions. In the last 5 minutes of churning, add your chopped almonds and extra crushed pistachios.

Freeze: Transfer to an airtight container and freeze for 2–4 hours until firm.


Pro Tips for the Perfect Scoop


Bright Green Color: If your pistachios aren’t giving you that bright green hue, you can blanch them in boiling water for 1 minute and peel off the brown skins before making the paste

Serving: Use a metal bowl (like the one in your photo) and pre-chill it in the freezer to keep the scoops from melting while you garnish.
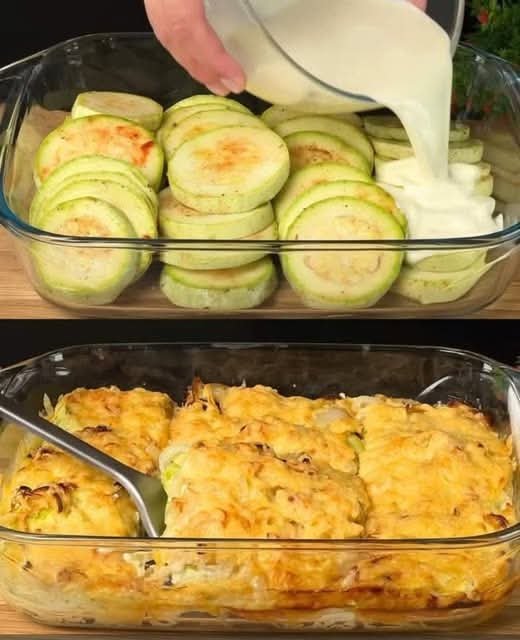

Baked Zucchini with Cheese

Baked Zucchini with Cheese

A creamy, golden-brown vegetable bake featuring tender zucchini and a savory yogurt-egg glaze.


Prep time: 15 minutes


Cook time: 30–35 minutes


Servings: 4 side portions


Ingredients

2 zucchini, sliced into rounds


2 onions, thinly sliced into rounds

2 cloves garlic, finely chopped


2 eggs


150 g yogurt (plain or Greek)


150 g cheese, grated (such as Mozzarella or Cheddar)


Seasonings: Salt, black pepper, paprika, and vegetable seasoning to taste


Oil for greasing and cooking

Instructions

1. Prepare the Vegetables

Preheat your oven to 390°F (200°C). Lightly grease a glass baking dish with oil. Season the zucchini rounds with salt, black pepper, paprika, and vegetable seasoning.


2. Layer the Dish

Arrange the seasoned zucchini rounds and sliced onions in rows in the baking dish, overlapping them slightly to fill the pan. Sprinkle the chopped garlic evenly over the top.


3. Mix the Creamy Glaze

In a small bowl, whisk together the 2 eggs and 150 g of yogurt until smooth. Season this mixture with a pinch of salt and pepper if desired.


4. Top and Bake

Pour the yogurt and egg mixture evenly over the rows of vegetables, ensuring they are well-coated. Sprinkle the 150 g of grated cheese generously over the entire surface.


5. Bake to Perfection

Place the dish in the oven and bake for 30–35 minutes, or until the zucchini is tender and the cheese topping is bubbly and deep golden brown.


6. Serve

Let the dish rest for 5 minutes before serving to allow the creamy sauce to set.

Recipe Variations

Extra Protein: You can tuck slices of cooked ham or turkey between the zucchini layers.


Herb Freshness: Top with fresh chopped parsley or dill after baking for a burst of color and flavor.

Ingredients (1–2 servings)


1 tsp fresh rosemary (or ½ tsp dried)


1 tsp fresh turmeric root, sliced (or ½ tsp ground turmeric)


1 cinnamon stick


2 cups water


Optional:


½ tsp fresh ginger


A squeeze of lemon


1 tsp raw honey (optional & not recommended for people managing blood sugar)


🔥 Instructions


Bring the water to a gentle boil.


Add turmeric, cinnamon, and rosemary.


Reduce heat and simmer for 10–15 minutes.


Strain into a mug.


Add lemon or honey if desired.


Sip warm.


📝 Description


This earthy, aromatic infusion combines warming spices and herbs long used in traditional wellness practices. It’s soothing, gently stimulating, and perfect as a daily ritual drink.


đź’ˇ Tips for Best Results


Use fresh turmeric when possible — it’s more fragrant and potent.


Add a pinch of black pepper to improve turmeric absorption.


Drink consistently, not excessively (1 cup per day is plenty).


Best enjoyed after meals or in the evening.


🍵 Servings


Makes 1 large cup or 2 small cups


Recommended: 1 serving daily

No-Bake Banana Pudding Cheesecake Cups

No-Bake Banana Pudding Cheesecake Cups 🍌✨

Creamy. Dreamy. And shockingly simple.

What You’ll Need — Comfort in a Cup

These cozy little cheesecakes are built from pantry staples and pure joy — no oven, no eggs, no fuss.

For the Crust

1 cup crushed vanilla wafers (Nilla Wafers or any store brand)

3 tbsp melted butter

For the Cheesecake Filling

8 oz (225 g) cream cheese, softened — full-fat for that luscious texture

½ cup sweetened condensed milk (not evaporated!)

½ cup mashed ripe banana (about 1 medium banana)

1 tsp vanilla extract

A pinch of lemon juice — keeps the banana bright and fresh

For the Topping

1–2 bananas, thinly sliced

Extra crushed vanilla wafers

Optional: whipped cream or a caramel drizzle for a little extra magic

That’s it.

No gelatin, no baking, no special equipment — just layers of real flavor and love.

How to Make It — Step by Step

Step 1: Build the Crust

In a small bowl, mix the crushed vanilla wafers with melted butter until everything looks evenly moistened.

Spoon about 1–2 tablespoons into the bottom of each mini jar, glass, or cupcake liner.

Press down firmly using the back of a spoon or a small glass.

Refrigerate while you prepare the filling.

💡 Tip: This recipe makes about 12 mini cheesecakes — perfect for sharing or hoarding (no judgment).

Step 2: Whip the Filling

In a mixing bowl, beat the softened cream cheese for about 1 minute until smooth and fluffy.

Add the sweetened condensed milk, mashed banana, vanilla, and lemon juice.

Beat again on medium speed until creamy and glossy — don’t overmix.

You’re looking for a thick, silky filling that holds its shape.

Step 3: Layer & Chill

Spoon the cheesecake mixture over the chilled crusts, almost to the top.

Smooth the surface with a spoon or spatula.

Cover and refrigerate for at least 4 hours (overnight if you can wait!).

The filling will firm up into a dreamy, mousse-like texture.

Step 4: Top & Serve

Just before serving, layer on banana slices and a sprinkle of crushed vanilla wafers.

Add a dollop of whipped cream or drizzle caramel over the top for extra sweetness.

Serve cold — and watch them vanish, spoonful by spoonful. 🥄💛

Easy Vegetable Egg Muffins (Omelette Muffins)

Easy Vegetable Egg Muffins (Omelette Muffins)

Soft, savory egg muffins loaded with vegetables and cheese. These are easy to prepare, kid-friendly, and perfect for breakfast or a light snack.


Ingredients

(Makes 8–10 muffins)


Eggs: 4 large


Onion: 1 small, finely chopped


Green chili: 1, finely chopped (optional; adjust or skip for kids)


Carrot: 1 medium, finely grated or finely chopped


Sweetcorn: ÂĽ cup, boiled or canned (drained)


Mozzarella cheese: ½ cup, grated

Fresh coriander leaves: 2 tablespoons, finely chopped


Black pepper: to taste


Salt: to taste


Oil or butter: for greasing the muffin tray


Instructions

1. Prepare the Oven and Tray

Preheat the oven to 180°C (350°F).


Lightly grease a muffin tin with oil or butter, or line with silicone or paper liners.


2. Prepare the Egg Mixture

Crack the eggs into a large mixing bowl.


Add salt and black pepper.

Whisk well until the eggs are fully combined and slightly frothy.


3. Add Vegetables and Cheese

Add chopped onion, green chili (if using), carrot, sweetcorn, and coriander leaves to the egg mixture.


Stir gently to distribute the vegetables evenly.


Fold in the grated mozzarella cheese.


4. Fill the Muffin Tray

Pour the mixture evenly into the prepared muffin cups, filling each about Âľ full to allow space for rising.


5. Bake

Place the tray in the preheated oven.


Bake for 18–22 minutes, or until the muffins are set in the center and lightly golden on top.


A toothpick inserted in the middle should come out clean.

6. Cool and Serve

Remove from the oven and allow the muffins to rest in the tray for 5 minutes.


Carefully remove and serve warm.


Serving Suggestions

Serve with toast, fruit, or yogurt for a balanced breakfast.


These muffins also work well in lunchboxes or as an evening snack.


Storage Tips

Store leftovers in an airtight container in the refrigerator for up to 3 days.


Reheat gently in a microwave or oven before serving.

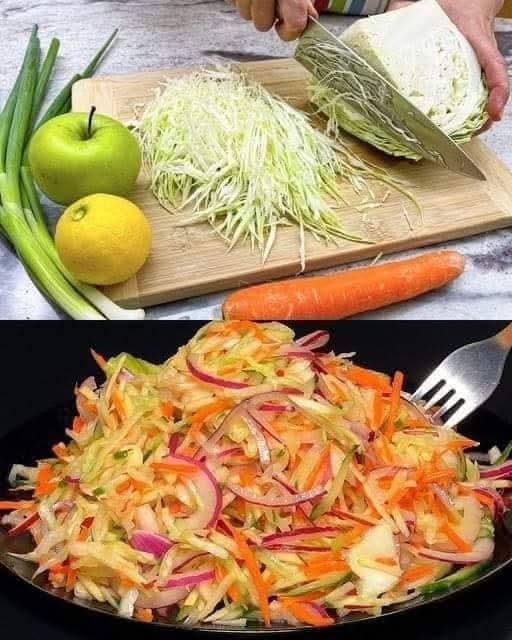
Crunchy Cabbage, Carrot & Apple Salad

Crunchy Cabbage, Carrot & Apple Salad

Crunchy Cabbage, Carrot & Apple Salad

Prep Time: 10 minutes

Servings: 4


Ingredients

200–400 g cabbage, finely shredded


1 carrot, peeled and grated


1 green apple, cored and thinly sliced or julienned


1–2 spring onions, chopped


Fresh dill or parsley, chopped (optional, to taste)


Lemon juice, to taste


Olive oil, to taste

Salt, to taste


Optional toppings: sunflower seeds, chopped walnuts, or pumpkin seeds


Instructions

Step 1: Prepare the Cabbage

Remove the outer leaves of the cabbage.


Shred the cabbage as finely as possible using a sharp knife or a mandoline.


Place the shredded cabbage in a large bowl and sprinkle with a pinch of salt.


Lightly massage the cabbage with your hands for 1–2 minutes. This softens the texture and releases some moisture, making it easier to eat.


Step 2: Add the Crunch

Grate the peeled carrot directly into the bowl with the cabbage.


Slice the green apple into thin matchsticks (julienne) or thin slices.

To prevent the apple from browning, toss the slices in a little lemon juice immediately after cutting.


Step 3: Incorporate Herbs and Aromatics

Add the chopped spring onions for a mild onion flavor.


Mix in fresh dill or parsley if using. This adds a bright herbal note to the salad.


Step 4: Dress the Salad

Drizzle olive oil and fresh lemon juice over the vegetables and apple.


Season with additional salt to taste.


Step 5: Toss and Serve

Toss all ingredients thoroughly so the dressing coats every piece of vegetable and fruit.


Let the salad sit for 5–10 minutes before serving. This allows the flavors to meld and the cabbage to soften slightly while retaining crunch.


Optional: Sprinkle sunflower seeds, chopped walnuts, or pumpkin seeds on top for extra texture and a nutty flavor.

Tips for a Perfect Salad

Apple Choice: A Granny Smith apple works best due to its tartness, which balances the sweetness of the carrot.


Add Protein: For a more filling meal, top the salad with grilled chicken, tofu, or chickpeas.


Extra Crunch: Adding seeds or nuts just before serving gives the salad a satisfying texture.


Make Ahead: The salad can be prepared 30–60 minutes in advance, but add apples last to prevent browning if storing.